

If you’re a long-time reader of Underground Crafter, today’s pattern for Bette the Piglet may look mighty familiar. You may recognize this amigurumi pig as the favicon you see on top of the menu bar. (She also used to be my Ravelry avatar.) This is a simple amigurumi project made with only sewn pieces. It works up pretty quickly and you can customize it by changing the eye color, adding nostrils, or using different colors for the ears or feet.
This post contains affiliate links. I may receive compensation (at no added cost to you) if you make a purchase using these links.
If you can believe it, this is actually one of the first patterns I ever wrote up. I used to make these all the time for baby and toddler gifts and to sell at craft fairs. I even had the pattern tested years ago on Ravelry, but shortly afterwards, I changed my pattern template and never got around to updating it until now. This little softie is small enough to be toted around by a toddler. It would also be a fun stocking stuffer.

If you make your own Bette the Piglet, I’d love to see it! Share your progress and questions by tagging me on Facebook as @Underground Crafter or Instagram as @ucrafter. You can also share a picture in the Underground Crafters Facebook group. Sign up for my weekly newsletter and get a coupon code for your choice of one of my premium patterns and other subscriber goodies. Plus, you’ll never miss one of my free patterns again!
Add the Bette the Piglet to your Ravelry favorites or queue.

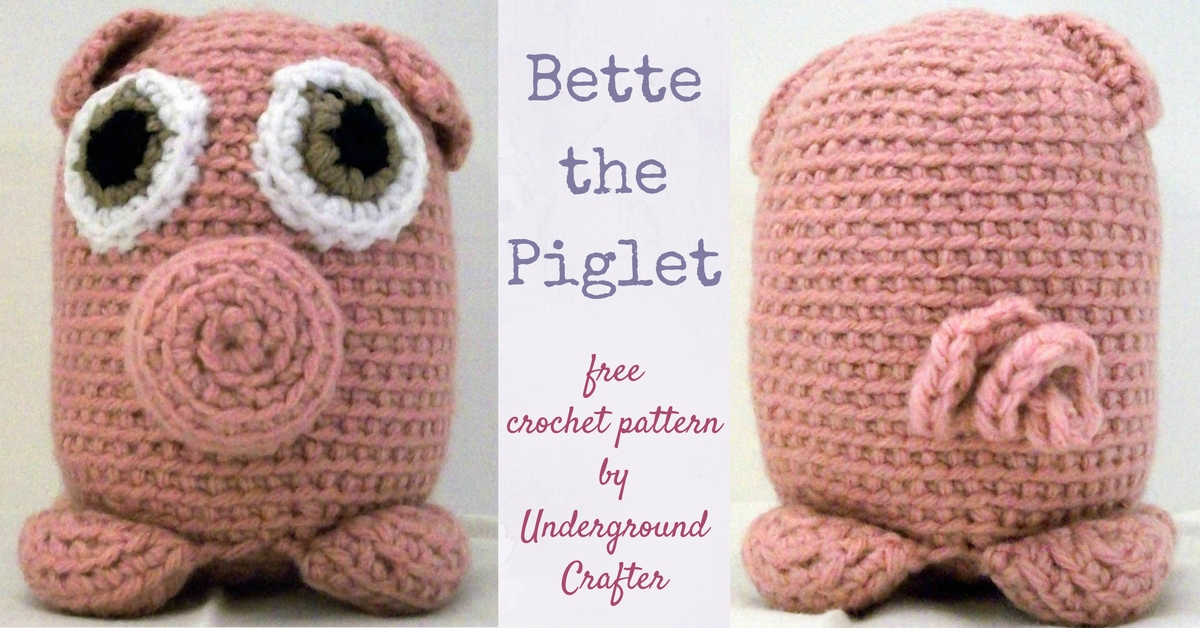
Bette the Piglet
Crochet Pattern by Underground Crafter
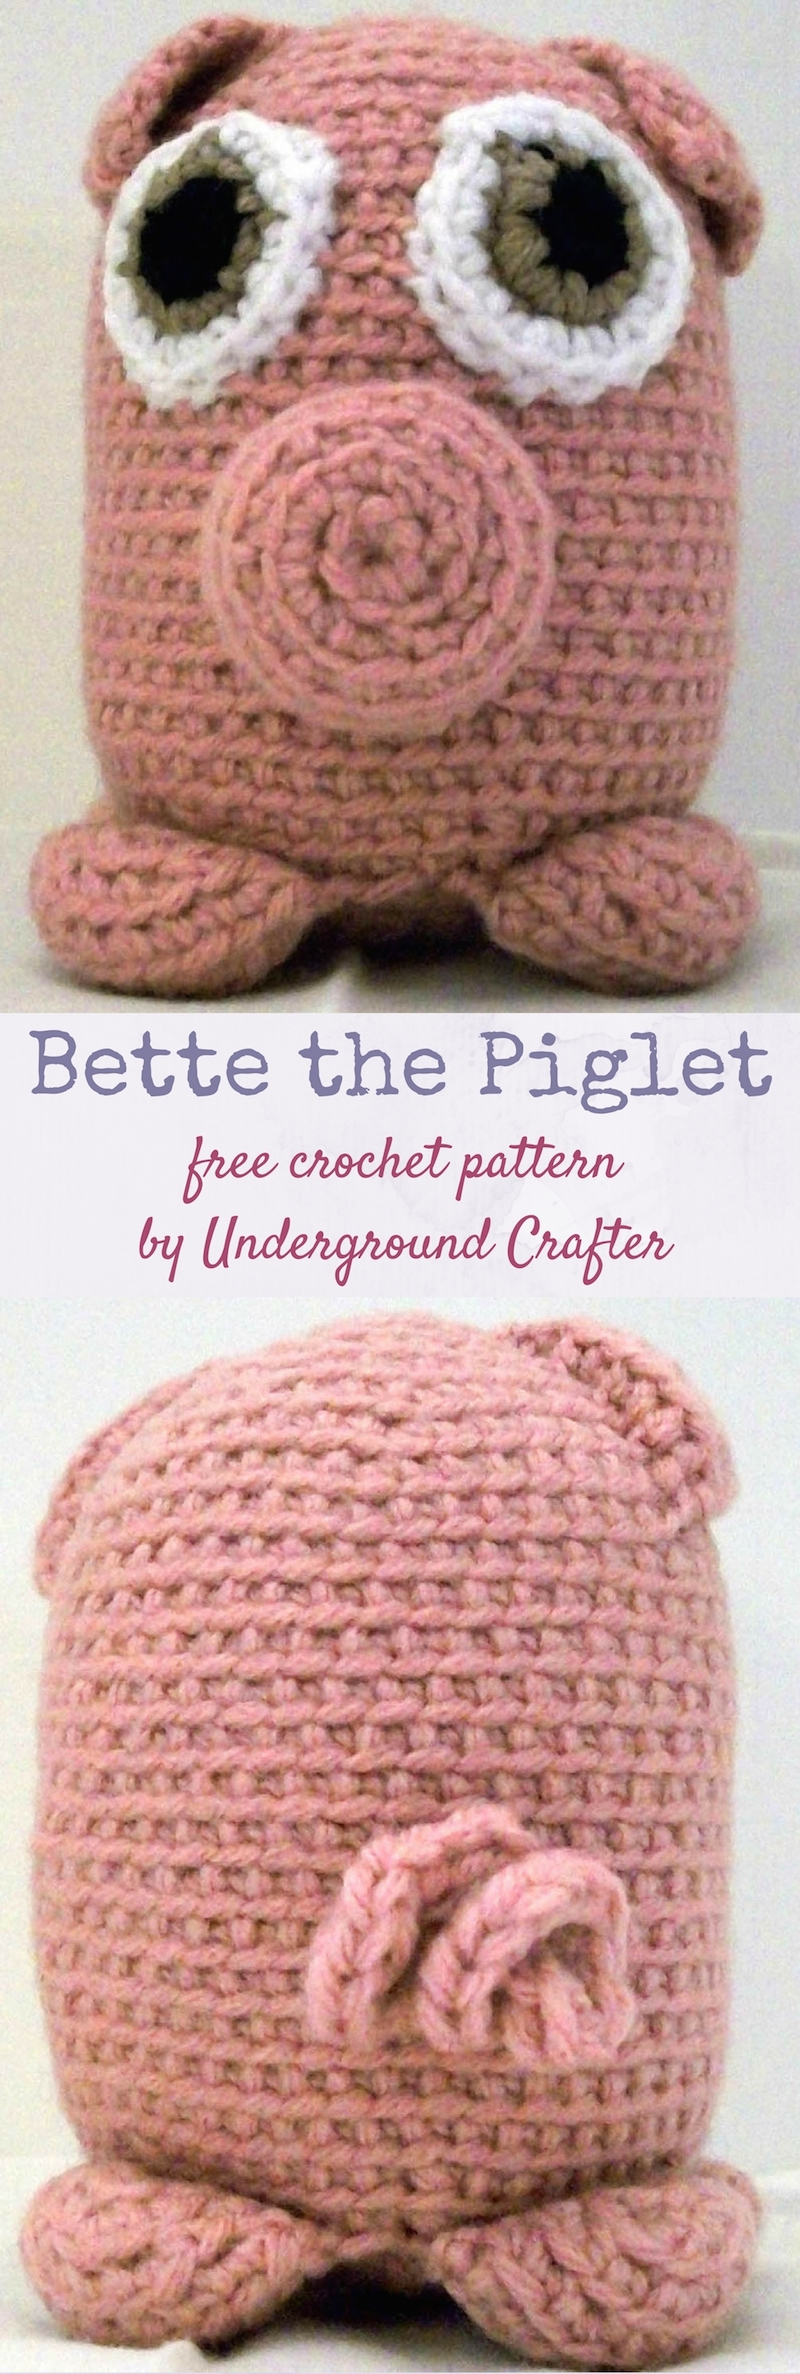


This little piggy has Bette Davis eyes and a curlicue tail.
Finished Size
- Approximately 5” (13 cm) tall.
Materials
- Medium weight yarn in 4 colors – approximately 60 yds (55 m) in pink (CA) and small amounts in white (CB), black (CC), and brown (CD).
- US Size F-5/3.75 mm crochet hook, or size needed to obtain gauge.
- Fairfield Poly-Fil Crafter’s Choice Dry Polyester Packing Fiber Fill – 12 ounce bag.
- Yarn needle.
- Clover Quick Locking Stitch Marker set, or locking stitch marker.
Gauge
- Exact gauge is not critical for this project but stitches should be small so that fiber filling doesn’t show.
Abbreviations Used in This Pattern
- BL – back loop only
- CA – Color A
- CB – Color B
- CC – Color C
- CD – Color D
- ch – chain
- ea – each
- hdc – half double crochet
- invdec – invisible decrease – Insert hook in back loop only of ea of next 2 sts, yarn over and draw up a loop, yarn over and draw through 2 loops. (Planet June has a great invisible decrease tutorial here, though she works into the front loop.)
- pm – place marker
- rep – repeat
- Rnd(s) – Round(s)
- sc – single crochet
- sl st – slip stitch
- st(s) – stitch(es)
- * Repeat instructions after asterisk or plus sign as indicated.
Pattern Notes
- This pattern is worked in continuous rounds or spirals. Do not join or turn unless otherwise noted.
- The position of increases and decreases is alternated to keep the shape rounded.
- Move stitch marker up as each round is completed to mark position unless otherwise noted.
- When choosing colors, note that CA is the main (body) color, CB is the white of the eye, CC is the pupil of the eye, and CD is the iris (eye color).
Pattern Instructions
Body
- With CA, start with magic adjustable ring. (Oombawka Design has a great magic ring tutorial here.)
- Rnd 1: Ch 1, 6 sc in ring, pull yarn tightly to close ring, pm in last st to mark position. (6 sts)
- Rnd 2: 2 scBL in ea st around. (12 sts)
- Rnd 3: *2 scBL in next st, scBL in next st; rep from * around. (18 sts)
- Rnd 4: *ScBL in next 2 sts, 2 scBL in next st; rep from * around. (24 sts)
- Rnd 5: *2 scBL in next st, scBL in next 3 sts; rep from * around. (30 sts)
- Rnd 6: *ScBL in next 4 sts, 2 scBL in next st; rep from * around. (36 sc)
- Rnd 7: *2 scBL in next st, scBL in next 5 sts; rep from * around. (42 sc)
- Rnd 8: *ScBL in next 6 sts, 2 scBL in next st; rep from * around, pm in last st to mark position. (48 sc)
- Rnd 9: ScBL in ea st around, do not move marker up.
- Rep Rnd 9 until body measures approximately 2.75” (7 cm) from stitch marker. Remove stitch marker.
- Rnd 10: *Invdec, scBL in next 6 sts; rep from * around, pm in last st to mark position. (42 sts)
- Rnd 11: *ScBL in next 5 sts, invdec; rep from * around. (36 sts)
- Rnd 12: *Invdec, scBL in next 4 sts; rep from * around. (30 sts)
- Rnd 13: *ScBL in next 3 sts, invdec; rep from * around. (24 sts)
- Rnd 14: *Invdec, scBL in next 2 sts; rep from * around. (18 sts) Pm in loop of last st to prevent unraveling. Stuff body tightly with Poly-Fil. Remove stitch marker.
- Rnd 15: *ScBL in next st, invdec; rep from * around. (12 sts)
- Rnd 16: Invdec around. (6 sts)
- Fasten off with a long yarn tail. Thread yarn tail through yarn needle, sew closed, and weave in ends on inside of body.
Eyes (Make 2)
- With CC, start with magic adjustable ring.
- Rnd 1: Ch 1, 6 sc in ring, pull yarn tightly to close ring, change to CD with sl st to first sc, fasten off CC. (6 sts)
- Rnd 2: Ch 1, 2 sc in ea st around, change to CB with sl st to first sc, fasten off CD. (12 sts)
- Rnd 3: Ch 1, *2 sc in next st, sc in next st; rep from * around, join with sl st to first sc. (18 sts)
- Fasten off with a long yarn tail for seaming. Position eye at top of body, near Rnd 9. Thread yarn needle with yarn tail, sew to body, and weave in ends on inside of body.
Snout
- With CA, start with magic adjustable ring.
- Rnd 1: Ch 1, 6 scBL in ring, pull yarn tightly to close ring, pm in last st to mark position. (6 sts)
- Rnd 2: 2 scBL in ea st around. (12 sts)
- Rnd 3: *2 scBL in next st, scBL in next st. (18 sts)
- Rnd 4: ScBL in ea st around.
- Rnds 5-6: Rep Rnd 4 twice.
- Fasten off with a long yarn tail for seaming. (Optional: Using black yarn and yarn needle, embroider two nostrils onto snout using the running stitch.) Stuff snout tightly with Poly-Fil. Thread yarn needle with yarn tail, center snout below eyes, sew snout to body, weave in ends on inside of body.
Feet (Make 4)
- With CA, start with magic adjustable ring.
- Rnd 1: Ch 1, 6 scBL in ring, pull yarn tightly to close ring, pm in last st to mark position. (6 sts)
- Rnd 2: 2 scBL in ea st around. (12 sts)
- Rnd 3: *2 scBL in next st, scBL in next st; rep from * around. (18 sts)
- Rnd 4: *ScBL in next 2 sts, 2 scBL in next st; rep from * around. (24 sts)
- Fasten off with a long yarn tail for seaming.
- To assemble, fold feet in half across diameter of circle. Stuff tightly with Poly-Fil. Thread yarn needle with yarn tail and seam feet closed. Using snout as the center guideline, position front feet at the bottom of body. Position back feet on the opposite side of front feet. Using yarn needle threaded with yarn tail, sew seamed edge of feet to bottom of body, and weave in ends on inside of body.
Ears (Make 2)
- With CA, ch 2.
- Row 1: Turn, skip 1 ch, 2 sc in next ch. (2 sts)
- Row 2: Turn, ch 1, sc in next st, 2 sc in next st. (3 sts)
- Row 3: Turn, ch 1, sc in ea st across to last st, 2 sc in last st. (4 sts)
- Rows 4-7: Rep Row 3, 4 times, increasing by 1 st with ea rep. (8 sts)
- Fasten off with a long a long yarn tail for seaming. Thread yarn needle with yarn tail, sew ears to top of body above eyes, and weave in ends on inside of body. Shape ears to flop forward.
Curlicue Tail
- With CA, ch 11.
- Row 1: Turn, skip 1 ch, 3 hdc in next ch, 3 hdc in next 8 ch, hdc in last ch. (28 sts)
- Fasten off with a long yarn tail for seaming. Thread yarn needle with yarn tail, sew curlicue tail to back in lower third of body, centered between feet, and weave in ends on inside of body.
1 thought on “Crochet Pattern: Bette the Piglet amigurumi”