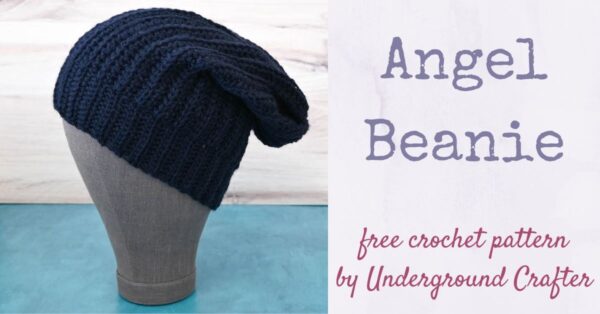
Today, I’m sharing a ribbed crochet beanie pattern as part of the charity spotlight series to meet the donation requirements of Hats for Sailors.
This post contains affiliate links. I may receive compensation (at no added cost to you) if you make a purchase using these links. I am a King Cole Brand Ambassador and this post is part of our ongoing collaboration.
This Month’s Featured Organization: Hats for Sailors
Hats for Sailors was founded in 2010 and donates hats to deployed sailors on United States Navy and Coast Guard ships. Hats for Sailors has two deadlines for deliveries each year: Memorial Day (the end of May) and Veterans Day (November 11).
You can find current needs on the Hats for Sailors website. Though the website is infrequently updated, you can also contact Hats for Sailors via the listed email on the site.
How To Crochet Beanies for Hats for Sailors
Hats for Sailors requires that all donations be made with superwash wool yarns, like King Cole Wool Aran. Superwash wool yarns can be easily cared for by machine washing. Wool projects also retain their shape after use and have great stitch definition.
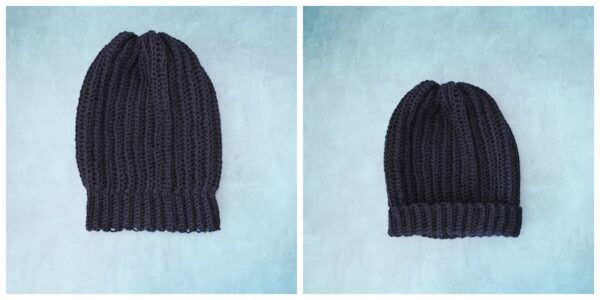
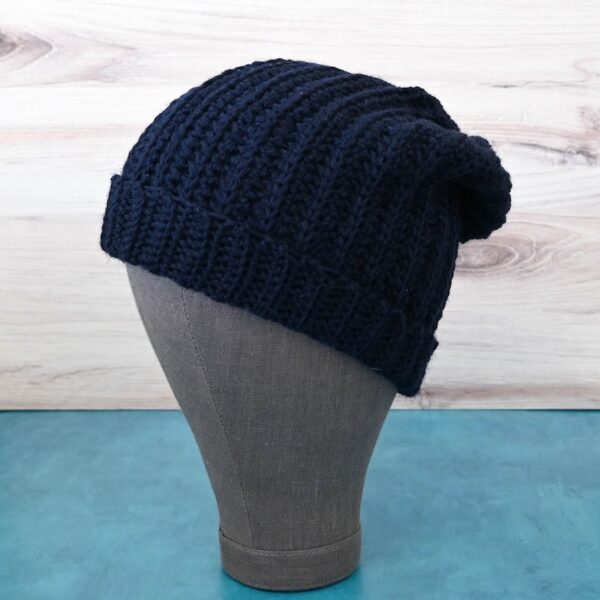
While Hats for Sailors doesn’t have any other requirements for hat styles or colors because there are many sailors on each boat and surely one will love your hat. The ribbed crochet beanie pattern I designed has a classic look and can be worn with the brim rolled up or down, as the wearer prefers.
Scroll down for the free pattern for the Angel Beanie. If you also knit, you can use any of the free knitting patterns available on the Hats for Sailors pattern suggestions page.
If you make your own Angel Beanie, I’d love to see it! Share your progress and questions by tagging me on Facebook as @Underground Crafter on on Instagram as @ucrafter. You can also share a picture in the Underground Crafters Facebook group. Sign up for my weekly newsletter and get a coupon code for your choice of one of my premium patterns and private access to my vault of subscriber goodies. Plus, you’ll never miss one of my free patterns again!
Add the Angel Beanie to your favorites or queue, or buy the ad-free PDF on Ravelry.

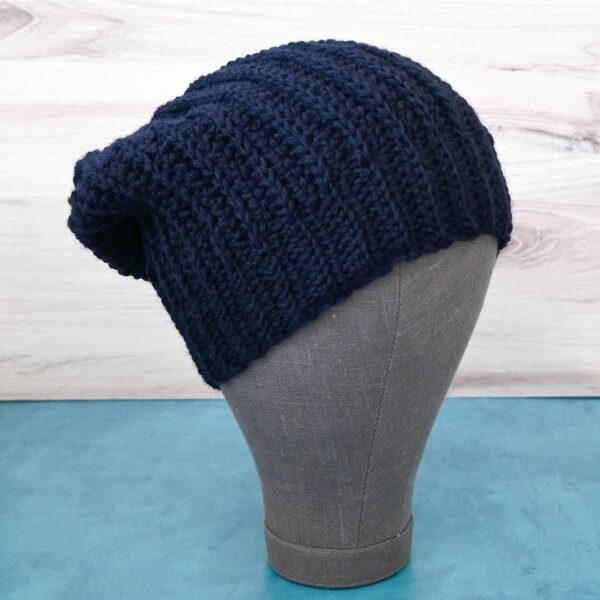
Angel Beanie
Ribbed Beanie Crochet Pattern by Underground Crafter


This ribbed beanie crochet pattern uses simple stitches and stretches to fit multiple child and adult sizes. Designed as part of Underground Crafter’s Charity Spotlight series, this pattern meets the donation requirements for Hats for Sailors.
Finished Size
- Teen/Adult: 15” (38 cm) circumference at roll up brim, 21” (53.5 cm) circumference for main part of hat x 12” (30.5 cm) height. This hat stretches to fit a range of teen and adult head sizes. Shown on a mannequin with 22.5” (57 cm) head circumference.
Materials
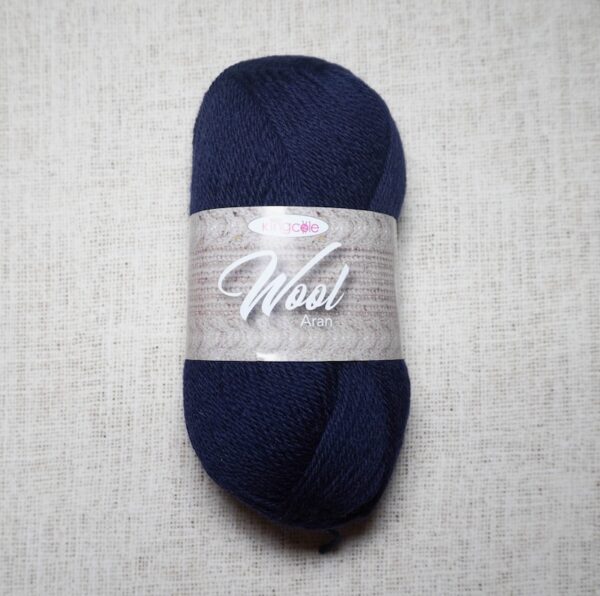
- King Cole Wool Aran yarn (100% superwash wool, 3.5 oz/100 g, 196 yd/180 m) – 2 skeins in 5048 Twilight, or approximately 275 yd (251.5 m) in any medium weight wool or superwash wool yarn.
- US Size I-9/5.5 mm crochet hook, or size needed to obtain gauge.
- Yarn needle.
- Stitch marker (optional).
Gauge
- 16 sc = 4” (10 cm) across. Exact gauge is not critical for this project.
Abbreviations Used in This Pattern
- BL – back loop only – Rich Textures Crochet has a helpful video demonstrating how to identify the back loop in crochet here.
- ch – chain
- rep – repeat
- sc – single crochet
- sl st – slip stitch
- st(s) – stitch(es)
- [] Repeat instructions within brackets as indicated.
Pattern Notes
- Ch 1 at the start of rows do NOT count as stitches.
- A helpful photo tutorial demonstrating how to cinch a slouchy hat closed is available here.
- Like my mannequin? It’s from CanvasHead/WELLDONE on Etsy.
Pattern Instructions
Beanie
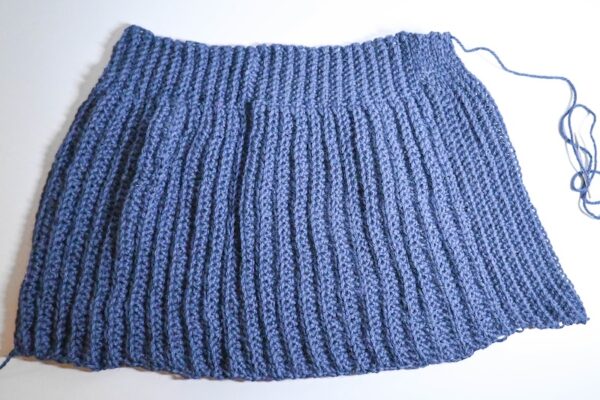
- Ch 51 (or any multiple of sts, + 10 for folded brim, + 1 for foundation row).
- Row 1: Turn, skip 1 ch, sl st in next 10 ch, sc in next 40 ch. (50 sts) Tip: If you’d prefer not to count stitches, place marker in last sl st and move it up each row to mark slip stitch section.
- Row 2: Turn, ch 1, scBL in first 40 sts, slstBL in next 10 sts.
- Row 3: Turn, ch 1, slstBL in first 10 sts, scBL in next 40 sts.
- Rep Rows 2-3 until wider (sc) edge measures approximately 21” (53.5 cm) or desired circumference for hat body, ending after a repeat of Row 2.
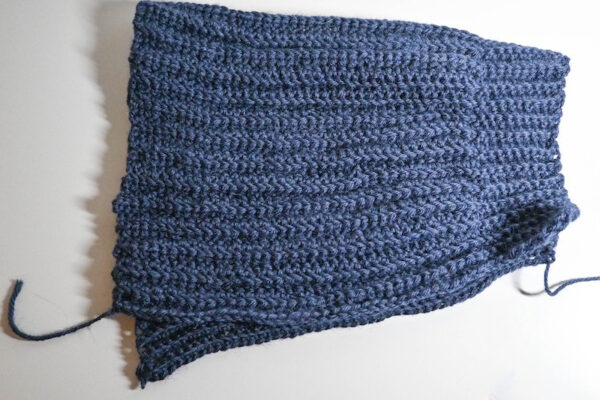
Assembly and Finishing
- Fold Beanie in half so that raw edges are parallel to ribbed rows. Join from narrow edge to wide edge with slip stitch seam (see video below).
- If you can’t see the video tutorial for joining with the slip stitch seam above, click HERE to watch it on YouTube.
- Fasten off with long yarn tail for seaming, approximately 30” (76 cm) long.
- Thread yarn needle with long yarn tail and cinch hat closed along wide edge (see Pattern Notes).
- With yarn needle, weave in yarn tails on inside of Beanie.
- If desired, roll up brim along section of slip stitches.