
I love ripple patterns. There’s something amazing about the way the peaks and valleys materialize right off the hook.
There’s also something about ripples and stripes. The color changes highlight the peaks and valleys, so naturally, stripes and ripples pair well. Until, of course, you get to the ends. No one likes weaving in ends, and color changes mean more ends to weave in. But with Cascade Casablanca, you can let the yarn do the striping for you.
This post contains affiliate links. The yarn for the sample was generously provided by Cascade.

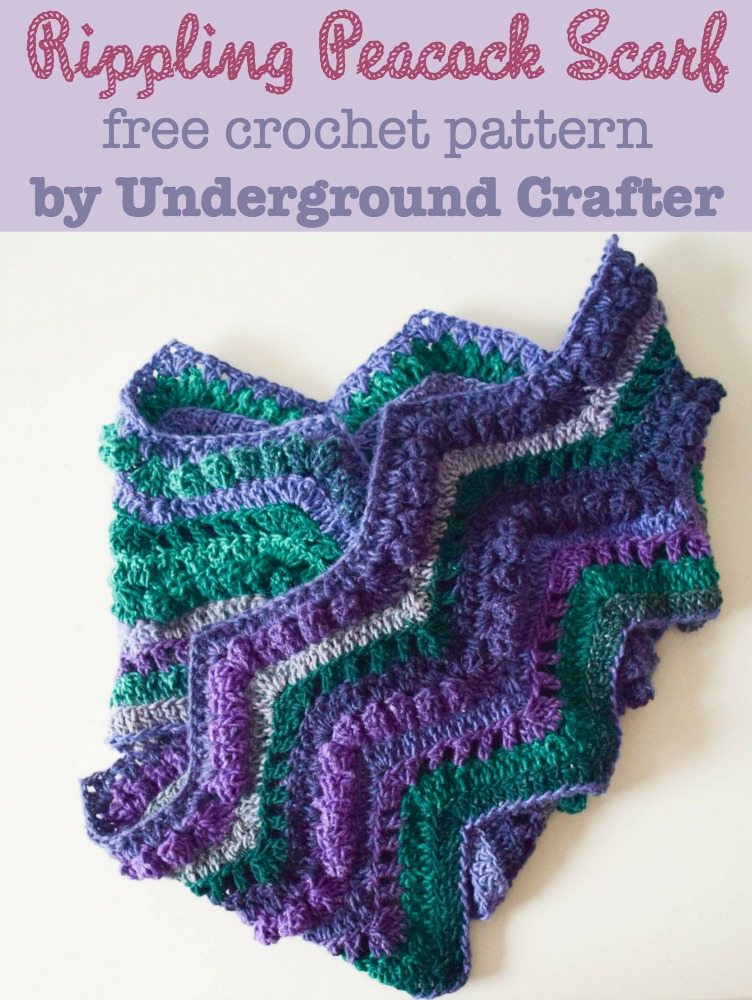
This stitch pattern isn’t just your standard ripple, though. There’s also texture because of the popcorn stitches, and a little eyelet action to give it a nice drape.

The yarn has a great texture and feel, too, because it is a wool/mohair/silk blend. The colors remind me of spring, which is always welcome during the dark days of winter.
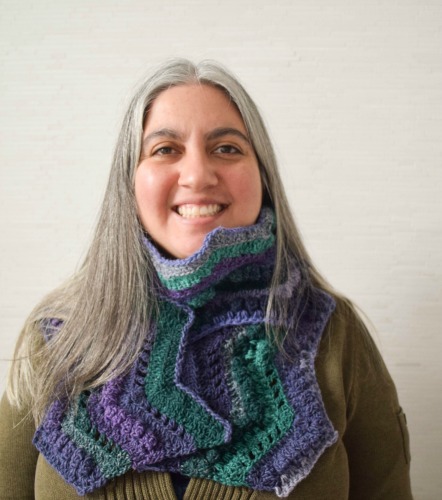
And, as you can see, it’s wide enough for full neck coverage, and long enough for an extra wrap around.
I’d love to see your pictures if you make your own. You can share pictures on Ravelry or on my Facebook page.
 If you want an easy print format, you can buy the ad-free PDF version on Craftsy.

Rippling Peacock Scarf
Crochet Pattern by Underground Crafter
![]()

 Create a dramatic scarf by combining a textured ripple stitch with a self striping yarn.
Finished Size
- Adult: 6.5” (16.5 cm) wide x 55” (140 cm) long (unblocked)/6.75” (17 cm) wide x 57” (145 cm) long (blocked).
Materials
- Cascade Yarns Casablanca (59% wool/24% silk/17%mohair, 3 oz/100 g, 220 yd/200 m) – 2 skeins in 5 Peacock, or approximately 440 yd (400 m) in any self-striping/long color repeat medium weight yarn.
- US H-8/5 mm crochet hook, or any size needed to obtain gauge.
- Yarn needle.

Gauge
- 17.5 sts in pattern = 4” (10 cm). Exact gauge is not critical for this project.
Abbreviations Used in This Pattern (✪ see Special Stitch Patterns, below)
- ch – chain
- dc – double crochet
- dc3tog – double crochet 3 sts together✪
- dc5tog – double crochet 5 sts together✪
- ea – each
- pop – 5-dc popcorn✪
- rep – repeat
- RS – right (front) side
- sk – skip
- sp – space
- st(s) – stitch(es)
- t-ch – turning chain
- * Rep instructions after asterisk as indicated.
Special Stitch Patterns
- dc3tog – double crochet 3 sts together – (Yo, insert hook in next st, yo and draw up a loop, yo and draw through 2 loops) 3 times, yo and drawn through all 4 loops on hook. (Decreases 2 sts, worked over 3 sts)
- dc5tog – double crochet 5 sts together – (Yo, insert hook in next st, yo and draw up a loop, yo and draw through 2 loops) 5 times, yo and drawn through all 6 loops on hook. (Decreases 4 sts, worked over 5 sts)
- pop – 5-dc popcorn – Dc 5 times in same st, remove hook from loop and insert hook from front to back of first dc in group, pick up dropped loop and pull through loop on hook.

Pattern Note
- When adding new skein, unravel new ball until you reach the current or next color in use in the project to continue striping sequence.
Pattern Instructions
Scarf
- Ch 245.
- Row 1: (RS) Turn, sk 3 ch (counts as dc), dc3tog, dc in next 9 sts, 5 dc in next st, dc in next 9 sts, *dc5tog, dc in next 9 sts, 5 dc in next st, dc in next 9 sts; rep from * across to last 4 ch, dc3tog, dc in last st. (243 sts)
- Row 2: Turn, ch 3 (counts as dc, here and throughout), dc3tog, dc in next 9 sts, 5 dc in next st, dc in next 9 sts, *dc5tog, dc in next 9 sts, 5 dc in next st, dc in next 9 sts; rep from * across to last 4 sts, dc3tog, dc in t-ch.
- Row 3: Turn, ch 3, dc3tog, ch 1, sk 1 st, (dc in next st, ch 1, sk 1 st) 4 times, 5 dc in next st, ch 1 (sk 1 st, dc in next, ch 1) 4 times, *sk 1 st, dc5tog, ch 1, sk 1 st, (dc, ch 1, sk 1 st) 4 times, 5 dc in next st, ch 1, (sk 1 st, dc in next st, ch 1) 4 times; rep from * to last 5 sts, sk 1 st, dc3tog, dc in t-ch.
- Row 4: Rep Row 2, treating both dc and ch-1 sp as sts.
- Row 5: Turn, ch 3, dc3tog, ch 2, sk 1 st, (pop, ch 2, sk 1 st) 4 times, (pop, ch 3, pop, ch 2) in next st, (sk 1 st, pop, ch 2) 4 times, *sk 1 st, dc5tog, ch 2, sk 1, (pop, ch 2, sk 1 st) 4 times, (pop, ch 3, pop, ch 2) in next st, (sk 1 st, pop, ch 2) 4 times; rep from * across to last 5 sts, sk 1 st, dc3tog, dc in t-ch.
- Row 6: Turn, ch 3, 2 dc in next 5 ch-2 sps, 5 dc in ch-3 sp, *2 dc in next 4 ch-2 sps, dc in next ch-2 sp, dc in next st, dc in next ch-2 sp, 2 dc in next 4 ch-2 sps, 5 dc in ch-3 sp; rep from * across to last 5 ch-2 sps, 2 dc in next 5 ch-2 sps, sk 1 st, dc in t-ch.
- Rows 7-9: Rep Rows 3-5.
- Row 10: Turn, ch 3, 2 dc in next 5 ch-2 sps, (2 dc, ch 2, 2 dc) in ch-3 sp, *2 dc in next 4 ch-2 sps, dc in next ch-2 sp, dc in next dc, dc in next ch-2 sp, 2 dc in next 4 ch-2 sps, (2 dc, ch 2, 2 dc) in ch-3 sp; rep from * across to last 5 ch-2 sps, 2 dc in next 5 ch-2 sps, sk 1 st, dc in t-ch. Fasten off.
Finishing
- Weave in ends. Spray block.
If you want an easy print format, you can buy the ad-free PDF version on Craftsy.
I’d love to see your pictures if you make your own. You can share pictures on Ravelry or on my Facebook page.
I pinned the Gerbera 6″ crochet square pattern! I love its earthy look. Find the pin at: https://www.pinterest.com/pin/390898442632807343/
HI,
I love this scarf, it is gorgeous! I spent hours trying to find it last night, on my computer, after having seen it on my phone, so that I could save it and print it out, so I can carry it with me to work on the project. I see so many ads in the same area with the pattern, so it would be kind of hard to copy and paste into a document, and no button for printing. Did I miss it? I don’t have any intention of sharing it, I am a designer myself and respect your work. I find lots of free patterns on blogs that don’t have any way of printing them, and I don’t get that. I can’t carry my computer around with me, and I often need to make some notes on patterns, so I would never use my phone, either, so I need to print it out! Can you please tell me how to do that here?
Thanks for stopping by, Olivia. I don’t have a print button on my blog, but you should be able to print from your browser by clicking command P on an Apple or Ctrl P on a Windows computer. Once your print menu opens, you can select the pages you’d like to print. Let me know if you have other questions.
Thanks for getting back to me so quickly! I tried your suggestion on my Mac, but there is no way to know which pages to select, because there are no pages on the pattern. I tried to just print it out as is, but that would have been NINE PAGES, so I canceled that! Sigh… Thanks anyway. I have definitely seen printer friendly patterns on blogs, so I would suggest that for all bloggers who put patterns on their blogs. I really appreciate these patterns, as I do not have a lot of money. Thanks!
Olivia, if you’re on a Mac, when you hit command-P on the lower left you will have the option to either “Print using system dialogue” or “Open PDF in Preview.” Once you select either option, you can scroll through the pages and choose the ones you want to print :).
On a Mac you can highlight and copy (Command C) the whole article, open a Word document and then paste in (Command V). Then you just delete the bits you don’t need (eg ads) and hit ‘Save As’. You can even delete some of the photos, or make them smaller (by clicking and dragging in the bottom corner of the photo). I got mine down to 3 pages.
You could most likely do a similar thing on a PC.
Hi Olivia & Marie
There is an absolutely awesome free browser tool called Print Friendly & PDF that I use a lot!
Olivia, I’m not a Mac User (unless you count my iPad) but you can add a Print Friendly & PDF button to several different browsers – here’s the link https://www.printfriendly.com/browser_tool look for your favorite browser on the right and follow the instructions for installing it.
Marie – Print Friendly & PDF has a WordPress plug in that is SO easy to install – https://wordpress.org/plugins/printfriendly/ I have it installed on 3 of my WordPress blogs that offer QuickBooks tips.
Hope this helps you and others 🙂
Thanks for sharing your tips, Nancy!
Thank you Marie for the beautiful pattern! I will be doing it in Red Heart’s Unforgettable Peacock. 🙂
Oooh, that sounds lovely, Sheila! I’d love to see a picture when you’re finished.