

This post is part of my monthly charity spotlight series where I highlight a charity that accepts crochet or knit donations and share a free pattern, so read on for details!
This post contains affiliate links.
November’s Featured Charity: The Seamen’s Church Institute (Christmas at Sea)
For over 100 years (!), the Seamen’s Church Institute has worked with volunteers to provide handmade accessories and garments to mariners who are away from home during the winter holidays through the Christmas at Sea program. These cozy items go to mariners working internationally as well as to the many who work in the inland waterways of the United States.
In addition to crocheted or knit winter wear, the mariners also receive personal letters, personal care items (like lip balm), and information about the services that The Seamen’s Church Institute offers.
Winter packages typically include a scarf and hat. Donations are accepted all year long. You can get links to approved free knitting and crochet patterns, find the mailing address for donations, and learn more about the Christmas at Sea Program here. If you’d like to organize a collection of personal care items to donate, you can find a list of what’s needed here.

Tips for Making Great Christmas at Sea Donations
The Seamen’s Church Institute accepts crocheted and knit hats and scarves made with machine washable yarns (including machine washable/superwash wool). Hats and scarves must be made with medium (worsted) weight yarns in dark, unisex colors. Hats should be close fitting, beanie-style projects. Scarves should measure from 6″ (15 cm) to 8″ (20.5 cm) wide and from 48″ (122 cm) to 54″ (137 cm) long. Use dense stitch patterns without eyelets or lace for maximum warmth and coverage.
For safety reasons, hats and scarves must be free of embellishments. In other words, no pompoms, tassels, fringes, or other extras can be added to projects as these may snag on equipment and cause injury.
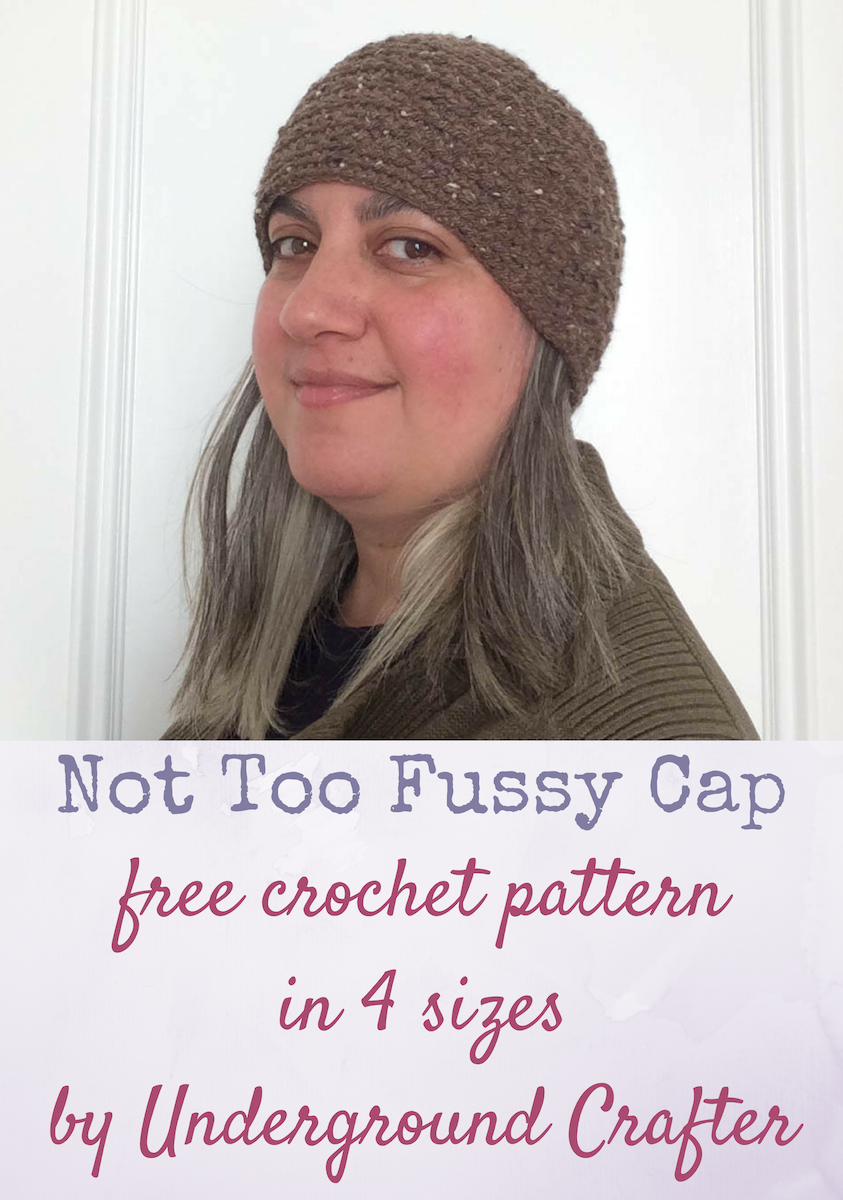
For the Not Too Fussy Cap, I combined relatively short stitches – the slip stitch, the half double crochet, and the single crochet – to limit open spaces between stitches to keep the warmth in. Crocheting in the back loop only gives the hat some texture without compromising on warmth.
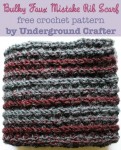
 If you’re looking for more projects to make for Christmas at Sea, try the Bulky Faux Mistake Rib Scarf, another Underground Crafter free crochet pattern. Just be sure to start with a chain of 200 instead of 216 so the scarf meets the length requirements!
If you make your own Not Too Fussy Cap, I’d love to see it! Share your progress and questions by tagging me on Facebook as @Underground Crafter, Instragram as @ucrafter, Google+ as +UndergroundCrafter, or Twitter as @ucrafter.
Add the Not Too Fussy Cap to your Ravelry favorites or queue.
 If you want an easy print format, you can buy an ad-free PDF version on Craftsy.

Not Too Fussy Cap
Crochet Pattern by Underground Crafter


 This unisex beanie has just enough texture to keep things interesting but not enough to make it “fussy” for the wearer. This hat is designed to meet the donation requirements for Christmas at Sea, a program of the Seamen’s Church Institute that provides warm accessories to mariners during the winter months.
Finished Sizes
- Newborn (Toddler, Teen/Adult Small, Adult Large). Photographed sample is size Adult Large.
- Newborn: 12.5” (31.75 cm) hat circumference, 4.5” (11.5 cm) length.
- Toddler: 16.5” (42 cm) hat circumference, 6” (15 cm) length.
- Teen/Adult Small: 20.5” (52 cm) hat circumference, 7.25” (18.5 cm) length.
- Adult Large: 22” (56 cm) hat circumference, 8” (20.5 cm) length.
Materials
- Lion Brand Vanna’s Choice yarn (92% Acrylic/8% Rayon, 3.5 oz/100 g/170 yd/156 m) – 1 (1, 1, 2) skein(s) in 403 Barley, or approximately 170 (170, 170, 216) yd/156 (156, 156, 197.5) m in any medium weight yarn.
- US Size I-9/5.5 mm crochet hook, or size needed to obtain gauge.
- Yarn needle.
Shop for Lion Brand Vanna’s Choice yarn at your favorite retailer! LeisureArts | Craftsy | Jo-Ann | Michaels | Amazon
Gauge
- Through Rnd 7 in pattern = 4” (10 cm) diameter. For best fit, always check your gauge.
Abbreviations Used in This Pattern
- BL – back loop only
- ch – chain
- ea – each
- hdc – half double crochet
- rep – repeat
- Rnd(s) – Round(s)
- sc – single crochet
- sc2tog – single crochet 2 sts together – (Insert hook in next st, yo and draw up a loop) twice, yo and draw through all 3 loops on hook.
- slst – slip stitch
- st(s) – stitch(es)
- yo – yarn over
- * Repeat instructions after asterisk as indicated.
Pattern Notes
- Hat is worked in rounds with the right side facing.
Pattern Instructions
Hat
- Starting at crown, ch 4, skip 3 ch, join with slip st to first ch to form ring.
- Rnd 1: Ch 1, 8 sc in ring, join with slst to first sc. (8 sts)
- Rnd 2: Ch 2 (counts as hdc, here and throughout), slstBL in same st, (hdc, slstBL) in ea st around, join with slst to top of ch 2. (16 sts)
- Rnd 3: Ch 1, starting in first st, *scBL in next st, 2 scBL in next st; rep from * around, join with slstBL to first sc. (24 sts)
- Rnd 4: Ch 2, slstBL in same st, hdc in next st, slstBL in next st, *(hdc, slstBL) in next st, hdc in next st, slstBL in next st; rep from * around, join with slst to top of ch 2. (32 sts)
- Rnd 5: Ch 1, starting in first st, *scBL in next 3 sts, 2 scBL in next st; rep from * around, join with slstBL to first sc. (40 sts)
- Rnd 6: Ch 2, slstBL in same st, (hdc in next st, slstBL in next st) twice, *(hdc, slstBL) in next st, (hdc in next st, slstBL in next st) twice; rep from * around, join with slst to top of ch 2. (48 sts)
- Rnd 7: Ch 1, starting in first st, *scBL in next 5 sts, 2 scBL in next st; rep from * around, join with slstBL to first sc. (56 sts) NEWBORN SIZE ONLY: Continue to Rnd 14.
- Rnd 8: Ch 2, slstBL in same st, (hdc in next st, slstBL in next st) 3 times,*(hdc, slstBL) in next st, (hdc in next st, slstBL in next st) 3 times; rep from * around, join with slst to top of ch 2. (64 sts)
- Rnd 9: Ch 1, starting in frst st, *scBL in next 7 sts, 2 scBL in next st; rep from * around, join with slstBL to first sc. (72 sts) TODDLER SIZE ONLY: Continue to Rnd 14.
- Rnd 10: Ch 2, slstBL in same st, (hdc in next st, slstBL in next st) 4 times, *(hdc, slstBL) in next st, (hdc in next st, slstBL in next st) 4 times; rep from * around, join with slst to top of ch 2. (80 sts)
- Rnd 11: Ch 1, staring in first st,*scBL in next 9 sts, 2 scBL in next st; rep from * around, join with slstBL to first sc. (88 sts) TEEN/ADULT SMALL SIZE ONLY: Continue to Rnd 14.
- Rnd 12: Ch 2, slstBL in same st, (hdc in next st, slstBL in next st) 5 times,*(hdc, slstBL) in next st, (hdc in next st, slstBL in next st) 5 times; rep from * around, join with slst to top of ch 2. (96 sts)
- Rnd 13: Ch 1, scBL in same st and ea st around, join with slstBL to first sc.
- Rnd 14: Ch 2, slstBL in next st, *hdc in next st, slstBL in next st; rep from * around, join with slst to top of ch 2.
- Rnd 15: Rep Rnd 13.
- Rep Rnds 14-15 until hat measures approximately 4” (5.5”, 6.75”, 7.5”)/10 cm (14 cm, 17 cm, 19 cm) from crown, ending after Rnd 14.
- Rnd 16: Ch 1, starting in first st, *scBL in next 5 (7, 9, 10) sts, sc2togBL; rep from * around, join with slstBL to first sc. – 48 (64, 80, 88) sts
- Rep Rnd 13. Fasten off.
Finishing
- With yarn needle, weave in ends.
© 2016 by Marie Segares (Underground Crafter). This pattern is for personal use only. You may use the pattern to make unlimited items for yourself, for charity, or to give as gifts. You may sell items you personally make by hand from this pattern. Do not violate Marie’s copyright by distributing this pattern or the photos in any form, including but not limited to scanning, photocopying, emailing, or posting on a website or internet discussion group. If you want to share the pattern, point your friends to this link: http://undergroundcrafter.com/2016/11/09/free-pattern-not-too-fussy-cap/. Thanks for supporting indie designers!
If you make your own Not Too Fussy Cap, I’d love to see it! Share your progress and questions by tagging me on Facebook as @Underground Crafter, Instragram as @ucrafter, Google+ as +UndergroundCrafter, or Twitter as @ucrafter.
Add the Not Too Fussy Cap to your Ravelry favorites or queue.
If you want an easy print format, you can buy an ad-free PDF version on Craftsy.
Thanks for sharing your pattern with us at Creatively Crafty #ccbg 🙂 I love seeing all the fiber arts posts every week!