

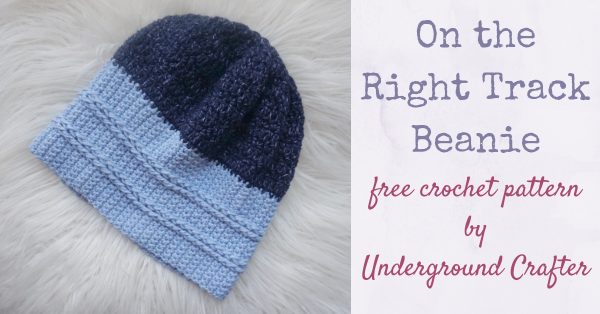
Are you looking for a crochet beanie pattern to make this weekend? I have just the right project for you! On the Right Tracks Beanie is a slightly slouchy hat with a wide, textured hat band… and you can make one for a good cause, too. Read on for details!
This post contains affiliate links. I may receive compensation (at no added cost to you) if you make a purchase using these links. Yarn for this project was generously provided by Lion Brand. Camera and vinyl backdrop were generously provided by B&H Photo Video and Pro Audio.
Lion Brand announced yesterday that they’ve extended the deadline for this year’s #HatNotHate initiative donations, so today seemed like just the time to release this blue beanie pattern. If you’re not familiar with #HatNotHate, it’s a campaign to increase awareness of the negative impact of bullying. Last year, Lion Brand had a goal to collect 1,500 hats, and this year, the goal is 25,000 hats! These hats will be distributed to schools around the United States so that students can wear them in October as part of National Bullying Prevention Month.
If you’d like to send a hat, the deadline is September 1, 2020 and you can get all the details (including the address where to send the hats) here. If it’s too late to donate by the time you read this, you can also order your own #HatNotHate wooden tags or faux leather tags from Lion Brand to add to your own hat. Wear it proudly in October as a conversation starter about bullying in your community!

Let me tell you a bit more about this crochet beanie pattern. I love to crochet hats when I’m short on time since they work up so quickly. I wanted the hat band for this project to be more dramatic so I made it wider than usual and included a lot of texture. Since I know that kids and teens (at least in my neighborhood) prefer beanies and slouchies, I added a slightly slouchy touch to this hat. The pattern is available in one size (20″/51 cm hat circumference) but it should fit a variety of children, teens, and even some adults comfortably.

If you make your own On the Right Track Beanie project, I’d love to see it! Share your progress and questions by tagging me on Facebook as @Underground Crafter, Instragram as @ucrafter, or Twitter as @ucrafter. You can also share a picture in the Underground Crafters Facebook group. Sign up for my weekly newsletter and get a coupon code for your choice of one of my premium patterns and other subscriber goodies. Plus, you’ll never miss one of my free patterns again!
Add the On the Right Track Beanie to your favorites or queue on Ravelry.

On the Right Track Beanie
Crochet Pattern by Underground Crafter
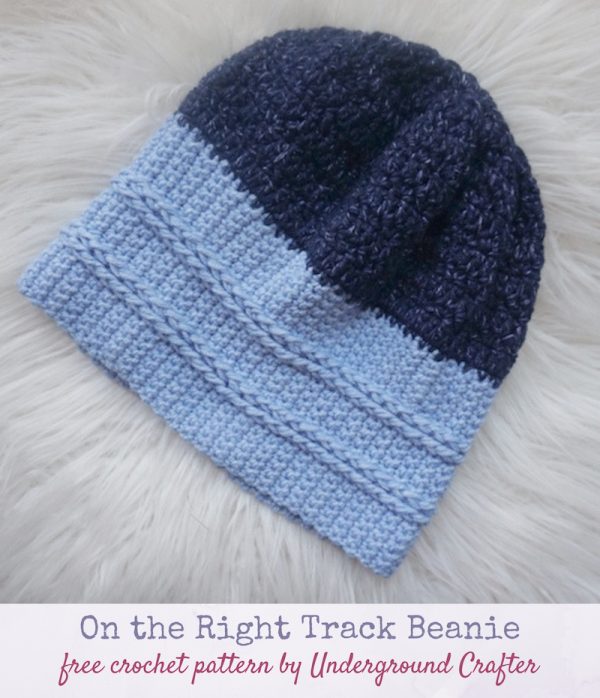


This slightly slouchy beanie has a wide, textured hat band. This project was designed to meet the donation requirements for Lion Brand’s #HatNotHate initiative to increase awareness of the negative impact of bullying.
Finished Size
- Teen/Adult Small: 20” (51 cm) hat circumference x 9.75” (25 cm) height.
Materials
- Lion Brand Jeans yarn (100% acrylic, 3.5 oz/100 g, 246 yd/225 m) – 1 skein each in 105 Faded (CA) and 108 Brand New (CB), or approximately 160 yd (146.5 m) in CA and 130 yd (119 m) in CB in any medium weight yarn.
- US Size H-8/5 mm and US Size I-9/5.5 mm crochet hooks, or any sizes needed to obtain correct gauge.
- Yarn needle.

Gauge
- 20 sts = 4.5” (11.5 cm) in pattern for Hat Band with smaller hook. For best fit, always check your gauge.
Abbreviations Used in This Pattern
- CA – Color A
- CB – Color B
- ch – chain
- dc – double crochet
- dc2tog – double crochet 2 stitches together (decrease) – [Yo, insert hook in next st, yo and draw up a loop, yo and draw through 2 loops] twice, yo and draw through all 3 loops on hook. Fiber Flux has a helpful video tutorial for this stitch here.
- FPdc – front post double crochet – front post double crochet = Yo, insert hook from front around back to front of indicated st, yo and draw up a loop, [yo and draw through 2 loops] twice. A video tutorial for this stitch is available here.
- rep – repeat
- Rnd(s) – Round(s)
- sc – single crochet
- sc2tog – single crochet 2 stitches together (decrease) – [Insert hook in next st, yo and draw up a loop] twice, yo and draw through all 3 loops on hook. Fiber Flux has a helpful video tutorial for this stitch here.
- sl st – slip stitch
- st(s) – stitch(es)
- yo – yarn over
- *Repeat instructions after asterisk as indicated.
- [] Repeat instructions between brackets as indicated.
- () Repeat instructions within parentheses into same stitch.
Pattern Notes
- When choosing colors, note that CA the color of the Hat Band and CB is the color of the rest of the Hat.
- Hat Band is worked flat in rows until it reaches the desired hat circumference length. Then, stitches are picked up along the long edge of seamed Hat Band. The rest of the hat is worked in the round and then decreased at crown.
- A helpful tutorial for joining pieces with the mattress stitch is available here.
- Ch 1 at beginning of Rows and Rounds does not count as a stitch.
Pattern Instructions
Hat Band
- With smaller hook and CA, ch 21.
- Row 1: Turn, sk 1 ch, sc in next 20 ch. (20 sts)
- Row 2: Turn, ch 1, sc in first st and in each st across.
- Row 3: Turn, ch 1, sc in first 6 sts, [FPdc around next 2 sts from Row 1, sc in next 4 sts] twice, sc in next 2 sts.
- Row 4: Rep Row 2.
- Row 5: Turn, ch 1, sc in first 6 sts, [FPdc around next 2 FPdc, sc in next 4 sts] twice, sc in next 2 sts.
- Rep Rows 4-5 until Hat Band measures approximately 20” (51 cm) long, or length of desired hat circumference.
- Fasten off CA with long yarn tail (approximately 24”/61 cm) for seaming. Fold Hat Band and seam short edges together with yarn needle threaded with long yarn tail using the mattress stitch (see Pattern Notes).
Pick Up Stitches Along Hat Band
- With larger hook and CB, begin working along long edge/joined circumference.
- Rnd 1: Ch 1, work 92 sc evenly along long edge, join with sl st to first sc.
Work Even
- Rnd 2: Ch 1, dc in same st and in each st around, join with sl st to first dc.
- Rnd 3: Ch 1, starting in same st, *(sc, dc) in next st, skip 1 st; rep from * around, join with sl st to first sc.
- Rep Rnds 2-3 until hat measures approximately 7” (18 cm) in height, or approximately 2.75” (7 cm) shorter than final desired height, ending after a rep of Rnd 2.
Decrease to Crown
- Rnd 4: Ch 1, starting in same st, *sc2tog, dc in next st, [(sc, dc) in next st] twice; rep from * around to last st, sc in last st, join with sl st to first sc. (79 sts)
- Rnd 5: Ch 1, starting in same st, *dc2tog, dc in next 4 sts; rep from * around to last st, dc in last st, join with sl st to first dc. (66 sts)
- Rnd 6: Ch 1, starting in same st, *sc2tog, dc in next st; rep from * around, join with sl st to first sc. (44 sts)
- Rnd 7: Ch 1, starting in same st, *dc2tog, dc in next 2 sts; rep from * around, join with sl st to first dc. (33 sts)
- Rnd 8: Ch 1, starting in same st, *sc2tog, dc in next st; rep from * around, join with sl st to first sc. (22 sts)
- Rnd 9: Ch 1, starting in same st, dc2tog around, join with sl st to first dc. (11 sts)
- Rnd 10: Ch 1, starting in same st, [sc2tog, dc in next st] 3 times, sc2tog. (7 sts)
- Fasten off CB with long yarn tail (approximately 12”/30.5 cm) for closing top of hat.
Finishing
- With yarn needle, draw CB yarn tail through remaining stitches. Pull yarn tight and secure to close crown.
- With yarn needle, weave in ends on inside of hat.