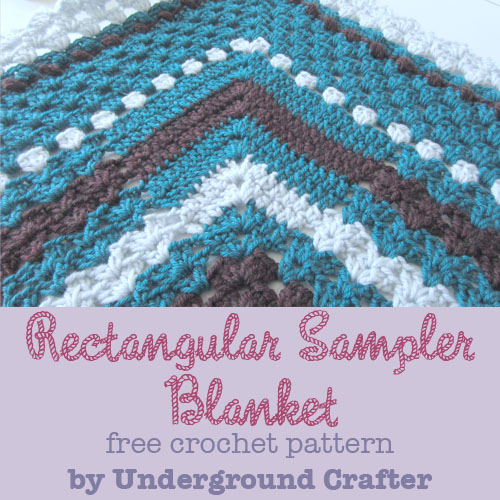
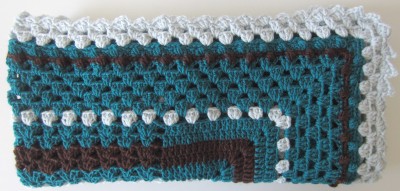
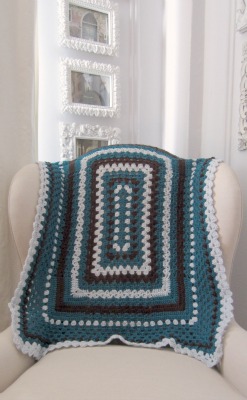
I’m a huge fan of granny squares, but sometimes I like to make granny projects in one piece rather than joining a bunch of squares together at the end. For the Crochetville National Crochet Month blog tour in 2013, I designed the pattern for the Rectangular Sampler Blanket. It combines different stitch patterns into a granny-style rectangle project that makes a great stroller or baby blanket. These work up pretty quickly and you can make them larger by continuing the repeats at the end. Enjoy!

This post contains affiliate links. I may receive compensation (at no added cost to you) if you make a purchase using these links. The yarn for the sample was generously provided by Cascade.
If you make your own Rectangular Sampler Blanket, I’d love to see it! Share your progress and questions by tagging me on Facebook as @Underground Crafter on on Instagram as @ucrafter. You can also share a picture in the Underground Crafters Facebook group. Sign up for my weekly newsletter and get a coupon code for your choice of one of my premium patterns and private access to my vault of subscriber goodies. Plus, you’ll never miss one of my free patterns again!
Add the Rectangular Sampler Blanket to your favorites or queue, or buy the ad-free PDF on Ravelry.
Rectangular Sampler Blanket
Crochet Pattern by Underground Crafter


This rectangular sampler is a twist on the traditional granny square pattern.
Finished Size: 34” x 29” (86 cm x 74 cm).
Materials:
- Cascade Yarns 220 Superwash yarn (100% superwash wool, 3.5 oz/100 g/220 yds/201 m) – 4 skeins 1960 Pacific (CA), 2 skeins 1914 Alaska Sky (CB), and 1 skein 863 Cordovan (CC), or approximately 1,540 yards (1,408 m) in any medium weight yarn
- J-10/6 mm crochet hook, or any size needed to obtain correct gauge
- Yarn needle
Gauge:
- First 4 rounds in pattern = 9.5” (24 cm) x 4” (10 cm). Exact gauge is not critical for this project.
Abbreviations Used in This Pattern:
- BL – back loop only
- CA – color A
- CB – color B
- CC – color C
- ch – chain
- dc – double crochet
- ea – each
- FPsc – front post single crochet – Insert hook from front to back around post of next puff st from previous row, yo and draw up a loop around post, yo and draw through 2 loops, sk st behind FPsc. A helpful video tutorial for this stitch is available below.
- If you can’t see the FPsc video tutorial above, click HERE to watch it on YouTube.
- puff – 4-repeat puff stitch – Yo, insert hook in next st, yo and draw up a loop, (yo, insert hook in same st, yo and draw up a loop) 3 times, yo and draw through all 9 loops. A helpful video tutorial for the 3-repeat version of this stitch is available below.
- If you can’t see the puff stitch video tutorial above, click HERE to watch it on Facebook.
- rep – repeat
- Rnd(s) – Round(s)
- RS – right (front) side
- sp – space
- sk – skip
- sc – single crochet
- sl st – slip stitch
- st(s) – stitch(es)
- yo – yarn over
- * Repeat instructions after asterisk as indicated
Pattern Notes:
- Entire project is worked in the round with the right (front) side facing. Always join new color to first corner of short edge of rectangle.
Pattern Instructions:
Granny Rectangle
- With CA, ch 26.
- Rnd 1: (RS) Sk 3 ch (counts as dc here and throughout), (2 dc, ch 2, 3 dc, ch 2, 3 dc) in next ch, *(ch 1, sk 1 ch, dc in ea of next 3 ch) around to last 2 sts, ch 1, sk 1, [(3 dc, ch 2) twice, 3 dc] in next ch. Working on opposite side of foundation ch, rep from * around to last ch, ch 1, join with sl st to top of first ch 3. Fasten off.
- Rnd 2: Join CB with sl st in corner ch-2 sp, ch 3, (2 dc, ch 2, 3 dc) in same ch-2 sp, ch 1, (3 dc, ch 2, 3 dc) in next ch-2 sp, *(ch 1, 3 dc in next ch-1 sp)** around to corner ch-2 sp, [(3 dc, ch 2, 3 dc, ch 1) in next ch-2 sp] twice, 3 dc in next ch-1 sp. Rep from * to ** around, ch 1, join with sl st to top of first ch 3. Fasten off.
- Rnd 3: Join CA with sl st in corner ch-2 sp, ch 3, (2 dc, ch 2, 3 dc) in same ch-2 sp, ch 1, *(3 dc in next ch-1 sp, ch 1) around to corner ch-2 sp,** (3 dc, ch 2, 3 dc, ch 1) in next ch-2 sp. Rep from * 3 times, ending last rep at **, join with sl st to top of first ch 3. Fasten off.
- Rnd 4: With CC, rep Rnd 3.
- Rnd 5: Join CA with sl st in corner ch-2 sp, ch 3, (2 dc, ch 2, 3 dc) in same ch-2 sp, ch 1, *(3 dc in next ch-1 sp, ch 1) around to corner ch-2 sp,** (3 dc, ch 2, 3 dc, ch 1) in next ch-2 sp. Rep from * 3 times, ending last rep at **, join with sl st to top of first ch 3.
- Rnd 6: Sl st in ea of next 2 sts and in ch-2 sp, ch 3, (2 dc, ch 2, 3 dc) in same ch-2 sp, ch 1, *(3 dc in next ch-1 sp, ch 1) around to corner ch-2 sp,** (3 dc, ch 2, 3 dc, ch 1) in next ch-2 sp. Rep from * 3 times, ending last rep at **, join with sl st to top of first ch 3. Fasten off.
- Rnds 7 & 8: With CB, rep Rnds 5 & 6.
- Rnds 9 & 10: With CC, rep Rnds 5 & 6.

Alternating V-Stitch
- Rnd 11: Join CA with sl st in corner ch-2 sp, ch 3, (dc, ch 2, 2 dc) in same ch-2 sp, *ch 1, [(dc, ch 1, dc) in next ch-1 sp, (2 dc, ch 1, 2 dc) in next ch-1 sp] to last ch-1 sp before corner ch-2 sp, (dc, ch 1, dc) in ch-1 sp, ch 1,** (2 dc, ch 2, 2 dc) in corner ch-2 sp. Rep from * 3 times, ending last rep at **, join with sl st to top of first ch 3.
- Rnd 12: Sl st in next st and in corner ch-2 sp, ch 3, (dc, ch 2, 2 dc) in same ch-2 sp, *dc in ea st up to ch-1 sp, sk ch-1 sp, ch 1, [(2 dc, ch 1, 2 dc) in next ch-1 sp, (dc, ch 1, dc) in next ch-1 sp] to last 2 ch-1 sps before corner ch-2 sp, (2 dc, ch 1, 2 dc) in ch-1 sp, ch 1, sk ch-1 sp, dc in ea st to corner ch-2 sp,** (2 dc, ch 2, 2 dc) in corner ch-2 sp. Rep from * 3 times, ending last rep at **, join with sl st to top of first ch 3. Fasten off.
- Rnd 13: Join with CB in corner ch-2 sp, ch 3, (dc, ch 2, 2 dc) in same ch-2 sp, *dc in ea st up to ch-1 sp, sk ch-1 sp, ch 1, [(dc, ch 1, dc) in next ch-1 sp, (2 dc, ch 1, 2 dc) in next ch-1 sp] to last 2 ch-1 sps before corner ch-2 sp, (dc, ch 1, dc) in ch-1 sp, ch 1, sk ch-1 sp, dc in ea st to corner ch-2 sp,** (2 dc, ch 2, 2 dc) in corner ch-2 sp. Rep from * 3 times, ending last rep at **, join with sl st to top of first ch 3.
- Rnd 14: Rep Rnd 12.
- Rnds 15 & 16: With CA, rep Rnds 13 & 12.
- Rnds 17 & 18: With CC, rep Rnds 13 & 12.
- Rnds 19 & 20: With CA, rep Rnds 13 & 12.
Granny Rectangle
- Rnd 21: Join CB with sl st in corner ch-2 sp, ch 3, (2 dc, ch 2, 3 dc) in same ch-2 sp, *[ch 1, sk 3 sts, 3 dc in next st] around to first ch-1 sp, ch 1, sk ch-1 sp, (3 dc in next ch-1 sp, ch 1) around to last ch-1 sp of side, sk ch-1 sp, [3 dc in next st, ch 1, sk 3 sts] around to corner ch-2 sp,** (3 dc, ch 2, 3 dc, ch 1) in corner ch-2 sp. Rep from * 3 times, ending last rep at**, join with sl st to top of first ch 3. Fasten off.
- Rnds 22-25: With CA, rep Rnds 5 & 6, do not fasten off. Rep Rnd 6 again, do not fasten off. Rep Rnd 6 again.

Staggered Puffs
- Rnd 26: Join CC with sc in corner ch-2 sp, (2 sc, ch 1, 3 sc) in same ch-2 sp, *sc in next st, puff in next st, [sc in next 3 sts, (including ch), puff in next st] around to st before next corner ch-2 sp, sc in next st,** (3 sc, ch 1, 3 sc) in corner ch-2 sp. Rep from * 3 times, ending last rep at **, join with sl st to top of first sc. Fasten off.
- Rnd 27: Join CA with sc to corner ch-1 sp, (sc, ch 2, sc) in same ch-1 sp, *scBL in next 4 sts, [FPsc around puff st, scBL in next 3 sts] around to st before corner ch-2 sp, scBL in next st,** (sc, ch 2, sc) in corner ch-2 sp. Rep from * 3 times around, ending last rep at **, join with sl st to top of first sc.
- Rnd 28: Sl st in ch-2 sp, ch 1, *(sc, ch 2, sc) in corner ch-2 sp, sc in next 2 sts, [puff, sc in next 3 sts] around to last st before corner ch-2 sp, sc in next st. Rep from * 3 times, join with sl st to top of first sc.
- Rnd 29: Sl st in ch-2 sp, ch 1, *(sc, ch 2, sc) in same ch-2 sp, scBL in next 3 sts, [FPsc around puff st, scBL in next 3 sts] around to last 2 sts before corner ch-2 sp, scBL in next 2 sts. Rep from * 3 times, join with sl st to top of first sc. Fasten off.

Granny Rectangle
- Rnd 30: Join CB with sl st in corner ch-2 sp, ch 3, (2 dc, ch 2, 3 dc) in same ch-2 sp, sk 3 sts, *(ch 1, 3 dc in next st, sk 3 sts) around to corner ch-2 sp,** (3 dc, ch 2, 3 dc, ch 1) in next ch-2 sp, sk 3 sts. Rep from * 3 times, ending last rep at **, ch 1, join with sl st to top of first ch 3.
- Rnd 31: Rep Rnd 6, do not fasten off.
Edging
- Rnd 32: Sl st in ea of next 2 sts and in corner ch-2 sp, ch 1, 5 sc in same ch-2 sp, *[(sc, ch 3, 3 dc) in next ch-1 sp, sk 3 sts] around to corner ch-2 sp,** 5 sc in corner ch-2 sp. Rep from * 3 times, ending last rep at **, join with sl st to top of first sc. Fasten off.
- With yarn needle, weave in ends. Spray or steam block if necessary.


I like to make thisThis
Thanks, altonette. Share pictures if you do!
Is there a way to convert this to a larger size?
Thanks for writing, Cindy. Several people on Ravelry have converted the blanket to a larger size by continuing the alternating v-stitch and granny rectangle repeats at the end.
You do beautiful work. Thanks for the patterns.
Thanks so much, Mary! I’d love to see your pictures if you make one of them :).
What a fun blanket! I love the colors you chose, too!
I’d like to invite you to link up to Fiber Tuesdays link party. 🙂
http://www.ouicrochet.com/2015/07/fiber-tuesdays-19-link-party.html
Hope to see you there!
Thanks so much, Susie!
I am loving this pattern! I am making it for a baby shower gift. I’m having a problem though at rnd 27. Should I have closed the top of the puffs in rnd 26? I can’t figure out how to do the FPsc with right way otherwise.
Thanks for any advise!
Thanks for the kind words, Kerri. I never close the tops of my puffs but I know there are others that do. In the following row, I wrap the hook around the “puffy” part of the puff’s post to make my FPsc. I hope this helps!