

I’m excited to introduce Sarah from Rich Textures Crochet as a guest contributor. She’s sharing the Trinity crochet beanie pattern. This textured hat works up quickly in a super bulky yarn, and Sarah’s included a video tutorial to guide you through crocheting it, step by step.
This post contains affiliate links. I may receive compensation (at no added cost to you) if you make a purchase using these links. Photos in this post are © Sarah Thompson/Rich Textures Crochet and are used with permission.
About Rich Textures Crochet

Sarah grew up in rural Nova Scotia, Canada. She now resides in rural Ontario with her husband, four young children, and a puppy. When she is not crocheting, she is tidying the house, playing with the kids, gardening, and walking the conservation forests near her home. She also works as a part-time librarian at the local library and loves to read.
Sarah started designing crochet patterns in January, 2017 and enjoys learning new stitches and playing with texture in her patterns. Her favourite things to design are blankets but you will also find a variety of other patterns including washcloths and scrubbies, hats and scarves, shawls and wraps on Rich Textures Crochet.
Show your support by following Sarah on Website | Etsy | Facebook | Instagram | Pinterest | Ravelry | Twitter | YouTube
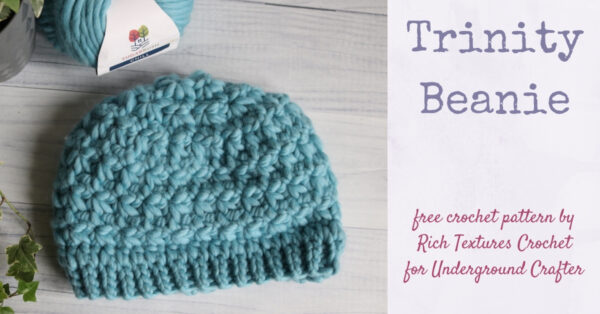
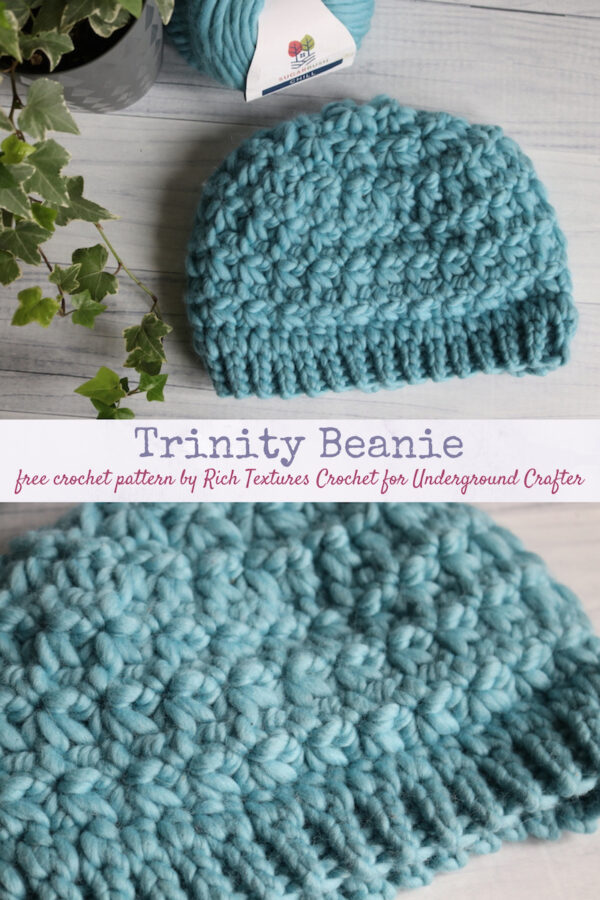
Trinity Beanie
Crochet Pattern by Rich Textures Crochet
Hello and welcome! My name is Sarah of Rich Textures Crochet and I am so excited to be featured as a guest designer here on Underground Crafter.
First off, I would like to say “thank you” to Marie for allowing me to be here with you today.
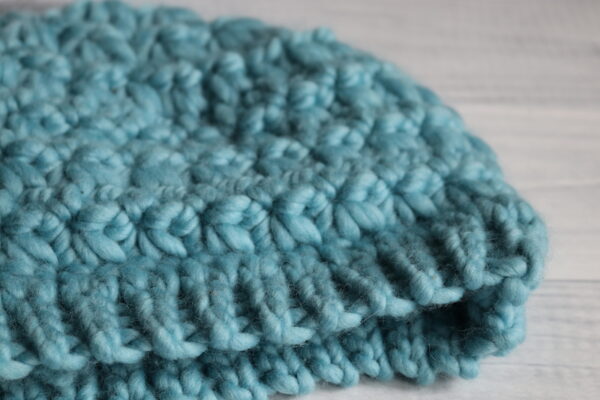
The pattern that I am bringing to you today is called the Trinity Beanie. It’s named as such for the very simple reason that the hat features one of my new favourite stitches called the trinity stitch. Sometimes the stitch is also called the rocking stitch.
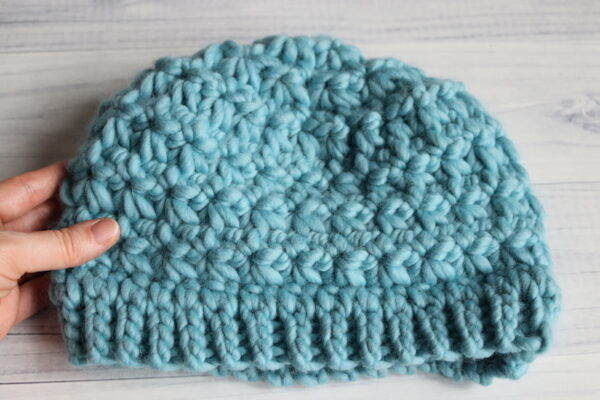
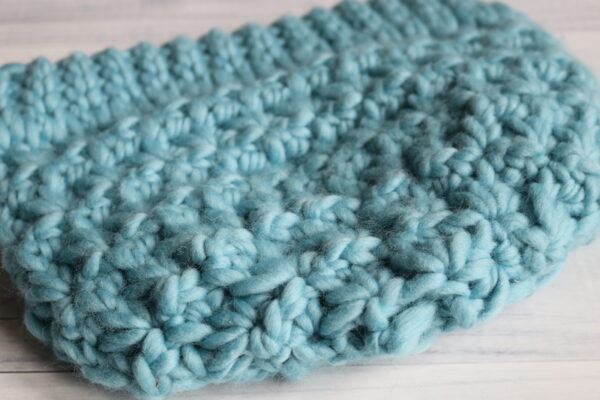
The trinity stitch found in this crochet beanie is a fun stitch to work, comprised primarily of single crochet three together stitches. When this stitch is worked one over top of the other it gives the appearance of a star. It’s a pretty stitch to look at!
The hat body is worked in rounds while the brim of the hat is worked in rows. I love a slip stitch ribbing on my hats as I find that the brim is more snug and holds it shape better. The slip stitches can be a bit tedious to work though, so if you would like, you may work the ribbing using a single crochet stitch or even a half double crochet stitch.
This crochet beanie pattern is made using a super bulky weight 100% wool yarn called Sugar Bush Chill. The yarn is a roving yarn which means that it loosely spun making it super squishy to work with. For a wool this yarn is also very soft! I have worked hats with it before, such as this Winter Chill Beanie and have loved the result each time.
Along with the super bulky weight yarn you are also going to need two crochet hooks for this beanie. You will use an 8mm crochet hook for the brim of your hat and a 10mm crochet hook for the body of the hat. They had is worked from the brim up and, because it is worked in the super bulky weight yarn, it works up quickly.
I hope you enjoy this crochet Trinity Beanie! If you run into difficulty or are more of a visual learner, I invite you to view the free YouTube tutorial that can be found here and embedded in the pattern below. While you are there, I invite you to subscribe!
Once again, thank you so much for stopping by and thank you to Marie for allowing me to meet you!
Until next time, happy crocheting!
Sarah
Skill Level
- Easy
Gauge
- 5 sts x 7 rows of pattern = 4” (10 cm).
Finished Size
- Approximately 10” (25.5 cm) x 9” (23 cm) laid flat, 20” (51 cm) – 21” (53.5 cm) circumference.
Yarn
- Chill by Sugar Bush Yarns (100% extra fine merino wool; 3.5 oz/100g; 52 yds/48 m); 1.5 Skeins; Colour: Lazuli. Weight: #6/Super Bulky.
Hook
- Size L/11 (8 mm) for Brim and P/15 (10 mm) for hat body. Adjust hook size if necessary to obtain correct gauge.
Notions
- Yarn Needle.
Stitches and Abbreviations
- Blo – Back Loop Only
- Ch – Chain
- Hdc – Half Double Crochet
- Rpt – Repeat
- Sc – Single Crochet
- Sc2tog – Single Crochet two stitches together
- Sc3tog – Single Crochet three stitches together
- Sc4tog – Single Crochet four stitches together
- Sc5tog – Single Crochet five stitches together
- Sk – Skip
- Sl St – Slip Stitch
- Sp – Space
- St – Stitch
- Yo – Yarn Over
Pattern Notes:
- Pattern is written in American English (U.S.) terms.
- Hat Brim is worked in rows.
- Hat Body is worked in rounds.
- Ch 1 at beginning of round does not count as stitch.
- Weave in ends as needed.
- A complete video tutorial for the pattern is available below.
Pattern
Brim (Worked in rows)
Using the 8 mm crochet hook:
- Ch 5.
- Row 1: Working in the blo, sl st in the 2nd ch from hook and in each ch across. Ch 1, turn. (4 sl sts)
- Row 2: Working in the blo, sl st in each st across. Ch 1, turn. (4 sl sts)
- Continue to repeat row 2 until work from the beginning measures approximately 19” (48 cm).
- Do not fasten off, but fold brim of hat so that two shorter ends meet. Now working through both thicknesses, sl st across working through the blo on each side. Do not fasten off, turn work right side out (so that the right side is facing you).
- Now working around the edge of the brim, continue working in rounds as follows:
- Rnd 1: Ch 1, evenly work 48 hdc all the way around. Join with a sl st in the first st, do not turn. (48 sts)
Hat Body (Worked in rounds)
Using the 10 mm crochet hook:
- Rnd 2: Ch 1, sc2tog over the 1st two stitches, * ch 1, sc3tog over the previous sc and the next two sc; rpt from * around and join with a sl st in the 1st st. Turn.
- Rnd 3: Ch 1, sc2tog over the first sc2tog and ch-1 sp, *ch 1, sc3tog over the previous ch sp, the next sc3tog and the next ch sp; rpt from * around and join with a sl st in the first st. Turn
- Rnds 4-7: Ch 1, sc2tog over the first sc2tog and ch-1 sp, *ch 1, sc3tog over the previous ch sp, the next sc3tog and the next ch sp; rpt from * around and join with a sl st in the first st. Turn.
- Rnd 8: Ch 1, sc4tog over the first 4 sts and ch-1 sps, *ch 1, sc4tog over the previous st and the next 3 sts and ch-1 sps; rpt from * around to the final 2 sts, sc3tog, join with a sl st in the first st. Turn.
- Rnd 9: Ch 1, sc5tog over the first 5 sts and ch-1 sps, *ch 1, sc5tog over the previous st and the next 4 sts and ch-1 sps; rpt from * around to the final 3 sts, sc4tog, join with a sl st in the first st. Turn.
- Rnd 10: Ch 1, sc5tog over the first 5 Sts and ch-1 sps, *ch 1, sc5tog over the previous st and the next 4 sts and ch-1 sps; rpt from * around, join with a sl st in the first st. Turn.
- Fasten off leaving a long tail. Using the long tail, sew the top of the hat closed.