

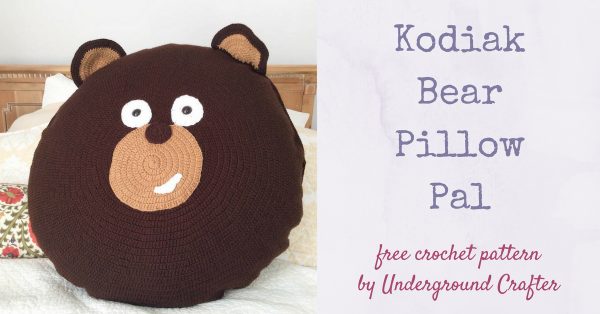
The Kodiak Bear Pillow Pal is a very large pillow pal, indeed. Like its namesake, it is designed to fit over the largest round pillow form. It has flat features so you can use it as a floor cushion, too. I am so excited to share the free crochet pattern with you today!
This post contains affiliate links. I may receive compensation (at no added cost to you) if you make a purchase using these links. Materials for the sample were generously provided by Fairfield, Red Heart, Clover USA, and NELSONWOOD.
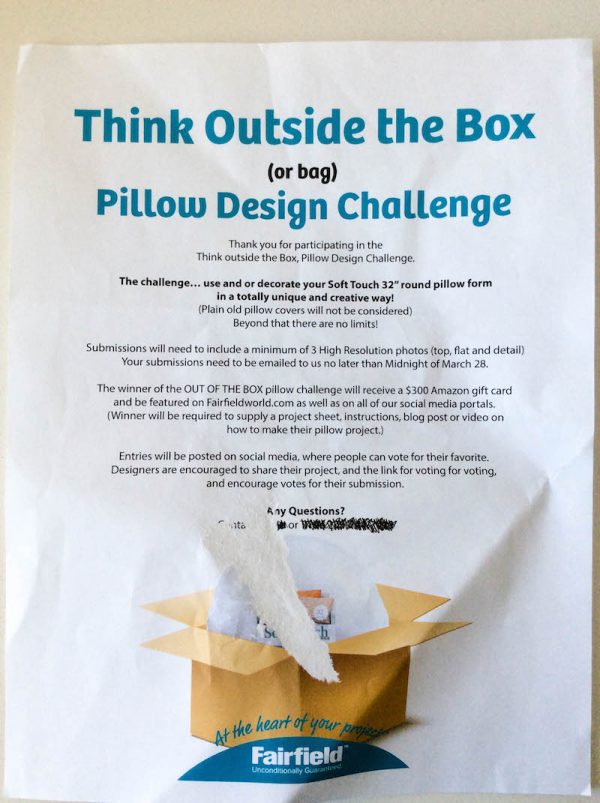
I know I often say I’m excited to share a pattern, but this time, I’m REALLY excited. Back in March, I was invited to submit a design to Fairfield World‘s Think Outside the Box Pillow Design Challenge using the new Fairfield Soft Touch® 32” Round Pillow Insert.
 Confession time: When I heard about the 32″ (81.5 cm) pillow, I kinda thought that was the circumference measurement, not the diameter. (If you need to brush up on your geometry, Math is Fun has an explanation of the difference here.) I thought, sure, I can design a pillow that size in a few weeks, bring it on!
When the pillow actually showed up at my apartment in a big box, it was too late to change my mind. I had to get stitching before the deadline, which was just a few weeks away. Besides, there was a $300 Amazon gift card on the line. I started with a sketch, and hoped that no one else was going to design a bear.
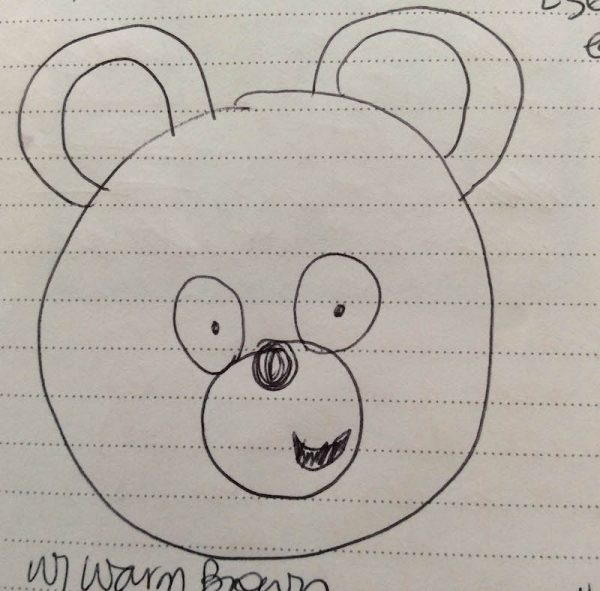
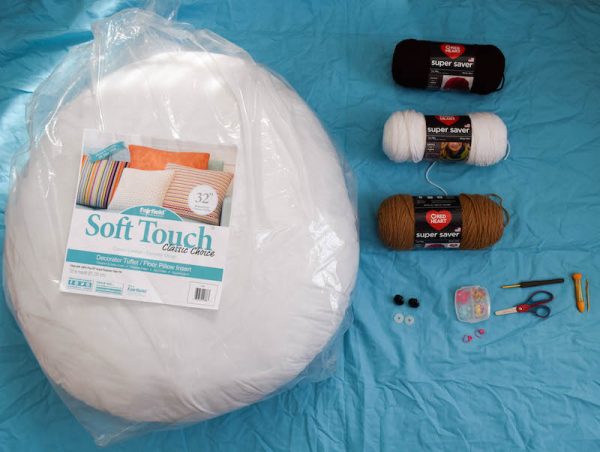
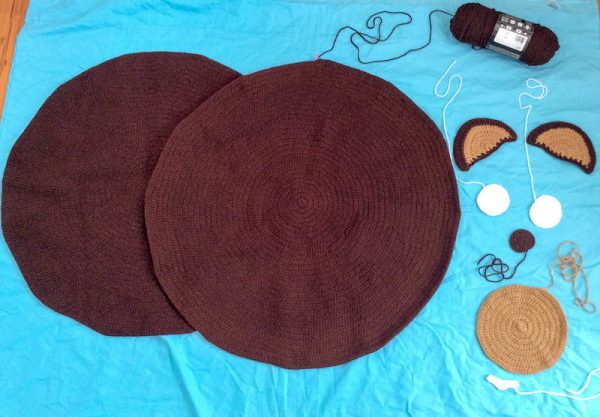
Once the idea was settled, I got my supplies ready and went to work.
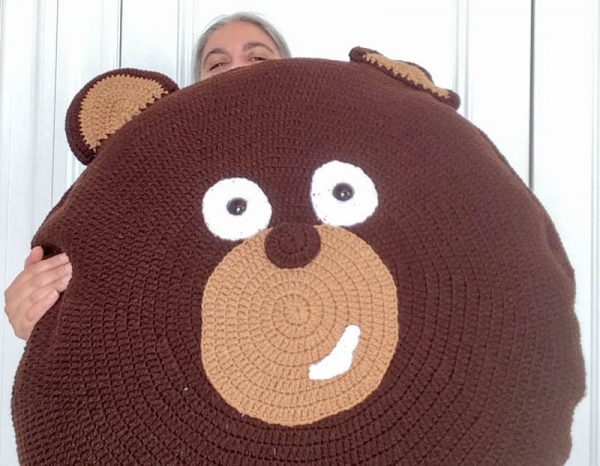
 Eventually, I came up with the Kodiak Bear Pillow Pal. And, he really is the Kodiak of all Pillow Pals. (Yes, that is me behind the Pillow.)
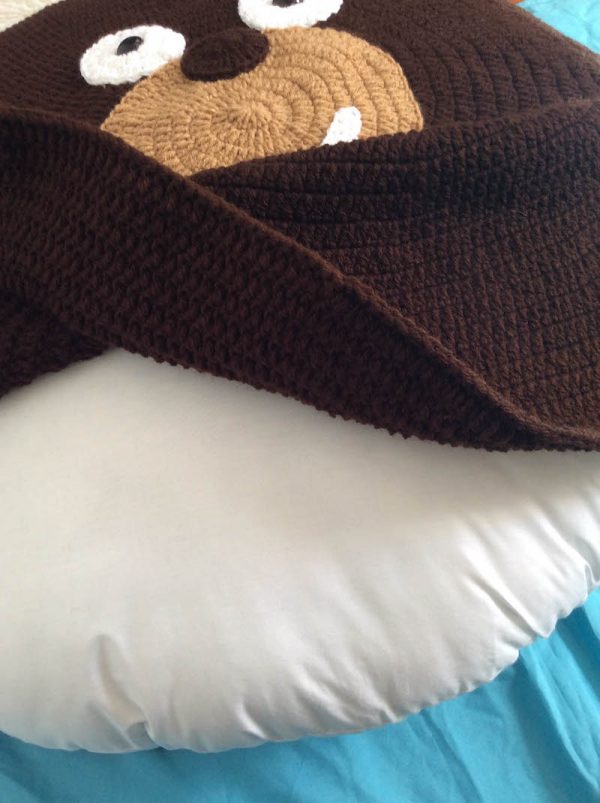
 This is an adorable gift for just about anyone, but if you gift the Pillow Pal to a child, it can grow with the recipient. To a younger child, it’s just a fun giant pillow to lean against while reading or playing video games. For a teen, it makes a great floor pillow. I made the features flat so someone can easily sit on it or lean against it. You will need the Fairfield Soft Touch® 32” Round Pillow Insert to stuff inside of it. I made the project removable using a button closure, so the cover is easy to wash in case of spills.
If you want to make a plain cover for floor pillow for an older teen or young adult, you can follow the instructions for the Front and Back and then join and make the button holes. You will not need the safety eyes.
I’m excited to share that I did win the competition thanks to votes from nice folks like you, and I also had a lot of fun spending that gift card. I got a bunch of stuff we needed for the apartment and then two big ticket items: a new slow cooker (this KitchenAid 6-Qt. Slow Cooker recommended by America’s Test Kitchen) and an amazing pair of pink Dr. Martens Oxford shoes. (You can see the shoes in action here on Instagram.) It’s a wonderful thing when you can get a pair of shoes that allows you to stand for ages without making your back hurt AND lets you look fabulous because you have metallic pink shoes on.
 So, are you ready to make your own Kodiak Bear Pillow Pal? If you do, I’d love to see it! Share your progress and questions by tagging me on Facebook as @Underground Crafter, Instragram as @ucrafter, or Twitter as @ucrafter. You can also share a picture in the Underground Crafters Facebook group. Sign up for my weekly newsletter and get a coupon code for your choice of one of my premium patterns and other subscriber goodies. Plus, you’ll never miss one of my free patterns again!
Add the Kodiak Bear Pillow Pal to your Ravelry favorites or queue.

If you want an easy print format, you can buy an ad-free PDF version on Craftsy.


Kodiak Bear Pillow Pal
Crochet Pattern by Underground Crafter


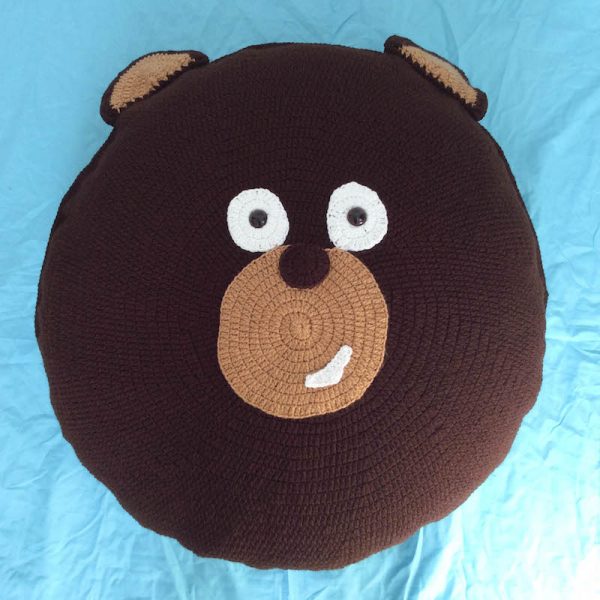
 Like its namesake, this is a very large pillow pal. Its flat facial features allow you to use it as a floor cushion, too.
Finished Size
- Fits a 32” (81.5 cm) round pillow form.
Materials
- Red Heart Super Saver yarn (100% acrylic, 7 oz/198 g/364 yd/333 m) – 5 skeins in 365 Coffee (CA), 1 skein in 336 Warm Brown (CB), and 1 skein in 311 White (CC), or approximately 1,638 yd (1,498 m) in CA, 100 yd (91.5 m) in CB, and 30 yd (27.5 m) in CC in any medium weight yarn.
- US Size G-6/4 mm crochet hook, or size needed to obtain gauge. (I’m using a NELSONWOOD hand turned crochet hook in the photos. You can buy one on Etsy here. You can read or watch my review of the hook here.)
- Fairfield Soft Touch® 32” Round Pillow Insert.
- 24 mm brown safety eyes – 1 pair.
- Clover Quick Locking Stitch Marker set.
- 7/8”/22 mm sew-through or shank buttons – 10 buttons.
- Yarn needle.
Gauge
- Muzzle = 8.25” (21 cm) diameter in pattern. Exact gauge is not critical for this project. Stitches should be tight so that pillow doesn’t show through.
Abbreviations Used in This Pattern
- CA – Color A
- CB – Color B
- CC – Color C
- ch – chain
- dc – double crochet
- hdc – half double crochet
- pm – place stitch marker
- rep – repeat
- Rnd(s) – Round(s)
- sc – single crochet
- sl st – slip stitch
- st(s) – stitch(es)
- *+ Repeat instructions after asterisk or plus sign as indicated.
- [] Repeat instructions between brackets as indicated.
Pattern Notes
- Project is crocheted in the round with the right (front) side facing up.
- Ch 1 at beginning of Rounds does NOT count as a stitch.
- Unless otherwise directed, move stitch marker up each Round to mark position.
- When choosing colors, note CA is the main color of the Face, Nose, Ear Back, and Back; CB is the color of the Muzzle and Ear Front; and CC is the color of the Eyes and Smile.
Pattern Instructions
Muzzle
- With CB, rep instructions for Back (see below for Back instructions) through Rnd 8.
- Final Rnd: Hdc in next st, sc in next st, sl st in next st. Fasten off CB with long yarn tail (approximately 48”/122 cm) for seaming.
Nose
- With CA, rep instructions for Back (see below for Back instructions) through Rnd 2.
- Final Rnd: Hdc in next st, sc in next st, sl st in next st. Fasten off CB with long yarn tail (approximately 24”/61 cm) for seaming.
Ears (Make 2)
Ear Front
- With CB, start with magic adjustable ring. Oombawka Design has a helpful magic ring tutorial here.
- Set Up Rnd: Ch 1, 9 dc in ring, pull yarn tightly to close ring, pm in 5th st (center) to mark position, do not join, begin working in Rows. (9 sts)
- Row 1: Turn, ch 3 (counts as dc, here and throughout), dc in same st, dc to marked st, 3 dc in marked st, pm in second (center) dc of group, dc to last st, 2 dc in last st. (13 sts)
- Row 2: Rep Row 1. (17 sts)
- Row 3: Rep Row 1. (21 sts)
- Row 4: Turn, ch 3, dc in same st and next st, *2 dc in next st, dc in next st;** rep from * across to marked st, 3 dc in marked st, pm in second (center) dc of group, dc in next st, rep from * to ** across to last st, 2 dc in last st. (33 sts)
- Row 5: Turn, ch 3, dc in same st, dc in next 2 sts, *2 dc in next st, dc in next 2 sts; rep from * across to st before marked st, 2 dc in next st, remove marker, 2 dc in next st, +dc in next 2 sts, 2 dc in next st; rep from + across to last st. Fasten off CB. (45 sts)
Ear Back
- With CA, follow instructions for Ear Front through Row 5. Do not fasten off CA.
Assemble Ears
- Position Ear Front on top of Ear Back.
- With CA, working along curved edge, ch 1, join with single crochet seam through both layers. (See tutorial for single crochet join here.) Sc in next 45 sts along curve, turn to work along straight edge, ch 1, 2 sc in side of each of next 5 rows and Set Up Rnd, sc in ring of Set Up Rnd, 2 sc in side of Set Up Rnd, 2 sc in side of each of next 5 rows, sl st to join. Fasten off CA with long yarn tail (approximately 2 yd/2 m) for joining.
Eyes (Make 2)
- With CC, rep instructions for Back (see below for Back instructions) through Rnd 3.
- Final Rnd: Hdc in next st, sc in next st, sl st in next st. Fasten off CC with long yarn tail (approximately 24”/61 cm) for seaming.
Mouth
- With CC, ch 12.
- Row 1: Turn, skip 1 ch, sc in next 11 ch. (11 sts)
- Row 2: Turn, ch 1, sl st in first 2 sts, sc in next 2 sts, hdc in next st, dc in next st, hdc in next st, sc in next 2 sts, sl st in last 2 sts. Fasten off CC with long yarn tail (approximately 12”/30.5 cc) for seaming.
Back
- Note: Back diameter should measure 31” (79 cm) across to fit the pillow. This is more important than the number of Rounds! If your Back reaches that diameter before 30 Rounds, continue to Final Rnd instructions. If your Back still hasn’t reached that diameter at 30 Rounds, continue increasing following the established pattern before continuing to Final Rnd instructions.
- With CA, start with magic adjustable ring. Oombawka Design has a helpful magic ring tutorial here.
- Rnd 1: Ch 1, 12 dc in ring, pull yarn tightly to close ring, pm in last st to mark position, do not join. (12 sts)
- Rnd 2: 2 dc in each st around. (24 sts)
- Rnd 3: *2 dc in next st, dc in next st; rep from * around. (36 sts)
- Rnd 4: *2 dc in next st, dc in next 2 sts; rep from * around. (48 sts)
- Rnd 5: *2 dc in next st, dc in next 3 sts; rep from * around. (60 sts)
- Rnd 6: *2 dc in next st, dc in next 4 sts; rep from * around. (72 sts)
- Rnd 7: *2 dc in next st, dc in next 5 sts; rep from * around. (84 sts)
- Rnd 8: *2 dc in next st, dc in next 6 sts; rep from * around. (96 sts)
- Rnd 9: *2 dc in next st, dc in next 7 sts; rep from * around. (108 sts)
- Rnd 10: *2 dc in next st, dc in next 8 sts; rep from * around. (120 sts)
- Rnd 11: *2 dc in next st, dc in next 9 sts; rep from * around. (132 sts)
- Rnd 12: *2 dc in next st, dc in next 10 sts; rep from * around. (144 sts)
- Rnd 13: *2 dc in next st, dc in next 11 sts; rep from * around. (156 sts)
- Rnd 14: *2 dc in next st, dc in next 12 sts; rep from * around. (168 sts)
- Rnd 15: *2 dc in next st, dc in next 13 sts; rep from * around. (180 sts)
- Rnd 16: *2 dc in next st, dc in next 14 sts; rep from * around. (192 sts)
- Rnd 17: *2 dc in next st, dc in next 15 sts; rep from * around. (204 sts)
- Rnd 18: *2 dc in next st, dc in next 16 sts; rep from * around. (216 sts)
- Rnd 19: *2 dc in next st, dc in next 17 sts; rep from * around. (228 sts)
- Rnd 20: *2 dc in next st, dc in next 18 sts; rep from * around. (240 sts)
- Rnd 21: *2 dc in next st, dc in next 19 sts; rep from * around. (252 sts)
- Rnd 22: *2 dc in next st, dc in next 20 sts; rep from * around. (264 sts)
- Rnd 23: *2 dc in next st, dc in next 21 sts; rep from * around. (276 sts)
- Rnd 24: *2 dc in next st, dc in next 22 sts; rep from * around. (288 sts)
- Rnd 25: *2 dc in next st, dc in next 23 sts; rep from * around. (300 sts)
- Rnd 26: *2 dc in next st, dc in next 24 sts; rep from * around. (312 sts)
- Rnd 27: *2 dc in next st, dc in next 25 sts; rep from * around. (324 sts)
- Rnd 28: *2 dc in next st, dc in next 26 sts; rep from * around. (336 sts)
- Rnd 29: *2 dc in next st, dc in next 27 sts; rep from * around. (348 sts)
- Rnd 30: *2 dc in next st, dc in next 28 sts; rep from * around. (360 sts)
- Final Rnd: Hdc in next, sc in next, sl st in next. Fasten off CA.
 Front
Front
- With CA, rep instructions for Back (see above for Back instructions) until Front is the same size. Do not fasten off CA.

- Important: Before moving on to assembly, position the last Final Rnd stitch at the side of the Front piece (where the hook is in the picture above). Position all facial pieces for assembly with this in mind.
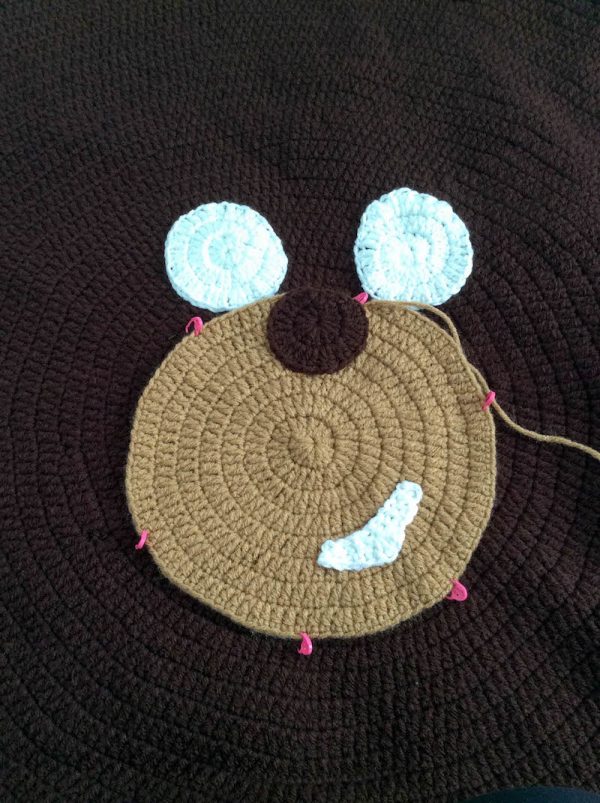
Assembly
- Tip: Use locking stitch markers to “pin” pieces into position before sewing in place.

- Position facial features on Front.
- Thread yarn needle with yarn tail from Nose and sew Nose to Muzzle.
- Thread yarn needle with yarn tail from Mouth and sew Mouth to Muzzle.
- Thread yarn needle with yarn from Eyes and sew Eyes to Front.
- Thread yarn needle with yarn tail from Muzzle and sew Muzzle to Front.
- Position safety eyes on top of Eyes. Attach firmly by securing washers on back.
- Position first Ear with Ear Front right side up on right side of Front. Join with sc seam to front loops of Front using yarn tail.
- Position second Ear in relation to first Ear on Front. Join with sc seam to front loops of Front using yarn tail.
- With yarn needle, weave in yarn tails on inside of Front.
- Position Front and Back so the wrong sides are touching with the right side of the Front facing you. Your first stitch should be at the center on the side of the Front. Join Front and Back with sc seam through first 190 sts. When you get to the Ears, you can join the seam through the back loops only on the Face.
Make Buttonholes
- Working on Front only (not joining to Back), [sc in next 14 sts, ch 3, sk 2 sts] 10 times, sc in next 10 sts. Fasten off CA.
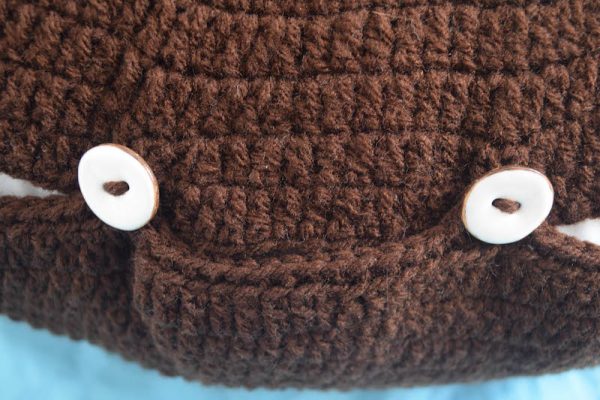
Attach Buttons
- Slip pillow form into Pillow Pal. With yarn needle and your choice of yarn, sew buttons in position on Back to match buttonholes on Front.
Finishing
- With yarn needle, weave in ends on inside.
- Close buttons and enjoy.
© 2018 by Marie Segares (Underground Crafter). This pattern is for personal use only. You may use the pattern to make unlimited items for yourself, for charity, or to give as gifts. You may sell items you personally make by hand from this pattern. Do not violate Marie’s copyright by distributing this pattern or the photos in any form, including but not limited to scanning, photocopying, emailing, or posting on a website or internet discussion group. If you want to share the pattern, point your friends to this link: https://undergroundcrafter.com/2018/06/16/crochet-pattern-kodiak-bear-pillow-pal. Thanks for supporting indie designers!
If you make your own Kodiak Bear Pillow Pal, I’d love to see it! Share your progress and questions by tagging me on Facebook as @Underground Crafter, Instragram as @ucrafter, or Twitter as @ucrafter. You can also share a picture in the Underground Crafters Facebook group. Sign up for my weekly newsletter and get a coupon code for your choice of one of my premium patterns and other subscriber goodies. Plus, you’ll never miss one of my free patterns again!
Add the Kodiak Bear Pillow Pal to your Ravelry favorites or queue.
If you want an easy print format, you can buy an ad-free PDF version on Craftsy.
Oh my gosh this is so awesome!!!
Thank you!