

Since the Not Quite a Slouchy Hat pattern was released on Monday, I’ve been really happy to see the variations made by crocheters! I know the special stitches are challenging for beginners, though, so I’m sharing both video and photo tutorials today.

This post contains affiliate links. I may receive compensation (at no added cost to you) if you make a purchase using these links.
The tutorials are presented in the order the stitches are introduced in the pattern. The photo tutorials are first, and if you scroll to the bottom of the post, you will find a video tutorial for both stitches.

How to crochet the FPdc
The first special stitch in the pattern is the FPdc. (By the way, I’m using US terms. This same stitch is called the FPtr or RFtr in UK terms.)
Here is the written explanation for this stitch:
- FPdc – front post double crochet – Yo, insert hook from front around back to front of st in previous round, yo and draw up a loop, (yo and draw through 2 loops) twice.
A video tutorial for this stitch is shown below.
If you can’t see the video tutorial for the FPdc above, click HERE to watch it on YouTube. And, here is the photo tutorial:
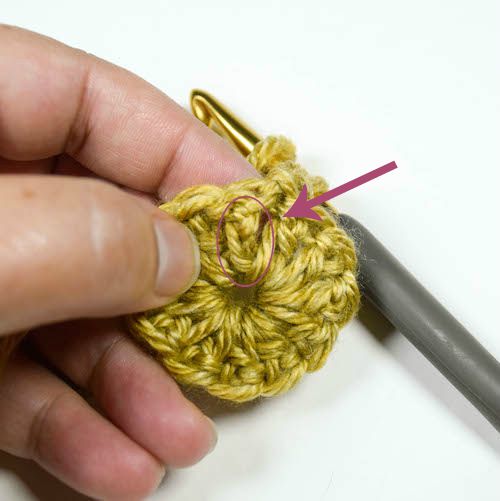
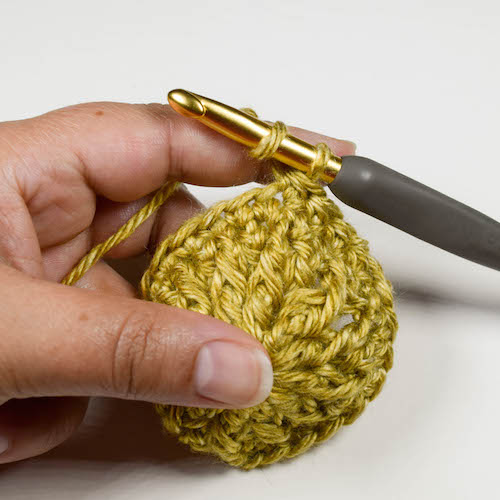
Step 1: Locate the post
Usually when we crochet, we work into the top loops of a stitch. The post is actually the length of the stitch itself in the previous round or row. It is sometimes called the “stem” of the stitch.
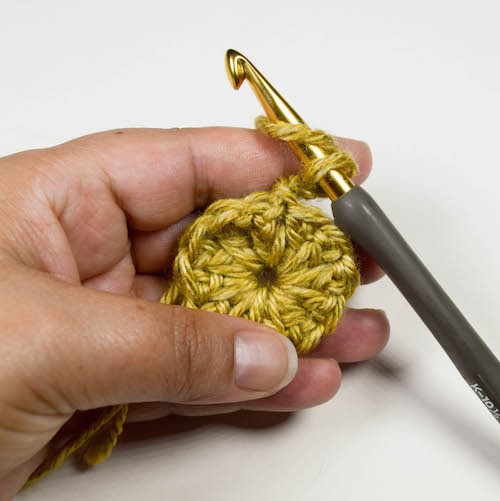
Step 2: Yarn over
The FPdc is a lot like a double crochet, so yarn over before inserting the hook, just as you would for a standard dc stitch.
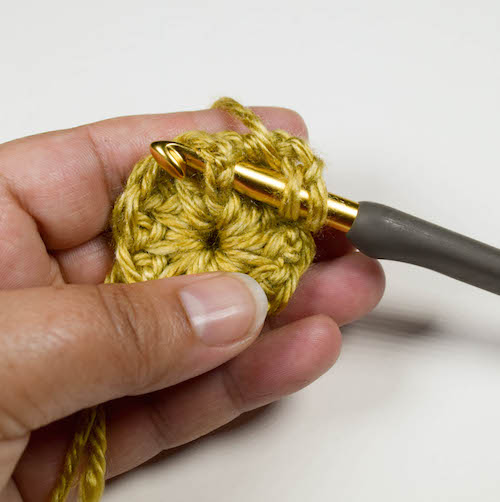
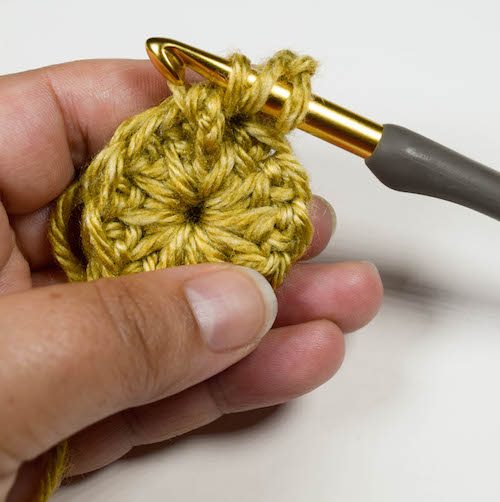
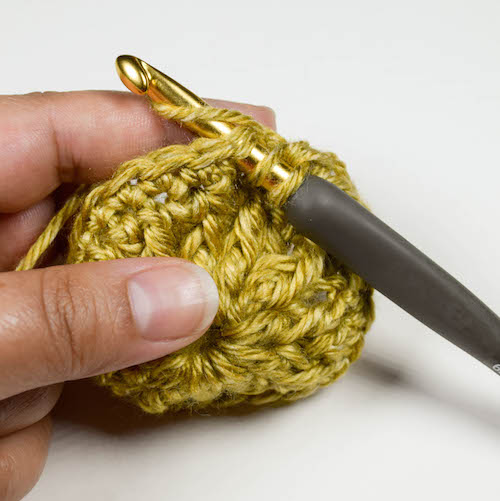
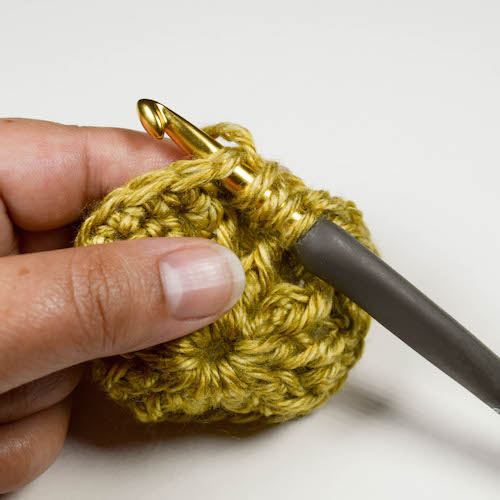
Step 3: Insert hook from from front around back of the post…

Step 4: … to the front of the post
You will now have 3 “loops” on your hook – your original loop, the yarn over, and the post.
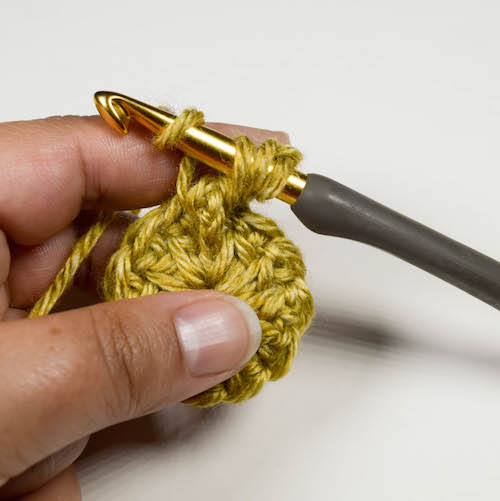
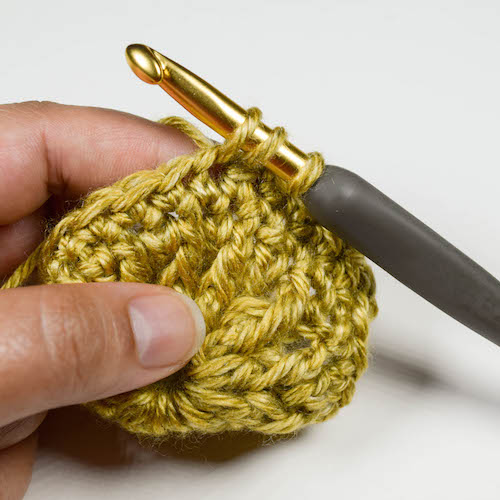
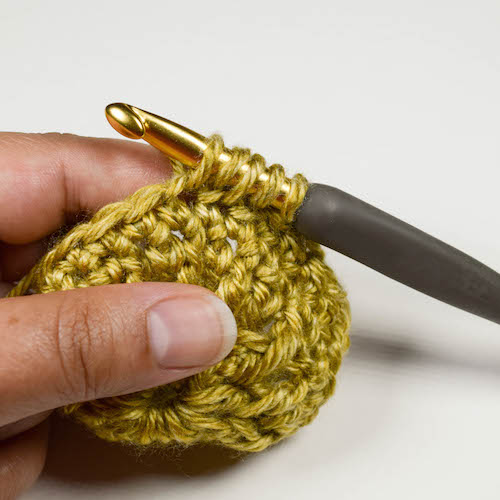
Step 5: Yarn over
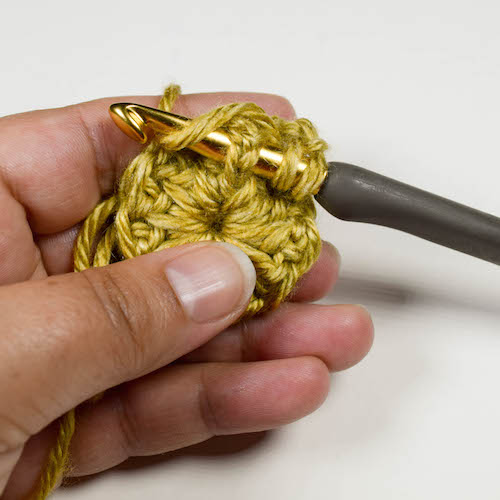
Step 6: Draw up a loop
It may feel awkward at first to draw the loop up under the post. You will have 3 loops on your hook again, but the post will be off the hook.
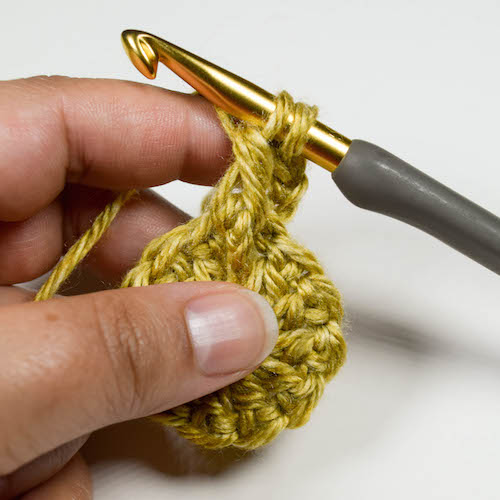
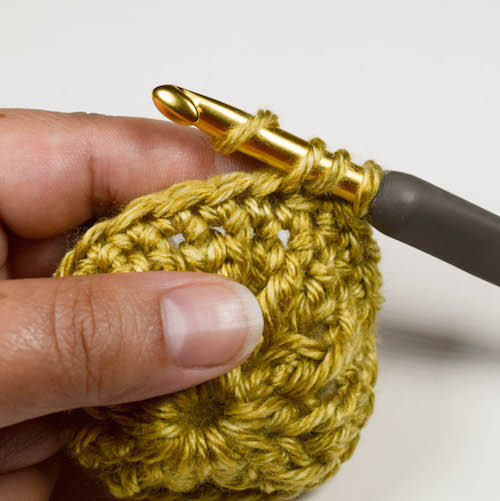
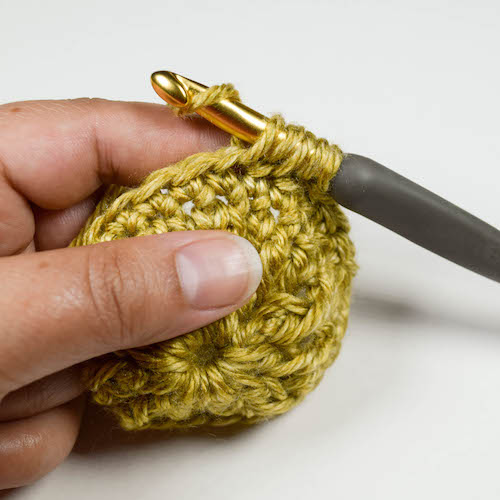
Step 7: Yarn over
Step 8: Draw through 2 loops
You should now have 2 loops left on the hook.
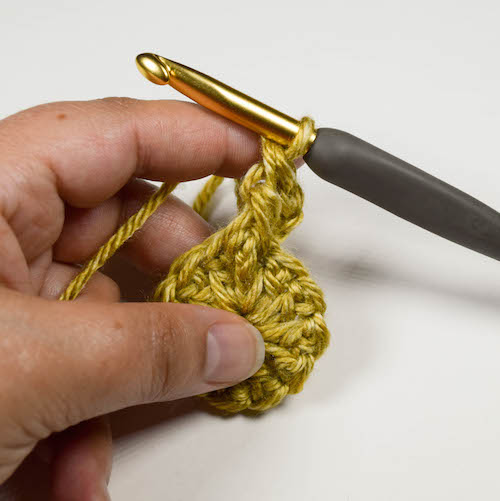
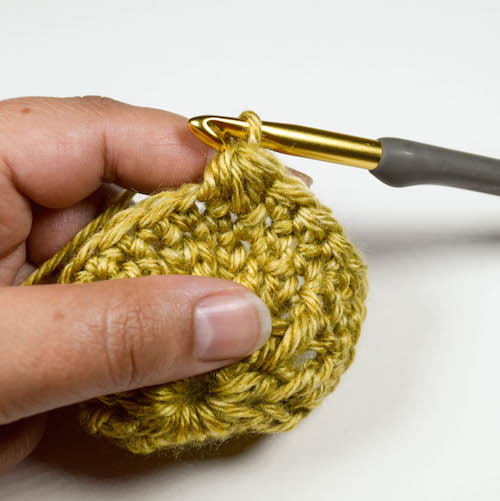
Repeat Steps 7 & 8
Yarn over and draw through 2 loops again. You will now have 1 loop on the hook. Congratulations, you’ve made your first FPdc!
In future rounds or rows, it gets easier
After the first FPdc round or row, the stitches will be raised from the surface, making it easier to insert your hook from front around back to front of the post.
How to crochet hdc2tog
The second special stitch in the pattern is the hdc2tog. (By the way, I’m using US terms. This same stitch is called the htr2tog in UK terms.)
Here is the written explanation for this stitch:
- hdc2tog – half double crochet 2 sts together – (Yo, insert hook in next st, yo and draw up a loop) twice, yo and draw through all 5 loops on hook.
A video tutorial for the hdc2tog is shown below.
If you can’t see the tutorial for the hdc2tog above, click HERE to watch it on YouTube. And, here is the photo tutorial:
Step 1: Yarn over
Step 2: Insert hook in next stitch

Step 3: Yarn over
Step 4: Draw up a loop
You should now have 3 loops on your hook.
Repeat Steps 1-4: Yarn over
Insert hook in next stitch
Yarn over

Draw up a loop
You will now have 5 loops on your hook.
Step 5: Yarn over
Step 6: Draw through all 5 loops on hook
This may be a bit challenging, so be sure to work loosely. You’ve made your first hdc2tog! This same set of steps, when working into the SAME stitch, is a puff stitch. When worked over multiple stitches, as in this example, it is a decrease.
Video Tutorial
The video tutorial includes both special stitches from this pattern. If you can’t see the video below, click here to watch it on YouTube.
I hope you’ve found these tutorials helpful! Let me know if you have other questions about the Not Quite a Slouchy Hat pattern.
Hello Marie,
I am an adventurous beginner and this is my first project. I am stuck on rnd7. I have spent the better part of the day trying to get it and I’m just stuck. And every time I count the stitches and they don’t amount to the number needed, I am further frustrated as I don’t understand how the number of stitches can increase from 72 stitches to 84 stitches between rnds 6 and 7 when each series of stitches skips 3 stitches? Can you guess what I might be doing wrong based on your experience teaching beginners? Thank you kindly, Charna
Thanks for writing, Charna. From your description, I am assuming you are working on the adult size. Each series of repeats is skipping 3 stitches and working 7 stitches, so you are adding 4 stitches with each repeat. That is how you are able to increase. I’m not sure where you are making a mistake, but my guess is that you may be repeating the first part twice, rather than alternating the number of stitches that are skipped. Let me know if this helps.