

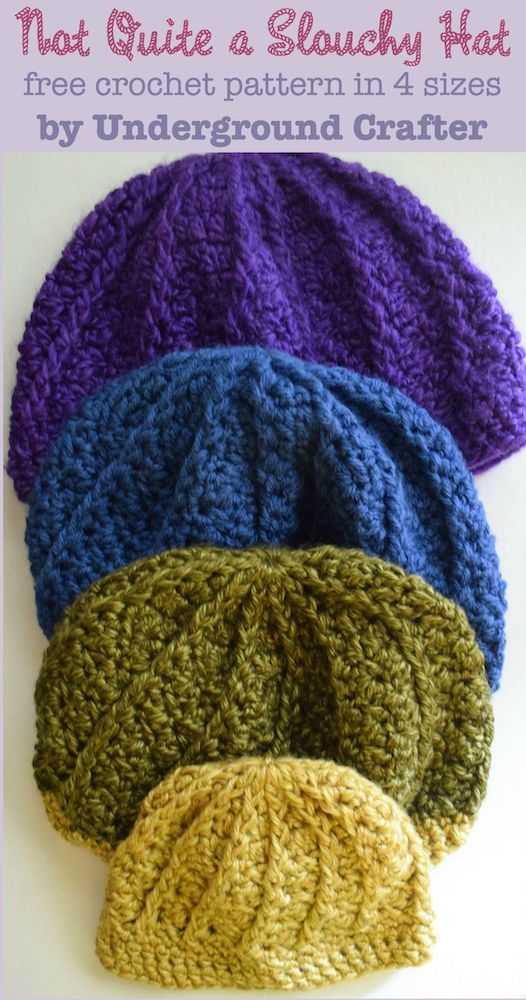
I’m thrilled to kick off the Holiday Stashdown Crochet-a-long today with the Not Quite a Slouchy Hat pattern. (If you’re new to the Holiday Stashdown CAL, you can find all the details here.)

This post contains affiliate links. I may receive compensation (at no added cost to you) if you make a purchase using these links. The yarn for the samples was generously provided by Lion Brand.
I love crocheting hats, but I don’t love “hat hair.” On the other hand, I’m not much of a slouchy hat wearer myself. In today’s pattern, I combined my love of hats with my dislike of hat hair to create a loose fitting beanie that isn’t a total slouchy but isn’t too tight, either.
This is a unisex pattern that works great for many people on your holiday gift list (or for yourself!). Not Quite a Slouchy Hat is available in 4 sizes, but because of the loose fit, it’s very likely that one of the sizes will fit most anyone on your list. And since, in most sizes, it will use less than one skein, it’s great for using up those odd balls in your stash.
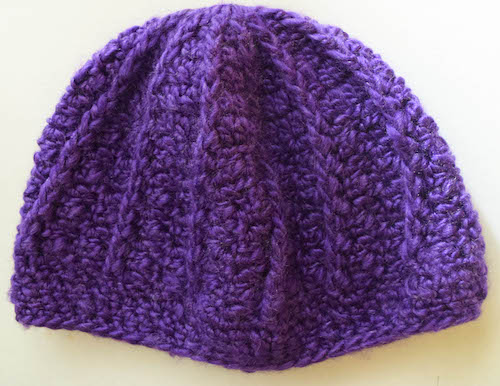
I made the first version in Lion Brand Landscapes, a single ply yarn with a soft halo. It definitely makes the hat look more feminine! I got this yarn while at this year’s Stitch ‘N Pitch. It’s generally available as a self-striping yarn, but I traded with Amy Ramnarine from the Stitchin’ Mommy for the solid Amethyst colorway.

Since the Holiday Stashdown CAL focuses on using your stash yarn to make the projects (though, of course, as yarn lovers ourselves, none of the participating designers will scold you if you buy some!), I decided to try other yarns for the rest of the sizes to see how it would impact the look of the hat.
I may be biased, but I think the hat works pretty well in any medium (worsted/aran/#4) weight yarn. You can even make a two color version, like I did when I ran out of yarn on the toddler size version.
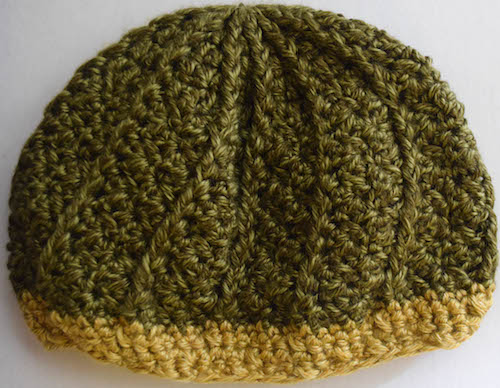
If you’d like to do something similar, just change colors before starting the last 4 Rounds in your selected size.
I’m looking forward to seeing the variations you come up with!
Now, I did list this pattern as intermediate because it uses two special stitches: the front post double crochet (FPdc) and the half double crochet 2 together decrease (hdc2tog). If you’re an adventurous beginner, you can find photo and video tutorials for these stitches here, or watch the video tutorial at the end of the pattern.
If you make your own Not Quite a Slouchy Hat, I’d love to see it! Share your progress and questions by tagging me on Facebook as @Underground Crafter or on Instragram as @ucrafter. You can also share a picture in the Underground Crafters Facebook group. Sign up for my weekly newsletter and get a coupon code for your choice of one of my premium patterns and private access to my vault of subscriber goodies. Plus, you’ll never miss one of my free patterns again!
Add the Not Quite a Slouchy Hat to your Ravelry queue or favorites.

Not Quite a Slouchy Hat
Crochet Pattern in 4 sizes by Underground Crafter


This unisex hat is loose fitting but not quite a slouchy hat. The changing stitch pattern adds nice detail to the finished hat.
Finished Sizes
- Infant (Toddler, Child, Adult).
- Infant: 13.25” (33.5 cm) circumference x 5” (12.7 cm) height.
- Toddler: 17.25” (43.8 cm) circumference x 7” (17.8 cm) height.
- Child: 19.5” (49.5 cm) circumference x 7.5” (19 cm) height.
- Adult: 22” (56 cm) circumference x 8” (20.25 cm) height.
Materials
- Approximately 80 yd/73.2 m (160 yd/146 m, 165 yd/151 m, 175 yd/160 m) in any medium weight yarn.
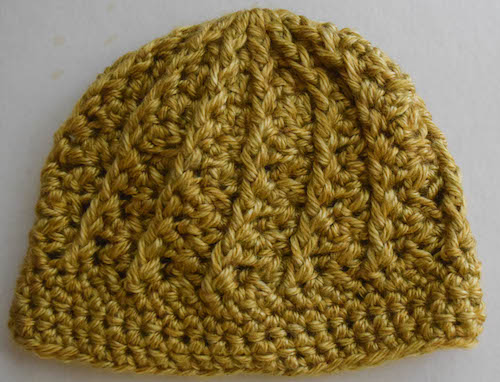
- Infant sample in Lion Brand Heartland (100% acrylic, 5 oz/142 g, 251 yd/230 m) in 169 Shenandoah.
- Toddler sample in Lion Brand Heartland (100% acrylic, 5 oz/142 g, 251 yd/230 m) in 174 Joshua Tree (main color) and 169 Shenandoah.
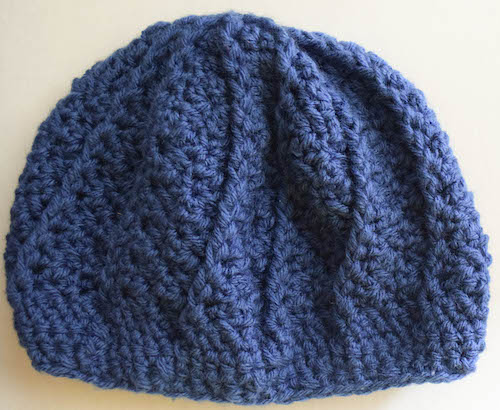
- Child sample in Lion Brand Vanna’s Choice (100% acrylic, 3.5 oz/100 g, 170 yd/156 m) in 109 Colonial Blue.
- Adult sample in Lion Brand Landscapes (100% acrylic, 3.5 oz/100 g, 147 yd/134 m) in 144 Amethyst.
- US Size I-9/5.5 mm crochet hook, or any size needed to obtain gauge.
- Yarn needle.
- Stitch marker or scrap yarn (optional).
Gauge
- Through Rnd 4 in pattern = 4.5” (11.4 cm). For best fit, always check your gauge.

Abbreviations Used in This Pattern
- ch – chain
- dc – double crochet
- FPdc – front post double crochet – Yo, insert hook from front around back to front of st in previous round, yo and draw up a loop, (yo and draw through 2 loops) twice. A video utorial for this stitch is available at the end of the pattern or here.
- ea – each
- hdc – half double crochet
- hdc2tog – half double crochet 2 sts together – (Yo, insert hook in next st, yo and draw up a loop) twice, yo and draw through all 5 loops on hook. A video tutorial for this stitch is available at the end of the pattern or here.
- rep – repeat
- Rnd(s) – Round(s)
- sc – single crochet
- sk – skip
- sl st – slip stitch
- st(s) – stitch(es)
- yo – yarn over
- * Rep instructions after asterisk as indicated.
Pattern Instructions
All Sizes
- Ch 4, sk 3 ch, join with sl st to first ch to form ring.
- Rnd 1: Ch 3 (counts as dc, here and throughout), 11 dc in ring, join with sl st to top of first ch 3. (12 sts)
- Rnd 2: Ch 3, FPdc around same st from previous row, *dc in next st, FPdc around same st from previous row; rep from * around, join with sl st to top of first ch 3. (24 sts)
- Rnd 3: Ch 3, dc in same st, FPdc around next FPdc, *dc in next 2 sts, FPdc around same FPdc; rep from * around, join with sl st to top of first ch 3. (36 sts)
- Rnd 4: Ch 3, dc in same st and next st, FPdc around next FPdc, *dc in next 3 sts, FPdc around same FPdc; rep from * around, join with sl st to top of first ch 3. (48 sts)
- Continue on to instructions for specified size.
 Infant Size
- Rnd 5: Ch 1, starting in same st, *(sc, hdc, dc) in next st, sk 2 sts, FPdc around next FPdc, sk st behind FPdc; rep from * around, join with sl st to top of first sc. (48 sts)
- Rnd 6: *Sk 2 sts, (dc, hdc, sc) in next st, FPdc around next FPdc, sk st behind FPdc; rep from * around, join with sl st to top of first dc.
- Rep Rnds 5 & 6 until hat measures approximately 4” (10 cm) from crown.
- Rnd 7: Ch 1, sc in same st and ea st around, join with sl st to top of first sc.
- Rnd 8: Ch 2 (counts as hdc, here and throughout), hdc in next st and ea st around, join with sl st to top of first ch 2.
- Rnd 9: Rep Rnd 8.
- Rnd 10: Rep Rnd 7. Fasten off.
- Continue on to finishing instructions.
Toddler (Child) Sizes
- Rnd 5: Ch 3, dc in same st and next 2 sts, FPdc around next FPdc, *dc in next 4 sts, FPdc around next FPdc; rep from * around, join with sl st to top of first ch 3. (60 sts)
- Rnd 6: Ch 1, starting in same st, *[(sc, hdc, dc) in next st, sk 1 st] twice, FPdc around next FPdc, sk st behind FPdc; rep from * around, join with sl st to top of first sc. (84 sts)
- Rnd 7: *[Sk 2 sts, (dc, hdc, sc) in next st] twice, FPdc around next FPdc, sk st behind FPdc; rep from * around, join with sl st to top of first dc.
- Rnd 8: Ch 1, starting in same st, *[(sc, hdc, dc) in next st, sk 2 st] twice, FPdc around next FPdc, sk st behind FPdc; rep from * around, join with sl st to top of first sc.
- Rep Rnds 7 & 8 until hat measures approximately 6”/15 cm (6.5”/16.5 cm) from crown.
- Rnd 9: Ch 1, sc in same st and ea st around, join with sl st to top of first sc.
- Rnd 10: Ch 2 (counts as hdc, here and throughout), hdc in next 4 sts, hdc2tog, *hdc in next 5 sts, hdc2tog; rep from * around, join with sl st to top of first ch 2. (72 sts)
- Rnd 11: Ch 2, hdc in next 3 sts, hdc2tog, *hdc in next 4 sts, hdc2tog; rep from * around, join with sl st to top of first ch 2 (60 sts).
- Rnd 12: Ch 1, sc in same st and next st, hdc2tog, *sc in next 2 (3) sts, hdc2tog; rep from * around, join with sl st to top of first sc. — 45 (48) sts
- Fasten off. Continue on to finishing instructions.
Adult Size
- Rnd 5: Ch 3, dc in same st and next 2 sts, FPdc around next FPdc, *dc in next 4 sts, FPdc around next FPdc; rep from * around, join with sl st to top of first ch 3. (60 sts)
- Rnd 6: Ch 3, dc in same st and next 3 sts, FPdc around next FPdc, *dc in next 5 sts, FPdc around next FPdc; rep from * around, join with sl st to top of first ch 3. (72 sts)
- Rnd 7: Ch 1, starting in same st, *(sc, hdc, dc) in next st, sk 2 sts, (sc, hdc, dc) in next st, sk 1 st, FPdc around next FPdc, sk st behind FPdc; rep from * around, join with sl st to top of first sc. (84 sts)
- Rnd 8: *[Sk 2 sts, (dc, hdc, sc) in next st] twice, FPdc around next FPdc, sk st behind FPdc; rep from * around, join with sl st to top of first dc.
- Rnd 9: Ch 1, starting in same st, *[(sc, hdc, dc) in next st, sk 2 sts] twice, FPdc around next FPdc, sk st behind FPdc; rep from * around, join with sl st to top of first sc.
- Rep Rnds 8 & 9 until hat measure approximately 7” (17.8 cm) from crown.
- Rnd 10: Ch 1, sc in same st and ea st around, join with sl st to top of first sc.
- Rnd 11: Ch 2 (counts as hdc, here and throughout), hdc in next 4 sts, hdc2tog, *hdc in next 5 sts, hdc2tog; rep from * around, join with sl st to top of first ch 2. (72 sts)
- Rnd 12: Ch 2, hdc in next 3 sts, hdc2tog, *hdc in next 4 sts, hdc2tog; rep from * around, join with sl st to top of first ch 2 (60 sts).
- Rnd 13: Rep Rnd 10. Fasten off.
- Continue on to finishing instructions.
Finishing
- With yarn needle, weave in ends. Spray block if necessary.
© 2015 by Marie Segares (Underground Crafter). This pattern is for personal use only. You may use the pattern to make unlimited items for yourself, for charity, or to give as gifts. You may sell items you personally make by hand from this pattern. Do not violate Marie’s copyright by distributing this pattern or the photos in any form, including but not limited to scanning, photocopying, emailing, or posting on a website or internet discussion group. If you want to share the pattern, point your friends to this link: https://undergroundcrafter.com/2015/09/14/free-pattern-not-quite-a-slouchy-hat/. Thanks for supporting indie designers!
Watch the video tutorial for the special stitches in this pattern below. If you can’t see the video, click here to watch it on YouTube.
Love it thank you
Great, I’m looking forward to seeing your version hettie.
Awesome, so excited to get started. Do we make one of each size for the CAL?
Wendy, it’s your choice how many sizes you’d like to make. I’m looking forward to seeing what you come up with!
can’t wait to try the pattern. I have some brite green at home that will work and I think will match my granddaughter’s new tennis shoes. I like your purple hat. My Mom’s favorite color was purple too and her name was Marie too.
I love a hat that matches tennis shoes, Irma! I’m looking forward to seeing the picture!
This is absolutely the perfect start to this CAL! Versatile and in so many sizes! Thank you, Marie! I might have to make myself one in Heartland for fall!
So glad you like it, Karen! I’m looking forward to seeing what you come up with.
Quick question although I’m probably just being a bit OCD but in the first 4 rounds, we “FPdc around same FPdc”. Then, for the toddler and adult sizes, it says “FPdc around next FPdc”. I haven’t started yet but from the pics posted, I don’t think it actually changes and it appears to just be a difference in wording going from “same” to “next”. We don’t really go to the next one, do we? I just want to make sure I’m understanding before I begin. Help??
Thanks for checking in Tinkers! In the first four rounds, we are increasing by working both the FPdc and another stitch into the same stitch. In the remaining rounds, the FPdc is the only stitch being worked into the FPdc from the prior round. You are right that it isn’t really the “next” one (as in, you aren’t skipping one), but it’s the next stitch. I hope this is helpful!
So we aren’t increasing rounds 5 & 6 on the adult version, just like rounds 3 & 4? Shoot…..gotta frog and try to figure out what the difference is because I’m just not getting it. I knew better than to start before I fully understood. Thanks for answering!
Still not getting it so I’m gonna increase rounds 5 & 6 just like 3 & 4 and say I’m adding my own creative flair! Thanks for the pattern!
Tinkers, your first thought was right. I wasn’t sure which size you were working from your original question. Yes, you are still increaseing in Rnds 5 & 6 on the adult version. I am sure you are probably overthinking this and your creative flair will create a hat that is just right! I’m looking forward to seeing your version.
Is there a YouTube video for this Pattern
Deborah, thanks for stopping by. The tutorial is available here: http://undergroundcrafter.com/2015/09/16/special-stitches-tutorials-for-not-quite-a-slouchy-hat/
Hi Marie. First thank you for another great free pattern.
Question on beginning round 8 is their a chain to start?
Hi Marie. Forgot to say the round 8 start chain is for adult size.
Thanks for stopping by, Angie! No, there is no chain at the beginning of Rnd 8 for the adult size. It will feel a bit weird at first, but I promise things will work out :).
Just finished the Toddler hat! Loved the instructions – very easy to understand. However, (you knew that was coming ;)! ), my “swirls” go the opposite direction! Oh well! It’s a great hat. Pretty in Pink.
It seems like there is quite a bit of variation in the swirls, Carla! I’m looking forward to seeing pictures of your variation.
love the design of this hat! thanks for sharing with us all!
Thanks so much, Kristina & Millie! If you make your own version, share a picture.
I have been challenging myself to new patterns lately! I’m a bit confused with Row 8, adult size..I understand there is no ch after the sl st from previous row. Do I begin with sk2st or (dc, hdc, sc)? Seems if I start with sk2st, the pattern does not line up. Thanks! Can’t wait to make one of each size!!! 🙂
I think I figured it out!!!
Adult Rnd 8: Begin in next st. with (dc, hdc, sc), then follow from *
Thanks for writing, Notdamomme. Actually, the pattern as it is written includes the skipping 2 stitches at the beginning of Round 8 because it is an alternating stitch pattern from this point forward.
I haven’t tried it out the way you are doing it, so let me know how it works out.
Finished! I don’t know how to include or send you a picture of it.
The only change was the very first stitch. After that, it goes as you have written. Weird, I would end up at the top of the FP post if I sk2 after sl st, when I follow the instructions. It would make it stripe down deform looking.
Thanks for the pattern! Going to try to make the other sizes now… 🙂
Glad it worked out. You can share a picture on Facebook, Ravelry, or via email.
I have the same issue with hats! This pattern looks great but I have a big head, well like 23 and a quarter inches. Any suggestions for making it bigger?
Jae, most crochet hats are a smaller circumference than your head because they stretch. My head is about your size and I’m wearing the adult hat in the photo.
I was just checking because when people say 22, I don’t know if they mean the actual hat is 22 inches or if it’s meant to it a 22 inch head. Thank you for the clarification, I will get cracking on the hat! 🙂