
There are many reasons you might want to “pick up” stitches in knitting. If you’re making the Anthology Blanket, you may need to pick up stitches on the outer edges of the blanket to add borders, but if you’re making a sweater, you may need to pick up stitches along the neckline to “clean up” the edges and add some embellishment. Updated: This post now includes a video tutorial.

This post contains affiliate links.
In this tutorial, I’m going to show you two variations for picking up stitches. (By the way, you can click on any picture to enlarge it if you need to see more detail.)
Watch the video tutorial showing how to pick up stitches below.
If you can’t see the video tutorial above, click here to watch it on YouTube.
Step 1: Insert your needle into the first stitch along the edge (for a border), or into the designated stitch.
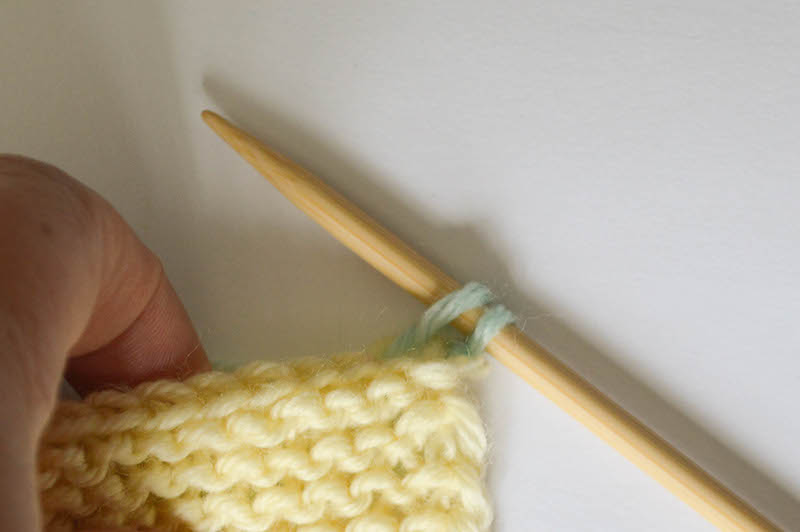
If the instructions don’t specify, insert the needle with the right side facing you. You can either insert the needle under the back loop of your stitches…

…or under both loops.

Inserting the needle under the back loop only will leave a textured “line” across the top…
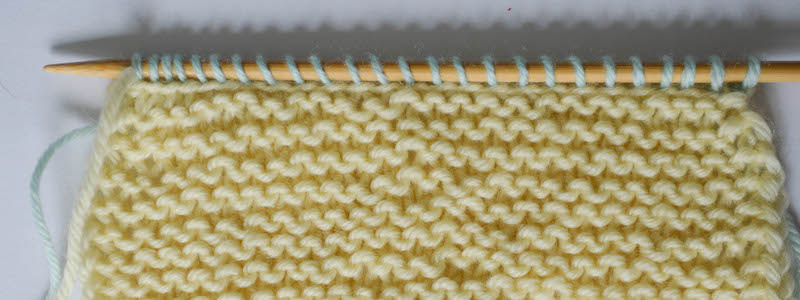
…while inserting the needle under both loops of the stitch will create a flat edge.
Step 2: Form a slip knot with the yarn you are using to pick up stitches.

Step 3: Pull the slip knot through the loop on the needle.

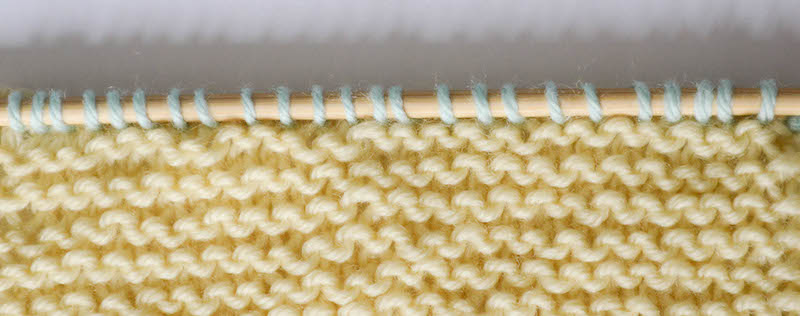
Step 4: Insert the needle under the next stitch.
To keep your edge consistent, continue to work under the back loop or both loops as before.

Step 5: Wrap the yarn over.
I recommend wrapping the yarn over clockwise, but this part is a bit of personal preference.
When knitting, you wrap the yarn over counter-clockwise, so that may seem more “natural.” However, wrapping the yarn over counter-clockwise when picking up stitches makes it a bit more difficult to knit (or purl) into the next row and can twist your stitches.
When you wrap the yarn over clockwise, it will be more counter-intuitive when you pick up stitches but easier when knitting the next row.
Your choice!
Step 6: Draw the yarn through the loop on the needle.
Repeat Steps 4-6 until you have picked up as many stitches as required.
Sometimes a pattern will direct you to “pick up (a certain number) of stitches evenly” or to “pick up a multiple of (a certain number) of stitches.”
Pick up stitches evenly means to spread the number of stitches across the entire area. For example, if you are asked to pick up 80 stitches evenly but the edge has 100 stitches, you wouldn’t want to pick up the first 80 and leave the last 20 empty because it would make your project lopsided. You would want to evenly skip stitches along the edge so that you will have picked up 80 stitches across starting in the first stitch and ending in the last stitch.
If you are more likely to fly by the seat of your pants, then you can eyeball what “evenly” means. If you’re the type that will become anxious if your stitches aren’t perfectly even, then do a little arithmetic to figure out how often to skip a stitch.
Pick up a multiple of stitches is similar, except that your total number of stitches doesn’t matter as long as they are a multiple of another number. For example, if you are asked to pick up a multiple of 4 stitches, you can pick up 4, 8, 16, 400, or any other multiple of 4. Again, you can eyeball when to skip a stitch if your original edge is not an even multiple of the number of stitches you are being asked to pick up, or work out the arithmetic if you prefer.
Stumbled across your blog – and specifically this post! Thank you!!!
I’ve pinned for future reference, as goodness knows I will need this!