

The Chubby Sheep was my first free pattern on the blog. This adorable sheep amigurumi is a very simple project. I’ve even included tutorials for the special stitches.
This post contains affiliate links. I may receive compensation (at no added cost to you) if you make a purchase using these links. Yarn for the samples was provided by Galler Yarns and Kollabora.
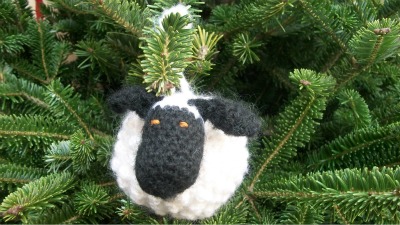
Just in time for the holidays, the pattern also includes (optional) instructions to transform Chubby Sheep into an ornament or hanging decoration. Exact gauge is not critical for this project but stitches should be small so that fiber filling doesn’t show. This pattern was tested by aimeefae, anamoji, ayoung, and ss9904 on Ravelry. It takes about 5-6 hours to complete. Enjoy!
If you make your own Chubby Sheep, I’d love to see it! Share your progress and questions by tagging me on Bluesky as @UndergroundCrafter, Facebook as @UndergroundCrafter, or on Instagram as @ucrafter. You can also share a picture in the Underground Crafters Facebook group. Sign up for my weekly newsletter and get a coupon code for your choice of one of my premium patterns and private access to my vault of subscriber goodies. Plus, you’ll never miss one of my free patterns again!
Add the Chubby Sheep to your Ravelry favorites or queue.

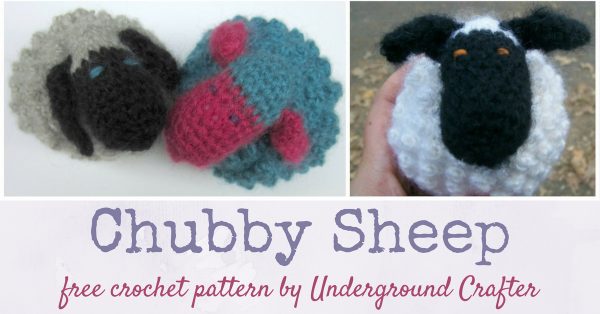
Chubby Sheep
Crochet Sheep Amigurumi Pattern by Underground Crafter
Updated 11/15/2025
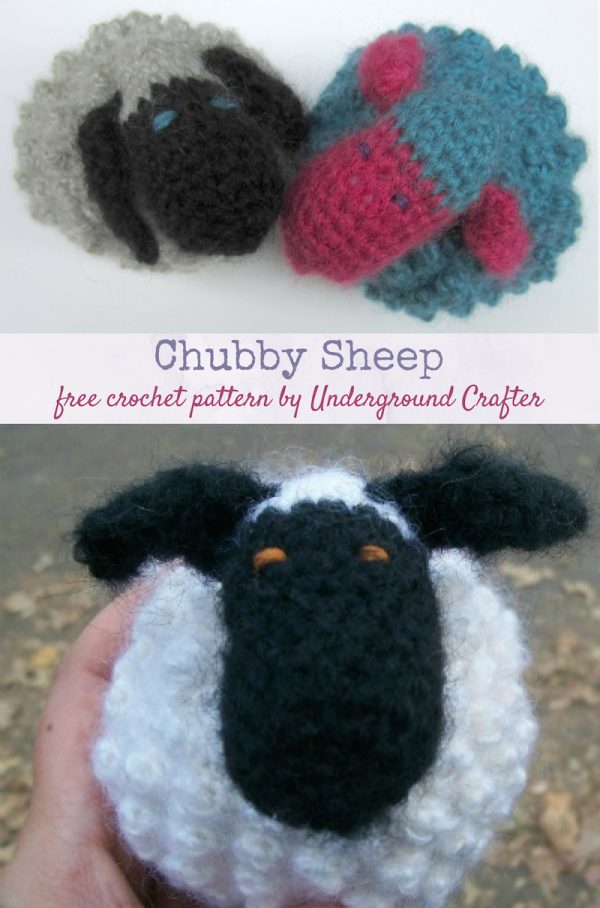


This rotund sheep amigurumi is fun to play with and simple to make. The shape and textured bottom allow it to “sit up” without legs. Optional instructions are included to transform the sheep into an ornament or hanging decoration.
Finished Size
- 3.75” (9.5 cm) height from base of body to top of head.
Materials
- Galler Yarns Flore II yarn (1.75 oz/50 g/100 yd/91 m/75% Kid Mohair, 15% Wool, 10% Nylon) – 1 skein in each of 2 colors, or approximately 100 yd (91.5 m) in Main Color and 35 yd (32 m) in Color B in any light weight yarn.
- Small amount of embroidery floss for facial features.
- US Size E-4/3.5 mm crochet hook, or size needed to obtain gauge.
- Yarn needle.
- Locking stitch markers.
- Fiber filling.
Gauge
- Body through Round 12 = 3.75” (9.5 cm) diameter. Exact gauge is not critical for this project. Stitches should be small so that fiber filling doesn’t show.
Abbreviations Used in This Pattern
- CB – Color B
- ch – chain
- hdc – half double crochet
- invdec – invisible decrease – Insert hook in front loop only of each of next 2 sts, yo and draw up a loop, yo and draw through 2 loops. A helpful video tutorial for this stitch is available below.
- If you can’t see the invdec video above, click HERE to watch it on YouTube.
- MC – Main Color
- pop – popcorn – Hdc 4 times in same st, remove hook from loop and insert hook from front to back of first hdc in group, pick up dropped loop and pull through loop on hook. A photo tutorial for this stitch is available at the end of this pattern.
- rep – repeat
- Rnd(s) – Round(s)
- sc – single crochet
- sl st – slip stitch
- st(s) – stitch(es)
- yo – yarn over
- * Repeat instructions after asterisk as indicated.
- [] Repeat instructions between brackets as indicated.
Pattern Notes
- The Head and Body are worked in rounds in continuous spirals without joining. Move stitch marker up each round to mark last st.
- Most pieces start with magic adjustable ring. Oombawka Design has a helpful magic ring tutorial here.
- For the Ears, ch 2 does not count as a stitch.
- When choosing colors, note that MC is the main (Head and Body) color and CB is the color of the Snout and Ears.
- Instructions for making an ornament or hanging decoration are at the end of this pattern.
Pattern Instructions
Head
- Beginning at crown, with MC, start with magic adjustable ring (see Pattern Notes).
- Rnd 1: Ch 1, 6 sc in ring, pull the yarn tail tightly to close ring, place marker to mark last st. (6 sts)
- Rnd 2: 2 sc in each st around. (12 sts)
- Rnd 3: Sc in each st around.
- Rnd 4: [2 sc in next st, sc in next st] around. (18 sts)
- Rnds 5 & 6: Rep Rnd 3 twice.
- Rnd 7: Change to CB in last yo of next sc, sc in each st to marker.
- Rnds 8 – 13: Rep Rnd 3, 6 times.
- Rnd 14: [Invdec, sc] around. Do not fasten off. (12 sts)
Create Eyes
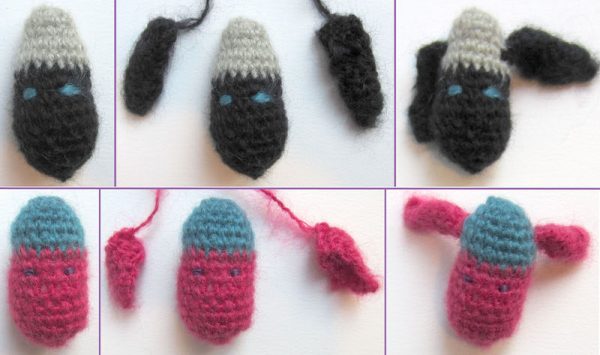
- Thread yarn needle with embroidery floss. Starting with floss inside of the head, stitch 2 eyes in third row of CB, using photos as a guide. Stuff head firmly with fiber filling.
Finish Snout
- Rnd 15: [Invdec] around. (6 sts)
- Rnd 16: [Invdec] around. Fasten off with long yarn tail (approximately 9”/23 cm) for seaming. (3 sts).
- Thread yarn needle with yarn tail, sew remaining sts together to close Snout. Weave in yarn tail through Head before finishing off.
Ears (Make 2)
- With CB, ch 3. Begin working flat in rows.
- Row 1: Turn, skip 2 ch, 2 dc in third ch from hook.
- Row 2: Turn, ch 2 (see Pattern Notes), hdc in first st, 2 hdc in next st. (3 sts)
- Row 3: Turn, ch 2, hdc in first 2 sts, 2 hdc in next st. (4 sts)
- Row 4: Turn, ch 2, hdc in first 3 sts, 2 hdc in next st. (5 sts)
- Row 5: Turn, ch 2, hdc in first 4 sts, 2 hdc in next st. Do not fasten off. (6 sts)
- Fold Ear in half across Row 5, so that first and last st of row are back to back. Join with sl st to top of first hdc.
- Row 6: Do not turn, ch 1, join edge of ear with sc in each of next 3 sts, working through both layers. Fasten off with a 9” (23 cm) yarn tail for seaming.
Join Ears to Head
- Thread yarn needle with yarn tail. Sew ears to second row of MC (Rnd 5 of Head), using photos as a guide. Weave in yarn tail through Head before finishing off.
Body
- Beginning at bottom of body, with MC, start with magic adjustable ring (see Pattern Notes).
- Rnd 1: Ch 1, 6 sc in ring, pull the yarn tail tightly to close ring, place marker to mark last st. (6 sts)
- Rnd 2: 2 sc in each st around. (12 sts)
- Rnd 3: [Pop in next st, 2 sc in next st] around. (18 sts)
- Rnd 4: [Sc in next 2 sts, 2 sc in next st] around. (24 sts)
- Rnd 5: [Pop in next st, sc in next 2 sts, 2 sc in next st] around. (30 sts)
- Rnd 6: Sc in each st around.
- Rnd 7: *[Sc in next st, pop in next st] twice, sc in next st, 2 sc in next st; rep from * around. (35 sts)
- Rnd 8: [Sc in next 6 sts, 2 sc in next st] around. (40 sts)
- Rnd 9: *[Pop in next st, sc in next 2 sts] twice, pop in next st, 2 sc in next st; rep from * around. (45 sts)
- Rnd 10: [2 sc in next st, sc in next 8 sts] around. (50 sts)
- Rnd 11: *[Pop in next st, sc in next 2 sts] 3 times, 2 sc in next st; rep from * around. (55 sts)
- Rnd 12: [2 sc in next st, sc in next 10 sts] around. (60 sts)
- Rnd 13: [Pop in next st, sc in next 2 sts] around.
- Rnd 14: Sc in each st around.
- Rnds 15 & 16: Repeat Rnds 13 & 14 once.
- Rnd 17: *[Pop in next st, sc in next 2 sts] 3 times, sc in next st, invdec; rep from * around. (55 sts)
- Rnd 18: [Invdec, sc in next 9 sts] around. (50 sts)
- Rnd 19: *[Pop in next st, sc in next 2 sts] twice, pop in next st, sc in next st, invdec; rep from * 3 more times, pop in next st, sc in next 7 sts, invdec. (45 sts)
- Rnd 20: [Invdec, sc in next 7 sts] around. (40 sts)
- Rnd 21: *[Pop in next st, sc in next 2 sts] twice, invdec; rep from * 3 more times, sc in next 6 sts, invdec. (35 sts)
- Rnd 22: [Invdec, sc in next 5 sts] around. (30 sts)
- Rnd 23: [Pop in next st, sc in next 4 sts] around.
- Rnd 24: [Invdec, sc in next 3 sts] around. (24 sts)
- Rnd 25: [Invdec, pop in next st, sc in next st] around. Do not fasten off. (18 sts)
Join Head to Body
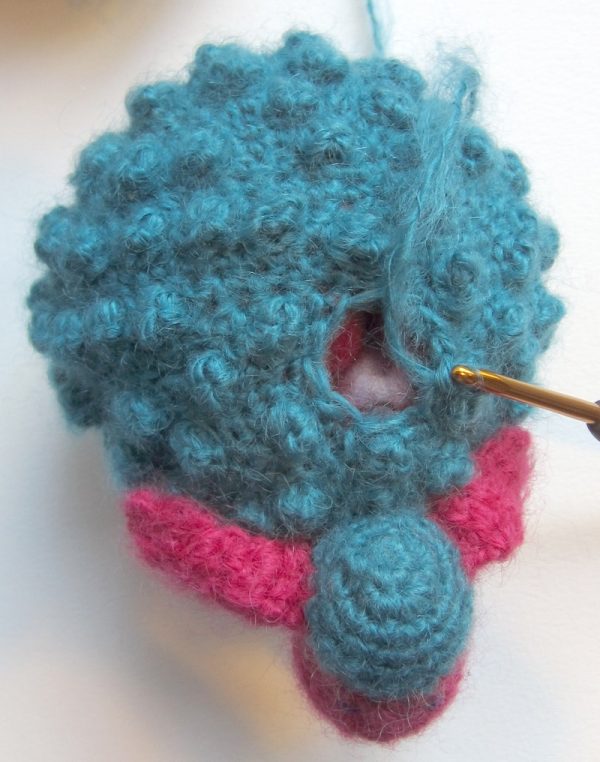
- Thread yarn needle with 9” (23 cm) strand of MC. Sew Head to Body in flat area with fewer popcorns (Rnds 18-22), using photos as guide. Stuff Body firmly. Weave in yarn tails from joining into Body.

Finish Body
- Rnd 26: [Invdec, sc in next st] around. (12 sts)
- Rnd 27: [Invdec, pop in next st] around. Fasten off with long yarn tail (approximately 9”/23 cm) for seaming. (8 sts).
- Thread yarn needle with yarn tail, sew remaining sts together to close Body. Weave in yarn tail through Body before finishing off.
Ornament/Decorative Hanging Loop (optional)
- To use Chubby Sheep as an ornament or decorative hanging, join MC with sl st to any st in center top of Body after assembly, sc in same st, ch 25, sc to another nearby st in center top. Fasten off. Weave in yarn tail through body before finishing off.
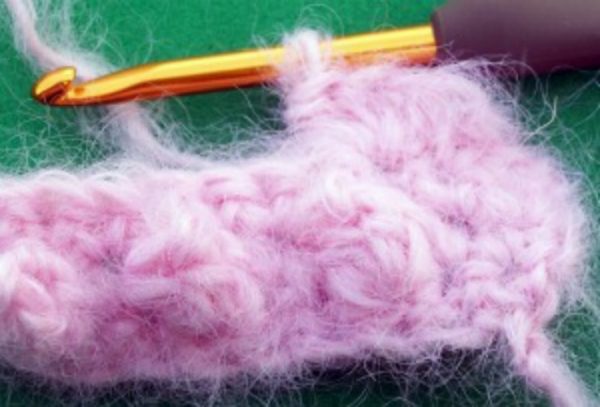
Popcorn Tutorial
- Step 1: Make 4 half double crochet in same stitch.
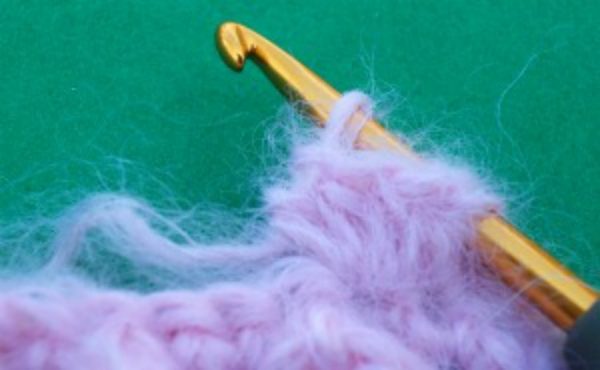
- Step 2: Remove hook from loop. Insert hook from front to back of first hdc in group.

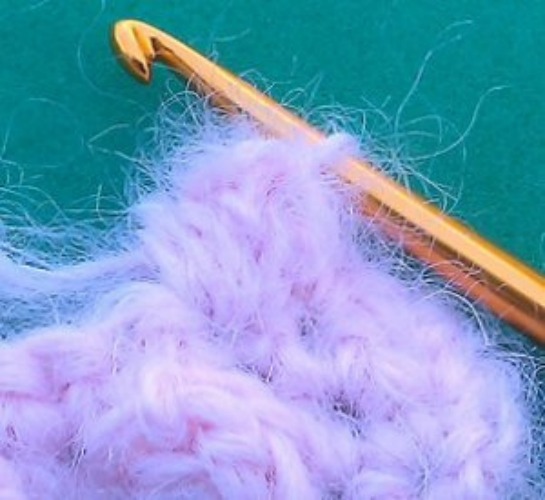
- Step 3: Pick up dropped loop.
- Step 4: Pull the dropped loop through loop on hook to complete popcorn.
j’aime bien tout ce quelle fait et tout est bien expliquer dans ses patrons ,j’aime beaucoup
ohh so sweet and oh so cute! what an adorable addition the Christmas tree! Thanks for sharing the pattern for your chubby sheep!
Thanks, Kristina & Millie.
Very sweet. Anxious to try the pattern.
BuckeyePam
This is the cutest idea EVER, love it so much, starting a whole lot and planning to hang them outside on my bayleaf tree, plus gift them, plus…you get my drift, I love these.