
As a relatively new Cricut owner, I’ve been having fun exploring different tools and supplies. If you’re not sure you’re getting the most out of your machine, in this post I’ll share my must-have list of Cricut tools and supplies, along with a quick and easy project for yarn lovers using holographic vinyl and transfer tape.
This post contains affiliate links. I may receive compensation (at no added cost to you) if you make a purchase using these links. This post is sponsored by Cricut, but the opinions and thoughts are my own.
Must-Have Tools
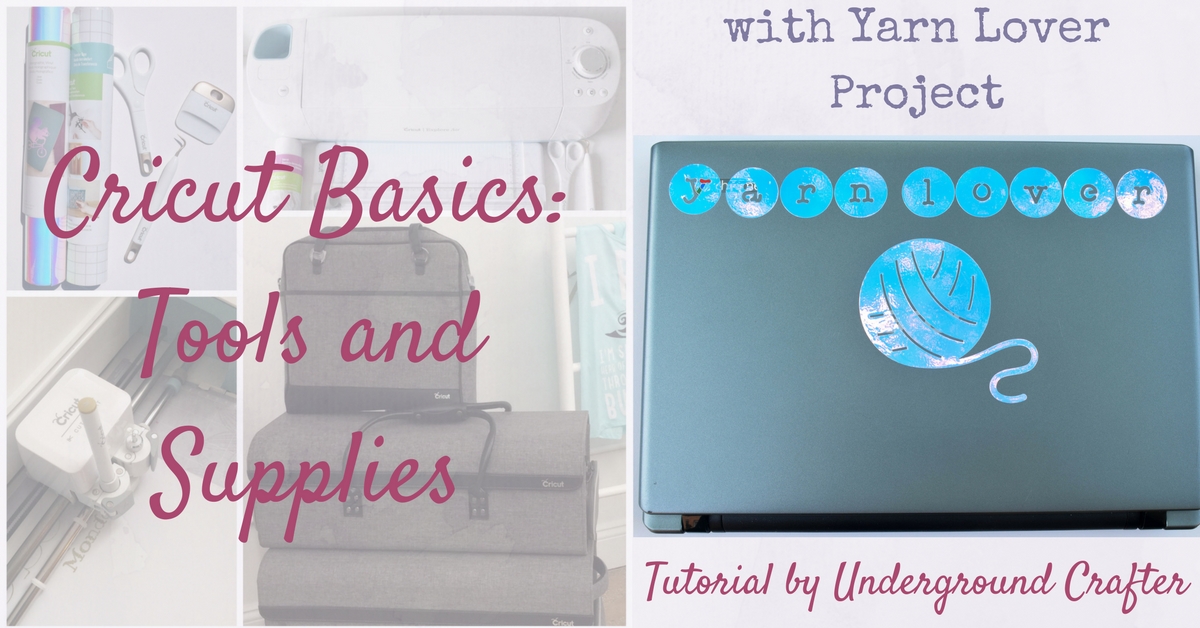
Once you have a Cricut Explore machine, you’ll probably wonder which tools you really need. Here’s my list of must-haves.
- Desktop or laptop computer, or iOS device, with broadband connection. To use Cricut Design Space, the free, cloud-based software that controls your Cricut Explore, you’ll need a device and internet connection. You can check if your existing computer or mobile device meets the system requirements here. I’ve used Design Space on my MacBook Pro and on my iPad. The look is a bit different on each device, but both are easy to use.
- Cricut Access subscription. Unless you’re a graphic designer, you’ll want a subscription to Cricut Access. This subscription will give you access to hundreds of fonts, over 30,000 images, and 1,000 projects. Otherwise, you will need to buy fonts, images, and tutorials on a per project basis.
- Blades and cutting mats. Your Explore Machine will come with a blade and a 12″ x 12″ StandardGrip cutting mat. (Tip: Cricut mats are adhesive, so keep the plastic cover. This will help protect the mat from cat hair and the like while not in use.) At some point you’ll need a replacement blade. Depending on the materials you plan to cut, you may also need the Deep Cut Blade. I recommend getting one of the cutting mat variety three packs with one of each grip to start.
- Weeder. A weeder, which looks a lot like a dental implement, is the tool you use to remove thin cut outs so you don’t damage your project. It is pretty much a necessity for any intricate cutting project.
- Scraper. A scraper is supposed to help you keep your cutting mat clean by gently removing little scrappy pieces, but I usually use it for applying vinyl.
- Scoring Stylus. If you plan to do any scoring (that is, creating fold lines for cards, boxes, etc.), then you should get the scoring stylus.
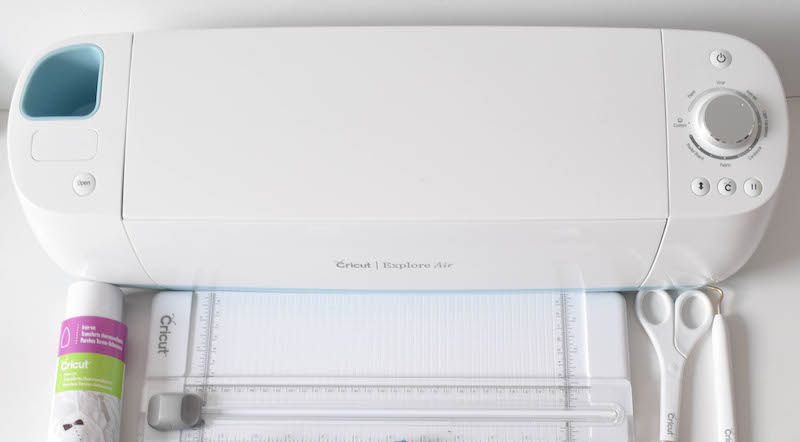
Tip: Cricut has a lot of tool sets, which are often cheaper (or about the same price) as ordering the tools separately. They also have color-coded sets that can match (or contrast) your machine. I have the Cricut Gold Tools and Trimmer Set and the Cricut Essential Tool Set in Rose. Both sets include a weeder, scraper, and scoring stylus, along with tweezers, micro-tip scissors, spatula, and trimmer. I use the trimmer and scissor all the time, too. (My Rose set, except for the trimmer, fits inside the matching accessory pouch, shown below.)
Other Tools You Might Like
If you plan to travel frequently with your machine, you may want to invest in the bags and totes that are specially designed for your Cricut Explore. I had the chance to see these in person at a Cricut Crafternoon I attended with Jessie At Home a few weeks ago. (You can read Jessie’s post about the event, and learn how to make rolled flowers with cardstock, here.)
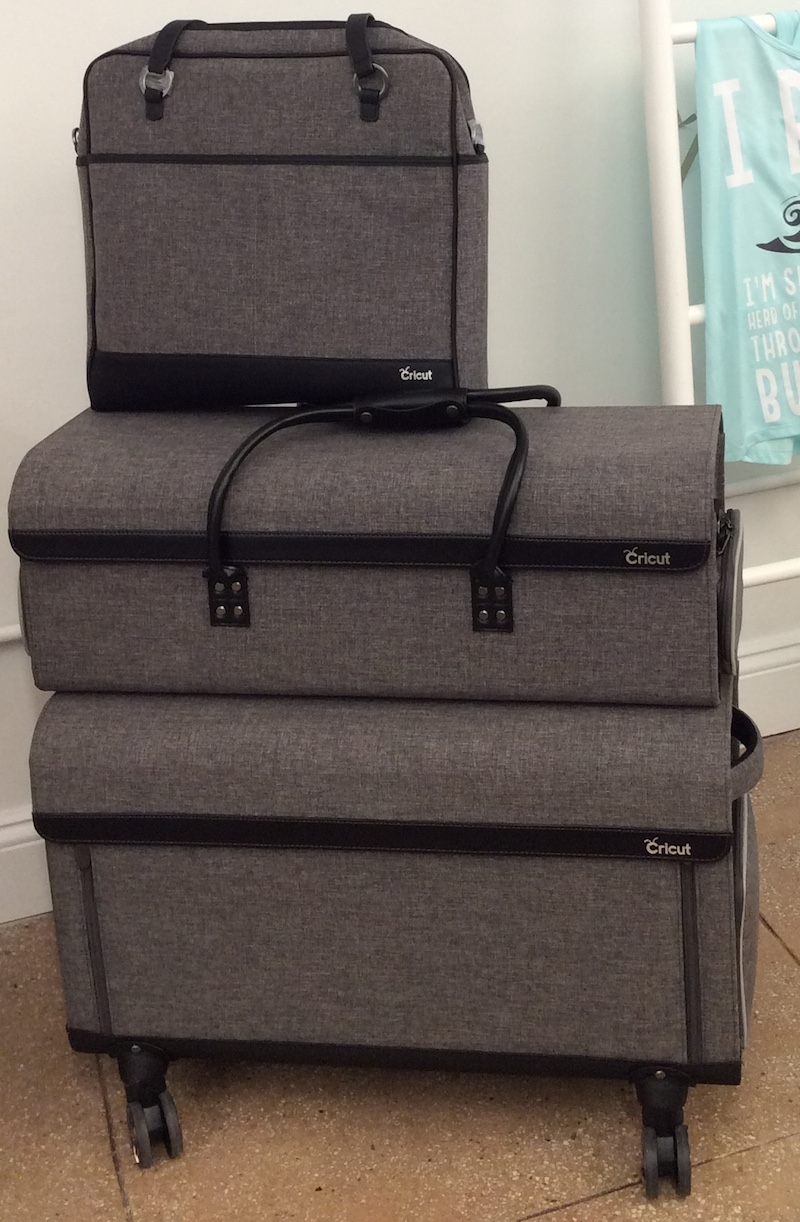
These are on my wish list because I often take pictures for my tutorials up at my mom’s apartment. If you take your Cricut to a regular craft night, these would be a great investment.
Must-Have Supplies
The types of supplies you need will depend on the projects you plan to make, as well as what you already have available in your craft supply stash. Here are my must-have supplies.
- Pens. One of the features I love on the Cricut Explore machines is its ability to write! You’ll need specialized pens, though. The pens are available in a variety of colors and tips.

- Cutting materials. The Cricut is a cutting machine, so cutting materials are the most fun (and quickly used) supplies you’ll need to get. So far, I’ve cut…
- Adhesive foil (tutorial here),
- Cardstock (tutorial here),
- Faux leather (tutorial coming soon),
- Iron-on and glitter iron-on (tutorials here and here),
- Magnet sheets (tutorials here and here),
- Vinyl (tutorials here and here), and
- Washi sheets (tutorial coming soon).
- Transfer tape. Transfer tape is a clear film that helps you transfer vinyl cuts from your mat to the final project. I’ve used other transfer tapes, but I prefer the Cricut transfer tape because it has a grid so you can position your vinyl easily.
I hope this list of tools and supplies will help you get the most out of your Cricut Explore! Now, let’s move on to our project.
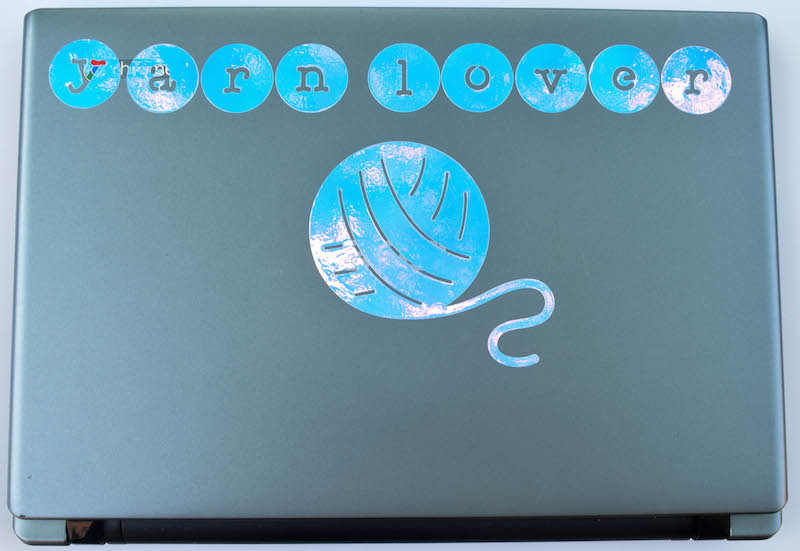
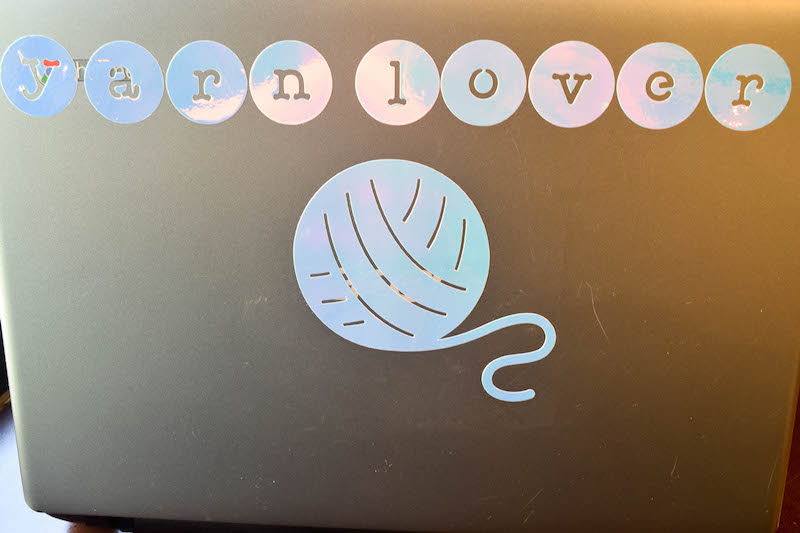
Yarn Lover Vinyl
Tutorial by Underground Crafter
So, as I mentioned, a few weeks ago, I went with Jessie At Home to a Cricut Crafternoon in New York City. I made this adorable yarn lover tote using the Cricut Alphabet Circle font (available for free in Design Space) and a yarn ball image (included with a Cricut Access subscription) with the Glitter Iron-On and Holographic Sparkle Iron-On that were available at the event. (I also got to try out the super speedy, Cricut Explore Air 2.)
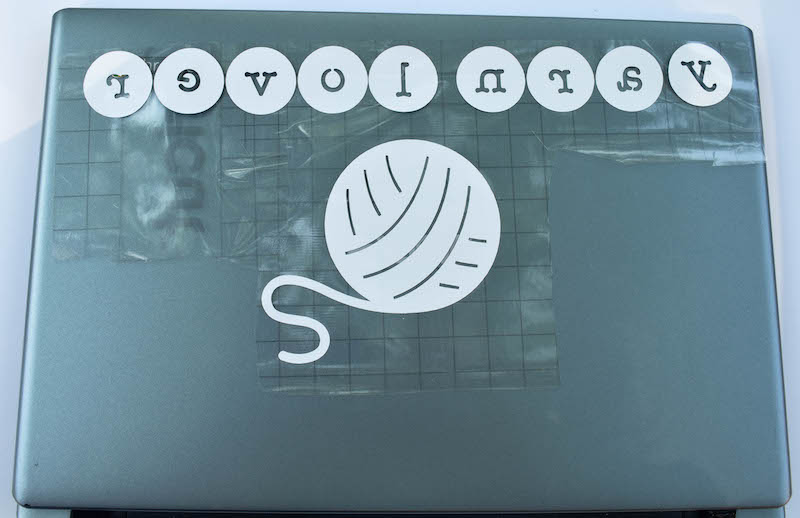
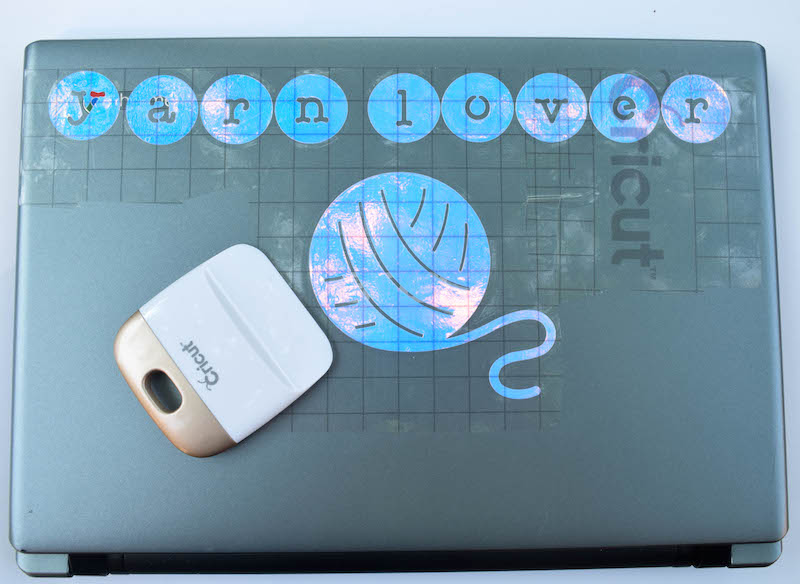
I decided I wanted to continue the yarn lover theme by decorating my Chromebook. This poor old gal has been through a lot, but she’s my travel computer so I wanted her to be pretty for the world. You can decorate your computer, netbook, or tablet (or pretty much any other surface) with this project.
Materials
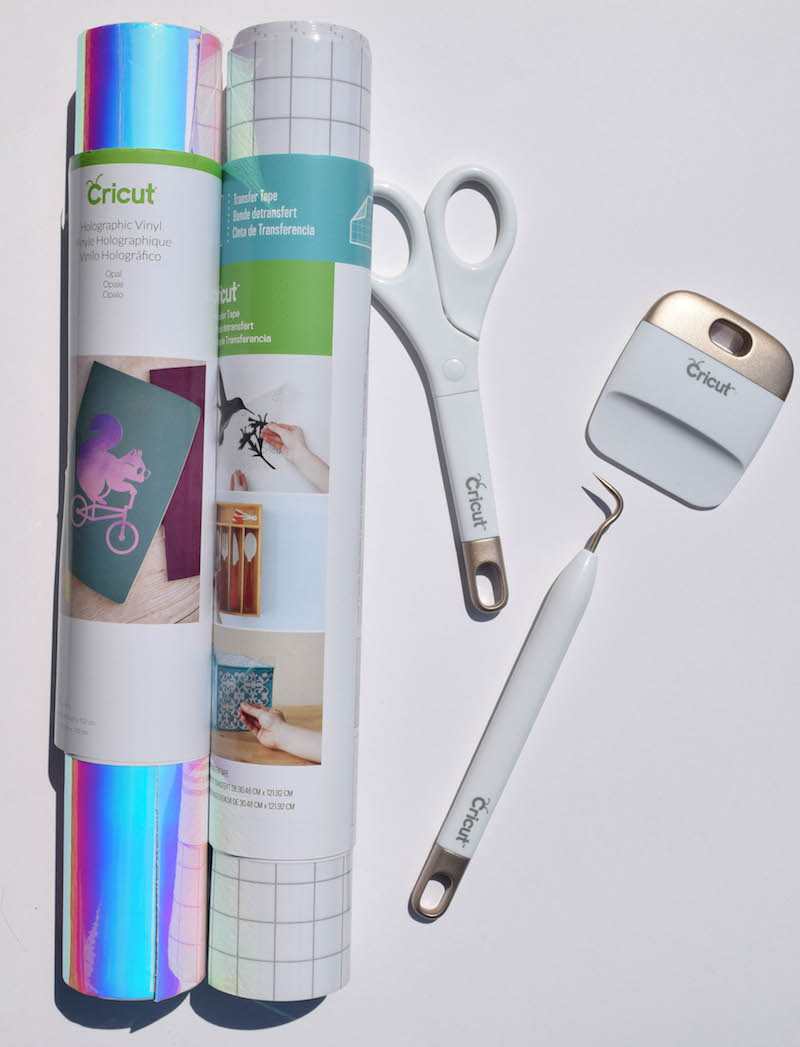
- Cricut Explore with Cricut Design Space and Cricut Access.
- StandardGrip cutting mat (I used the one from the Cutting Mat Variety 3 pack).
- Weeder, scraper, and scissors and/or trimmer (I used the ones from my Cricut Gold Tools and Trimmer Set).
- Cricut Transfer Tape.
- Cricut Holographic Vinyl (I used Opal, which looks blue, purple, pink, or silver, depending on the angle and lighting).
- Yarn Lover project in Design Space.
Instructions
Cut the Holographic Vinyl
- Set your Cricut’s pressure setting wheel to Vinyl. Open the Yarn Lover project in Design Space. Adjust the size or spacing, if necessary, for your project.
- Place Cricut Holographic Vinyl on the cutting mat with the shiny side up.
- Choose “Go” and follow the instructions for cutting.
- Once your vinyl is cut, remove it from the mat.
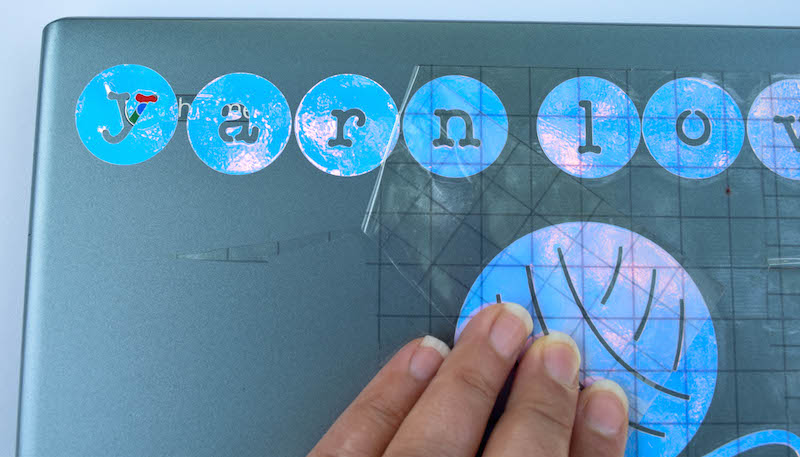
Weed the Holographic Vinyl
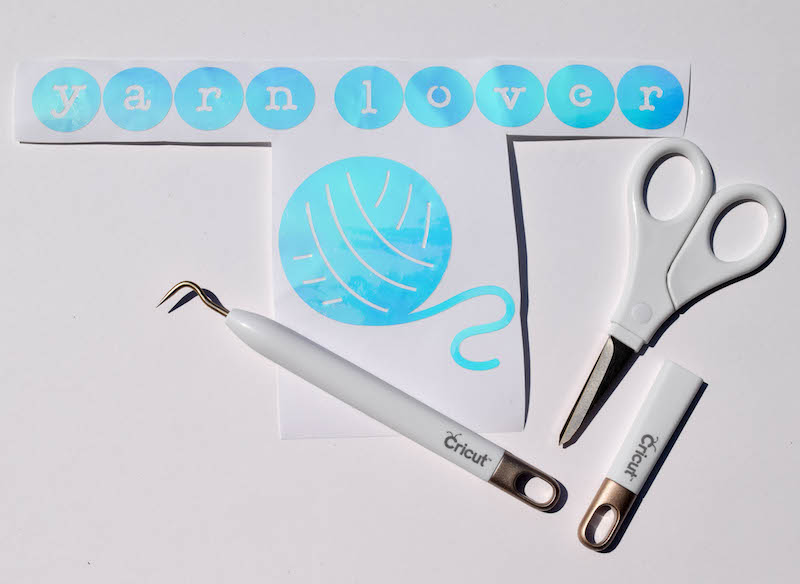
- Use your weeder to remove the excess vinyl from your project.
- Tip: Cut excess pieces away before weeding so you can use the vinyl scraps for other projects.
Attach the Transfer Tape to the Vinyl

- Cut a piece of transfer tape so that it is slightly larger than your vinyl piece.
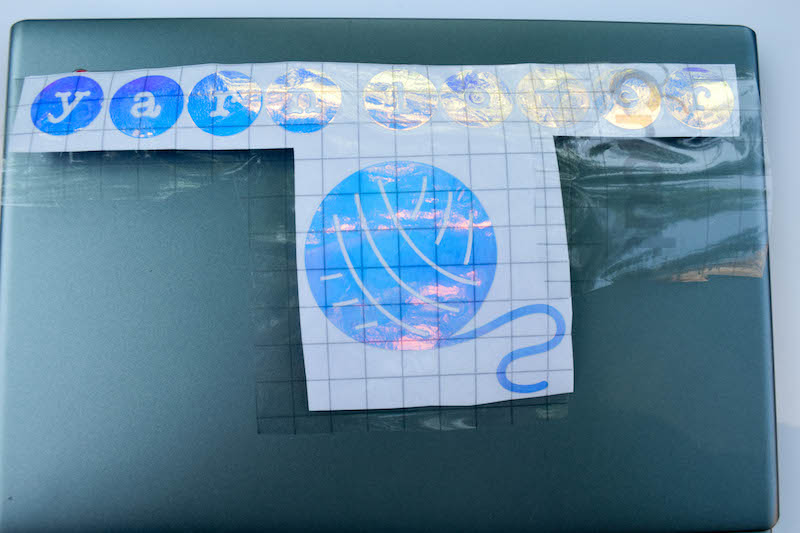
- Peel away the backing of the transfer tape.
- Apply the transfer tape, sticky side down, on top of your vinyl, lining up the vinyl pieces to the grid.
- Once you’re satisfied with the position, peel away the vinyl backing.
Attach the Vinyl to the Surface
- Use the transfer tape to apply the vinyl to the surface you’re using for your project, positioning the vinyl with the transfer tape’s grid.
- Move the scraper over the project, from the center to the outer edges. This will help secure the vinyl and squeeze out air bubbles.
- When you’re happy with the positioning, gently peel away the transfer tape.
- Now, you can share your love of yarn with the world!

This is a sponsored conversation written by me on behalf of Cricut. The opinions and text are all mine.
1 thought on “Cricut Basics: Tools and Supplies (with Yarn Lover Project Tutorial)”