

Besides having survived college myself and working as a Resident Assistant while I was a student, since graduating many moons ago, I’ve worked in higher education for about 15 years in student services, academic affairs, and as a professor. That’s why I’m so excited today to share my five tips for helping you to get your teen ready to live in a dorm room or off-campus apartment, along with a quick crochet pattern for the L Square Pillow, a decorative project you can use to add a touch of handmade to your teen’s dorm room.

If you have a high school senior at home applying to college, you’re reading this at the perfect time. You have almost a year to prepare her or him (and yourself!) for the big “move in” day. To get you started, here are my five tips.
Special thanks to CollegeCovered.com for sponsoring today’s post. CollegeCovered.com, powered by Discover Student Loans, was created to provide students and parents with great tips and tools on getting into, paying for and adjusting to college. This post is sponsored by CollegeCovered.com, but all opinions and ideas are my own. This post contains affiliate links. I may earn a small commission (at no added cost to you) if you make a purchase using these links. Materials for the tutorial were provided by Fairfield and Red Heart.
Scroll down for the free crochet pattern for the L Square Pillow!
5 Tips for Getting Your Teen Ready to Live in a Dorm Room or Off-Campus Apartment
1: Pack light.
It will be tempting to pack tons of stuff from your room at home — but don’t. Most dorm rooms are pretty small and even if you’ll be living in a larger, off-campus apartment, packing, unpacking, and moving can take up a lot of time and money that would be better used for studying or campus activities. Spend the next few months thinking about what’s really essential and paring down what you plan to bring.
2: Personalize.

Dorms can be a bit dull, and there may be times when your teen will feel homesick, so be sure to pack what they will need to make a room feel like a new home. Use your teen’s favorite colors for sheets or an area rug. Instead of buying everything new, pack some of your teen’s favorite decorations from home. (This will also help you save some money that your teen can use for books and other expenses.) If your teen is crafty, be sure to remind them to bring some handmade projects, like the L Square Pillow, to add a personal touch to the room.
3: Don’t forget the memories.
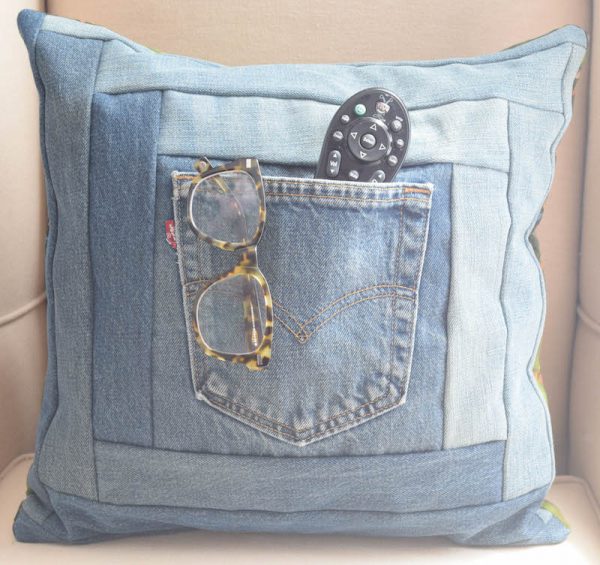
Okay, I know I said to pack light but if your teen brings things with sentimental value, you can help them find some emotional (as well as physical) comfort in their room after a long night of studying. Remind your teen to collect pictures and playlists from friends so they can have a bit of nostalgia when necessary. If you know your teen won’t want to announce that they’re missing home to the world, think ahead. Collect bits of old jeans from close friends and sew up a set of DIY Denim Pocket Pillows. Your teen will be able to think back on fun times and the new roommate will be none the wiser.
4: Be gentle to the walls.
Most dorms and rental apartments do not want you to damage the walls with nails or by painting. Pack removable vinyl decor or hang lightweight posters and pictures with adhesive putty. Crochet bunting is another lightweight (and easy to pack) project that can add a lot of color without damaging dorm walls.
5: Start teaching your teen how to live on their own.
If they’ve never done their own laundry or can’t cook to save their life, there’s still time to figure these things out. Have your teen talk to you, grandparents, or other trusted adults about taking on more responsibility at home, or teach them how to prepare their favorite dinner. Not only will knowing how to take care of themselves make college life easier, it’s also a great way to make friends! Trust me, if they cook a homemade dinner in the common area or help a floor mate with laundry, they will be a hero(ine).
If you make your own L Square Pillow, I’d love to see it! Share your progress and questions by tagging me on Bluesky as @UndergroundCrafter, Facebook as @UndergroundCrafter, or on Instagram as @ucrafter. You can also share a picture in the Underground Crafters Facebook group. Sign up for my weekly newsletter and get a coupon code for your choice of one of my premium patterns and private access to my vault of subscriber goodies. Plus, you’ll never miss one of my free patterns again!
Add the L Square Pillow to your favorites or queue, or buy the ad-free PDF on Ravelry.

L Square Pillow
Crochet Pattern by Underground Crafter


Get cozy with this simple motif envelope pillow case.
Finished Size
- 12” (30.5 cm) square.
Materials
- Red Heart Super Saver yarn (100% acrylic, 7 oz/198 g/364 yd/333 m) – 1 skein ea in 387 Soft Navy (CA) and 256 Carrot (CB), or approximately 166 yd (152 m) in ea of 2 colors in any medium weight yarn.
- US H-8/5 mm crochet hook, or size needed to obtain gauge.
- Fairfield Crafter’s Choice 12” x 12” Pillow.
- Yarn needle.
Gauge
- Square in pattern = 4” (10 cm) square. Exact gauge is not critical for this project.
Abbreviations Used in This Pattern
- CA – Color A
- CB – Color B
- ch – chain
- dc – double crochet
- ea – each
- rep – repeat
- Rnd – Round
- sc – single crochet
- sk – skip
- sl st – slip stitch
- sp – space
- st(s) – stitch(es)
- yo – yarn over
- * + Repeat instructions following asterisk/plus sign as indicated.
- () Instructions within parenthesis are worked into indicated stitch or space.
- [] Repeat instructions in brackets as indicated.
Pattern Instructions L Square (Make 11 starting with CA and make 10 starting with CB)

- With first color, ch 4, sk 3 ch, join with sl st to next ch to form ring.
- Rnd 1: Ch 3 (counts as dc, here and throughout), 2 dc in ring, [ch 2, 3 dc in ring] 3 times, ch 1, sc (counts as ch-1 sp, here and throughout) to top of ch 3 to join. (12 sts + 4 ch-2 sp)
- Rnd 2: Ch 3, dc in same sp, [*dc in next 3 sts,** (2 dc, ch 2, 2 dc) in ch-2 sp] 3 times, rep from * to ** once, 2 dc in first ch-2 sp, ch 1, sc to top of ch 3 to join. (28 sts + 4 ch-2 sp)
- Rnd 3: Ch 3, dc in same sp, +[*dc in next 7 sts,** (2 dc, ch 2, 2 dc) in ch-2 sp], rep from * to **, 2 dc in next ch-2 sp++ changing to second color in final yo of last dc, ch 2, 2 dc in same ch-2 sp, rep from + to ++, ch 2, sl st to top of ch 3 to join. Fasten off with long yarn tail (approximately 12”/30.5 cm) for seaming.

Assemble front panel
- With right sides facing and using yarn tail, follow assembly diagram to join squares on back with slip stitch seam (see video below) starting in ch before dc and ending in ch after dc on every square.
- If you can’t see the video above demonstration a slip stitch seam, click HERE to watch it on YouTube.

- Join rows together in same manner following assembly diagram.
Assemble back panels
- Join back panels in the same manner as front panel following assembly diagram.

Assemble pillow
- Position front panel with right side up.

- Position both back panels over front panel, with center rows overlapping.

- Join yarn with sl st to any corner ch-2 sp. With right sides facing, join front and back panels with slip stitch seam (see Pattern Note) starting in ch before dc and ending in ch after dc on every square and working through all 3 layers at overlapping rows.

Finishing
- With yarn needle, weave in ends.
- Turn pillowcase right side out.

- Insert pillow form into pillowcase.
- Enjoy your new pillow!

2 thoughts on “Crochet Pattern: L Square Pillow”