

 Emily from Fiat Fiber Arts is joining us again and she’s sharing her best tips and tricks for making pompoms and tassels. Pompoms and tassels make great additions to any crochet, knitting, or craft project. They can even make projects by themselves! If you struggle with making plump and beautiful pompoms and tassels, read on for Emily’s best tips (and check out her video).
This post contains affiliate links. I may receive compensation (at no added cost to you) if you make a purchase using these links.
About Emily Reiter from Fiat Fiber Arts in Her Words
As a Catholic wife and mother of 5 small children, the most common remark I get regarding my work is, “How do you find the time?” My half-joking answer is “neglect.” Cross-stitch was my first fiber love. I’ve stitched since 2nd grade. But when I had my first three children, I stopped stitching and life became exceedingly stressful. I fell into a horrible bout of post-partum anxiety after the third was born. As part of my recovery, I began to attend meetings of our local chapter of the Embroiderer’s Guild of America. It reminded me of the true contentment I feel from creating things with a needle in my hand. My husband could also see the effect.
Soon my fiber love branched into crochet. I had always crocheted but wasn’t very adventurous with it. Then I discovered a book of amigurumi patterns in the library. The embroidery section abuts the crochet books. Each toy I made was like Christmas for my kids. They still have and play with all those toys from 6 years ago. Crochet took off after that.
“After testing for a designer for a few years, I was encouraged to pursue technical editing. Finally, I feel tech editing combines the value of my educational background (BS, MS & Unfinished PhD in Range & Wildlife Management, strong data collection and manipulation skills, eye for detail) with my natural passions for fiber arts. I feel that I am finally serving God through my fiat (thus the business name), God’s will for my life. Why else would I have the combination of these great skills if not to serve and provide for my family?
Oh, and the answer to “how do you find the time?” is a loving and understanding husband, early bedtime for the kids, I tend to stitch fast because my time is limited. Neglect probably still plays a part, my home certainly isn’t the cleanest, but the kids are happy, clean and fed.
Show your support by following Emily on:
Fiat Fiber Arts Website | Facebook Page | Facebook Group | Instagram | Pinterest | Ravelry | YouTube
Tips and Tricks for Making Pompoms and Tassels
by Fiat Fiber Arts
 Making pompoms is a craft that can add fun and whimsy to your designs and can also be a source of major frustration for some. Today, I will share with you my thoughts and what I have learned about making pompoms.
I used to hate making pompoms, but mostly that was because my pompoms were always flimsy, yucky looking things. I thought I was following instructions, but it just didn’t turn out right. Today, you can search for “how to make a pompom” on the internet and find loads of videos and project ideas. Even if you’re not a crochet or knit maker, you can make pompoms and use them in a variety of ways. Who’s seen the viral video of the pompom rug? Have you tried that one?
Pompoms
Here, I’ll go over the equipment and tools and my secrets (and secret annoyances) I have discovered about pompom making. If you want to just cut to the chase and watch some poms getting made by myself and my daughter, then check this out.
Special Equipment?
Do you need special tools to make a pompom? Not necessarily. There are pompom makers out there, interestingly shaped little devices that can help you in making pompoms that are different sizes. But, as seen in many videos, you can use a piece of cardboard also. I’ve also used a book or just my hand. If you want the special pompom makers, you can find them at your local craft store, but I found a set on wish. It’s pretty flimsy but it gets the job done. Some of the other bonuses to using the tool is that it has a groove designed for proper scissor cutting placement. It holds your cut pieces together while you get the tie piece in the same groove. PLUS, the little bumps help to hold that tying yarn tight while knotting.
The Yarn
If you want to be making pompoms fast, use bigger yarn. It’s the same as when you’re stitching: bigger yarn works up faster than smaller yarn. So, unless you just have to have a pompom in that dk or sock weight color, stick with weight 4 or larger yarns or you’re going to be wrapping all day long. Even with weight 4 yarn, I started to double and triple the strands to make it faster.
What’s the secret?
So, how did I go from hating pompoms because they were flimsy to making seriously solid pompoms capable for a rug? It’s all about your wraps. MAKE MORE WRAPS. Wrap that yarn around and around and around. The more wraps you make, the stuffier and sturdier your pompom will be. So, if your pompoms, like mine, are flimsy, make another and wrap it more.
The Cutting
Since we’re cutting through several layers of yarn, you want the scissors sharp so that the job is easier. Thin scissors would be easier to slip further under the yarn. Also, don’t use those scissors that only cut in one spot where the blades meet, you know the ones. You need scissors that cut very well close to the tips. The thinner and sharper the blades, the less actual cuts will be needed. If you are making a big pom project you will be doing a lot of cutting. You want COMFORTABLE scissors! The first time I tried making the pom rug I quit after 5 poms because I was getting a blister or a bruise on my hand. Crafting injuries. So, take it easy or pay for some super sharp scissors.
The Middle Tie
After cutting your yarn around the card, book, or pompom maker, you need to get a center tie string around your loops BEFORE removing the pieces from your wrapping device. Usually I use the same type of yarn that I used to make the pompom. But you want to use something that can make a really tight knot without breaking. If you used super bulky yarn to make your pom, then maybe get some tough string or sewing thread for the tie. I like using upholstery thread for projects that need to stay for a long time. Upholstery thread is very durable and you can pull it super tight. If you have a cotton yarn that can be pulled to break, it’s not ideal for the knot. Usually, my acrylic weight 4 yarns are good for wrapping and tying. Also, make sure you leave a long tail for the tie. That’s what you will be using to attach the pom.

Removal and Shaping
Honestly, along with cutting, this is my new annoyance for pompoms. Again, you’re using your scissors, so if your hand already hurt from cutting through all those wraps, here goes round 2. First, get over the trash can or a bowl or something to catch a bunch of tiny cut bits of yarn. Then, start trimming off the yarn ends that stand out from your pompom surface. This part feeds into my perfectionism in not the best way. I could trim forever, sometimes. Oh wait, this side is too flat, I can round it out here, that bit is sticking out, now that bit, and on and on. Eventually, you have to be happy about it. My big tip for shaping is SHAKING. After you do a couple cuts, shake that pom! Shake, shake, shake. It loosens the pieces and shows the true shape. Then evaluate for the next cut. Just cut a couple times and shake again. Move it around in your hand. Think about the average person looking at it, not a critical crafter’s eye like yours.
Attachment
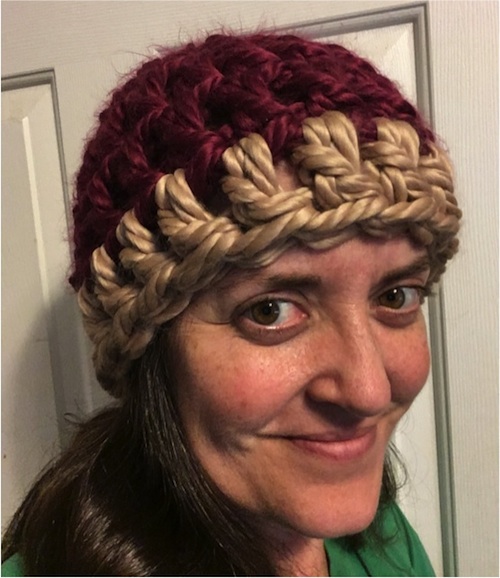
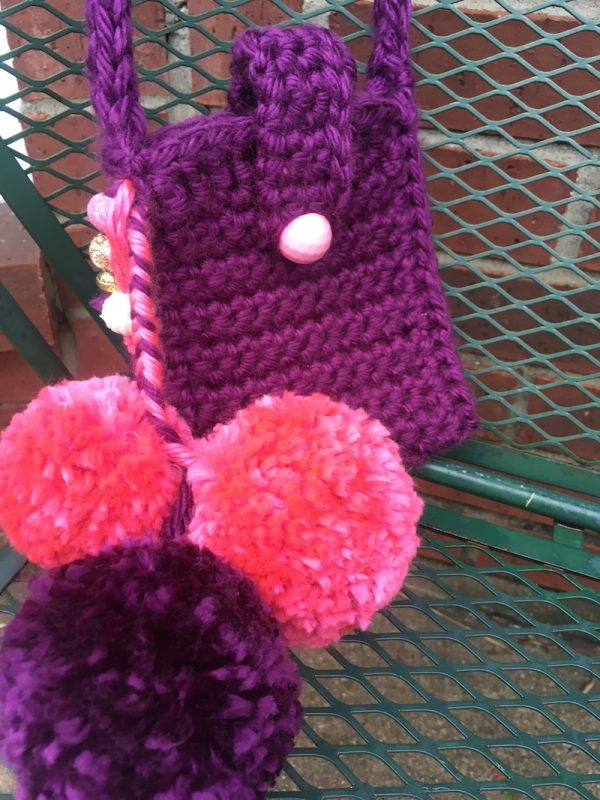
Now you have a pompom ready for placement!! Usually you can use the long tail from the tie to attach the pom wherever you need it. Again, you probably want to attach it very tightly to wherever it’s going. If it’s topping a hat, you don’t want it flopping off. If it’s going on that rug, you want it firmly secured. Tassels and purse accents might give you a little more leeway but you’ll have to think about what you’re doing with it when you make that tie.
Tassels
Tassels are similar to pompoms. Making a tassel doesn’t necessarily need a tool. But you want your strands to be uniform in length. I’ve often used a hardback book to wrap yarn around and get equal lengths of yarn. You can also just measure out the length you want and cut and cut and cut and cut each length of yarn. However you do it, you want several lengths of yarn of roughly equal length.

The Ties
A tassel will have two ties in it. One tie will go around all lengths of yarn in the middle of them. All lengths will then fold down from this point. This tie is what you will use for attachment of the tassel. After making the center tie, pull all lengths down so that all ends are opposite the tie. Depending on your size of yarn, the next tie will be about a half to 1 inch down from the center tie. This tie will wrap around all strands. You want this one to be very tight because it’s giving the tassel it’s shape and will hold it together. The tails of this tie need to be as long or longer than the ends of the tassel.

Trimming
Your next step on tassel making is similar to the shaping of the pompom but way easier!! All you need to do is trim the ends of the lengths so you have a straight even cut across the bottom.
Attachment
Now you can attach your tassel using the top tie ends.
Pinterest is an amazing place to see other ideas for poms and tassels. Here’s my own Pinterest board of inspiration for tassels and purses.
I hope you have fun making your own pompoms and tassels. Let me know what you make!
© 2018 by Emily Reiter (Fiat Fiber Arts) and published with permission by Underground Crafter. This pattern is for personal use only. You may use the tutorial to make unlimited items for yourself, for charity, or to give as gifts. You may sell items you personally make by hand from this tutorial. Do not violate Emily’s copyright by distributing this tutorial or the photos in any form, including but not limited to scanning, photocopying, emailing, or posting on a website or internet discussion group. If you want to share the tutorial, point your friends to this link: https://undergroundcrafter.com/2018/07/31/how-to-make-yarn-pompoms-and-tassels. Thanks for supporting indie designers!
Thank you, Emily, for sharing this beautiful pattern with us! Show your support by visiting Emily at one of the following links:
Fiat Fiber Arts Website | Facebook Page | Facebook Group | Instagram | Pinterest | Ravelry | YouTube
Thanks for these great tips!
Great video, I think your baby girl might have a future in front of the camera ❣️ You both are adorable and work so well together, thanks for sharing❤️