
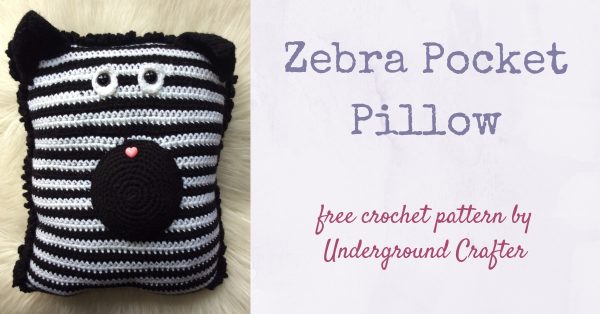
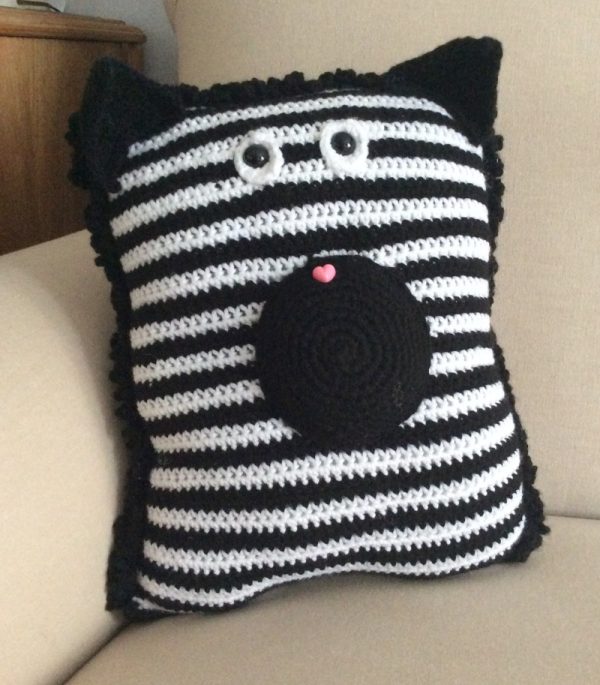
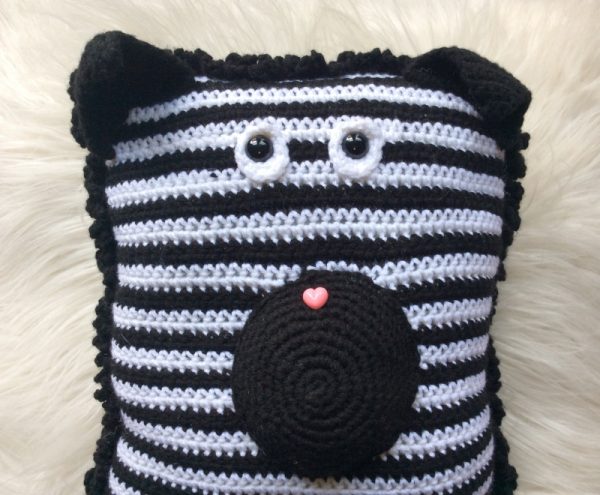
I’m kicking off the second annual Softie Crochet Along with CAL Central with the Zebra Pocket Pillow! This crocheted amigurumi pillow has a pocket panel that you can use as gift wrap, to tote a favorite book, or to store your tablet.
This post contains affiliate links. I may receive compensation (at no added cost to you) if you make a purchase using these links. Materials for the sample were generously provided by Clover USA, Fairfield World, and Red Heart.
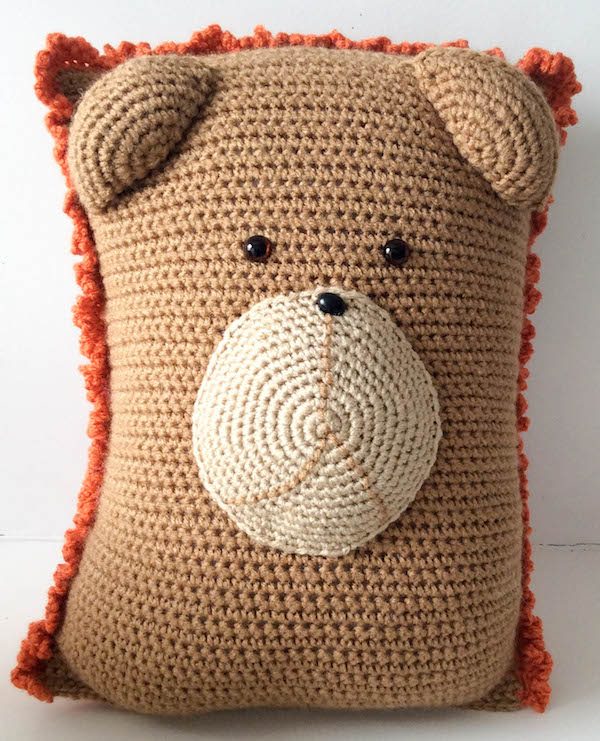
Last year, I made the Lion Pocket Pillow for the first Softie CAL and I kind of felt like he needed a buddy.
Since the basics of the panel shapes would be the same, I decided to add some interest with stripes, and that’s where the idea for the Zebra Pocket Pillow was born.
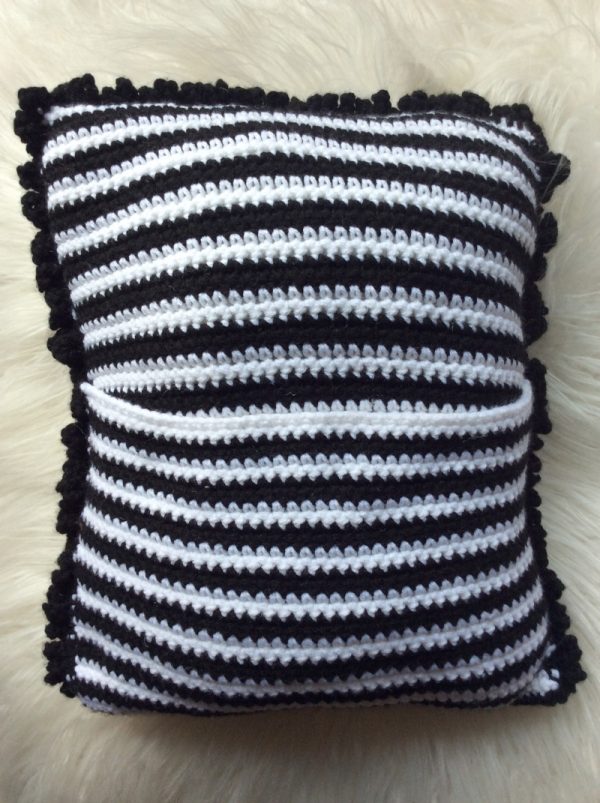
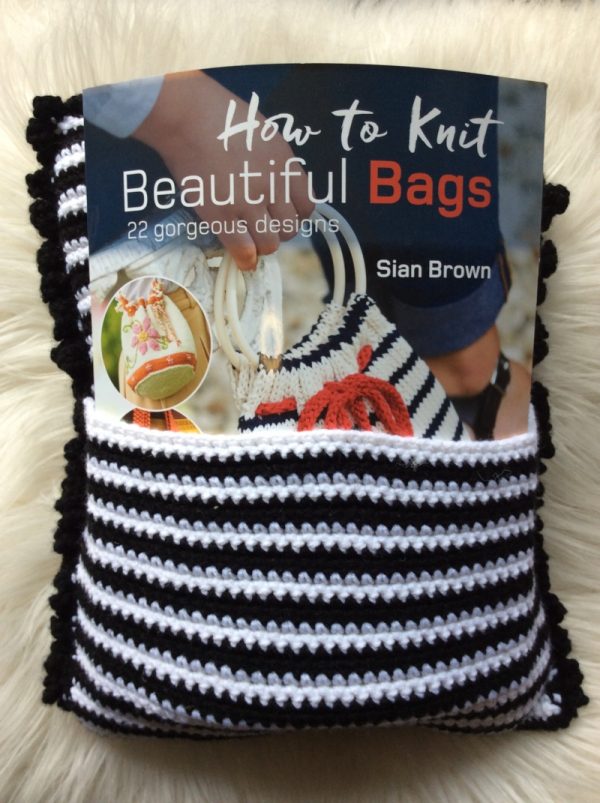
Just like its Lion Pocket Pillow pal, the Zebra Pocket Pillow has a generous pocket panel. This is great for encouraging your littles to read, for including a small gift, or for putting a tablet out of reach.
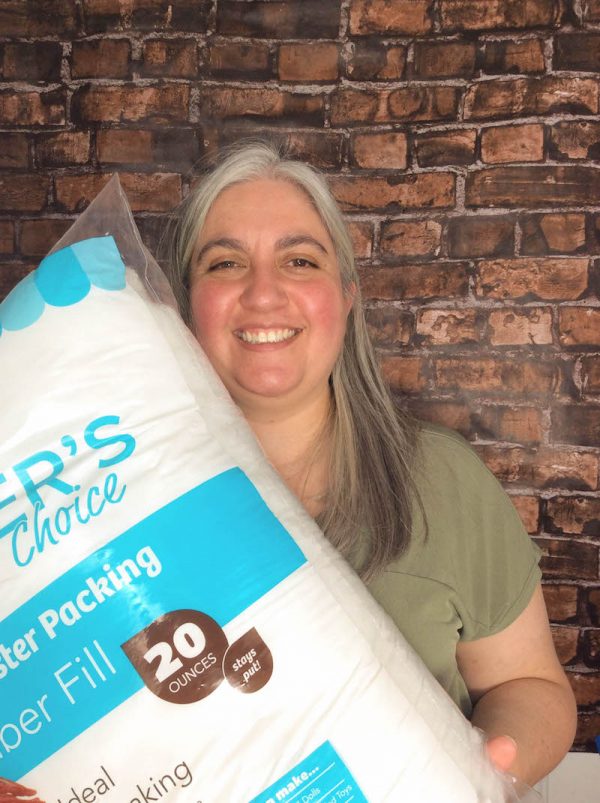
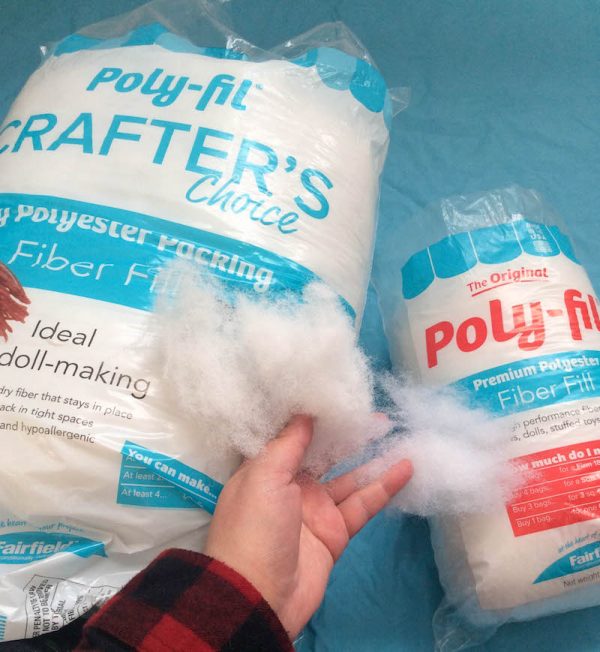
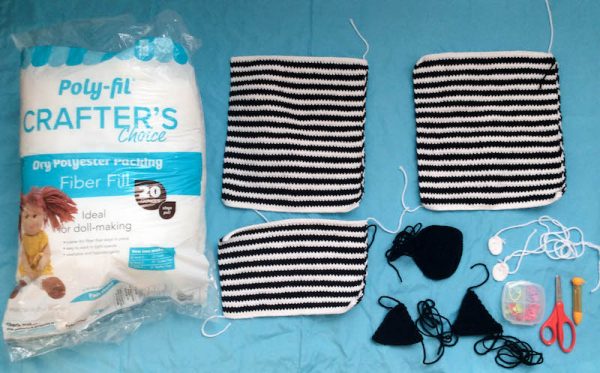
For this year’s Softie CAL, Fairfield World generously provided all of the participating designers with Crafter’s Choice Dry Polyester Fiber Fill. This happens to be one of my favorite fiber fillings to use for making crocheted softies.
It’s coarser and denser than the standard Poly-Fil. That means it doesn’t “fluff out” as much when you are stuffing your project. It helps because then you aren’t accidentally crocheting your Poly-Fil onto the right side of your projects.
If you’re just hearing about the Softie Crochet Along, you can get all the details here.
- You can join in by crocheting the patterns as you have time.
- Share your progress and post pictures of your finished projects. Tag your projects and posts #CALCentral on all social media. If you use Fairfield World Poly-Fil for your project, tag @fairfieldworld and use #fairfieldworld, too.
- If you’d like to chat with other crocheters, join the CAL Central Facebook group or visit this thread in the CAL Central Ravelry group.
- By the end of the CAL, you’ll have up to 10 awesome projects. Make adorable softies while having fun with us! Enter here to win one of the great end-of-CAL giveaway prizes!
- Use this button below on your Ravelry project pages or elsewhere on social media. Right click (on desktop) or tap and hold (on mobile) to save.

If you make your own Zebra Pocket Pillow, I’d love to see it! Share your progress and questions by tagging me on Facebook as @Underground Crafter, Instragram as @ucrafter, or Twitter as @ucrafter. You can also share a picture in the Underground Crafters Facebook group. Sign up for my weekly newsletter and get a coupon code for your choice of one of my premium patterns and other subscriber goodies. Plus, you’ll never miss one of my free patterns again!
Add the Zebra Pocket Pillow to your favorites or queue, or buy the ad-free PDF on Ravelry.


Zebra Pocket Pillow
Crochet Pattern by Underground Crafter
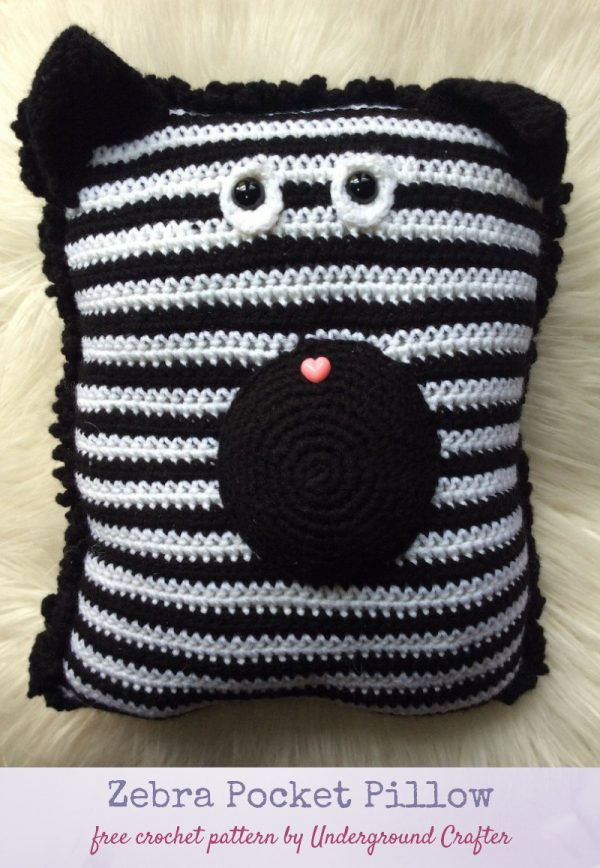


Stripes, facial features, and a mane add character to a simple, stuffed pillow. The pocket on the back can be used to hide a gift or to keep a book safe during travels.
Finished Size
- Pillow: 10” (25.5 cm) wide x 12” (30.5 cm) tall before stuffing.
Materials
- Red Heart Super Saver yarn (100% acrylic, 7 oz/198 g/364 yd/333 m) – 1 skein each in 311 White (CA) and 312 Black (CB), or approximately 228 yd (208.5 m) in CA and 300 yd (274 m) in CB in any medium weight yarn.
- US Size F-5/3.75 mm crochet hook, or size needed to obtain gauge.
- Fairfield Poly-Fil Crafter’s Choice Dry Polyester Fiber Fill, 20 ounce bag.
- 15 mm black safety eyes – 1 pair.
- 13 mm heart craft nose in pink – 1 piece.Yarn needle.
- Clover Quick Locking Stitch Marker Set, or 8-12 locking stitch markers.
Gauge
- 18 sc x 20 rows = 4” (10 cm). Exact gauge is not critical for this pattern but stitches should be small so that fiber filling doesn’t show.
Abbreviations Used in This Pattern
- CA – Color A
- CB – Color B
- ch – chain
- pm – place stitch marker
- Rnd(s) – Rounds
- sc – single crochet
- sl st – slip stitch
- st(s) – stitch(es)
- yo – yarn over
- * Repeat instructions after asterisk as indicated.
- [] Repeat instructions between brackets as indicated.
Pattern Notes
- Front Panel, Back Panel, Pocket Panel, and Ears are crocheted flat in rows.
- Eyes and Muzzle are crocheted in unjoined spirals in the round. Move stitch markers up each round to mark position of last stitch.
- Mane is crocheted in the round when joining layers with single crochet seam. A helpful photo tutorial for seaming with single crochet is available here.
- When choosing colors, note that CA and CB are used for Panel stripes. CA is used for Eyes. CB is used for the Muzzle and Ears.
- Change colors in the last yarn over of the final single crochet of designated rows. Moogly has a helpful video tutorial here.
- Oombawka Design has a helpful magic adjustable ring tutorial here.
- If you are crocheting in low light conditions, you may find black yarn difficult to work with. Choose two high contrast colors instead of black and white to make it easier to see your stitches.
Pattern Instructions
Front and Back Panels (Make 2)
- With CA, ch 46.
- Row 1: Turn, sk 1 ch, sc in next ch and in each ch across. (45 sts)
- Row 2: Turn, ch 1, sc in first st and in each st across, changing to CB in last yo of final sc (see Pattern Notes).
- Row 3: Turn, ch 1, sc in first st and in each st across.
- Row 4: Turn, ch 1, sc in first st and in each st across, changing to CA in last yo of final sc.
- Row 5: Repeat Row 3.
- Rows 6-57: Repeat Rows 2-5 – 13 times, or until Panel measures approximately 12” (30.5 cm) tall, ending after Row 5. Fasten off.
Pocket Panel
- Repeat instructions for Front Panel until Pocket Panel measures approximately 7” (18 cm), ending after Row 3 or Row 5. Fasten off.
Muzzle
- With CB, start with magic adjustable ring (see Pattern Notes).
- Rnd 1: Ch 1, 6 sc in ring, pull yarn tightly to close ring, pm in last st to mark position. (6 sts)
- Rnd 2: 2 sc in ea st around. (12 sts)
- Rnd 3: *2 sc in next st, sc in next st; repeat from * around. (18 sts)
- Rnd 4: *2 sc in next st, sc in next 2 sts; repeat from * around. (24 sts)
- Rnd 5: *2 sc in next st, sc in next 3 sts; repeat from * around. (30 sts)
- Rnd 6: *2 sc in next st, sc in next 4 sts; repeat from * around. (36 sts)
- Rnd 7: *2 sc in next st, sc in next 5 sts; repeat from * around. (42 sts)
- Rnd 8: *2 sc in next st, sc in next 6 sts; repeat from * around. (48 sts)
- Rnd 9: *2 sc in next st, sc in next 7 sts; repeat from * around. (54 sts)
- Rnd 10: Sc in each st around.
- Rnd 11: Repeat Rnd 10. Fasten off with long yarn tail (approximately 1 yd/1 m) for joining.
- Position the craft nose at the top of the Muzzle and secure with washer.
- With yarn needle, weave in ends of starting yarn from magic circle on back of Muzzle.
Ears (Make 2)
- With CB, ch 2.
- Row 1: Turn, skip 1 ch, 2 sc in next ch. (2 sts)
- Row 2: Turn, ch 1, sc in first st, 2 sc in next st. (3 sts)
- Row 3: Turn, ch 1, sc in first st and in each st across to last st, 2 sc in last st. (Increases by 1 st)
- Rows 4-16: Repeat Row 3 – 13 times, ending with 17 sts. Fasten off with long yarn tail (approximately 1 yd/1 m) for joining.
- With yarn needle, weave in ends of starting yarn on back of Ears.
Eyes (Make 2)
- With CA, ch 4.
- Rnd 1: Turn, skip 1 ch, 2 sc in next ch, sc in next ch, 4 sc in next ch, turn to work along underside of foundation chain, sc in next ch, 2 sc in first ch, pm in last st to mark position. (18 sts)
- Rnd 2: 2 sc in next st, sc in next 3 sts, 2 sc in next 2 sts, sc in next 3 sts, 2 sc in next st, sl st to first st to join.
- Fasten off with long yarn tail (approximately 1 yd/1 m) for joining.
- With yarn needle, weave in ends of starting yarn on back of Eye.
Decorate Face
- Using locking stitch markers, pin Eyes, Muzzle, and Ears on Front Panel using pictures as a guide.
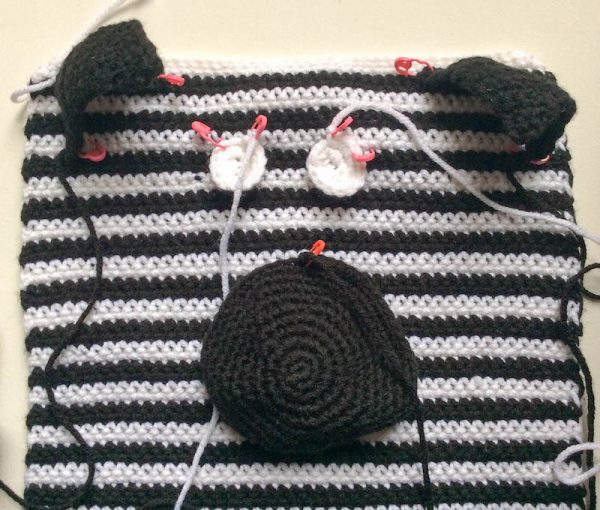
- Once satisfied with positioning, place safety eyes in crocheted eyes. Attach by firmly securing washers on back.
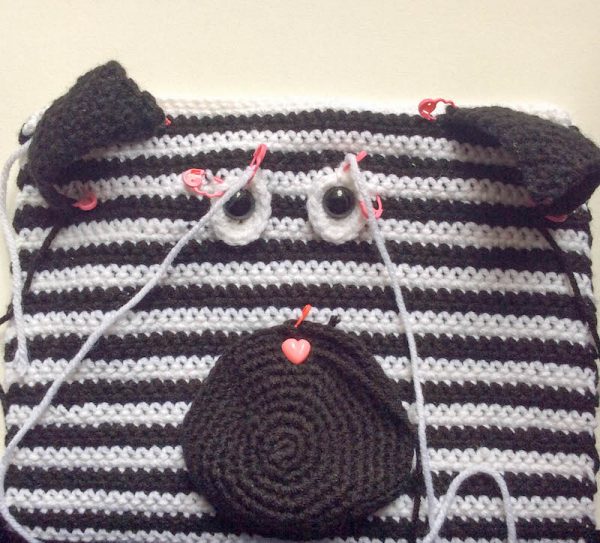
- With yarn needle and yarn tail, sew Eyes to Front Panel. With yarn needle, weave in ends from Eyes on back of Front Panel.
- With yarn needle and yarn tail, sew Muzzle to Front Panel, leaving about 2” (5 cm) unseamed. Stuff Muzzle firmly and continue to sew Muzzle to Front Panel. With yarn needle, weave in ends from Muzzle on back of Front Panel.
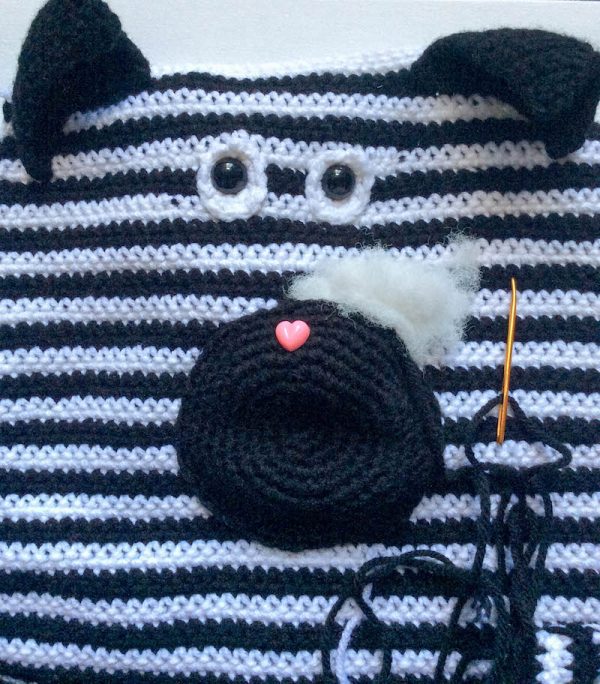
- With yarn needle and yarn tail, sew the lower edge (final row) of each Ear to Front Panel, shaping each Ear so that it is curved. With yarn needle, weave in ends from Ears on back of Front Panel.
Assemble Pillow and Add Mane
- With locking stitch markers, pin the Panels together as follows. Position right side of Front Panel with face up on top, with Back Panel underneath, and the Pocket Panel at the bottom.
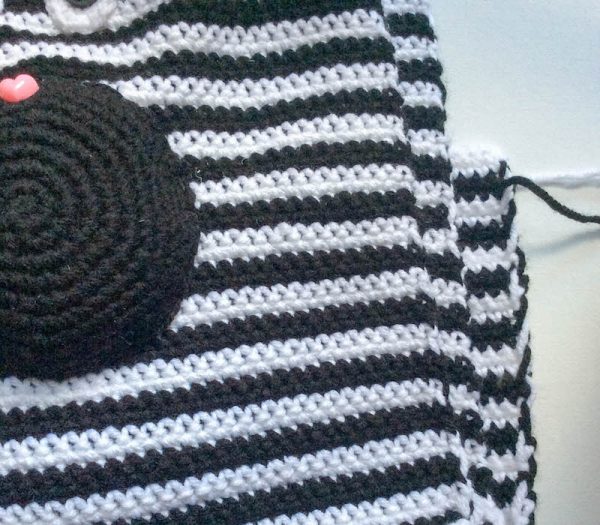
- With right side of Front Panel (face) facing you, join CB with sl st at bottom of Front Panel. Lining up stitches and working through all layers, begin working a single crochet seam (see Pattern Notes). Ch 1, sc in same st, sc in next 44 sts, turn to work along long edge and begin to crochet Mane, [sc in side of next row, ch 6] across to final row of Front Panel, turn to work along top of Front Panel, [sc in next st, ch 6] across top of Front Panel, turn to work along long edge, [sc in side of next row, ch 6] across to Front Panel until approximately 4” (10 cm) remain. Stuff pillow firmly with Poly-Fil. Continue to seam side of long edge by working [sc in side of next row, ch 6] across, sl st to join to first sc.
Finishing
- With yarn needle, weave any remaining ends into inside of pillow.
1 thought on “Crochet Pattern: Zebra Pocket Pillow”