


Do your beautiful, handmade crafts look boring, ugly, or unrecognizable when you share them online? Are you finding it difficult to cut through the noise and get your Etsy shop or patterns noticed? Today, I’m sharing my 10 tips for how to photograph your handmade crafts with flat lay. These tips will take your pictures from ok to awesome! I’ve even included a video demonstrating some of the tips, so read on for details.
This post contains affiliate links. I may receive compensation (at no added cost to you) if you make a purchase using these links. This post is part of an ongoing collaboration with B&H Photo Video Pro Audio, who generously provided a camera and photography equipment.
Many of us are skilled as makers but less skilled as photographers. Our beautiful projects may come across less than exciting when we share pictures online. Or, maybe your children or spouse won’t cooperate for photography, or you don’t have a budget for paying local models to wear your makes.
What is flat lay?
Flat lay is a style of photography where you literally lay your project flat against a background. It’s easier to master than other types of photography because you don’t have to worry about movement in the background, getting models not to blink, or keeping yourself in the frame for a self-portrait. Here are my 10 tips for taking amazing photographs of your handmade crafts using flat lay photography. (Don’t forget to scroll down for the video it you’d like to see some of the tips in action!)
10 Tips for Photographing Your Handmade Crafts Using Flat Lay

1 – Get to know your camera
Whether you’re using a complex DSLR or the camera on your smartphone, every camera is a little bit different. Use your camera’s manual (or search online for “name of your camera” manual or “name of your smartphone” camera manual) to learn about the features included in your camera. You may be surprised at what you find!
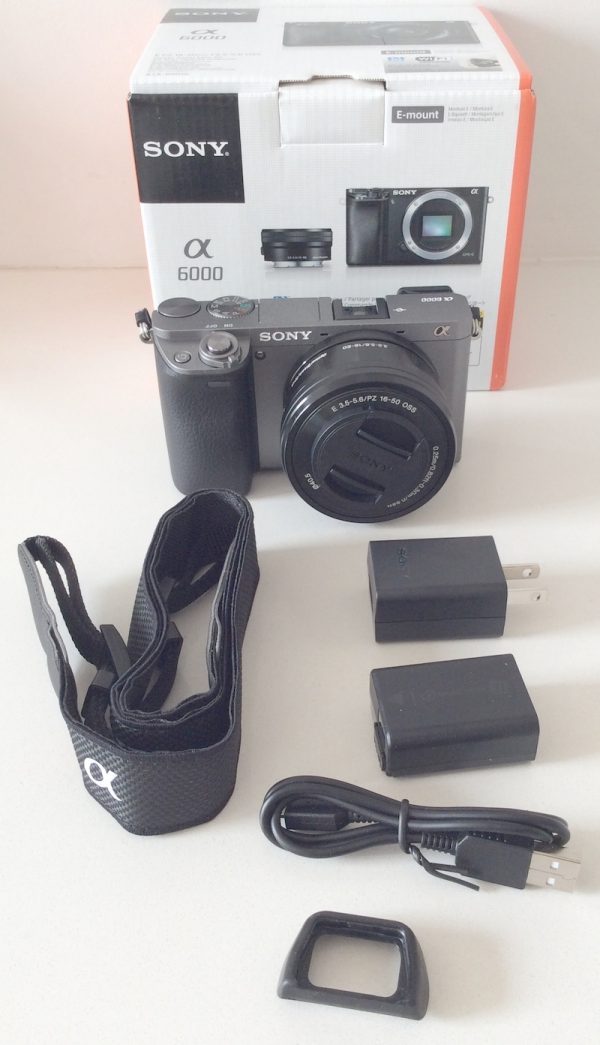
The pictures in this post were taken using a Sony Alpha a6000 mirrorless camera. Until I received this camera in April, I had never used a mirrorless camera before, and I had mostly worked with Nikon cameras. The Sony Alpha a6000 is very straight-forward, but it still helped to read through the manual to find some of my preferred settings, and of course, to practice using it by taking lots of pictures!
2 – Use a vinyl backdrop
Vinyl backdrops have matte backgrounds so they reduce shine from natural light or glare from a flash. These are also easy to store on a roll or you can cut them down to specific sizes that you use regularly. Bonus: vinyl is easy to wipe clean if you have any spills.
I use the Savage White Brick Printed Vinyl Backdrop, a white, faux painted brick backdrop. There are many different styles of backdrops available including faux wood, solid colors, and bokeh (blurred, pops of light). White has the added benefit of matching with any handmade project and helping to calibrate your camera’s white balance. I have found that using a white backdrop helps the yarn colors show more accurately than using a colorful backdrop, but you can also pick a backdrop color that contrasts with or coordinates with your favorite colors or your brand colors.
You can see some examples below showing how a backdrop can improve the final look of your photographs. These are pictures I took using various wood surfaces at home. The natural wood often makes the yarn colors look drab or distracts from the project, while the painted white wood reflects and adds a lot of shadows. Continue on to tip 7 to see how I improve the pictures using a vinyl backdrop!
3 – Use a lightweight camera
I loved all the features of my Nikon D5300 DSLR, but it was a beast. I could not take pictures one handed because it was just too heavy. This made it impossible to put my hands in the picture (to hold a crochet hook, for example) or to take a very quick, spontaneous photograph. It also made bringing my camera with me on trips or outside a pain. Since I started using the Sony Alpha a6000, I have really enjoyed how light and portable it is. Mirrorless cameras are available to fit a variety of budgets and they are generally much lighter than DSLRs (because they use a digital, rather than optical, viewfinder) but with much more control over settings, lenses, and so on than a smartphone or tablet camera.
4 – Use a tripod or monopod if necessary
If your camera is heavy, or if you have the tendency to move slightly while taking pictures, you may see evidence of “camera shake,” or slightly blurred edges in your photos. You may also have the tendency to take a picture including your thumb because you are too focused on holding the camera. Using a tripod or monopod helps to stabilize your camera, and, therefore, your pictures, and to keep your thumb out of the frame. It’s also helpful if you’re trying to keep the background, the lighting, and the project the same while switching out props. You can find many affordable options for tripods or monopods in different sizes and configurations to fit any camera or smartphone.
In the video below, I’m using the Manfrotto MT055XPRO3 Tripod with the 494 Center Ball Head with 200PL-PRO Quick Release Plate. Though this setup is pricier, it has several added benefits. The horizontal bar on the tripod makes it great for filming video tutorials of your hands as well as focusing downward for flat lay pictures. It’s a very sturdy tripod, so it can also hold a heavier camera and be used outdoors without a problem.
5 – Finish your project
The camera seems to spot every flaw on a handmade crafts project. Look over the project very carefully before taking pictures. Crochet and knit projects usually look better after blocking. Weave in ends (or hide them very well on the back), trim threads, and remove pet hair before positioning it flatly on your background.
6 – Think about your composition
The composition includes everything that will end up in the final picture. Most of us are so excited to share our handmade crafts online that we forget there is a large tuft of cat hair in the background.
Do you want your project to be straight or at an angle? Do you want to include it entirely or just share a peek? Should large projects be folded, rolled, or draped? Do you want to have a close up, where the project fills most or all of the frame, or take it from a distance, with more empty background framing your project? Think about all of these things as you position your project on your backdrop. When using a vinyl backdrop, make sure that if it has directional lines your project and your composition are lined up. Otherwise, you will end up with what looks like a trapezoid instead of a beautiful rectangular or square project. (Ask me how I know this!)
Take a moment to look through your camera’s viewfinder or LCD screen and make sure that there are only pretty things in your composition before you take a picture.
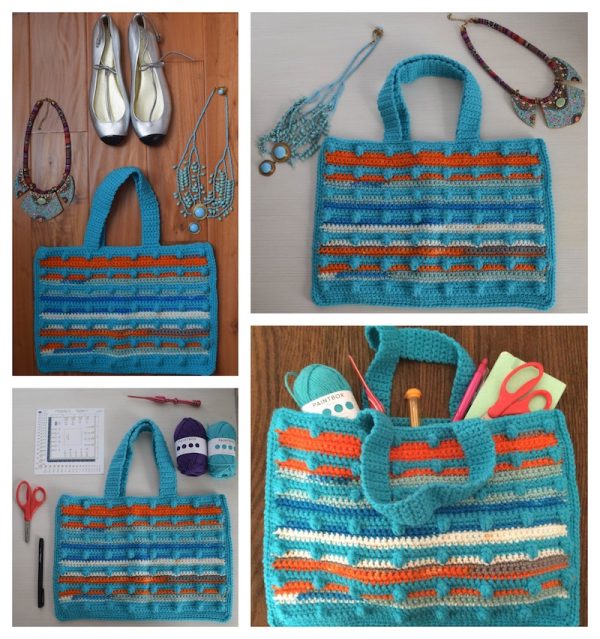
7 – Add props to your pictures
Pictures of the project alone can be boring or too stark. Get creative by adding props to make your pictures “Instagram-worthy.” Some examples of props you can find around the house include supplies you used to make the project (yarn, fabric, crochet hook, and buttons); items that can be used with the project (things to fit inside of a bag, a book you might read while sitting under a lap blanket); seasonal or holiday decorations (a small tree, a birthday hat, flowers); or clothing or accessories that you would wear with the project. Use colors that coordinate or colors with high contrast in your props for different looks. In the collage below, you can see how different props impacted the finished picture.

8 – Check your lighting
I use indirect natural light whenever possible. Direct natural light tends to cause big (and not very attractive) shadows. If you don’t have access to a well-lit place for photography, or if you usually take your handmade crafts pictures at night, invest in lighting for photography. There are a lot of portable options these days. Personally, I prefer LED lighting since it is available in both portable and natural light options. “Natural light” LED lighting tends to display yarn colors most accurately. There is also a broader range of prices, including many affordable options, and LED lighting is relatively easy to use compared to other types of photography lighting.
When first using artificial lighting, you may need to try different set ups, including placing the lights in different positions or using multiple lights in order to get the results you want.
It’s not a total crisis if you don’t have perfect lighting, but you will need to be more confident with photo editing!
9 – Take a lot of pictures
Most often, the best picture is not the first one! Be sure to take some pictures horizontally and others vertically. If using your phone or tablet, take some square pictures for Instagram. If using a camera, take some rectangular pictures with nothing on the sides that you can crop down to square. Take multiple pictures and then delete the ones you don’t like.
10 – Ask for feedback
When you’re first trying out new setups, it can be overwhelming. Ask some of your creative friends for their opinions on your lighting, composition, or props. Share a few of your many pictures (see tip 9) and get help choosing the best picture. You can also engage your fans by asking them to vote for the main picture on your pattern or Etsy listing.
I hope you’ve found these 10 tips helpful! You can watch a video highlighting my five top tips and sharing my setup below. If you can’t see the video below, watch it out on YouTube.
By the way, do you want the free crochet pattern for the bag featured in the pictures? Get the Caribbean Sunset Bag pattern here.
Have you tried flat lay photography for your handmade crafts before?