
The Button Christmas tree is my take on a crochet Christmas tree pattern. Your version can be an ornament, a softie, or a gift wrap embellishment. This pattern is simple so you can make these easily as you get ready for the holidays.

This post contains affiliate links. I may receive compensation (at no added cost to you) if you make a purchase using these links. Materials for this project were generously provided by Fairfield World, Oriental Trading, and Yarnspirations Red Heart.
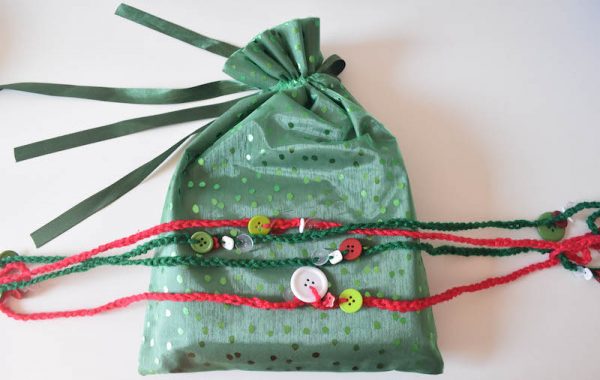
If you’ve been reading my blog for a while, you know that I love buttons. About two years ago, Oriental Trading sent me the Christmas Bag of Buttons, and for a few weeks, I couldn’t stop making projects with them. I made this Crochet Button Garland (which also makes great gift wrapping “ribbon”)…
…and I also made these Button Christmas Trees. I used the buttons as “ornaments” on the crochet Christmas tree, and I love the look.

This pattern was previously available for free only on Instagram, but I know that it was difficult for people to read it from there, so I’m sharing it on the blog as a freebie for this holiday season.

If you make your own Button Christmas Tree project, I’d love to see it! Share your progress and questions by tagging me on Bluesky as @UndergroundCrafter, Facebook as @UndergroundCrafter, or on Instagram as @ucrafter. You can also share a picture in the Underground Crafters Facebook group. Sign up for my weekly newsletter and get a coupon code for your choice of one of my premium patterns and private access to my vault of subscriber goodies. Plus, you’ll never miss one of my free patterns again!
Add the Button Christmas Tree to your favorites or queue on Ravelry.

Button Christmas Tree
Crochet Christmas Tree Pattern by Underground Crafter


This quick and easy Christmas tree softie includes optional instructions for making an ornament. This would be great for decorating or using as a gift tag.
Finished Size
- Approximately 7” (18 cm) tall.
Materials
- Red Heart Super Saver yarn (100% acrylic, 7 oz/198 g/364 yd/333 m) – 1 skein each in 368 Paddy Green (CA) and 365 Coffee (CB), or approximately 60 yd (55 m) in CA and 15 yd (14 m) in CB in any medium weight yarn.
- US Size F-5/3.75 mm crochet hook, or size needed to obtain gauge.
- Yarn needle with an eye small enough to fit through button holes.
- Fairfield Poly-Fil Fiber Fill, 16 oz. bag.
- Oriental Trading Christmas Bag of Buttons.
Gauge
- Tree (before Trunk) = approximately 5.5” (14 cm) tall in pattern. Exact gauge is not critical for this project. Stitches should be small so that fiber filling doesn’t show.
Abbreviations Used in This Pattern
- CA – Color A
- CB – Color B
- ch – chain
- ea – each
- rep – repeat
- RS – right (front) side
- sc – single crochet
- sk – skip
- sl st – slip stitch
- st(s) – stitch(es)
- WS – wrong (back) side
- yo – yarn over
- * Repeat instructions after asterisk as indicated.
- () Repeat instructions between parentheses in same stitch or space.
- [] Repeat instructions between brackets as indicated.
Pattern Instructions
Tree (Make 2)
- With CA, ch 2.
- Row 1: Turn, sk 1 ch, 2 sc in next ch. (2 sts)
- Row 2: Turn, ch 1, 2 sc in first st, 2 sc in next st. (4 sts)
- Row 3: Turn, ch 1, 2 sc in first st, sc to last st, 2 sc in last st. (Increases by 2 sts)
- Row 4: Turn, ch 1, sc in same st, sc in ea st across.
- Rows 5-24: Rep Rows 3 & 4 – 10 more times until you have 26 sts, ending after Row 4. Fasten off CA.
Decorate Tree
- Designate one side of ea Tree piece as RS. With yarn needle and CA, sew buttons on to RS of ea Tree piece. With yarn needle, weave in yarn tails on WS.
Tree Trunk (Piece 1)
- Row 1: With RS facing on first Tree piece in Row 24, sk 7 sts, join CB with sl st to next st, ch 1, sc in same st and in next 11 sts. (12 sts)
- Row 2: Turn, ch 1, sc in first st and ea st across. Rows 3-5: Rep Row 2 – 3 more times. Fasten off CB.
Tree Trunk (Piece 2)
- Rep as for Piece 1 on second Tree piece, do not fasten off CB.
Assemble Tree
- Turn to work along short edge of trunk, sl st in side of ea row along short edge. Position Trees with WS together.
- Border Join (working through both pieces): Ch 1, working along short edge of Trunk, sc in side of ea of next 5 rows of Trunk, turn to work across long edge of Trunk, sc in next 12 sts, turn to work along short edge of Trunk, sc in side of ea of next 5 rows, changing to CA in final yo of last sc, sc in ea of next 7 sts along base of Tree, turn to work along angled edge of Tree, sc in side of ea row along angled edge.
- (Optional: To make a hanging ornament, ch 20 at point of Tree.)
- Stuff Tree and Trunk firmly with fiber fill.
- Turn to work along next angled edge of Tree, sc in side of ea row along angled edge. Add additional fiber filling.
- Turn to work along straight base of Tree, sc in ea of next 7 sts, join with sl st to first sc, fasten off.
Finishing
- With yarn needle, weave in ends on inside of Tree.