

I’m happy to introduce Wan from KnitcroAddict as a guest contributor. In this post, she’s sharing a crochet lace cardigan pattern that is perfect for warm weather. The Summer Grace Cardigan pattern includes a two-part video tutorial to guide you through making your version in one of six adult sizes from XS through XXL. Wan has also included tips for making your cardigan longer or shorter, so read on for details.
This post contains affiliate links. I may receive compensation (at no added cost to you) if you make a purchase using these links. Photos in this post are © Wannipa Yunker/KnitcroAddict and are used with permission. Yarn for the sample was generously provided by Yarnspirations.
About KnitcroAddict
Wan, the designer behind KnitcroAddict, is a native of Thailand with 8 years of crochet experience. She learned basic English and crocheting by watching YouTube, eventually starting her own YouTube channel in 2018. She had never made a video, written a pattern, and had barely made any garments before. Her passion for crochet and teaching others has driven her to develop the necessary skills to make and share her designs, and her talent. From winter cardigans to summer tank tops, KnitcroAddict has a design for you.
Show your support by following Wan on Website | Etsy | Facebook | Instagram | Pinterest | Ravelry | YouTube
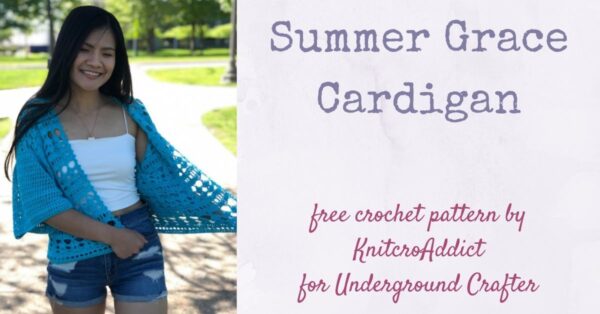
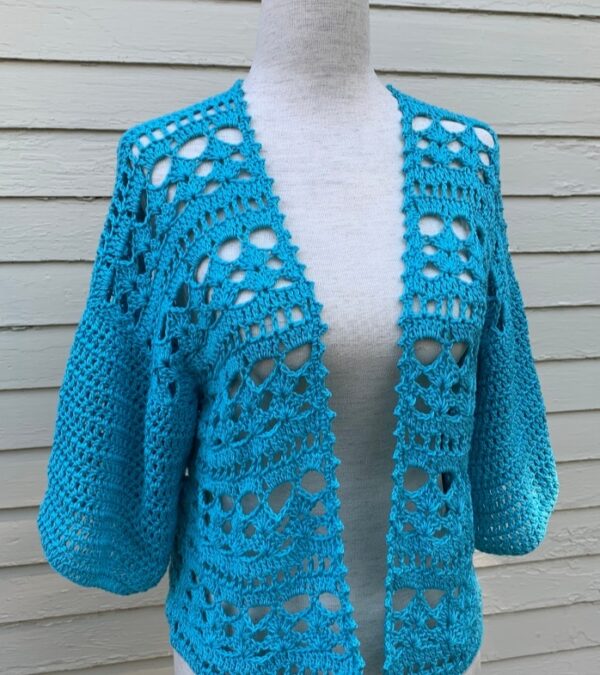
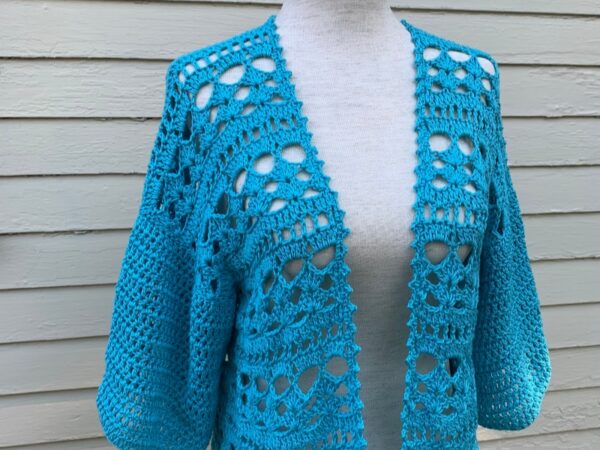
Summer Grace Cardigan
Crochet Lace Cardigan Pattern by KnitcroAddict
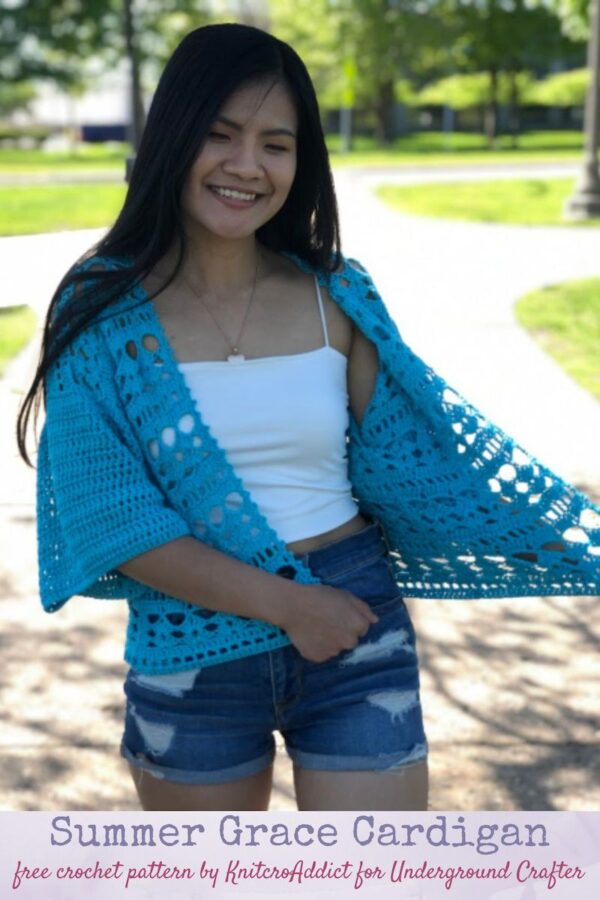
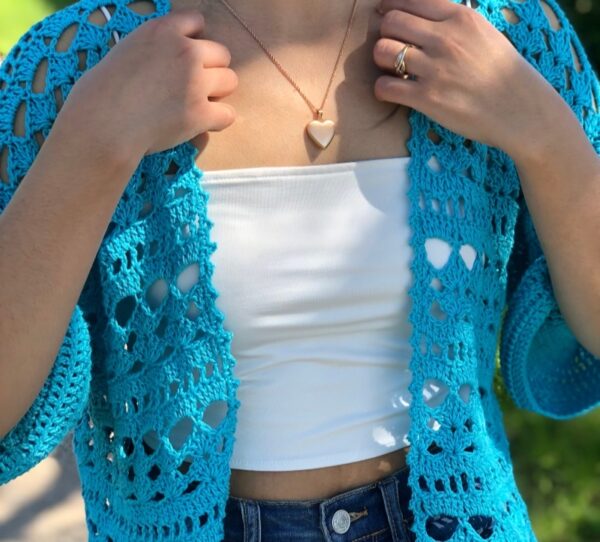
Hi everyone, I am so happy to be here sharing my free pattern on Underground Crafter. I started making garments a few years ago, and I have been obsessed with making cute tops for every season since then. This one is summer inspired and will make a perfect compliment to any summer outfit. Wear it over a tank top or as a little extra coverage over a bikini top.
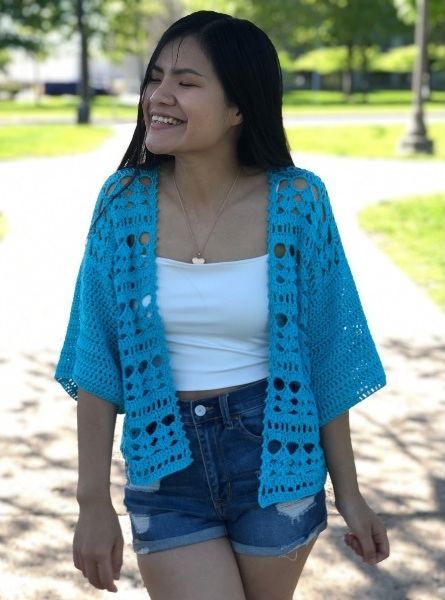
It is very beginner friendly and easy to make. I am including all your materials and yardage below. I would like to thank Yarnspirations for the yarn support on this Patons Grace yarn.
Materials
- #3 Light/DK weight yarn
- I used Patons Grace #3 Light/DK weight yarn in Aquifer: 136 yards per ball
- Crochet hook size 4 mm
- Scissors
- Yarn needle
- Stitch markers
Stitches Used & Code (US terms)
- ch = chain
- dc = double crochet
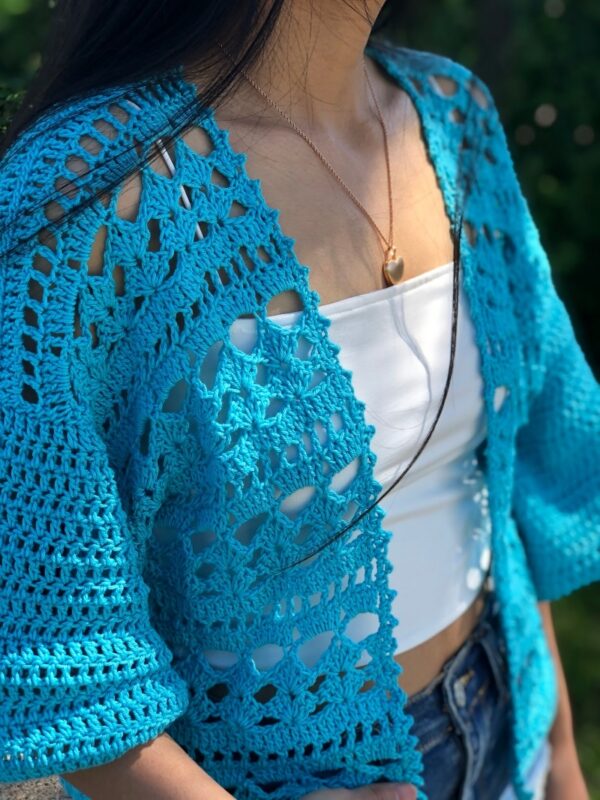
- Lace shell = 3 dc, ch 2, 3 dc, All into same st
- Picot = ch 3, sl st into the back bump of the first ch that you made
- REP = repeat
- RS = right side
- sc = single crochet
- sk = skip
- sl st = slip stitch
- sp = space
- st = stitch(es)
- WS = wrong side
- ” = inches
Notes:
- This pattern is made as US women’s sizes XS (S, M, L, XL, XXL)
- This pattern is made in 5 separate pieces and then sewn together
- This pattern is 6 rows repeat (Row 2 – 7)
- This pattern is in multiples of 6+3 chains
- In this picture I have demonstrated with size small
- A two-part video for this pattern is below. Scroll down for sizing, yarn requirements and the written pattern.


Yarn needed (In Yards): 735 (815, 895, 1,025, 1,105, 1,185)
Yarn needed (In balls) : 6 (6, 7, 8, 9, 9) Of Patons Grace
Gauge blocked: 18 dc X 7 rows = 4” (10 cm)
Measurements (After blocked)
- XS = 17.55″ (44.5 cm) Width across back X 18.85″ (48 cm) Long
- S = 20.22″ (51.5 cm) Width across back X 18.85″ (48 cm) Long
- M = 22.88″ (58 cm) Width across back X 18.85″ (48 cm) Long
- L = 25.55″ (65 cm) Width across back X 22.28″ (58 cm) Long
- XL = 28.22″ (71.5 cm) Width across back X 22.28″ (58 cm) Long
- XXL = 30.88″ (78.5 cm) Width across back X 22.28″ (58 cm) Long
Back Panel (Make 1)
- Row 1 (RS): ch 81(93, 105, 117, 129, 141), sk 3 ch (count as 1 dc), 1 dc into next ch and each ch across. – Total of 79 (91, 103, 115, 127, 139) dc
- Row 2 (WS): Turn, ch 4 (count as 1 dc and ch 1 sp ), sk next st, 1 dc into next st, *ch 1, sk next st, 1 dc into next st* REP from *TO* across (Make sure to make the last dc into the third ch/the turning ch ) – Total of 79(91, 103, 115, 127, 139) st including the ch sp
- Row 3: Turn, ch 3 (count as 1 dc), *1 dc into ch 1 sp, 1 dc into the dc st* REP from *TO* across (Make sure to make the last dc into the third ch/the turning ch ) – Total of 79( 91, 103, 115, 127, 139 ) dc
- Row 4: Turn, ch 3 (count as 1 dc), 2 dc into the first st/same ch 3 st, *sk 5 st, 1 Lace shell into next st* REP from *TO* until you have 6 st left, sk 5 st, 3 dc into last st (The last st is a third ch/the turning ch) – Total of 12(14, 16, 18, 20, 22) Lace shell st
- Row 5: Turn, ch 3 (count as 1 dc), 2 dc into the first st/same ch 3 st, 1 Lace shell into each ch 2 sp across, end with 3 dc into the third ch/the turning ch – Total of 12(14, 16, 18, 20, 22) Lace shell st
- Row 6: Turn, ch 1 (do not count as a st ), 1 sc into first st, ch 5, *1 sc into ch 2 sp, ch 5* REP from *TO* cross, end with 1 sc into the third ch/the turning ch – Total of 13(15, 17, 19, 21, 23) ch 5 sp
- Row 7: Turn, ch 3 (count as 1 dc), *5 dc into ch 5 sp, 1 dc into the sc st*, REP from *TO* across – Total of 79(91, 103, 115, 127, 139) dc
- REP Row 2 – 7: 4(4, 4, 5, 5, 5) more times. – Total of 31(31, 31, 37, 37, 37) rows
- *If you want a shorter cardigan, just rep row 2-7 less times. If you want a longer cardigan, just keep repeating row 2-7 more times to the desired length
- Row 32(32, 32, 38, 38, 38): REP row 2
- Row 33(33, 33, 39, 39, 39): REP row 3
Front Panels (Make 2)
- Row 1 (RS): ch 33(39, 45, 51, 57, 63), sk 3 ch (count as 1 dc), 1 dc into next ch and each ch across. – Total of 31(37, 43, 49, 55, 61) dc
- Row 2 (WS) : Turn, ch 4 ( count as 1 dc and ch 1 sp ), sk next st, 1 dc into next st, *ch 1, sk next st, 1 dc into next st* REP from *TO* across (Make sure to make the last dc into the third ch/the turning ch ) – Total of 31(37, 43, 49, 55, 61) st including the ch sp
- Row 3: Turn, ch 3 (count as 1 dc), *1 dc into ch 1 sp, 1 dc into the dc st* REP from *TO* across (Make sure to make the last dc into the third ch/the turning ch) – Total of 31(37, 43, 49, 55, 61) dc
- Row 4: Turn, ch 3 (count as 1 dc), 2 dc into the first st/same ch 3 st, *sk 5 st, 1 Lace shell into next st* REP from *TO* until you have 6 st left, sk 5 st, 3 dc into last st (The last st is a third ch/the turning ch ) – Total of 4(5, 6, 7, 8, 9) Lace shell st
- Row 5: Turn, ch 3 (count as 1 dc), 2 dc into the first st/same ch 3 st, 1 Lace shell into each ch 2 sp across, end with 3 dc into the third ch/the turning ch – Total of 4(5, 6, 7, 8, 9) Lace shell st
- Row 6: Turn, ch 1 (do not count as a st ), 1 sc into first st, ch 5, *1 sc into ch 2 sp, ch 5* REP from *TO* cross, end with 1 sc into the third ch/the turning ch – Total of 5(6, 7, 8, 9, 10) ch 5 sp
- Row 7: Turn, ch 3 (count as 1 dc), *5 dc into ch 5 sp, 1 dc into the sc st*, REP from *TO* across – Total of 31(37, 43, 49, 55, 61) dc
- REP Row 2 – 7: 4(4, 4, 5, 5, 5) more times. – Total of 31(31, 31, 37, 37, 37) rows
- *Reminder: If you want a shorter cardigan, just rep row 2-7 less times. If you want a longer cardigan, just keep repeating row 2-7 more times to the desired length (Make sure that you have the same length as the back panel)
- Row 32(32, 32, 38, 38, 38): REP row 2
- Row 33(33, 33, 39, 39, 39): REP row 3, cut the yarn and leave about 16-24″ (40.5-61 cm) long tail
Sleeves (Make 2)
- Row 1 (RS): ch 67(71, 75, 79, 83, 87), sk 2 ch (do not count as a st), 1 dc into next ch and each ch across – Total of 65(69, 73, 77, 81, 85) dc
- Row 2 (WS): Turn, ch 2 (do not count as a st), 1 dc into each st across – Total of 65(69, 73, 77, 81, 85) dc
- Row 3 – Row 17(17, 17, 19, 19, 19) REP Row 2
- This cardigan was designed to be short sleeves, but:
- If you want shorter sleeves, just rep row 2 less times.
- If you want longer sleeves, just keep repeating row 2 more to the desired length.
- The end of row 17(17, 17, 19, 19, 19) cut the yarn and leave about 40-50″ (101.5-127 cm) long tail
Joining the Pieces Together
Sew the back and 2 front panels
- Take the back and 2 front panels, place them with the correct side facing down, we will sew on the wrong side. Sew the front and back panel together. Using the tail that we left earlier, sew along the top of the shoulder area together using method of choice
Sew the sleeves to the main panel
- With your main panel correct side facing down. Place your sleeves correct side facing down and start sewing on the wrong side with your tail again. The shoulder seam of the main panel should be in the middle of the sleeves panel and even on both sides
Sew the sweater together
- Fold your cardigan in half at the shoulder seam. Cut a new strand of yarn 70-80″ long, enough to sew the side and the sleeve. Start sewing from the bottom up to the side seam until you reach the armpit and continue sewing the sleeve side seam until you reach the end of the sleeve and then weave all the ends
Crochet around the collar edges
- For the collar edges we’ll crochet into the end of each row ( sp for reference )
- Turn your cardigan right side out, Add new yarn into the bottom right front corner then, ch 1 (do not count as a st) , *( 1 sc, Picot, 1 sc, All into same sp )*, REP from *TO* into each sp up until you reach the corner of the shoulder seam, 1 sc into the corner of the shoulder seam, *Picot, 1 sc into next st*, REP from *TO* until you reach the other corner of the shoulder seam, 1 sc into the shoulder seam, *(1 sc, Picot, 1 sc, All into same sp) *, REP from *TO* into each sp down until you reach the end, sl st into the bottom corner.
- Cut the yarn and weave all the ends
So ironic this is featured because I just “accidentally” discovered her channel this week. I love her designs!! Thank you for featuring her!
If I were to change colors, where so you think I should change colors in the pattern? I have about 4 colors that compliment each other. Or so you think it is best using one color throughout?
When I change colors in patterns that were designed with a single color, I usually change at the end of a repeat.