
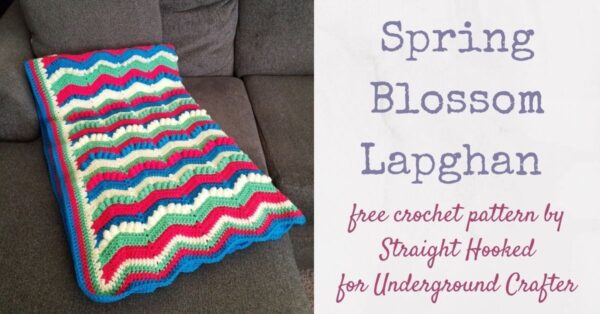
They say all good things must come to an end and today Malena from Straight Hooked is back for her final post in a series of three guest posts! Malena is sharing a beautiful crochet lapghan pattern called the Spring Blossom Lapghan.
This post contains affiliate links. I may receive compensation (at no added cost to you) if you make a purchase using these links. Photos in this post are © Malena Straight/Straight Hooked and are used with permission. Yarn for the sample was generously provided by Paintbox Yarns.
About Straight Hooked
Malena Straight from Straight Hooked Itaught herself to crochet in 2003 to make a blanket for her mother, and she has rarely put her hook down since. She crocheted well over a hundred blankets before realizing there was so much more you could do with crochet. After many years of encouragement from her husband, Malena launched her website in November of 2018 and began designing fashionable accessories for the modern trendsetter. She has had her biggest year of pattern releases in 2020, with 14 patterns published and still more to come. She loves creating gorgeous items using stitches that look complicated, but are easy to master. Malena’s goal is to write patterns that are easy to understand and fun to work up.
Malena’s signature stitch is the Dolphin Stitch. It’s a very versatile stitch that’s fun to make, works up quickly, and creates fabulous texture.
Show your support by following Malena on Website | Facebook | Instagram | Pinterest

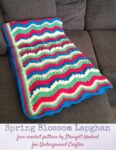
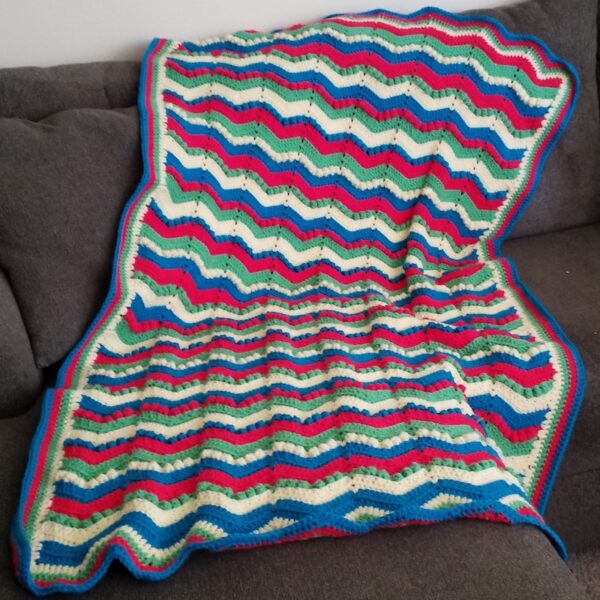
Spring Blossom Lapghan
Crochet Lapghan Pattern by Straight Hooked

Finished Size
- 36″ (91.5 cm) wide x 60″ (152.5 cm) long
Materials
- Bulky (5) yarn in 4 colors
- Color A: Paintbox Yarns Simply Chunky in 334 Kingfisher Blue ~600 yds (548.5 m)
- Color B: Paintbox Yarns Simply Chunky in 320 Banana Cream ~600 yds (548.5 m)
- Color C: Paintbox Yarns Simply Chunky in 325 Spearmint Green ~600 yds (548.5 m)
- Color D: Paintbox Yarns Simply Chunky in 351 Lipstick Pink ~600 yds (548.5 m)
- US Size J/10-6mm crochet hook
- Stitch Markers
- Finishing needle
- Scissors
Stitches Used
- bobble- bobble stitch- See Special Stitches below.
- ch- chain
- dc- double crochet
- dc3tog- double crochet 3 together- See Special Stitches below.
- sdc- standing double crochet- See Special Stitches below.
- R- row
- rs- right side
- st(s)- stitch(es)
- ws- wrong side
- yo- yarn over
Gauge
- 7dc x 3 rows= 2” (5 cm) square
Special Stitches Photo tutorials for all 3 special stitches are available in this blog post.
- bobble stitch: [yo, insert hook, yo, pull up a loop] 5 times in same st, yo, pull through all 6 loops on hook.
- double crochet 3 together (dc3tog): yo, insert hook, yo, pull up a loop, yo, pull through 2 loops, yo, insert hook in next st, yo, pull up a loop, yo, pull through 2 loops, yo, insert hook in next st, yo, pull up a loop, yo, pull through 2 loops, yo, pull through all 4 loops on hook.
- standing double crochet (sdc): Wrap yarn around hook 2x, insert hook, yo, pull up a loop, yo, pull through 2 loops, yo, pull through 2 loops.
Notes
- This pattern is written in US terms.
- The ch3 at the beginning of a row is counted as a dc.
- When counting stitches per row, the ch1 counts as a stitch
- Each row is labeled right side (rs) or wrong side (ws). Pay attention to the pattern as you will be working on the right side more than the wrong side.
- Your bobble stitches will always be on the right side of your project. If they try to pop backwards, just give them a little poke with your finger to make them face out on the right side.
- Each row will be labeled front loop only or back loop only. Each st in the row will be placed in either the front or back loop, as indicated. This creates the additional texture between bobble stitch rows.
Pattern instructions
- R1. Color A (rs) ch 130, dc in 4th ch from hook, dc in next 5 chs, dc3tog, *dc in next 6 chs, (dc, ch1, dc in next ch), dc in next 6 chs, dc3tog*, repeat from * to * 6 times, dc in next 5 chs, 2dc in last ch, turn. (127)
- R2. (ws) (Front loop only) Ch3, dc in base of turning ch, dc in next 5 sts, dc3tog, *dc in next 6 sts, (dc, ch1, dc in ch1 sp), dc in next 6 sts, dc3tog*, repeat from * to * 6 times, dc in next 5 sts, 2dc in top of ch3, turn. (127)
- R3. (rs) Color B (Back loop only) Ch3, dc in base of turning ch, dc in next 5 sts, dc3tog, *dc in next 6 sts, (dc, ch1, dc in ch1 sp), dc in next 6 sts, dc3tog*, repeat from * to * 6 times, dc in next 5 sts, 2dc in top of ch3, turn. (127)
- R4. Repeat R2
- R5. (rs) Color C (Back loop only) ch3, dc in base of turning ch, bobble, dc, bobble, dc, bobble, dc3tog, *bobble, dc, bobble, dc, bobble, dc, (dc, ch1, dc in ch1 sp), dc, bobble, dc, bobble, dc, bobble, dc3tog*, repeat from * to * 6 times, bobble, dc, bobble, dc, bobble, 2dc in top of ch3, finish off. (127)
- R6. (rs) attach Color D to top of ch3 from R5, using the standing double crochet (sdc), or you may choose to ch3, dc in base of turning ch, dc in next 5 sts, dc3tog, *dc in next 6 sts, (dc, ch1, dc in ch1 sp), dc in next 6 sts, dc3tog*, repeat from * to * 6 times, dc in next 5 sts, 2dc in top of ch3, turn. (127)
- R7. Repeat R2
- R8. Color A Repeat R3
- R9. Repeat R2
- R10. Color B Repeat R5
- R11. Color C Repeat R6
- R12. Repeat R2
- R13. Color D Repeat R3
- R14. Repeat R2
- R15. Color A Repeat R5
- R16. Color B Repeat R6
- R17. Repeat R2
- R18. Color C Repeat R3
- R19. Repeat R2
- R20. Color D Repeat R5
- R21. Color A Repeat R6
- R22. Repeat R2
- R23. Color B Repeat R3
- R24. Repeat R2
- R25. Color C Repeat R5
- R26-94. Repeat rows 6-25, ending at R14. Weave in all ends.
Border
- You can choose to border your blanket any way you wish. For my example, I chose to dc around using each color.
- Note from Underground Crafter: You can find 27 free crochet border patterns here.