

I’m so excited to share this beginner-friendly quilted tote bag pattern as part of the Christmas in July Make Along. This simple tote is perfectly sized for daily adventures and it makes a great gift. Using the stack and slice method, each bag is completely unique, too.

This post contains affiliate links. I may receive compensation (at no added cost to you) if you make a purchase using these links. I am a Baby Lock Brand Ambassador and this post is part of our ongoing collaboration. All opinions and thoughts are my own. Additional supplies for this project were provided by AdKnits, Cricut, Fairfield World, Michael Miller Fabrics, and Sewing by Sarah.
Early this year, my Stack and Slice Quilted Tote pattern debuted in the new digital magazine, We Like Sewing.

I love how it turned out and this pattern is so easy (or should I say “sew easy”) to make, too. I’ve updated the pattern for the Stack and Slice Quilted Tote for the Christmas in July Make Along to include more photos and a video with step-by-step instructions.

Quilted tote bags are fun to make. If you end up wanting to make another, check out my free sewing pattern for the Quilted Tote here.
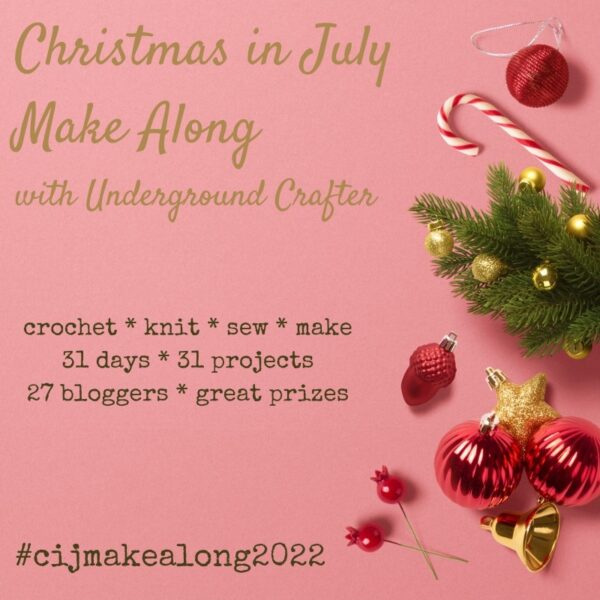
Scroll down to get the free pattern for the Stack and Slice Quilted Tote. This is the eleventh pattern in the fourth annual Christmas in July Make Along with Underground Crafter. You can get all the details, including links to all 31 included patterns, and enter the giveaway for your chance to win a great prize in this blog post. Each pattern can be finished in less than a day! To join the Christmas in July Make Along:
- Sign up for the Underground Crafter newsletter to get regular updates, including links to new Make Along patterns, each week. When you sign up, you’ll also get access to my subscriber vault which includes exclusive free PDF patterns, a coupon code for your choice of any crochet or knitting pattern or ebook from my Ravelry shop, and coupon codes from other indie designers and crafts businesses.
- You can join in by crocheting, knitting, sewing, or making the projects as you have time.
- Share your progress and post pictures of your finished projects. Tag your projects and posts #CIJMakeAlong2022 on all social media.
- If you’d like to chat with other crafters, join the Underground Crafters Facebook group.
- If you need more handmade holiday inspiration, check out the weekly roundups with even more free patterns for gift ideas.
- By the end of the Make Along, you’ll have up to 31 awesome projects. Get ready for the handmade holiday season while having fun with us!
- Use this button below on your Ravelry project pages or elsewhere on social media. Right click (on desktop) or tap and hold (on mobile) to save.
Stack and Slice Quilted Tote
Quilted Tote Bag Sewing Pattern by Underground Crafter

The stack and slice method is an easy way to make completely unique quilt blocks for customized projects. It’s great with planned colors or a scrappy look. This quilted tote bag pattern is the perfect size for your daily adventures and it also makes a great gift.
Continue on for the free sewing pattern, or buy the ad-free PDF in my Payhip shop.
Finished Size
- 11.5” (29 cm) wide x 14” (35.5 cm) tall, not including straps.
Tools
- Sewing machine with free arm, such as the Baby Lock Jubilant or Brilliant.
- Cricut 45 mm rotary cutter, acrylic ruler, and self-healing cutting mat.
- Fabric shears or thread snips.
- Hera marker or fabric marker, pen, or chalk.
- Quilting pins or fabric clips.
- Cricut EasyPress Mini and Sewing by Sarah Wool Press ‘n Lock Tiles™, or iron and iron safe surface.
- Basic sewing supplies (seam ripper, etc.)
- Optional: 1/4″ quilting presser foot with guide for seaming and walking foot for quilting through layers
Materials
- Universal sewing needle.
- 100% cotton thread in coordinating or contrasting colors for bobbin and top thread.
- Fairfield World Quilter’s 80/20 batting or any cotton or cotton blend batting – 1/2 yard.
- 100% cotton quilting fabric.
- Color A – 1/4 yard – Michael Miller Fabrics CoCo CX9316-CAPP-D Cappuccino (brown)
- Color B – 1/4 yard – Michael Miller Fabrics Garden Pindot CM1065-BLAC-D Black (black)
- Color C – 1/3 yard – Michael Miller Fabrics Garden Pindot CX1065-WINE-D Wine (red)
- Color D – 1/2 yard – Michael Miller Fabrics CoCo CX9316-SAND-D Sand (sand)
- Michael Miller Fabrics are available at your local quilt shop or online at Fat Quarter Shop or Amazon.
- Muslin or “ugly” fabric for backing – 1/2 yard.
- Optional: Gift tag by AdKnits.
Pattern Notes
- If you’re new to rotary cutting, watch the video below to see how to safely cut fabric and batting with a rotary cutter, acrylic ruler, and self-healing mat.
- If you can’t see the video tutorial above for cutting with a rotary cutter, click HERE to watch it on YouTube.
- Color A, B, and C are used for the blocks. Color C is also used for the straps. Color D is used for the lining.
- A video showing how to assemble the bag is available at the bottom of the pattern.

Pattern Instructions
Prepare Fabric
- Press fabric, batting, and “ugly” fabric/muslin to remove wrinkles.

Stack and Slice Blocks
- Cut 6 squares each measuring 5.5” (14 cm) square from Color A, Color B, and Color C. (18 squares total)
- Stack your squares in 6 groups as follows: With right sides facing up, position Color C on bottom, Color B in the middle, and Color A on top. Each group will have 3 squares, 1 in each color.
- Slice your squares as follows: Position acrylic ruler and slice through group of 3 squares with rotary cutter twice at intervals of your choosing. Both slices should move from bottom to top in straight lines. Keep each slice at least 1/2″ wide at narrowest point for ease in seaming.

- Separate slices. Keep left slice pile in same position. For middle slice pile, move Color B to top position. For right slice pile, move Color C to top position.

- Starting with top layer, sew 3 slices together into a block with 1/4” seam allowance. Continue by sewing middle layer block and then bottom layer block together with 1/4” seam allowance.

- Repeat stack and slice process until you have 18 blocks, each with 3 colors.
- Press seams on each block towards dark color.

- Trim blocks so that each measures 4-1/2” x 5-1/2” (11.5 cm x 14 cm).
- Sew first 3 blocks together to form row with 1/4″ seam allowance. Press seams on each block.
- Arrange blocks for front in 3 rows of 3 blocks so that long edges will be seamed together.

- Sew together 3 rows of 3 blocks for front with 1/4” seam allowance.

- Press seams on each row flat.
- Repeat for back.
Quilt Front and Back of Tote
- Trim front and back pieces to 12-1/2” x 15-1/2” (32 cm x 39.5 cm), or to same size.
- Cut 2 pieces of batting and 2 pieces of muslin or “ugly fabric” to 13-1/2” x 16-1/2” (34.5 cm x 42 cm), or to 1” (2.5 cm) larger on all sides than tote front and back pieces.

- Make a “quilt sandwich” for the front piece as follows: Position muslin on bottom, batting in middle, and front piece on top with right side facing up…

- Pin or clip layers together…

- With acrylic ruler, mark quilting lines using Hera marker or fabric pen.

- Repeat quilt sandwich for the back piece.
- Quilt through all 3 layers of front piece and back piece as desired.

- Trim front and back pieces to 12” x 14-1/2” (30.5 cm x 37 cm), or to same size.

- Position front and back pieces with right sides together.

- Starting at long edge, sew along 3 sides with 1/4” seam, using reinforcement stitches at start and end.

- Clip bottom corners.

- Turn right side out.

Prepare Bag Straps
- Cut 2 strips, each 5-1/2” (14 cm) wide, from Color C. Trim each strip to 29” (73.5 cm).
- Fold over short edge of first strip with right sides together, and sew along long edge with 1/4” seam.

- Turn right side out.

- Press wrinkles out of strip and fold over at short edge again, covering seam. Sew along long edge with 1/4” top stitch seam.

- Repeat for second strap.
- Trim straps to 28” (71 cm) long or desired length.
Prepare Lining
- Cut 2 pieces in Color D to 12” x 14-1/2” (30.5 cm x 37 cm), or to size of quilted tote front and back pieces.

- With right sides together, and starting at long edge, sew along 3 sides with 1/4” seam, leaving a 4” (10 cm) opening on one of the long side seams and using reinforcement stitches at start and end. Clip bottom corners. Do not turn right side out.

Assemble Tote
- Starting with first strap, pin short edges of first strap on front of tote, being careful not to twist strap. Repeat for second strap on back of tote.

- With sewing machine free arm, attach straps by sewing 1/4” seam around top edge, using reinforcement stitches at start and end.


- Position tote with straps right side out on inside of liner. Liner wrong side is out, with right sides facing tote right sides.

- With sewing machine free arm, attach liner to tote by sewing 1/2” seam around top edge, using reinforcement stitches at start and end.
- Turn lining right side out and pull tote out through lining opening. Sew lining opening closed using reinforcement stitches at start and end.

- Push liner inside of tote.

- Optional: With sewing machine free arm, sew a decorative 1/4” topstitch through tote and liner working around top edge with right side facing out.
- Trim threads and press.
- A video showing bag assembly is available below.
- If you can’t see the Stack and Slice Quilted Tote video above, click HERE to watch it on YouTube.