

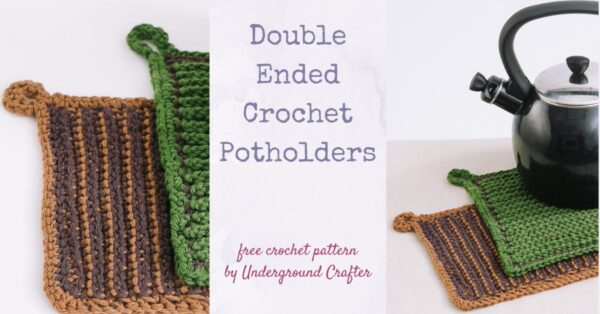
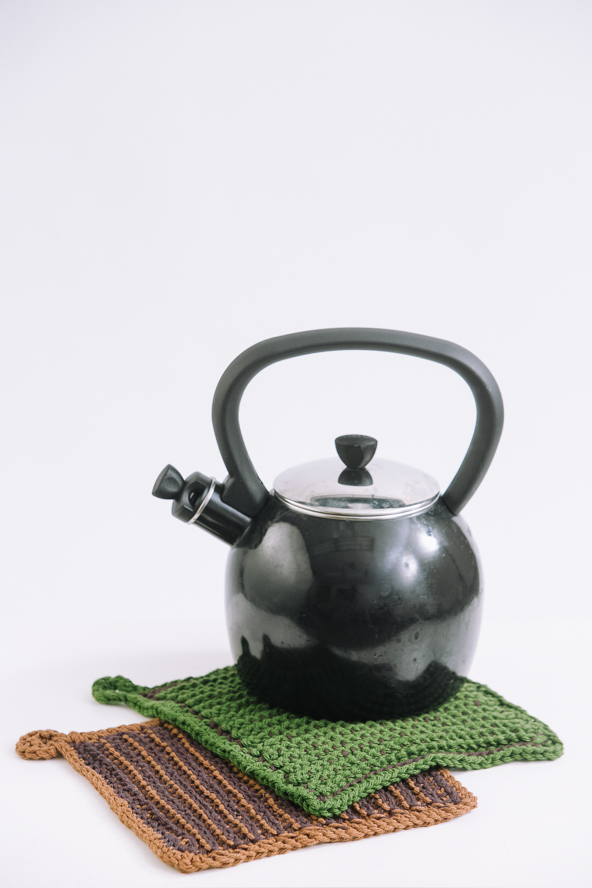
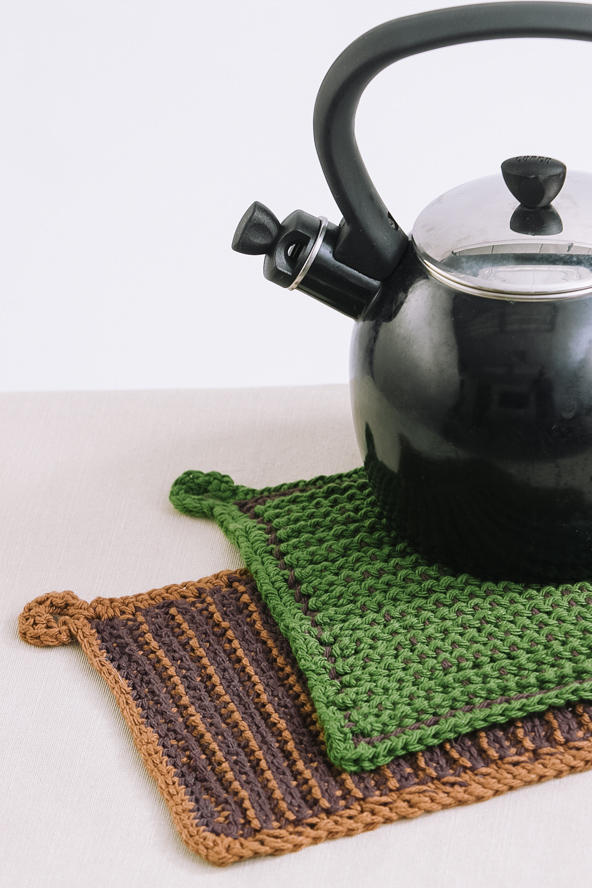
Double ended crochet, also known as double ended Tunisian crochet, is a fun technique and today’s free pattern is the perfect introduction! The double ended crochet technique makes a thicker potholder that can also be used as a hotpad. The Double Ended Crochet Potholders use two different stitches and I’ve included video tutorials for double ended crochet newbies.
This post contains affiliate links. I may receive compensation (at no added cost to you) if you make a purchase using these links. Yarn for the sample was generously provided by Lion Brand.
A few years back, I was on a freelance design kick and I designed several patterns for I Like Crochet when it was launching. It has since grown to include over 700 patterns and is by far my favorite digital crochet magazine!
I also did several tutorials for them, including a photo tutorial for basic double ended crochet stitches along with this pattern for the Double Ended Crochet Potholders.
I actually made a video tutorial for the stitches used in Potholder A, but never published it… until now! If you’re new to double ended crochet, the video will guide you through the basics. If you’re a double ended crochet pro, this is one of those patterns you can work on as you watch your favorite streaming shows or while waiting at the doctor’s office.
This post is part of the third annual Countdown to Christmas I’m sharing with folks signed up for the Crochet Along updates and the Underground Crafter newsletter.

Each day through December 24, 2025, I’m sharing a 2-day free coupon code straight to your inbox for one of my crochet patterns that is perfect for winter or holiday crafting. The Complementary Colors Beanie is the December 13 featured pattern. Sign up now to get access to the free PDF! (When you sign up for this list, you get regular updates from Underground Crafter, and an update email about every pattern for the CALs I host as those patterns are released. When you sign up, you’ll also get access to my subscriber vault which includes exclusive free PDF patterns, a coupon code for your choice of any crochet or knitting pattern or ebook from my Ravelry shop, and coupon codes from other indie designers and crafts businesses.)
If you make your own Double Ended Crochet Potholders, I’d love to see them! Share your progress and questions by tagging me on Bluesky as @UndergroundCrafter, Facebook as @UndergroundCrafter, or on Instagram as @ucrafter. You can also share a picture in the Underground Crafters Facebook group. Sign up for my weekly newsletter and get a coupon code for your choice of one of my premium patterns and private access to my vault of subscriber goodies. Plus, you’ll never miss one of my free patterns again!
Add the Double Ended Crochet Potholders to your favorites or queue, or buy the ad-free PDF on Ravelry.

Double Ended Crochet Potholders
Double Ended Tunisian Crochet Pattern by Underground Crafter


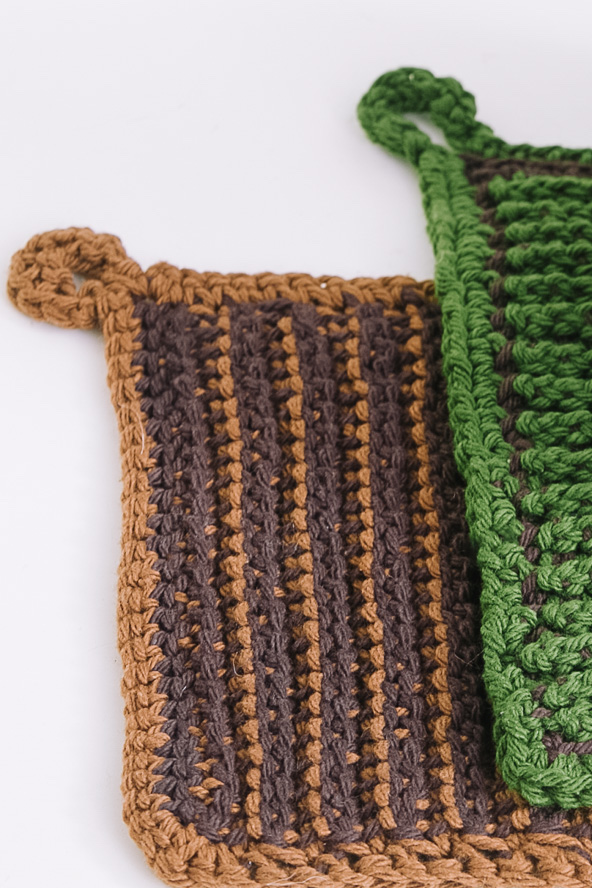
This unique set of potholders is the perfect introduction to double ended crochet, also known as double ended Tunisian crochet. The double ended technique makes a thicker potholder that can also be used as a hotpad.
Finished Size
- Potholders: Approximately 7” (18 cm) x 7.5” (19 cm) after blocking.
Materials
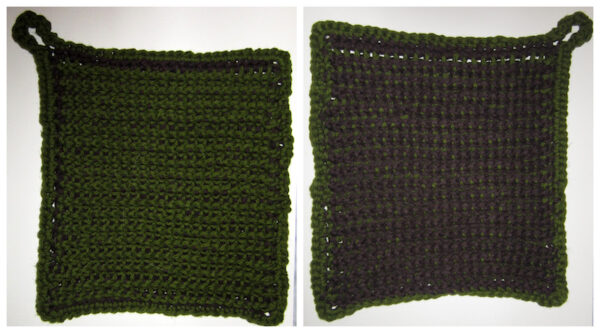
- Approximately 45 yd (41 m) in each of two colors in any medium weight, 100% cotton yarn for each potholder. I used Lion Brand Cotton yarn, which is now discontinued, in 152 Espresso (MC), 136 Clove (CA) and 180 Evergreen (CB).
- Denise Crochet US Size J-10/6 mm double-ended crochet hook, or any size needed to obtain correct gauge.
- Yarn needle.
Gauge
- 16 sts x 32 rows = 4” (10 cm) in Tss before blocking. Exact gauge is not critical for this project.
Abbreviations Used in This Pattern
- BL – back loop only – Fiber Flux has a helpful video tutorial for identifying the back loop here.
- CA – Color A
- CB – Color B
- ch – chain
- MC – Main Color
- Rnd(s) – Round(s)
- sc – single crochet
- sl st – slip stitch
- st(s) – stitch(es)
- Tfs – Tunisian full stitch – Insert hook under horizontal bar (between 2 vertical bars), yo and draw up loop onto hook. Winding Road Crochet has a helpful video tutorial for this stitch here.
- Tss – Tunisian simple stitch – Insert hook under next vertical bar, yo and draw up loop onto hook. A helpful video tutorial for this stitch is available below.
- If you can’t see the video above demonstrating the Tunisian simple stitch, watch it on YouTube.
- yo – yarn over
- * Repeat instructions after asterisk as indicated.
- [] Repeat instructions between brackets as indicated.
Pattern Notes
- A version of this pattern was originally published in the October, 2014 issue of I Like Crochet. Get instant access to 700+ patterns free with your subscription.
- Potholders are worked flat in rows using double-ended crochet. Borders are crocheted in the round using standard crochet.
- Always skip the first vertical bar (below the first loop on the hook) at beginning of each row.
- A helpful video tutorial demonstrating how to do the set up row and the double ended crochet version of the Tunisian simple stitch is available above in the Pattern Abbreviations section.
- If you are new to blocking, find helpful descriptions and tutorials here.
Pattern Instructions
Potholder A
- With MC, ch 25.
- Set Up Row: Turn, skip first ch, [insert hook in next ch, yo and pull up a loop] across. (25 sts)
- Row 1: Slide loops to other hook, turn. With CA, ch 1, [yo and draw through 2 loops] across.
- Row 2: Tss in each vertical bar across.
- Row 3: Slide loops to other hook, turn. With MC, ch 1, [yo and draw through 2 loops] across.
- Row 4: Repeat Row 2.
- Repeat Rows 1-4, 11 times, or until Potholder A measures approximately 6.5”/16.5 cm (or desired length), ending after Row 3. Fasten off CA.
- Final Row: *Insert hook under next vertical bar as for Tss, yo and draw up loop onto hook,** yo and draw through both loops; repeat from * across to last vertical bar, repeat from * to **, changing to CA with final yo through last 2 loops, fasten off MC.
Potholder A Border
- Rnd 1: Ch 1, turn and begin working along side of project (see video below), sc in side of each row across to last row, 2 sc in side of last row, turn and begin working along foundation ch, *2 scBL in first st, scBL in each st across to last st, 2 scBL in last st,** turn and begin working along side of project, 2 sc in side of first row, sc in side of each row across to last row, 2 sc in side of last row, turn and begin working along Final Row, repeat from * to **, ch 8 to form loop, turn and sc in same st as first st of Rnd.
- If you can’t see the video tutorial above demonstrating how to crochet around the side or edge of your project, watch it on YouTube.
- Rnd 2: Turn, sc in each ch, join with sl st to next sc. Fasten off.
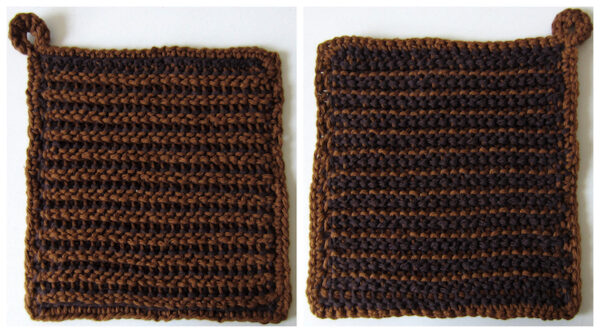
Potholder B
- With MC, ch 25.
- Set Up Row: Turn, skip first ch, [insert hook in next ch, yo and pull up a loop] across. (25 sts)
- Row 1: Slide loops to other hook, turn. With CB, ch 1, [yo and draw through 2 loops] across.
- Row 2: Tfs under each horizontal bar across to last bar, skip last horizontal bar, Tss in last vertical bar.
- Row 3: Slide loops to other hook, turn. With MC, ch 1, [yo and draw through 2 loops] across.
- Row 4: Repeat Row 2.
- Repeat Rows 1-4, 14 times, or until Potholder B measures approximately 6.5”/16.5 cm (or desired length), ending after Row 3. Fasten off CB.
- Final Row: *Insert hook under next horizontal bar as for Tfs, yo and draw up loop onto hook, yo and draw through both loops; rep from * across to last horizontal bar, insert hook under last vertical bar as for Tss, yo and draw up loop onto hook, change to CB with final yo through last 2 loops. Fasten off MC.
Potholder B Border
- Repeat instructions for Potholder A Border.
Finishing
- With yarn needle, weave in ends.
- Spray block (see Pattern Notes) to measurements.