

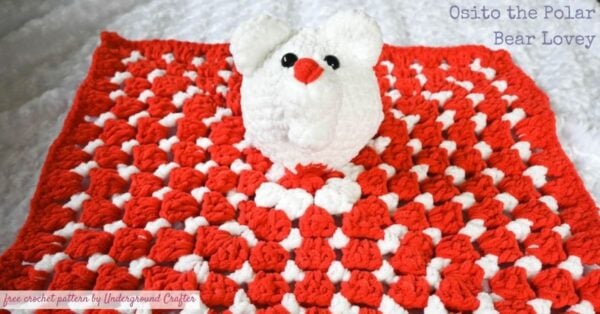
I’m sharing Osito the Polar Bear Lovey crochet pattern. This adorable lovey uses a bulky polyester yarn and it is so soft! It also works up fast. My version uses safety eyes, but I’ve included instructions if you prefer to add embroidery eyes.
This post contains affiliate links. I may receive compensation (at no added cost to you) if you make a purchase using these links. Yarn for the sample was generously provided by Herrschners. Clover USA provided additional supplies.
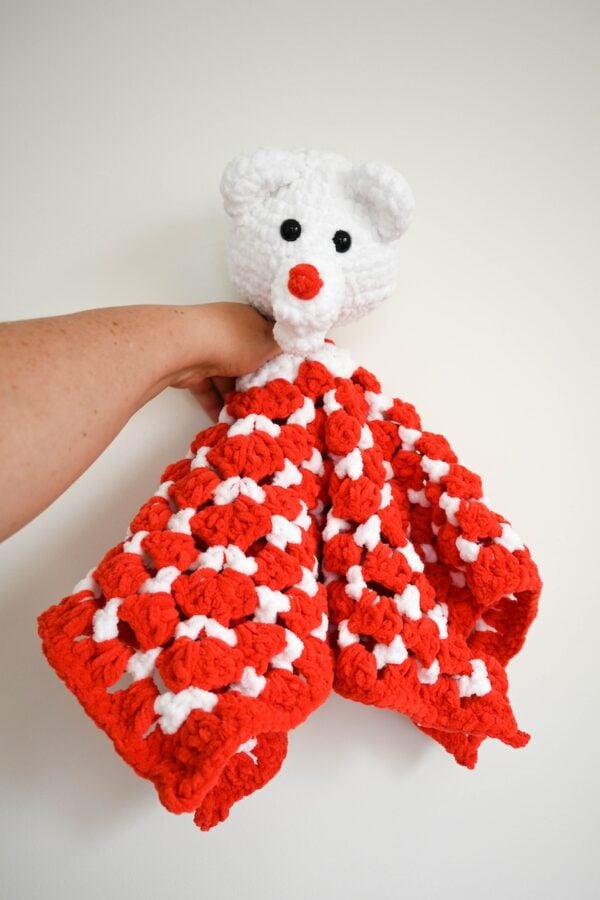
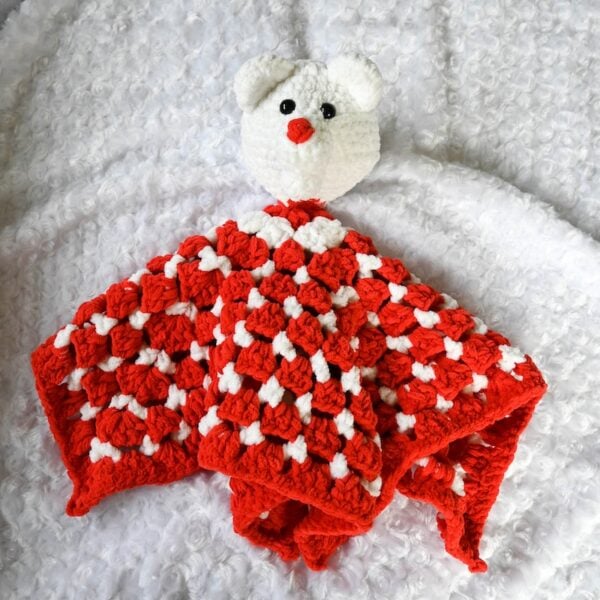
My version uses white and red yarns (more specifically, Polar and Ruby in Herrschners Cheerful Fleece yarn), so it’s perfect for Christmas or Valentine’s Day or any day. You could also choose a different CB to coordinate with a kiddo’s room or favorite color.
You should be able to get two loveys out of two skeins of Herrschners Cheerful Fleece.
Scroll down for the free Osito the Polar Bear Lovey crochet pattern. If you make your own Osito the Polar Bear Lovey, I’d love to see it! Share your progress and questions by tagging me on Bluesky as @UndergroundCrafter, Facebook as @UndergroundCrafter, or on Instagram as @ucrafter. You can also share a picture in the Underground Crafters Facebook group. Sign up for my weekly newsletter and get a coupon code for your choice of one of my premium patterns and private access to my vault of subscriber goodies. Plus, you’ll never miss one of my free patterns again!
Add Osito the Polar Bear Lovey to your favorites or queue, or buy the ad-free PDF on Ravelry.

Osito the Polar Bear Lovey
Bear Lovey Crochet Pattern by Underground Crafter
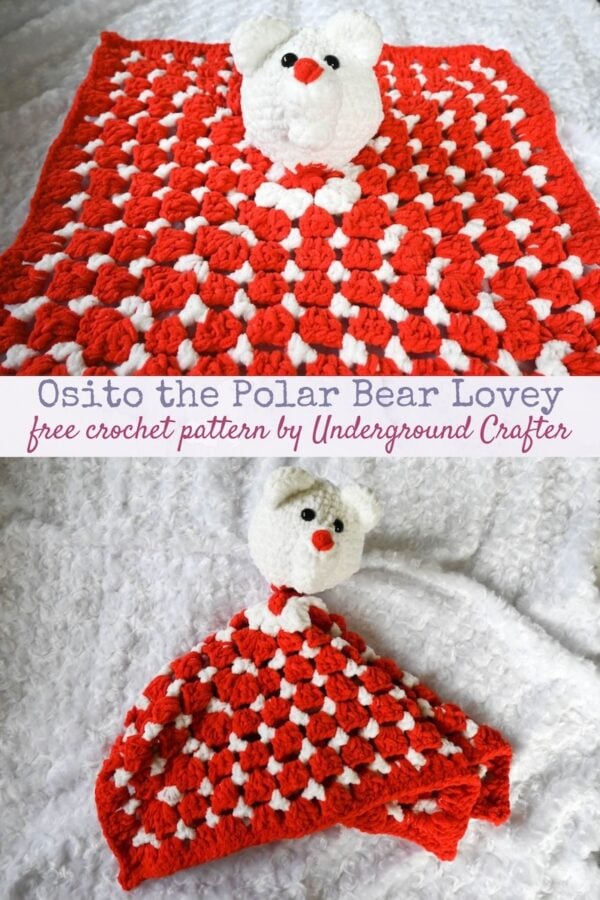



This polar bear lovey crochet pattern works up quickly and is oh so plush in bulky weight polyester yarn! Substitute embroidered eyes for safety eyes for young children.
Finished Size
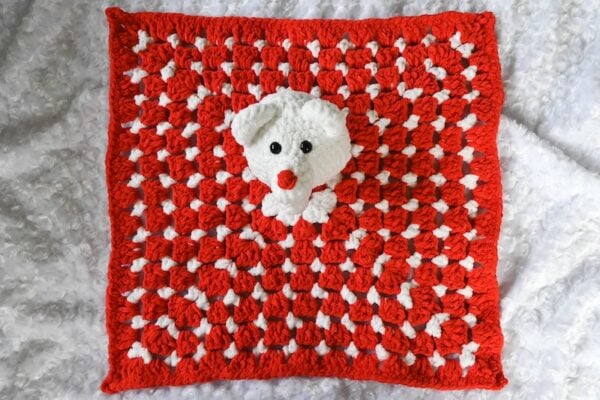
- One Size: Blanket measures 20″ (51 cm) square.
Materials
- Herrschners Cheerful Fleece yarn (100% polyester, 10.5 oz/300 g, 262 yd/240 m) – 1 skein each in Polar (CA) and Ruby (CB), or approximately 105 yd (96 m) in CA and 135 yd (123.5 m) in CB in any bulky weight, polyester yarn.
- Clover Amour US Size J-10/6 mm crochet hook, or any size needed to obtain correct gauge. Clover Amour original hooks are available online at Herrschners | Amazon.
- Clover Amour US Size 7 mm crochet hook, or any size needed to obtain correct gauge. Clover Amour jumbo hooks are available online at Herrschners | Amazon.
- Stitch marker.
- Yarn needle.
- Fiber filling. Available online on Herrschners | Amazon.
- Optional: 14 mm black safety eyes. Available online at Herrschners | Amazon.
Gauge
- With smaller hook, through Rnd 7 in pattern for Head = 4.5” (11.5 cm) diameter. Exact gauge is not critical for this project.
- With larger hook, 11 sts (9 dc + 2 ch-1 sp) in Rnd 7 in pattern for Blanket = 4” (10 cm) diameter. Exact gauge is not critical for this project.
Abbreviations Used in This Pattern
- CA – Color A
- CB – Color B
- ch – chain
- dc – double crochet
- invdec – invisible decrease – Insert hook in front loop only of each of next 2 sts, yo and draw up a loop, yo and draw through 2 loops. A video tutorial for this decrease is available below.
- If you can’t see the invdec video above, watch it on YouTube.
- pm – place stitch marker
- Rnd(s) – Round(s)
- sc – single crochet
- sl st – slip stitch
- sp – space
- st(s) – stitch(es)
- yo – yarn over
- * Repeat instructions after asterisk as indicated.
- [] Repeat instructions within brackets as indicated.
Pattern Notes
- All parts are crocheted in the round with the right (front) side facing up unless otherwise mentioned.
- Oombawka Design Crochet has helpful photo and video tutorials for the magic adjustable ring here.
- Simply Hooked has a helpful video tutorial for embroidering baby safe eyes onto crochet animals here.
- A helpful video tutorial for seaming with the whipstitch is available below.
- If you can’t see the whipstitch video above, watch it on YouTube.
- Jess Huff has a helpful video tutorial for embroidery a nose onto crochet animals here.
- A helpful video for seaming with the single crochet is available below.
- If you can’t see the single crochet seam video above, watch it on YouTube.
- To adjust the size of the blanket, add or remove repeats of Rnds 6-7.
Pattern Instructions
Head
- With CA and smaller hook, start with the magic adjustable ring (see Pattern Notes).
- Rnd 1: Ch 1, 6 sc in ring, tighten magic ring to close, pm in last st to mark position, move marker up each rnd. (6 sts)
- Rnd 2: 2 sc in each st around. (12 sts)
- Rnd 3: [2 sc in next st, sc in next st] around. (18 sts)
- Rnd 4: [2 sc in next st, sc in next 2 sts] around. (24 sts)
- Rnd 5: [2 sc in next st, sc in next 3 sts] around. (30 sts)
- Rnd 6: [2 sc in next st, sc in next 4 sts] around. (36 sts)
- Rnd 7: [2 sc in next st, sc in next 5 sts] around. (42 sts)
- Rnd 8: Sc in each st around.
- Rnds 9-13: Rep Rnd 8, 5 times.
- Remove hook and pm in loop to prevent unraveling. If using safety eyes, position approximately 5 Rnds above (Rnd 9), secure with washers on inside of head. Alternatively, embroider baby safe eyes in the same relative position using yarn or embroidery floss (see Pattern Notes).
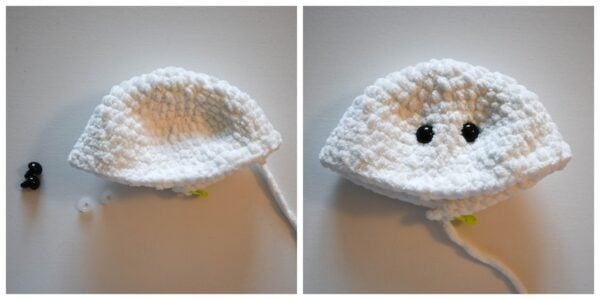
- Return smaller hook to loop and pm in last st to mark position, move marker up each rnd.
- Rnd 14: [Invdec, sc in next 5 sts] around. (36 sts)
- Rnd 15: [Invdec, sc in next 4 sts] around. (30 sts)
- Rnd 16: [Invdec, sc in next 3 sts] around. (24 sts)
- Rnd 17: [Invdec, sc in next 2 sts] around. (18 sts)
- Rnd 18: [Invdec, sc in next st] around. (12 sts)
- Fasten off CA.
Top Muzzle
- With CA and smaller hook, start with the magic adjustable ring (see Pattern Notes).
- Rnd 1: Ch 1, 6 sc in ring, tighten magic ring to close, pm in last st to mark position, move marker up each rnd. (6 sts)
- Rnd 2: 2 sc in each st around. (12 sts)
- Rnd 3: Sc in each st around.
- Rnd 4: Repeat Rnd 3 once.
- Fasten off CA with long yarn tail for seaming, approximately 12″ (30.5 cm) long.
Bottom Muzzle
- With CA and smaller hook, start with the magic adjustable ring (see Pattern Notes).
- Rnd 1: Ch 1, 6 sc in ring, tighten magic ring to close, pm in last st to mark position, move marker up each rnd. (6 sts)
- Rnd 2: Sc in each st around.
- Rnd 3: Repeat Rnd 2 once.
- Fasten off CA with long yarn tail for seaming, approximately 12″ (30.5 cm) long.
Ears – Make 2
- With CA and smaller hook, start with the magic adjustable ring (see Pattern Notes).
- Rnd 1: Ch 1, 6 sc in ring, tighten magic ring to close, pm in last st to mark position, move marker up each rnd. (6 sts)
- Rnd 2: 2 sc in each st around. (12 sts)
- Rnd 3: [2 sc in next st, sc in next st] around. (18 sts)
- Fasten off CA with long yarn tail for seaming, approximately 18″ (46 cm) long.
Assemble Head
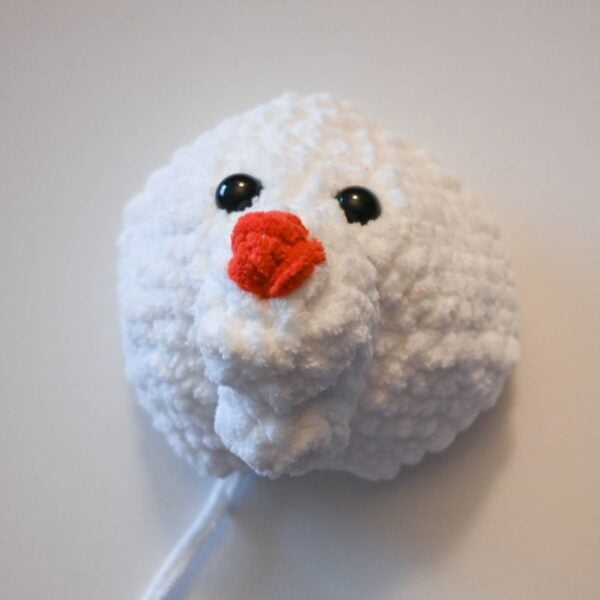
- Stuff Top and Bottom Muzzles thoroughly with fiber filling. Thread yarn needle with CA from long yarn tail at end of Top Muzzle. Position Top Muzzle centered between eyes. (Optional: Pin in place using pins or stitch markers.) With yarn needle, join Top Muzzle to face with whipstitch seam (see Pattern Notes). Weave in yarn tails on inside of head. Thread yarn needle with CA from long yarn tail at end of Bottom Muzzle. Position Bottom Muzzle on underside of Top Muzzle. (Optional: Pin in place using pins or stitch markers.) With yarn needle, join Bottom Muzzle to Top Muzzle with whipstitch seam (see Pattern Notes). Weave in yarn tails on inside of head.

- Thread yarn needle with approximately 18″ (46 cm) in CB. Embroider Nose on Top Muzzle using CB (see Pattern Notes). Weave in yarn tails on inside of Head.
- *Fold first Ear at diameter. Thread yarn needle with long yarn tail from end and whipstich seam (see Pattern Notes) along curved edge. Do not weave in yarn tail yet.

- Fold first Ear again at seamed (straight) edge. With yarn needle, weave through first few stitches, and whipstich seam (see Pattern Notes) through 2 center stitches at fold to curve first Ear. Do not weave in ends yet.
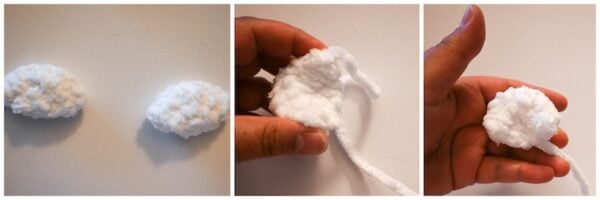
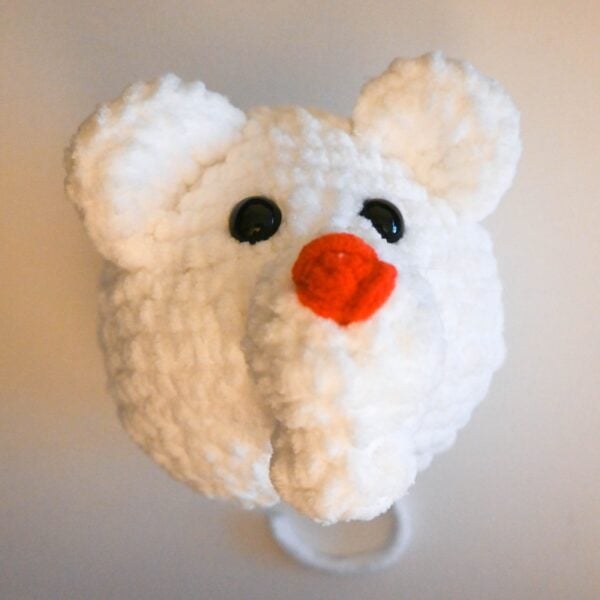
- Position first Ear on Head with edge of Ear centered above eye as shown in the photo below. (Optional: Pin in place using pins or stitch markers.) With yarn needle, join first Ear to Head with whipstich seam (see Pattern Notes). Weave in yarn tails on inside of Head. Repeat from * for second Ear.
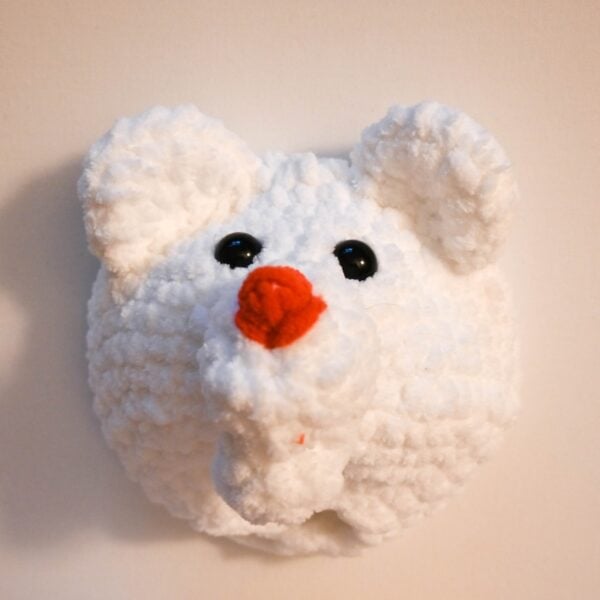
- Stuff Head firmly with fiber filling.
Seam Head Closed
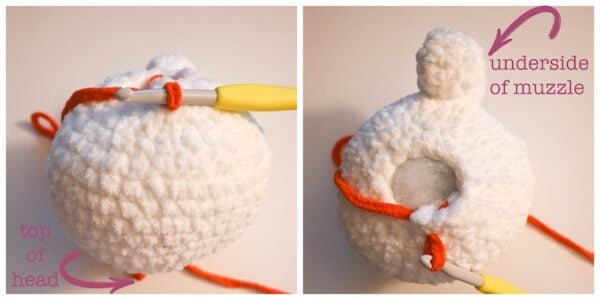
- Rnd 1: With bottom opening of Head facing you and with smaller hook, join CB with sl st to center back of opening as shown in collage below, ch 1, sc in same st and each of next 11 sts. (12 sts)
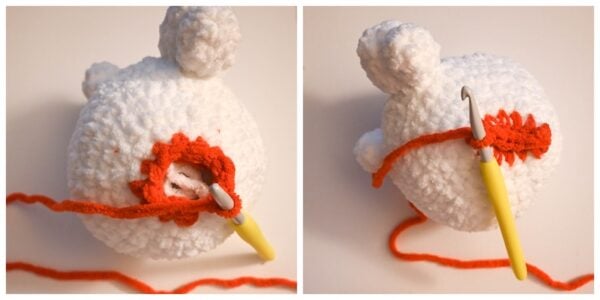
- Rnd 2: Lining up 6 sts on each side of opening, join with sc seam (see Pattern Notes), do not fasten off. (6 sts)
Continue Blanket
- Rnd 3: Continuing with smaller hook, and turning to other side of sc join, ch 1, 3 dc in same st, skip 4 sts, ch 2, [(3 dc, ch 2)] twice in next st, turning to other side of sc join, skip 4 sts, 3 dc in first st, ch 2, join with sl st to top of first dc, fasten off CB.

- Rnd 4: With larger hook, join CA with sl st to any ch-2 sp, ch 1, 3 dc in same sp, [ch 1, skip 3 sts, (3 dc, ch 2, 3 dc) in next ch-2 sp] 3 times, ch 1, skip 3 sts, 3 dc in first ch-2 sp, ch 2, join with sl st to top of first dc, fasten off CA.
- Rnd 5: With larger hook, join CB with sl st to any corner ch-2 sp, ch 1, 3 dc in same ch-2 sp, *[ch 1, sk 3 sts, 3 dc in next ch-1 sp] across to corner ch-2 sp, ch 1,** (3 dc, ch 2, 3 dc) in next ch-2 sp, repeat from * around, ending last repeat at **, 3 dc in first ch-2 sp, ch 2, join with sl st to first dc, fasten off CB.
- Rnd 6: With larger hook, join CA with sl st to any corner ch-2 sp, ch 1, sc in same sp, *[ch 3, skip 3 sts, sc in ch-1 sp] across to last 3 sts before ch-2 sp, ch 3, skip 3 sts,** (sc, ch 2, sc) in ch-2 sp; repeat from * around, ending last repeat at **, sc in first ch-2 sp, ch 2, join with sl st to first sc, fasten off CA.
- Rnd 7: With larger hook, join CB with sl st to any corner ch-2 sp, ch 1, 3 dc in same ch-2 sp, *[ch 1, skip next st, 3 dc in ch-3 sp] across side to last sc, ch 1, skip next st,** (3 dc, ch 2, 3 dc) in ch-2 sp; repeat from * around, ending last repeat at **, 3 dc in first ch-2 sp, ch 2, join with sl st to first dc, fasten off CB.
- Rnds 8-13: Repeat Rnds 6-7, 3 times.
- Rnd 14: Repeat Rnd 6 once.
- Rnd 15: With larger hook, join CB with sl st to any corner ch-2 sp, ch 1, 3 dc in same ch-2 sp, *[ch 1, skip next st, 3 dc in ch-3 sp] across side to last sc, ch 1, skip next st,** (3 dc, ch 2, 3 dc) in ch-2 sp; repeat from * around, ending last repeat at **, 3 dc in first ch-2 sp, ch 1, join with sc (counts as second ch in ch-2 sp) to first dc, do not fasten off CB.
- Rnd 16: Continuing with larger hook and CB, ch 1, sc in first ch-2 sp, *[sc in next 3 sts, sc in next ch-1 sp] across to last 3 sts before ch-2 sp, sc in next 3 sts,** (sc, ch 3, sc) in ch-2 sp; repeat from * around, ending last repeat at **, sc in first ch-2 sp, ch 3, join with sl st to first sc, fasten off CB.
- With yarn needle, weave in yarn tails on wrong side of blanket.