
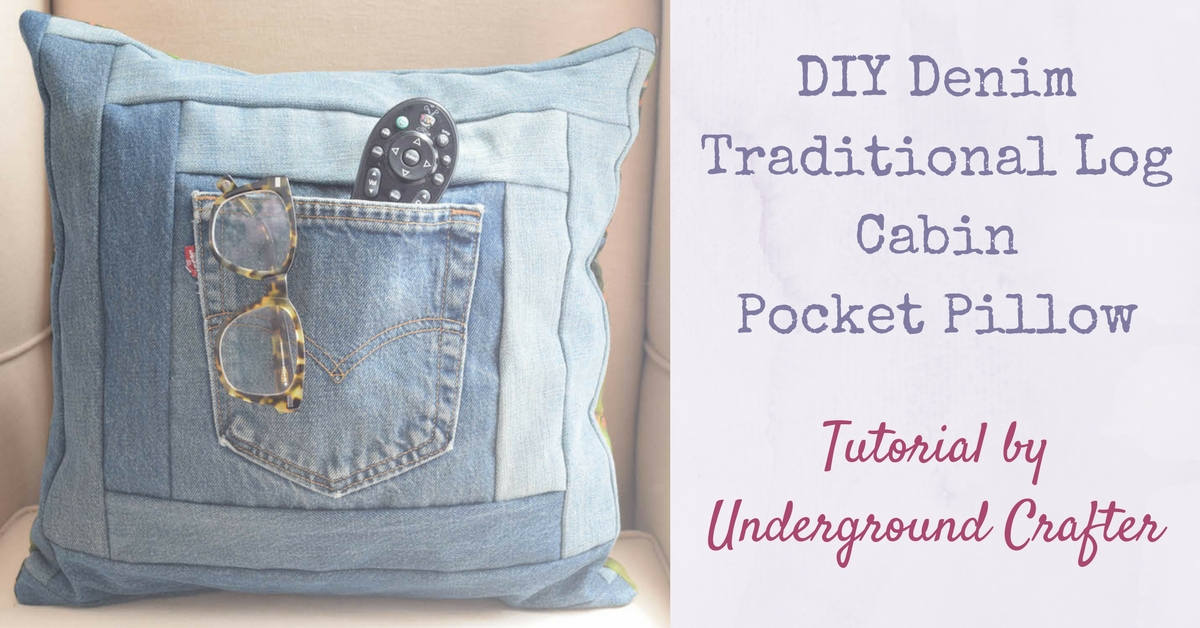
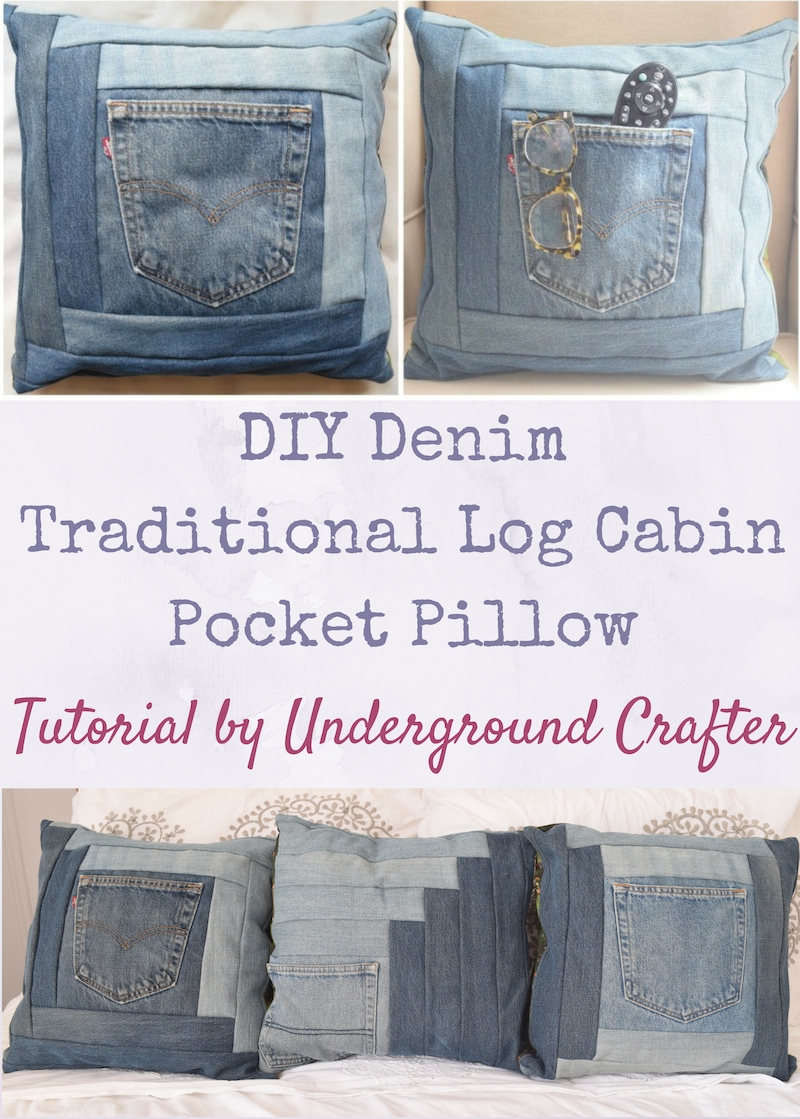
A few months ago, I shared a tutorial for making two DIY Denim Log Cabin Pillows with the Cabin in the Corner and Courthouse Steps blocks. Today, I’m sharing the Traditional Log Cabin Block.
This post contains affiliate links. I may receive compensation (at no added cost to you) if you make a purchase using these links. Materials for this post were generously provided by Fairfield World and Fiskars.
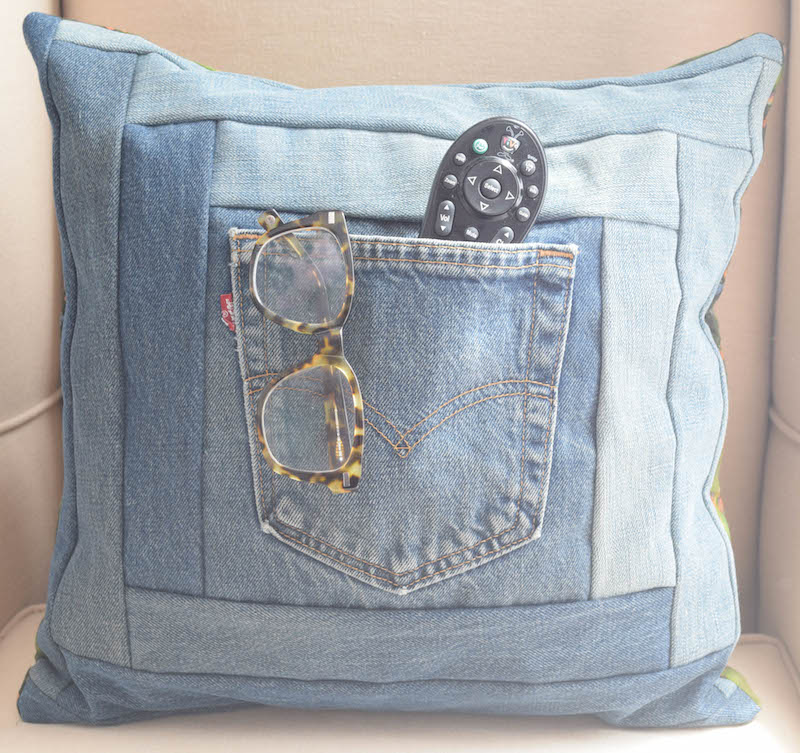
Denim makes for great pocket pillows. The pockets are already made, so these involve less sewing, pressing, and cutting than if you made your own pocket.
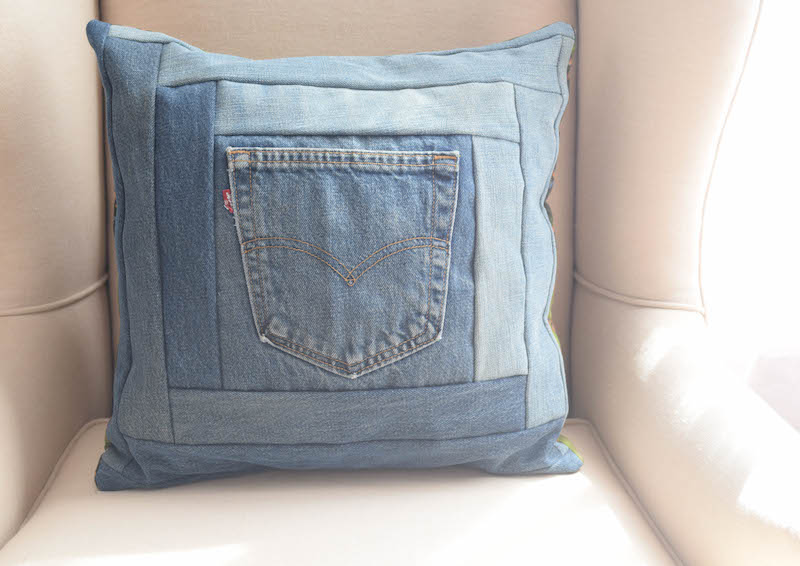
Also, worn denim is so ultra soft. Add in a Fairfield Decorator’s Choice Luxury Pillow Form, and you’ll have a pillow that you can cuddle, take a nap on, or store your remote in.


DIY Denim Traditional Log Cabin Block Pocket Pillow
Tutorial by Underground Crafter
Materials:
- Two pairs of jeans destined for the scrap pile. Designate one pair as “light” and one as “dark.” (Optional: The back pocket from a third pair of jeans in a slightly different color of denim.)
- Fiskars 45 mm Easy Change Ergo Control Rotary Cutter, Fiskars 18″ x 24″ Self-Healing Rotary Cutting Mat, and Fiskars 6″ x 24″ Acrylic Ruler.
- Cotton fabric for pillow back – ½ yard.
- Cotton fabric for pillow interior backing – ½ yard or fat quarter. This fabric will not be seen once your pillow is assembled, so you can use muslin, orphaned quilt blocks, or a pieced scraps instead.
- Fairfield Decorator’s Choice Luxury Pillow Form 16” x 16”.
- Fairfield Poly-Fil Low-Loft Quilt Batting.
- An iron and an ironing board or other heat-safe surface.
- Sewing machine with cotton thread.
- Basic sewing supplies (i.e., fabric scissors, seam ripper, pins, fabric pencil/marker, etc.).
- Optional: Denim needle for your sewing machine.
Instructions
Cut fabric and batting
Assemble “quilt sandwich” for front of pillow case
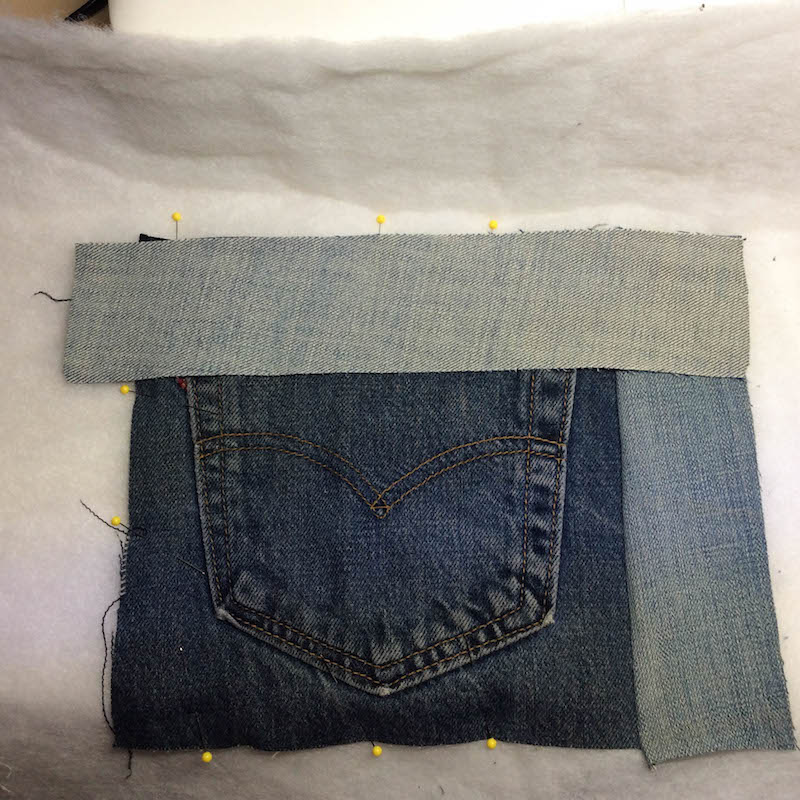
- Position the pillow interior backing fabric face down (wrong side up).
- Place batting over pillow interior backing.
- Position denim pocket at the center of your batting facing up. If you pin the pocket in place, be sure to pin through all three layers.

- Position a strip of your “light” denim on the left side of your pocket so that the right sides of the denim pieces are facing.

Quilt the front of pillow case
- Using a ¼” seam allowance, sew the strip to the pocket, working through all four layers.

- Trim the strip.
- Finger press the sewn strip so it is right side up. Attach the next “light” strip above the pocket.
- Sew the strip to the pocket, working through all four layers. Trim the strip.
- Finger press the sewn strip so it is right side up. Attach a “dark strip” to the left of the pocket. Sew the strip to the pocket, working through all four layers. Trim the strip.
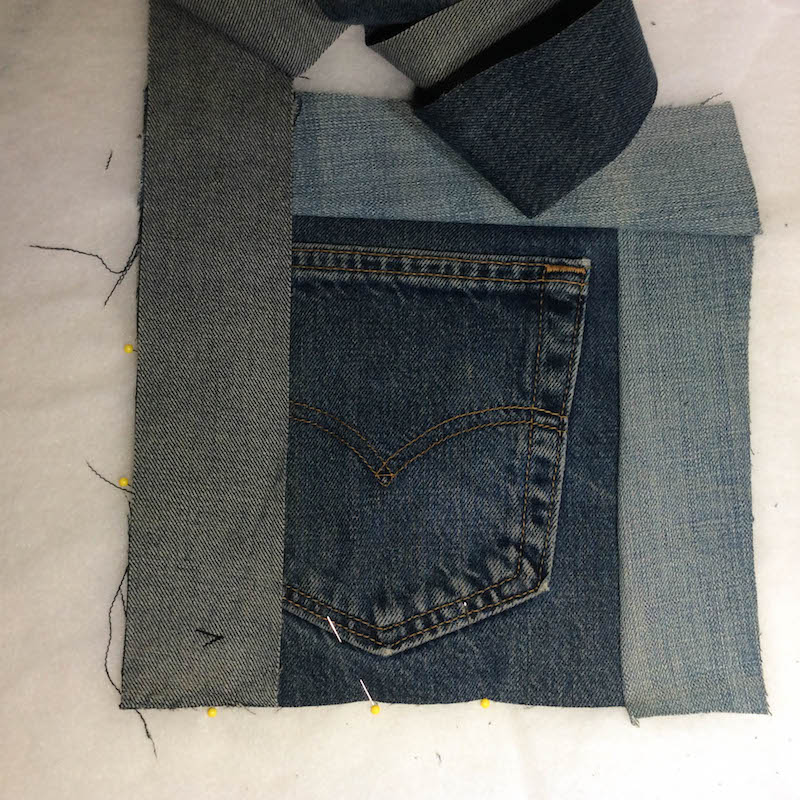
- Finger press the sewn strip so it is right side up. Attach the next “dark” strip below the pocket. Sew the strip to the pocket, working through all four layers. Trim the strip.
- Continue attaching pieces in this manner, following the assembly diagram, until the front of your pillow measures at least 16.5” (42 cm) square.

- Square up your pillow front to 16.5” (42 cm square), trimming away any excess fabric or batting.
Assemble the back of the pillow case
If you make your own DIY Denim Traditional Log Cabin Pocket Pillow, I’d love to see it! Share your progress and questions by tagging me on Facebook as @Underground Crafter, Instragram as @ucrafter, or Twitter as @ucrafter. You can also share a picture in the Underground Crafters Facebook group. Sign up for my weekly newsletter and get a coupon code for your choice of one of my premium patterns and other subscriber goodies. Plus, you’ll never miss one of my free patterns again!
Your log cabin pocket pillow is so adorable. Thank you for sharing at Snickerdoodle. I am featuring your pillow at the party tomorrow.