

I’m so excited to share an easy crochet shawlette pattern for the Make it for Me! Crochet-a-Long with ELK Studio. As I mentioned in yesterday’s post, one of my goals for 2016 I want to be more adventurous with color in projects that I crochet for myself. I usually stick to my favorite colors (purples and blues), so when I received these skeins from Bonita Yarns, I knew they would be perfect for this CAL.

This post contains affiliate links. I may receive compensation (at no added cost to you) if you make a purchase using these links.Yarn for the sample was generously provided by Bonita Yarns.
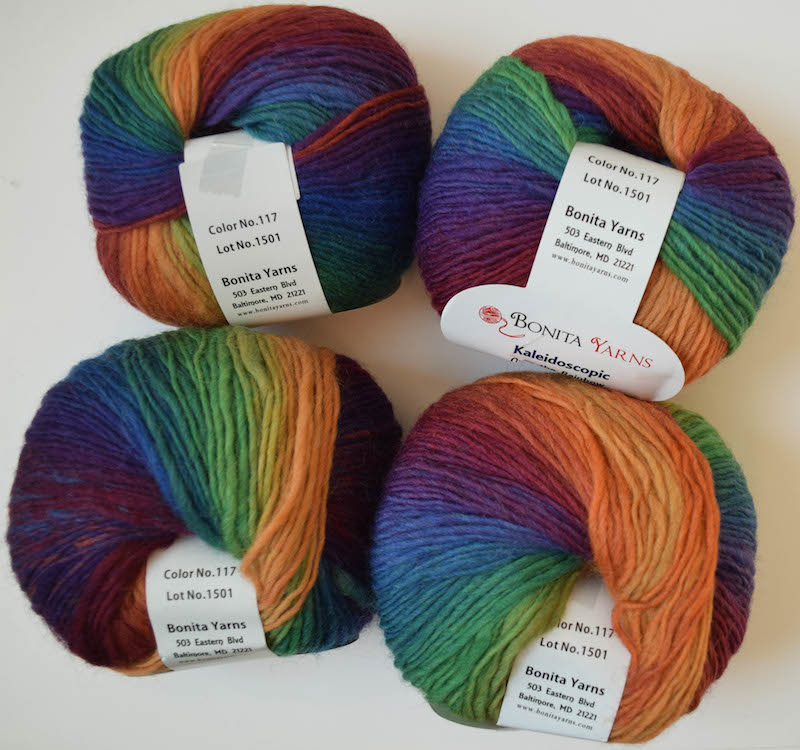
I love making shawlettes for myself because I can wear them as scarves under my coat in the cold, and then use them as accessories over my clothes while I’m out. Being a native New Yorker, I have a lot of black in my wardrobe, so the Over the Rainbow colorway in Bonita Yarns Kaleidoscopic seemed like a great way to bring a little sunshine with me wherever I go.

If you’re participating in the Make It for Me! Crochet-a-Long, you can chat with other crocheters in the ELK Studio Facebook group, or in this thread in the Underground Crafter Ravelry group.

If you make your own Rainbow After the Storm Shawlette, I’d love to see it! Share your progress and questions by tagging me on Facebook as @Underground Crafter on on Instagram as @ucrafter. You can also share a picture in the Underground Crafters Facebook group. Sign up for my weekly newsletter and get a coupon code for your choice of one of my premium patterns and private access to my vault of subscriber goodies. Plus, you’ll never miss one of my free patterns again!
Add the Rainbow After the Storm Shawlette to your favorites or queue, or buy the ad-free PDF on Ravelry.


Rainbow After the Storm Shawlette
Easy Crochet Shawlette Pattern by Underground Crafter


This triangular easy crochet shawlette pattern is made with self striping yarn and simple stitches.
Finished Size
- Adjustable. Photographed sample measured 66” (167.5 cm) wingspan x 9.5” (24 cm) spine before blocking; 70” (178 cm) wingspan x 9.5” (24 cm) spine after blocking.
Materials
- Bonita Yarns Kaleidoscopic (100% Icelandic wool, 1.75 oz/50 g/195 yds/178 m) – 3 skeins in Over the Rainbow, or approximately 530 yds (484.5 m) in any super fine weight yarn.
- US Size E-4 (3.5 mm) crochet hook, or any size needed to obtain gauge.
- Yarn needle.
- 3 locking stitch markers, or scrap yarn.
Gauge
- 18 sts x 9 rows = 4” (10 cm) in dc pattern. Exact gauge is not critical for this project.
Abbreviations Used in This Pattern
- ch – chain
- dc – double crochet
- dc2tog – double crochet 2 sts together – [Yo, insert hook in next st, yo and draw up a loop, yo and draw through 2 loops] twice, yo and draw through all 3 loops on hook. A video tutorial for this decrease is available below.
- If you can’t see the dc2tog video above, watch it on YouTube.
- dc3tog – double crochet 3 sts together – [Yo, insert hook in next st, yo and draw up a loop, yo and draw through 2 loops] 3 times, yo and draw through all 4 loops on hook. A video tutorial for this decrease is available below.
- If you can’t see the dc3tog video above, watch it on YouTube.
- ea – each
- pm1 – place marker 1
- pm2 – place marker 2
- pm3 – place marker 3
- rep – repeat
- RS – right (front) side
- sc – single crochet
- sl st – slip stitch
- sp – space
- st(s) – stitch(es)
- yo – yarn over
- * Repeat instructions after asterisk as indicated.
- [] Repeat instructions between brackets as indicated.
Pattern Notes
- Shawlette is crocheted in flat from side to side by increasing to midpoint, and then decreasing to opposite edge.
- Ch 2 at beginning of row does NOT count as a st.
- Adjust the size by changing the length to the midpoint.
- Edging is crocheting in the round. Border is crocheted flat.
- If using self-striping yarn like the photographed sample, when adding a new skein, unravel new ball until you reach the current or next color in use in the project to continue striping sequence.
Pattern Instructions
Shawlette
Increase to midpoint
- Ch 3.
- Row 1: Turn, skip 2 ch, 3 dc in next ch, pm1 in same ch to mark edge. (3 sts)
- Row 2: Turn, ch 2, dc in same st and in next st, 2 dc in last st. (4 sts)
- Row 3: Turn, ch 2, dc in same st and ea st across.
- Row 4: Turn, ch 2, dc in same st and in ea st across to last st, 2 dc in last st. (Increases by 1 st per row)
- Rep Rows 3 & 4 until shawlette measures approximately 33” (84 cm), or half your desired length.
- Row 5: Turn, ch 2, pm2 around ch-2 sp to mark center row, 2 dc in same st, dc in ea st across. (Increase by 1 st)
Decrease to end
- Row 6: Turn, ch 2, dc in same st and in ea st across to last 2 sts, dc2tog. (Decreases by 1 st per row)
- Row 7: Rep Row 3.
- Rep Rows 6 & 7 until 4 sts remain.
- Row 8: Rep Row 6. (3 sts)
- Row 9: Turn, ch 2, dc3tog, do not fasten off, pm3 in top of dc3tog to mark edge. (1 st)
Edging
- Round 1: (RS) Turn to work along straight edge, ch 1, 2 sc in side of ea row along straight edge to marker 1, 3 sc in marked st, remove and pm1 in second of 3 sc, turn to work along angled edge, 2 sc in side of ea row to marker 2, (2 sc, ch 2, 2 sc) in side of marked row, remove and pm2 in ch-2 sp, 2 sc in side of ea row to marker 3, 2 sc in marked st, remove marker, join with sl st to same st, do not fasten off.
Border
- Row 1: Turn, ch 1, *(sc, ch 3, sc) in next st, skip 1 st,** rep from * across to marker 2, (sc, ch 3, sc, ch 5, sc, ch 3, sc) in ch-2 sp, skip 1 st, rep from * to ** across to marker 1, join with sl st to next st. Fasten off.
Finishing
- With yarn needle, weave in yarn tails. Spray block if desired.
This is beautiful, the colours are stunning!
Thanks so much for sharing your shawlette with your fans! Beautiful…?❤️????
Thank you for the colorful hearts, Teei!
ohhhh love rainbows! beautiful yarn, beautiful shawlette! thanks for sharing the pattern with us!
thank you…this is gorgeous!
Very pretty, and I love the name! Thanks for sharing on my link party!
This is stunning! Love the yarn you used 🙂
Congratulations, you are being featured in this week’s
Snickerdoodle Crochet Round Up!
Have an awesome day!
Joanita
Thanks so much, Joanita!