

There’s something wonderful about starting your day with crochet, and that was the inspiration for this crochet bath mat pattern. Kick off your day with a shower and the Face the Day Bathmat!

This post contains affiliate links. I may receive compensation (at no added cost to you) if you make a purchase using these links. Yarn for the sample was generously provided by Yarnspirations.
It isn’t always practical to pick up a hook as soon as you wake up. Having something cozy to see first thing in the morning is a good substitute. For the past few years, I’ve had a crochet bathmat. It makes me smile in the morning when I get ready for the day.

My old bathmat was crocheted with thick fabric strips and it took forever to dry. For this pattern I used a cotton blend yarn that would dry a bit faster (both after the shower and after being washed). These motifs are simple to make, and of course, you can use them to make blankets, bags, or other projects, too.
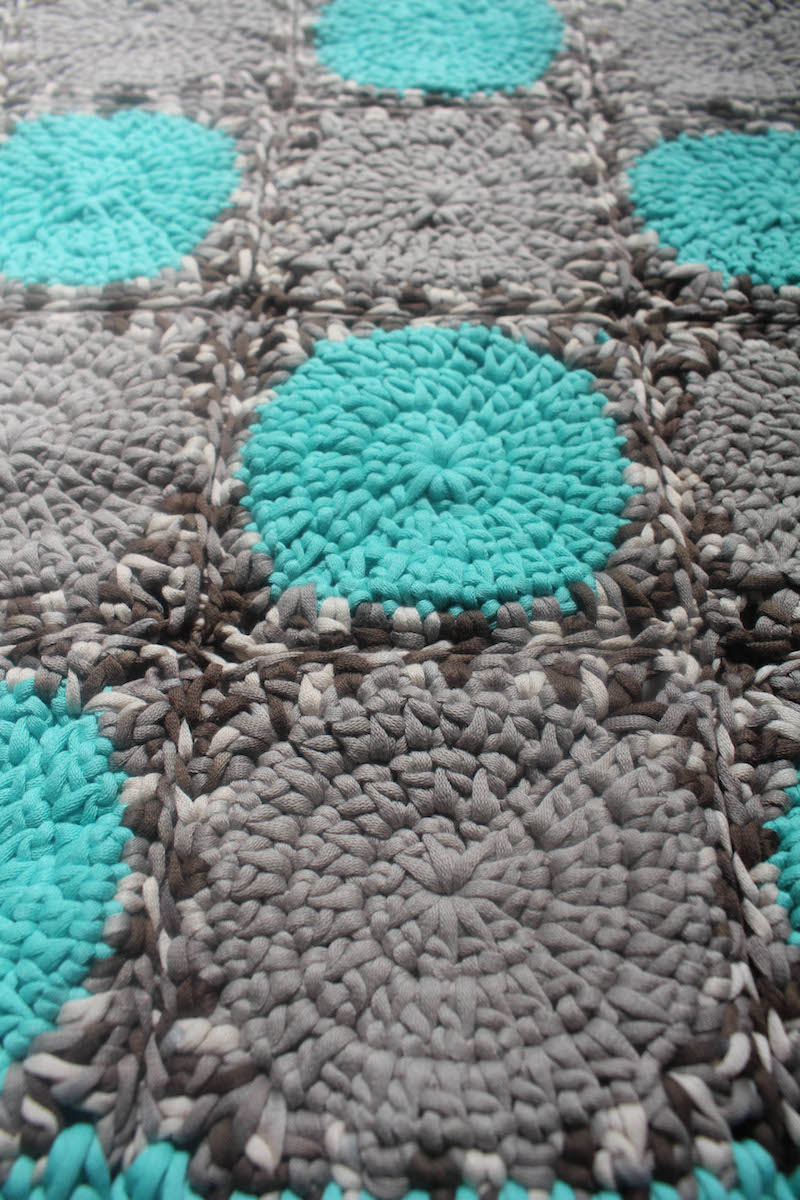
If you make your own Face the Day Bathmat, I’d love to see it! Share your progress and questions by tagging me on Bluesky as @UndergroundCrafter, Facebook as @UndergroundCrafter, or on Instagram as @ucrafter. You can also share a picture in the Underground Crafters Facebook group. Sign up for my weekly newsletter and get a coupon code for your choice of one of my premium patterns and private access to my vault of subscriber goodies. Plus, you’ll never miss one of my free patterns again!
Add the Face the Day Bathmat to your Ravelry favorites or queue.

Face the Day Bathmat
Crochet Bath Mat Pattern by Underground Crafter




This vibrant motif crochet bath mat will make you smile and get you ready for a new day. The cotton blend yarn is soft on your feet and easy to wash and dry in the machine.
Finished Size
- Bathmat: 19” (48 cm) wide x 23.5” (59.5 cm) long.
Materials
- Bernat Maker Home Dec (72% cotton/28% nylon, 8.8 oz/250 g/317 yd/290 m) – 1 skein each in 11005 Aqua (CA), 11008 Clay (CB), and 11019 Pebble Beach (CC), or approximately 220 yd (201 m) in any bulky weight, cotton blend yarn. NOTE: This yarn is now discontinued. You can find suitable alternatives on YarnSub here.
- US Size K-10.5/6.5 mm crochet hook, or size needed to obtain gauge.
- Yarn needle.
Gauge
- 1 square in pattern = 4.5” (11.5 cm). Exact gauge is not critical for this pattern.
Abbreviations Used in This Pattern
- CA – Color A
- CB – Color B
- CC – Color C
- ch – chain
- dc – double crochet
- hdc – half double crochet
- rep – repeat
- Rnd – Round
- sc – single crochet
- sl st – slip stitch
- sp – space
- st(s) – stitch(es)
- * Repeat instructions after asterisk as indicated.
Pattern Instructions
Bathmat
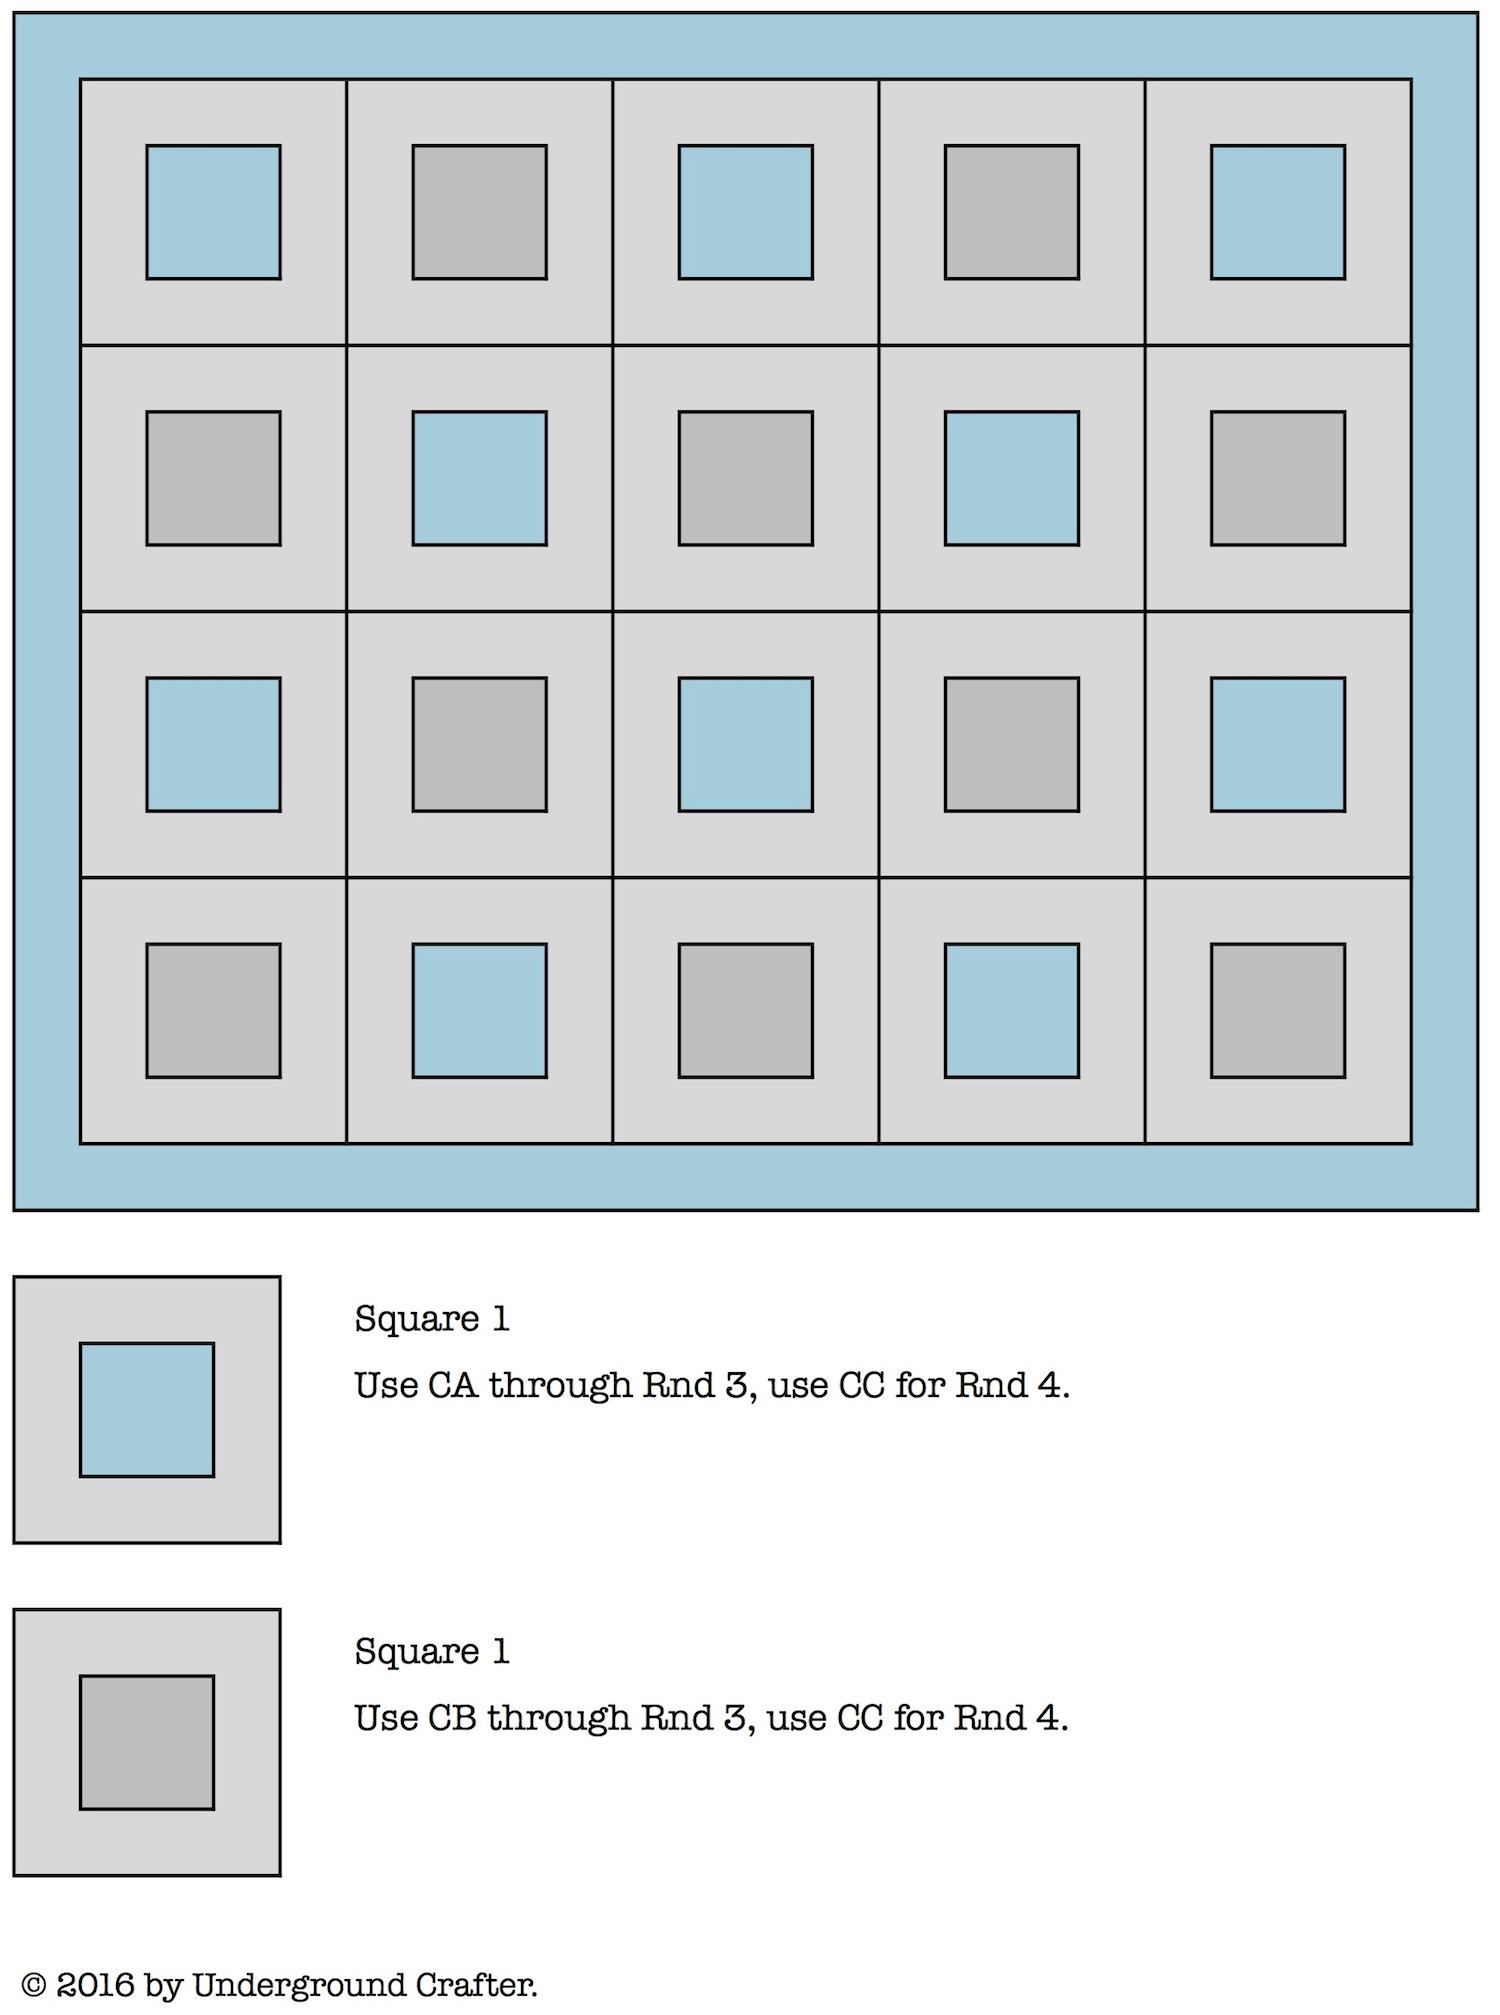
Square (Make 10 starting with CA and 10 starting with CB)
- Ch 4, join with sl st to first ch to form ring.
- Rnd 1: Ch 3 (counts as dc, here and throughout), 11 dc in ring, join with sl st to top of ch 3. (12 sts)
- Rnd 2: Ch 3, dc in same st, 2 dc in each st around, join with sl st to top of ch 3. (24 sts)
- Rnd 3: Ch 3, dc in same st and next st, *2 dc in next st, dc in next st; rep from * around, join CC with sl st to top of ch 3, fasten off original color. (36 sts)
- Rnd 4: Ch 5 (counts as dc + ch-2 sp, here and throughout), 2 dc in same st, *dc in next st, hdc in next 2 sts, sc in next 2 sts, hdc in next 2 sts, dc in next st,** (2 dc, ch 2, 2 dc) in next st; rep from * around, ending last rep at **, dc in first st, join with sl st to third ch, sl st in next ch, fasten off CC with 24” (61 cm) yarn tail for seaming. (48 sts + 4 ch-2 sp)
Assembly
- With yarn tails and following placement diagram, seam squares with a slip stitch join (see video below) on wrong side, starting at second ch of ch-2 sp.
- If you can’t see the slip stitch join video above, watch it on YouTube.
- Join squares into rows. Join rows in same manner.
Border
- Rnd 1: Join CA with sl st to any corner ch-2 sp, ch 5, 2 dc in same st, *dc in next 12 sts,** (2 dc in ch-2 sp) twice; rep from * across, ending at ** before corner ch-2 sp, (2 dc, ch 2, 2 dc) in corner ch-2 sp, rep from * to around, ending last rep at ** before first ch-2 sp, dc in first ch-2 sp, join with sl st to top of third ch, fasten off CA.
Finishing
- With yarn needle, weave in ends. Spray block if desired. (If you’re new to blocking, see my tutorial, Blocking Basics for Crocheters and Knitters.)
i just found this yarn at goodwill and bought 6 skeins and didn’t know what i would use it for,but maybe this. thanks for the parrern