

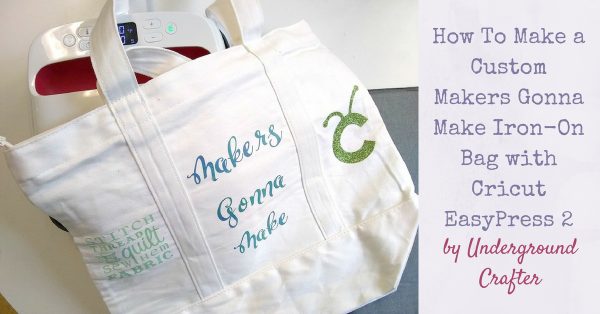
Are you always on the hunt for the perfect project bag to tote your next work-in-progress in? In today’s tutorial, I’m going to share how to make your own customized Makers Gonna Make project bag using iron-on and the Cricut EasyPress 2.
This post contains affiliate links. I may receive compensation (at no added cost to you) if you make a purchase using these links. This post is sponsored by Cricut, but all opinions and thoughts are my own.
Before I share the Makers Gonna Make project tote, let me tell you about my new favorite toy (er, um, I mean tool), the Cricut EasyPress 2.

If you’re like me, ironing is your least part of crafting. When I was quilting a lot, I always dreaded the torturous ironing at the beginning of each project. And, in the last two years, as I have made more and more Cricut projects (mostly iron-on), I have been reminded why I don’t quilt too much anymore! Ironing is really just not fun and with iron-on projects, sometimes the lack of fun can also lead to poor application. If you’ve ever had any of these ironing problems in your craft projects…
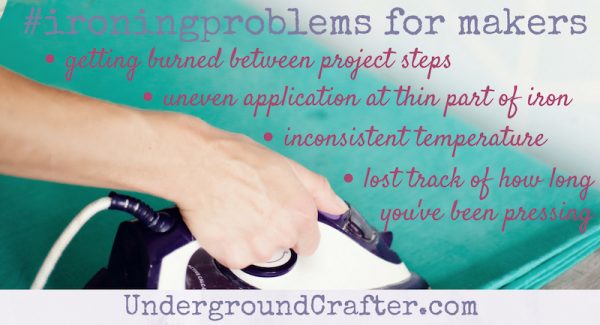
…you may want to check out the EasyPress 2 a new heat press by Cricut. I shared my unboxing below if you’d like to see what’s in the box.
If you can’t see the video above, click here to watch it on Facebook.
How Is the Cricut EasyPress 2 Different from Original EasyPress?
When Cricut announced the EasyPress 2 last year, it was available in one size (9” x 9”) and in one color (Sky). The EasyPress 2 is available in three sizes (6” x 7”, 9” x 9”, and 10” x 12”). Besides the difference in prices (as you might guess, the smallest is the least expensive), each size is best suited for different types of projects and situations. If you make a lot of smaller iron-on projects, like baby clothes or hats, or if you plan to take your EasyPress 2 to craft night often, you might want the 6” x 7” size. If you make a lot of larger projects, like banners or blankets, you will probably want the 10” x 12” size. The 9” x 9” size (which is the one I have) is great for medium sized projects, like shirts, bags, and aprons.

And, of course, the EasyPress 2 is available in Raspberry, not just Sky. The bottom of the EasyPress 2 is ceramic and flat, so it heats very evenly and stays dry. It also has a USB port for firmware updates in the future. If you like to pick your colors, that matters, too, right? It also comes with a Safety Base. You can rest your EasyPress 2 on the Safety Base while it heats up, between applications, and between projects. No more accidentally burning your arm on the side of an iron, or worrying about damaging your crafting surface (or your pressing surface) in between presses. TheEasyPress 2 heats up to as much as 400 degrees, but it feels cool on the sides, so as long as it is in the Safety Base, you shouldn’t have to worry about burning yourself between project steps. The Safety Base also comes with rubberized “feet” so you don’t have to worry about it scratching your crafting or storage surface, or slipping out of place.
How Does the Cricut EasyPress 2 Work?
Having never used the original EasyPress, I wasn’t sure how much of a learning curve there would be. I was pleasantly surprised about how easy it was to use.
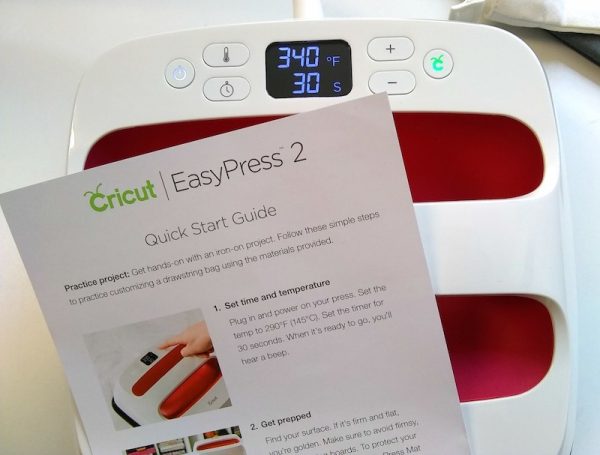
There are six buttons on the EasyPress 2. On the left side, you have the power button (to turn it on and off). The button with a thermometer on it (upper left) is what you press when you want to change the temperature. And, the button just beneath that with a clock on it is what you press when you want to adjust the time needed.

On the right side, you have a plus and minus button. After pressing the temperature or time button, you can adjust up or down with these buttons. On the far right, you have the Cricut button, which is just like the “Go” button on your Cricut machine. This will be red while the EasyPress 2 is heating up, to indicate that it is not yet ready to use. Once it reaches the right temperature, your EasyPress 2 will beep and the light will change. Even if you don’t hear the beep, you can what the temperature it has reached by checking the digital readout. There is a detailed chart of recommended EasyPress settings here that includes the temperature, time for pre-heat, time for application, time for post-heat, and whether the material is a “warm peel” or “cold peel” material. Some materials come off more easily after cooling completely (“cold peel”), while others can still be warm to the touch (“warm peel”).
Once you have reached your temperature — which happens quickly, even when you have an 80 degrees or more temperature difference between materials — and have set the amount of time you need, you’re ready to use the EasyPress 2. As the name suggests, it is literally about an easy press at this point.
Place your project on a heat-safe surface (I used the 12” x 12” EasyPress Mat, which is also portable for crafting on-the-go). Then put your project on the mat, and your iron-on material over that. Lift up your EasyPress 2, place it on top of the project you’d like to “iron,” and press the Cricut button. Once the time is counted down, it will beep again and you can remove it and return it to the Safety Base. If you want to use it to press fabric, just put your fabric on your heat-safe surface and go.

How To Make a Custom Makers Gonna Make Iron-On Bag with Cricut EasyPress 2
Tutorial by Underground Crafter
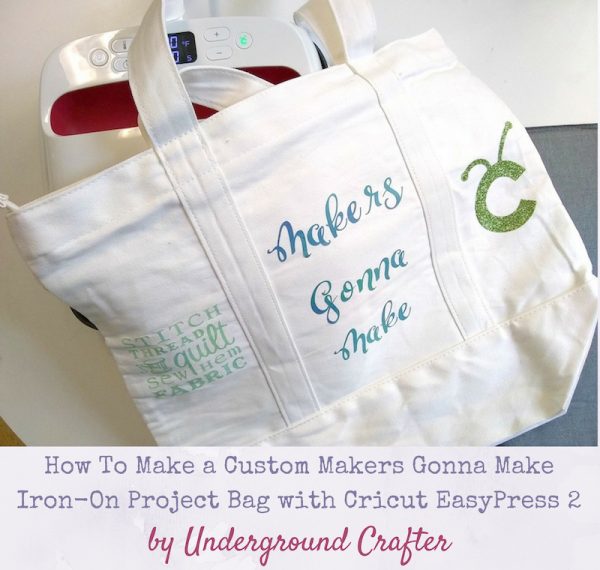
Now that you know all about the EasyPress 2, are you ready to make your custom Makers Gonna Make project bag? I customized the big project bag to show my love of Cricut and sewing. Be on the look out in a few weeks for the follow up project — customized notions bags (made in the three sizes pictured below) for crochet and knitting!

Materials
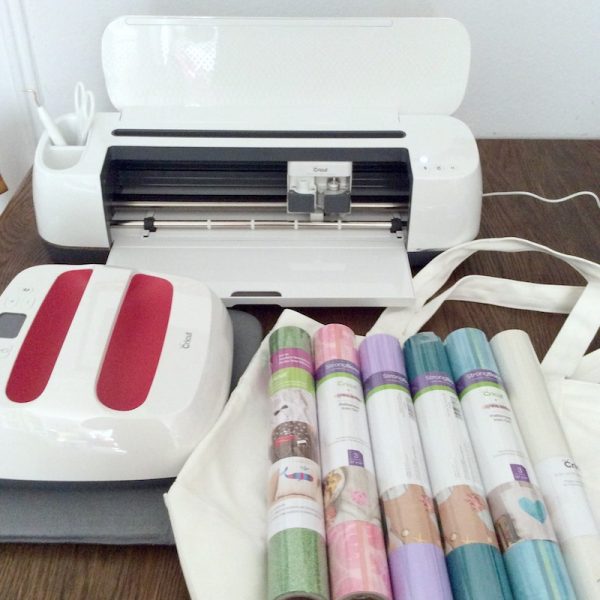
- Cricut Maker with Cricut Design Space and Cricut Access Standard subscription,
- Your choice of cut files in Design Space,
- Premium Fine Point Blade,
- StandardGrip Cutting Mat,
- Cricut EasyPress 2,
- Canvas tote bag
- Iron-on in at your choice of colors and styles — I used pieces from the Cricut Natalie Malan Aquamarine Patterned Iron-On Sampler, the Cricut Natalie Malan Sunset Blossom Patterned Iron-On Sampler, and Glitter Iron-On in Kiwi,
- 12” x 12” Easy Press Mat, or other heat-safe surface,
- Weeder and scissors (so you can save any excess materials for your next project) — I used the ones in my Essential Tool Set.
Instructions
Customize Your Bag in Design Space
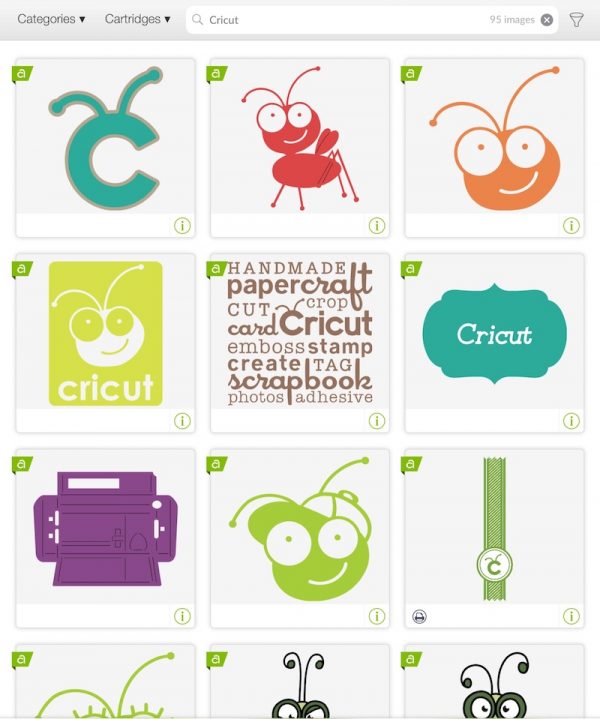
- Use my Makers Gonna Make Project Bag in Design Space “as is” by clicking on Make It, or customize by looking for images in your favorite crafts, changing the font, or adjusting the sizes of the images. Here are just a few of the Cricut options available, for example.
- You can also upload images of your own. If you aren’t sure how to upload images to Design Space, check out my tutorial here.
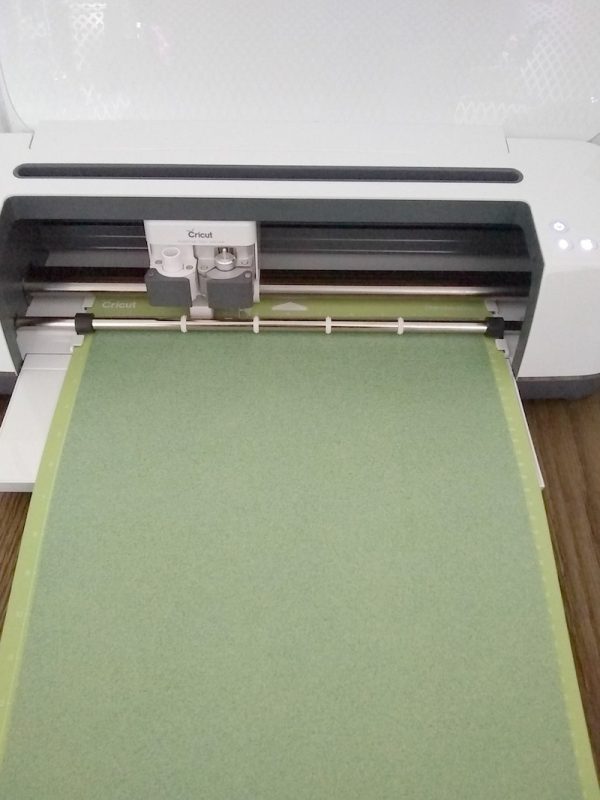
Cut Your Iron-On
- Make sure you “mirror” each mat before cutting. Choose your cutting materials in Design Space and it will let you know what to do next!
Weed Your Iron-On
- Once all your pieces are cut, trim away excess unused iron-on with your scissors to save for your next project. Use your weeder to remove iron-on from around your cuts.
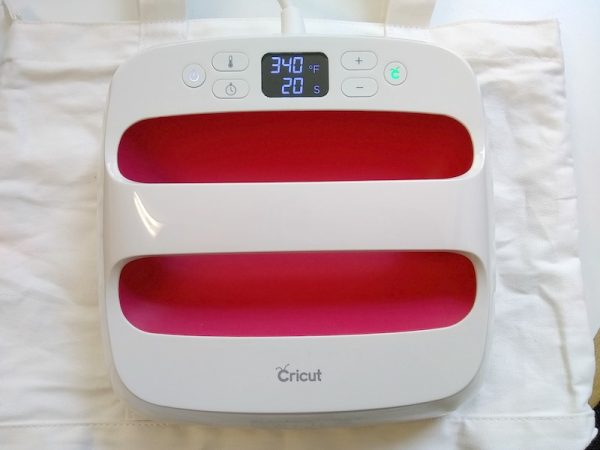
Pre-Heat Your EasyPress 2
- Be sure to check this detailed chart of recommended EasyPress settings so you know what temperature to set your EasyPress 2 to, how long to set the timer for, and whether you’ll need to do a “cold peel” or a “warm peel.”
- While it’s pre-heating, you can set your canvas bag on the 12” x 12” Easy Press Mat.
Start Pressing!
- Use the EasyPress 2 to press out any wrinkles on the bag before you get started.
- Position the largest piece of iron-on on your bag first with the clear liner at the top. That piece will make the biggest impression, so make sure it’s straight! I had to press this twice, because at first I didn’t realize that the straps on the bag were making the EasyPress 2 uneven. For the second application, I held down the EasyPress 2 firmly to make sure it was straight.

- After pressing your first piece of iron-on down, you can start to add the other pieces.

- Don’t forget to adjust the temperature and time settings on your EasyPress 2 if you switch to a different material, like I did!
- To avoid creating an uneven pressing surface from the added height of the bag straps, I held my EasyPress 2 sideways for the side pieces.

Once you have everything pressed down and all the pieces have reached the right temperatures, you are ready to peel off the clear liners and enjoy your new project bag!

If you love this project, check out my tutorial for the Crocheters Gonna Crochet and Hookers Gonna Hook iron-on bags here.

This is a sponsored conversation written by me on behalf of Cricut. The opinions and text are all mine.
2 thoughts on “How To Make a Custom “Makers Gonna Make” Iron-On Bag with Cricut EasyPress 2”