
I’m sharing a free crochet pattern for the Little Brother/Little Sister mile-a-minute blanket with you, along with links to 6 more free crochet blanket patterns that are perfect for donation to organizations that accept handmade blankets for children.
This post contains affiliate links. I may receive compensation (at no added cost to you) if you make a purchase using these links. Materials for this project were generously provided by Brightech and Red Heart.
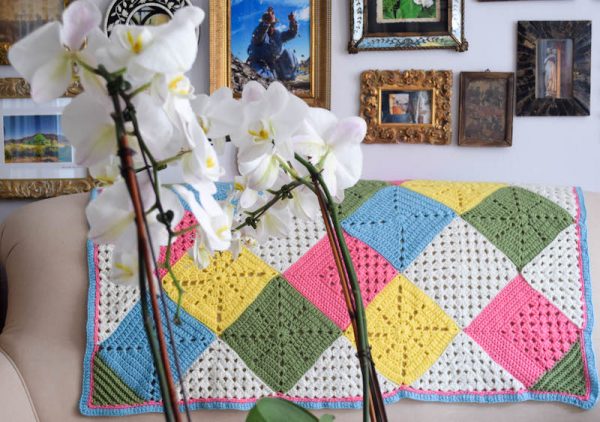
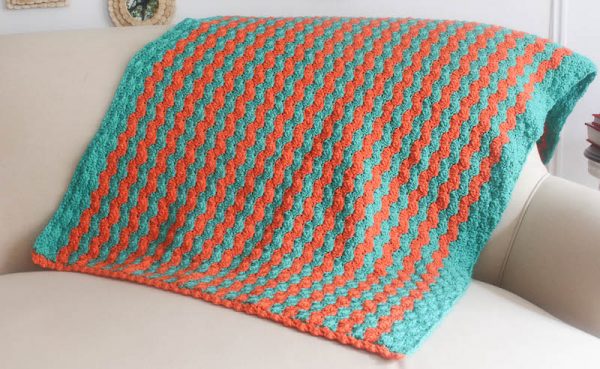
As my long-time readers know, I do most of my crocheting on my commute in New York City’s subways (hence the name Underground Crafter). When you’re working on a larger project, that’s not such a great idea. You may think that I live in this incredibly well lit (and incredibly neat) apartment shown in many of my blanket photos, like the one for the Classic Granny with a Twist Blanket shown below.
In fact, that’s my mother’s well-decorated apartment which also has great natural light. My own apartment has not-so-great natural light, a whole lot of cat hair, and we don’t have overhead lights in the living room or bedroom… so crocheting at night is not so easy. Or, at least, it wasn’t. Last year, the nice folks at Brightech contacted me about trying out one of their magnifier lamps. They have a great selection and that was sure tempting, but I asked to try the Montage Classic LED Floor Lamp in Oil Rubbed Bronze instead. When it arrived, MC and I were overjoyed. It came in a smallish box and we assembled it in minutes.
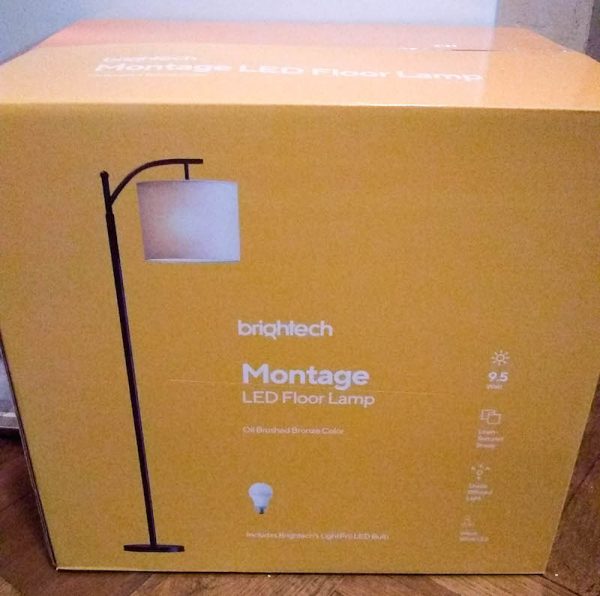
Just as I had hoped, it was easy to move around (though we usually keep it near the couch in the living room) and it has a beautiful soft light. It’s perfect for crocheting at night, especially with a darker yarn. Since it’s a warm LED light, it doesn’t overheat, even after hours of use, so I don’t have to worry about one of the cats getting hurt. The warmness of the light is also great because it doesn’t feel overly bright at night and it’s easy to use it right up until bedtime. You can see me how I kept my blanket strips organized in the Instagram post below.
I’m sure you’re wondering about the blanket by now. It’s a “mile-a-minute” blanket, meaning that it’s worked in the round in strips. The strips are portable and work up quickly since they are shorter and narrower than a scarf. Once you have all of your strips done, you assemble the blanket together. I wanted the blanket to be a very fun tactile experience, so I used Red Heart Dreamy and Dreamy Stripes, brushed yarns with a halo, and Red Heart Soft, a smooth and shiny yarn. Then, I joined the strips with a single crochet seam on the right side, so there are little hills of texture between each strip.

When AllFreeCrochetAfghanPatterns invited me to be part of their security blanket drive, I was happy to join in and become a Project Linus “Blanketeer,” using my hook to provide some cozy, handmade hugs to children in need.
Project Linus is a wonderful organization that has been connecting crafters with children in need for over two decades. They have distributed literally over 7 million (!) blankets. I profiled them in one of my charity spotlight posts and shared the free crochet pattern for the Rippled Security Blanket (shown above) a few years ago. And yes, that is my mother’s couch again.
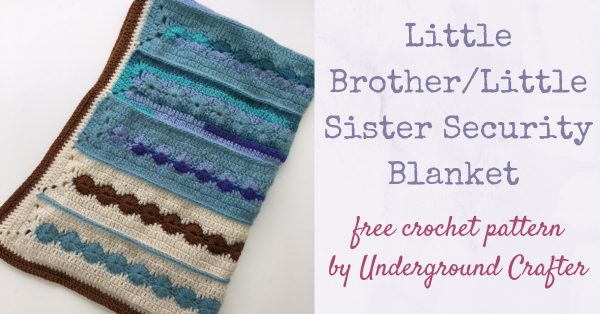
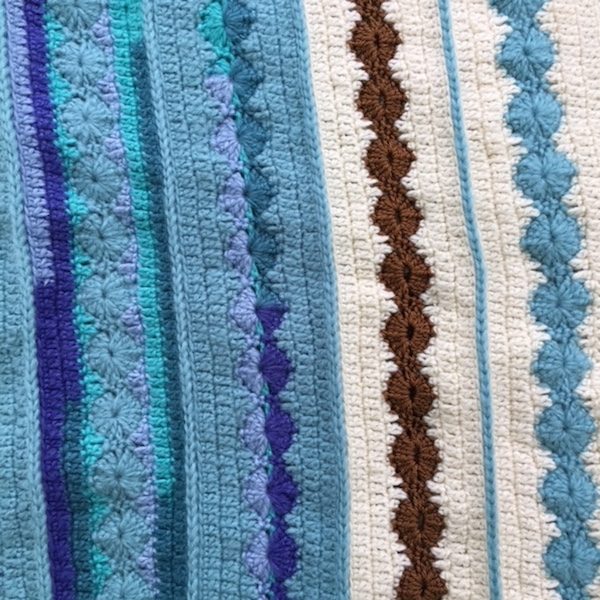
You can find all the guidelines for donating to Project Linus here. If you have pets like I do, be sure to wash your blanket before sending it in. The nice folks at AllFreeCrochetAfghanPatterns took the finished project photos for me. This one shows a lot of the details….
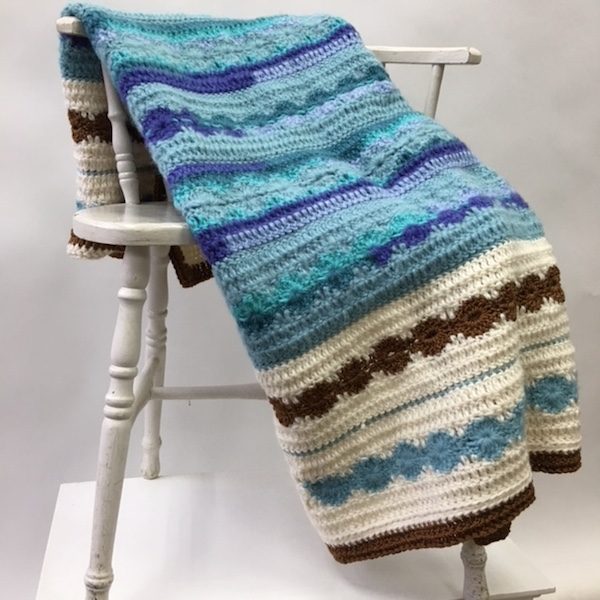
… and this one (though photographed on the “wrong side”) let’s you see the size and drape of the finished blanket.
Continue on to make the Little Brother/Little Sister Security Blanket, or find inspiration in one of these other free crochet patterns that would make great donations to Project Linus.
- Checkerboard in Primary Colors Blanket (in Baby Blanket size),
- Rippled Security Blanket,
- Gentle Gradient Ripple Blanket (with video tutorial),
- Simple Rectangular Granny Blanket,
- Classic Granny with a Twist Blanket, and
- The Wripple Blanket.
If you make your own Little Brother/Little Sister Security Blanket, I’d love to see it! Share your progress and questions by tagging me on Bluesky as @UndergroundCrafter, Facebook as @UndergroundCrafter, or on Instagram as @ucrafter. You can also share a picture in the Underground Crafters Facebook group. Sign up for my weekly newsletter and get a coupon code for your choice of one of my premium patterns and private access to my vault of subscriber goodies. Plus, you’ll never miss one of my free patterns again!
Add the Little Brother/Little Sister Security Blanket to your favorites or queue, or buy the ad-free PDF on Ravelry.

Little Brother/Little Sister Security Blanket
Crochet Pattern by Underground Crafter
Updated 2/23/2026


This mile-a-minute blanket meets the donation requirements for Project Linus, an organization that distributes handmade blankets to children in need. A combination of yarn types and textured joins make it a comforting and fun sensory experience. This pattern was designed for AllFreeCrochetAfghanPattern’s Security Blankets Drive.
Finished Size
- Baby Blanket: 43” (109 cm) wide x 34” (86.5 cm) long.
Materials
- Red Heart Dreamy yarn (100% acrylic, 8.8 oz/250 g, 466 yd/425 m/medium weight) – 1 skein each in 8512 Aqua (CA) and 8311 Ivory (CC), or approximately 466 yd (425 m) in each of 2 colors in any medium weight yarn.
- Red Heart Dreamy Stripes yarn (100% acrylic, 6.3 oz/180 g, 355 yd/325 m/medium weight) – 1 skein in 9381 Caribbean (CB), or approximately 325 yd (297 m) in any medium weight yarn.
- Red Heart Soft yarn (100% acrylic, 5 oz/141 g, 256 yd/234 m/medium weight) – 1 skein in 1882 Toast (CD), or approximately 230 yd (210.5 m) in any medium weight yarn.
- US Size J-10/6 mm crochet hook, or size needed to obtain gauge.
- Yarn needle.
- Stitch markers.
Gauge
- 12 dc = 4” (10 cm) across. Exact gauge is not critical for this project.
Abbreviations Used in This Pattern
- BL – back loop only – Marly Bird has a helpful video for identifying the back loop here.
- CA – Color A
- CB – Color B
- CC – Color C
- CD – Color D
- ch – chain
- dc – double crochet
- hdc – half double crochet
- rep – repeat
- Rnd(s) – Round(s)
- sc – single crochet
- sl st – slip stitch
- sp – space
- st(s) – stitch(es)
- tr – treble (triple) crochet
- *+Repeat instructions after asterisk or plus sign as indicated.
- () Repeat instructions between parentheses into same stitch or space.
- [] Repeat instructions between brackets as indicated.
Pattern Notes
- Entire blanket is worked in the round with the right (front) side facing up.
- A helpful tutorial for making a single crochet seam is available below.
- If you can’t see the single crochet seam video above, watch it on YouTube.
- Ch 1 at beginning of Rnds does not count as a stitch.
- Joining single crochet stitches in Rnds 2-4 of Strips and Border Rnds 1-4 count as last chain of chain space.
Pattern Instructions
Strips
- Make:
- 3 with CB as first color and CA as second color,
- 2 with CA as first color and CB as second color,
- 2 with CA as first color and CC as second color, and
- 2 with CD as first color and CC as second color.
- With first color, ch 86 (or any multiple of 6 sts, + 2).
- Rnd 1: Turn, skip 1 ch, sc in next ch, *skip 2 ch, 7 dc in next ch, skip 2 ch, sc in next ch;** rep from * across row, ch 2, place marker in ch-2 sp, turn to work on opposite side of foundation chain, sc in first st, rep from * to ** across foundation chain, ch 2, place marker in ch-2 sp, fasten off first color, join second color with sl st to first sc.
- Rnd 2: Ch 4 (counts as tr), *dc in next st, hdc in next st, sc in next st, skip 1 st, sc in next st,
hdc in next st, dc in next st,+ skip 1 st; rep from * to + across to last st before marker, tr in next st, ch 3, 3 dc in marked ch-2 sp, remove marker,** ch 3, tr in next st, rep from * to ** across, ch 2, join with sc to top of first ch 4. - Rnd 3: Ch 1, 3 dc in same ch-3 sp, *dc in each st across to ch-3 sp, (3 dc, ch 3, 3 dc) in ch-3 sp, dc in next st, skip next st, dc in next st,** (3 dc, ch 3, 3 dc) in ch-3 sp; rep from * to ** across to last ch-3 sp, (3 dc, ch 2, join with sc to first dc) in ch-3 sp.
- Rnd 4: Ch 1, 2 dc in same ch-3 sp, *dc in each st across to ch-3 sp, (2 dc, ch 2, 2 dc) in ch-3 sp, dc in next 8 sts,** (2 dc, ch 2, 2 dc) in ch-3 sp; rep from * to **, (2 dc, ch 1, join with sc to first dc) in ch-3 sp. Fasten off second color.
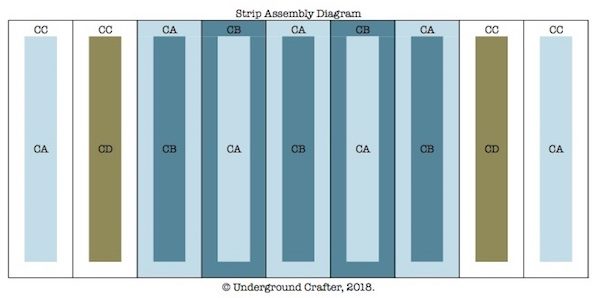
Assemble Strips
- Assemble Strips with single crochet join (see Pattern Notes) in the order indicated in assembly diagram as follows: With wrong sides together, join CA with sl st in corner ch-2 sp, working through both strips on right sides of strips, ch 1, sc in ch-2 sp, sc in center loops on of each st across row, sc in ch-2 sp, fasten off. Repeat until all Strips are joined.
Borders
- Border Rnd 1: Join CC with sl st to corner ch-2 sp before short edge of blanket, ch 1, *hdc in ch-2 sp, hdcBL in each st across side to corner ch-2 sp, (hdc, ch 3, hdc) in corner ch-2 sp, [hdcBL in each st across Strip to ch-2 sp, hdc in ch-2 sp on same Strip, hdc in ch-2 sp on next Strip] 8 times across to last Strip, hdcBL in each st across Strip to corner ch-2 sp,** (hdc, ch 3, hdc) in corner ch-2 sp; rep from * to **, (hdc, ch 2, join with sc to first hdc) in corner ch-2 sp.
- Border Rnd 2: Ch 1, hdc in same ch-3 sp, *hdc in each st across to corner ch-3 sp,** (hdc, ch 3, hdc) in corner ch-3 sp; rep from * around, ending last rep at ** before first ch-3 sp, (hdc, ch 3, sl st to first hdc to join) in corner ch-3 sp. Fasten off CC.
- Border Rnd 3: Join CD with sl st to any corner ch-3 sp, ch 1, 2 dc in same ch-3 sp, *dc in each st across to corner ch-3 sp,** (2 dc, ch 3, 2 dc) in corner ch-3 sp; rep from * around, ending last rep at ** before first ch-3 sp, (2 dc, ch 2, join with sc to first dc) in corner ch-3 sp.
- Border Rnd 4: Ch 1, 2 dc in same ch-3 sp, *dc in each st across to corner ch-3 sp,** (2 dc, ch 3, 2 dc) in corner ch-3 sp; rep from * around, ending last rep at ** before first ch-3 sp, (2 dc, ch 3, sl st to first dc to join) in corner ch-3 sp. Fasten off CD.
Finishing
- With yarn needle, weave in ends on wrong side of blanket.
The Catherine wheels in your little brother/little sister blanket are wonderful.. they match up so much better then any I have ever seen.. I don’t like doing blankets but will do this one just to see how you manage to get those wheels to work out right.