

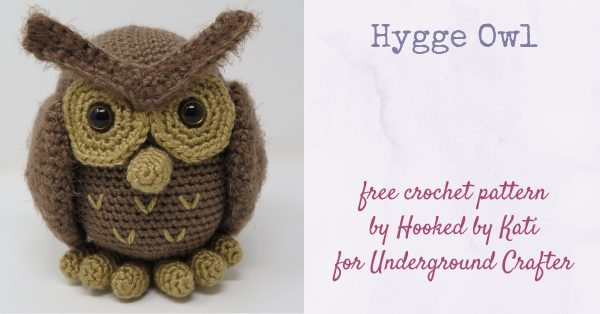
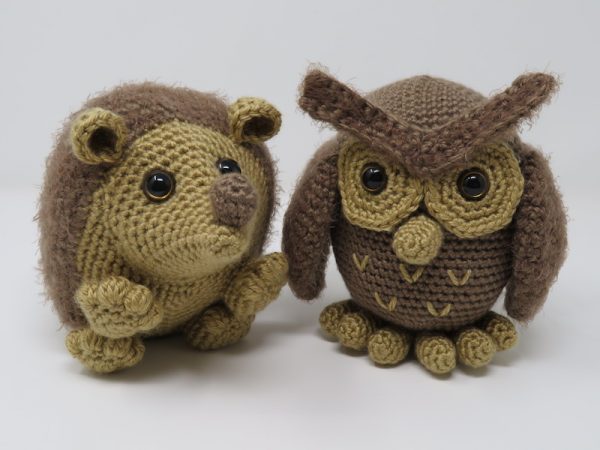
I’m thrilled to be sharing another adorable amigurumi crochet pattern by Hooked by Kati today! The Hygge Owl is a cute buddy to the Hygge Hedgehog.
This post contains affiliate links. I may receive compensation (at no added cost to you) if you make a purchase using these links. Photos in this post are © Kati Brown (Hooked by Kati) and are used with permission.
About Kati Brown

Kati Brown is a designer who lives in Colorado with her husband and two sons. Kati works in bright colors and fun shapes, and she loves making anything with safety eyes. Her inspiration mostly comes from the games and imaginations of her energetic boys, who thoroughly test all amigurumi for durability and aerodynamics. She is a regular contributor to several print magazines and runs Hooked by Kati, a blog about patterns and the craft business journey.
Show your support by following Kati on Hooked by Kati | Facebook | Instagram | Pinterest | Ravelry
Hygge Owl
Crochet Pattern by Hooked by Kati

The second woodland critter in the Hygge amigurumi series is a pudgy, round owl. Big feet and fuzzy wings give this guy personality beyond his 6.5” tall stature.
- Pattern Difficulty Level: Easy
- Terminology Used (U.S. or U.K.): US
Finished Size
- 6.5” (16.5 cm) tall x 4.5” (11.5 cm) wide x 4.5” (11.5 cm) deep when made with worsted weight yarn

Materials
- Red Heart Soft worsted weight yarn, 100% acrylic, 256 yds / 5 oz / 141 g, 1 ball (20 yds) #E728 Cocoa (MC), < 1 ball #7933 Wheat (AC1)
- Red Heart Hygge bulky yarn, 70% acrylic, 30% nylon, 132 yds / 5 oz / 141 g, 1 ball #E869 Latte (AC2).
- G (4.25 mm) crochet hook
- Two 15 mm brown safety eyes
- Fairfiled Poly-Fil Fiber Filling
- Tapestry needle
- Straight pins
- Stitch markers (if desired)
Gauge
- Gauge is not important for amigurumi. Be sure to use the same hook throughout to ensure proportional size.
Abbreviations Used in This Pattern
- [] Repeat instructions between brackets as indicated.
- AC1 – Accent Color 1
- AC2 – Accent Color 2
- ch – chain
- dec – decrease (sc2tog) – Watch a helpful video tutorial by Whistle & Ivy here.
- inc – increase (2 sc in next st)
- MC – Main Color
- sc – single crochet
- sc3tog – decrease over 3 sts: Insert hook through st, yo, pull up a loop, insert through next st, yo, pull up a loop, insert through next st, yo, pull up a loop, yo, pull through all four loops on hook. – Watch a helpful video tutorial by FreshStitches here.

Pattern Notes
- Work in continuous rounds unless otherwise specified by pattern.
- For best results, assemble parts in order specified by pattern.
- Do not weave in ends of each part until the end. This allows for repositioning of parts if needed.
- For more help with part attachment, check out 5 Tips for Perfect Amigurumi Part Attachment at Hooked by Kati.
- A video tutorial of the feet is available here.
Pattern Instructions
Eye Circles(Make 2)
- With AC1, ch 2.
- Rnd 1: 7 sc in second ch from hook. (7)
- Rnd 2: Inc in each st around. (14)
- Rnd 3: [sc, inc] 7 times. (21)
- Rnd 4: [2 sc, inc] 7 times. (28)
- Bind off and weave in ends.
Body
- With MC, ch 2.
- Rnd 1: 6 sc in second ch from hook. (6)
- Rnd 2: Inc in each st around. (12)
- Rnd 3: [sc, inc] 6 times. (18)
- Rnd 4: [2 sc, inc] 6 times. (24)
- Rnd 5: [3 sc, inc] 6 times. (30)
- Rnd 6: [4 sc, inc] 6 times. (36)
- Rnd 7: [5 sc, inc] 6 times. (42)
- Rnd 8: [6 sc, inc] 6 times. (48)
- Rnd 9: [7 sc, inc] 6 times. (54)
- Rnd 10-31: Sc evenly around. (54)
- Insert safety eyes through center of Eye Circles. Do not attach washers. Insert back of safety eyes though body at Round 14, with Eye Circles touching. Attach washers.
- Rnd 32: [7 sc, dec] 6 times. (48)
- Rnd 33: [6 sc, dec] 6 times. (42)
- Rnd 34: [5 sc, dec] 6 times. (36)
- Rnd 35: [4 sc, dec] 6 times. (30)
- Rnd 36: [3 sc, dec] 6 times. (24)
- Stuff.
- Rnd 37: [2 sc, dec] 6 times. (18)
- Rnd 38: [sc, dec] 6 times. (12)
- Rnd 39: Dec 6 times. (6)
- Bind off leaving a long tail for sewing. Thread yarn through front loops of remaining 6 sts. Pull tight to close. Weave in ends.
Wings (Make 2)
- With AC2, ch 2.
- Rnd 1: 6 sc in second ch from hook. (6)
- Rnd 2: Inc in each st around. (12)
- Rnd 3: Sc evenly around.
- Rnd 4: [sc, inc] 6 times (18)
- Rnd 5: Sc evenly around.
- Rnd 6: [2 sc, inc] 6 times. (24)
- Rnd 7: Sc evenly around.
- Rnd 8: [3 sc, inc] 6 times. (30)
- Rnd 9-14: Sc evenly around.
- Rnd 15: [3 sc, dec] 6 times. (24)
- Rnd 16: Sc evenly around.
- Rnd 17: [2 sc, dec] 6 times. (18)
- Bind off leaving long tail for sewing. Press flat. Wings will curve slightly. Working through both layers of last round, sew wing to body at Round 13, 1 stitch away from edge of Eye Circles on either side of body.
Beak
- With AC1, ch 2.
- Rnd 1: 6 sc in second ch from hook. (6)
- Rnd 2: [2 sc, inc] twice. (8)
- Rnd 3: [3 sc, inc] twice. (10)
- Rnd 4: [4 sc, inc] twice. (12)
- Rnd 5: Sc evenly around.
- Bind off leaving long tail for sewing. Stuff. Sew to body below and centered between Eye Circles.
Eyebrows
- With AC2, ch 24.
- Row 1: Sc in second ch from hook, 9 sc, sc3tog, 10 sc. Turn. (21)
- Rnd 2: Ch 1, 9 sc, sc3tog, 9 sc. (19)
- Bind off, leaving long tail for sewing. Sew eyebrows to body overlapping Eye Circles, with center point between safety eyes. Do not tack down last 6 sts on each end of Eyebrows.
Feet
- Note: For each foot, you will make 2 loose toes and bind off. Use continuous yarn from 3rd toe to attach all 3 toes and finish foot.

Loose Toes
- (Make 4)
- With AC1, ch 2.
- Rnd 1: 6 sc in second ch from hook. (6)
- Rnd 2: [sc, inc] 3 times. (9)
- Rnd 3-8: Sc evenly around.
- Bind off.
First Toe and Foot
- With AC1, ch 2.
- Rnd 1: 6 sc in second ch from hook. (6)
- Rnd 2: [sc, inc] 3 times. (9)
- Rnd 3-8: Sc evenly around.
- Do not break yarn. You will now be working around the last round of all 3 toes.
- Rnd 9: 4 sc on 1st loose toe, 9 sc on second loose toe, 5 sc on other side of first loose toe, 9 sc on starting toe. (27)
- Stuff toes.
- Rnd 10: [sc, dec] 9 times. (18)
- Rnd 11: Dec 9 times. (9)
- Rnd 12-16: Sc evenly around.
- Finish stuffing.
- Rnd 17: [sc, dec] 3 times. (6)
- Bind off leaving long tail for sewing. Thread yarn through front loops of remaining 6 sts. Pull tight to close.
- Attach feet to bottom of body, at a slight angle with back of feet touching. Body should balance on top of feet.
Finishing
- With AC1, sew 5 evenly-spaced Vs on body between Eye Circles and Feet.
So funny that our Danish word Hygge is used to your owl and squirrel 🙂 Ulla from Denmark
Hi Ulla, the yarn it is designed with is called Hygge :).
The Hygge Owl is so cute, thank you so much for sharing.