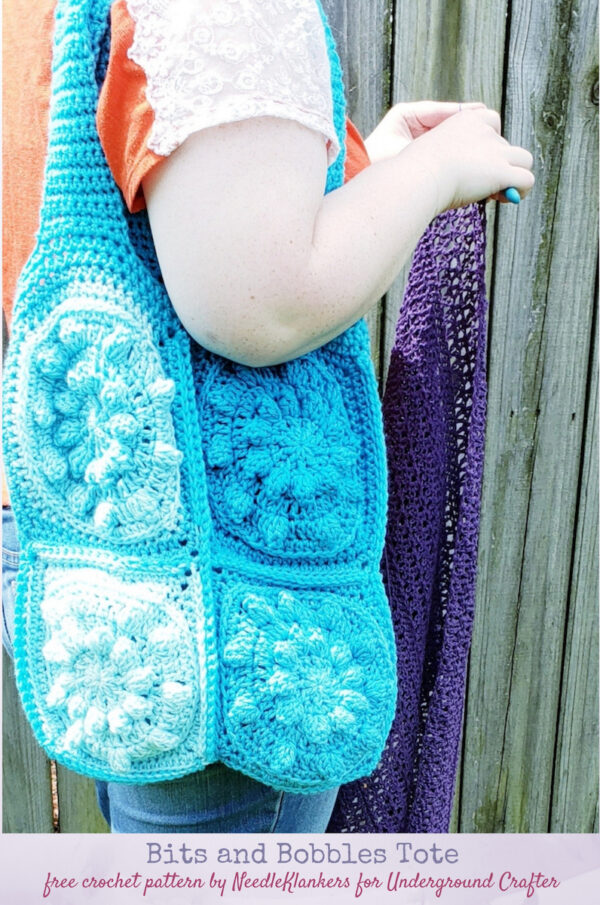
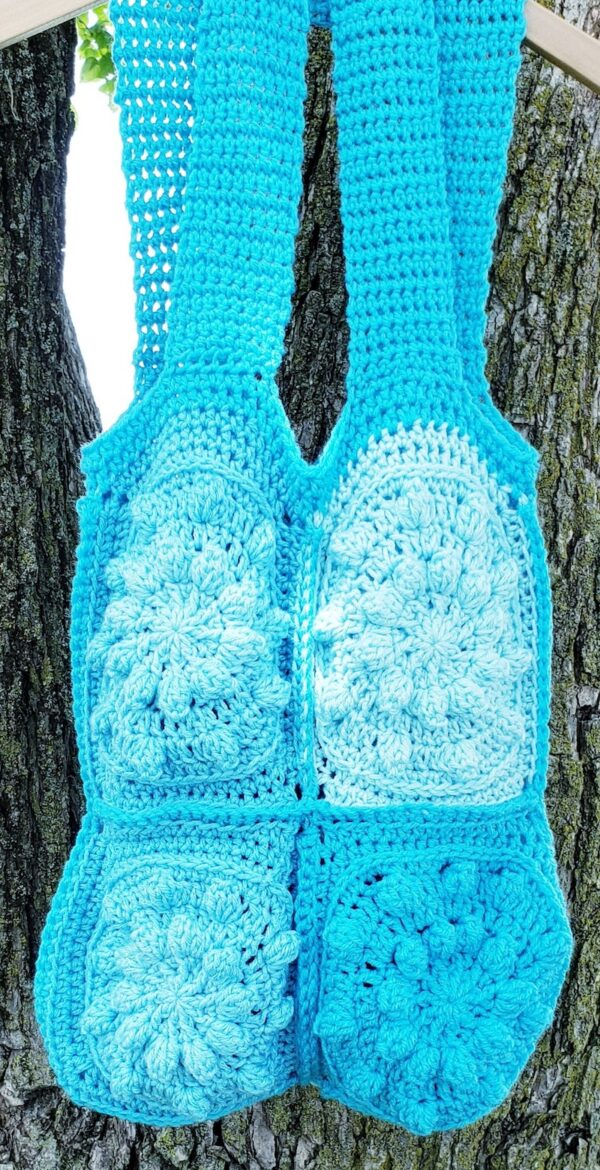
Crochet bag patterns are such fun to make because you can use them right away, no matter what the weather is like outside. This guest post by Taylor from Needle Klankers makes a textured tote bag that would be great as a market bag or project tote. There’s even a video to guide you through the entire project at the end of the post!

This post contains affiliate links. I may receive compensation (at no added cost to you) if you make a purchase using these links. Photos in this post are © Taylor Brewer/Needle Klankers and are used with permission.
About Needle Klankers

Needle Klankers is the two-woman show of mother-daughter team Lois and Taylor. These ladies have always had a love for crafts. If they could make it instead of buying it, it would make them feel happy and like they had accomplished something great!
As a child, Taylor watched her grandmother crochet, sew, quilt, and garden, but by the time she was able to understand crochet, her grandmother had Alzheimer’s and wasn’t able to teach her. Instead she learned the basics from a friend and then went on to YouTube videos to figure out the rest. Taylor found that crocheting was a big help for her severe anxiety.
When researching online for jobs she could do at home, Taylor found out more about being a crochet designer. She talked to her mom, who was all in! And, that is where Needle Klankers was born.
Show your support by following Taylor (and Lois) on Website | Newsletter | Etsy | Facebook | Instagram | Ravelry
Bits and Bobbles Tote
Crochet Bag Pattern by Needle Klankers

Supplies
- (1) Red Heart Ombre color Scuba
- (1) Red Heart Super Saver color Turqua
- Crochet Hook Size J
- Scissors
- Tapestry Needle
- Stitch Marker(s)
Abbreviations
- CH = Chain
- DC = Double Crochet
- FPDC = Front Post Double Crochet You can find a helpful video tutorial for this stitch here.
- HDC = Half Double Crochet
- MR = Magic Ring You can find a helpful video tutorial for forming a magic ring here.
- PC = Popcorn = Place 5 double crochets in 1 stitch, remove hook from loop and insert hook into 1st double crochet made, place hook back into loop and pull through 1st double crochet. AllFreeCrochet has a helpful video tutorial for this stitch here.
- R = Round
- REP = Repeat
- SC = Single Crochet
- SL ST = Slip Stitch
- ST(S) = Stitch(s)

Notes
- Ch1 does not count as a stitch.
- I sew my motifs together by single crocheting them, you are welcome to use your favorite method to attach your motifs. You can find a helpful photo tutorial for joining motifs with single crochet here.
- In the pattern I alternate between the Ombre yarn and solid yarn for my motifs, you may choose to make your tote how ever you like.
- A complete video tutorial for the Bits and Bobbles Tote is available at the end of this pattern.
Motif – Make 8
- R1: MR, Ch 1 place 10 Dc in MR Sl St to 1st Dc made
- R2: Ch 1, Dc in same St FpDc in same St *Dc, FpDc* in next St, Rep from ** around. Sl St to 1st St made.
- R3: Ch 1, Dc in same St, *Pc in next St, Ch 2 Dc in next St* Rep from ** around. Sl St to 1st St made.
- R4: Ch 1, Dc in same St, 1 Dc every St around (2 Dc in Ch 2 space) Sl St to 1st St made.
- R5: Ch 1, Pc in same St, Ch 3, 1 Dc in next 3 Sts *Pc in next St, Ch 3, 1 Dc in next 3 Sts* Rep from ** around. Sl St to 1st St made.
- R6: Ch 1, Hdc in same St and each St around (2 Hdc in Ch 3 space) Sl St to 1st St made.
- R7: Ch 1, Hdc in same St (3rd loop only) Hdc in every St around (3rd loop only) Sl St to 1st St made.
- R8: Ch 1, Hdc in same St, 1 Hdc in next 13 Sts (Hdc, Ch 2, Hdc) in next St *1 Hdc in next 14 Sts (Hdc, Ch 2, Hdc) in next St* Rep from ** around. Sl St to first St made.
- R9: Ch 1, Hdc in same St, * Hdc in each St till you reach Ch 2 space (Hdc, Ch 2, Hdc) in Ch 2 space* Rep from ** around. Sl St to 1st St made.
Sewing Together
- Place 2 motifs wrong sides together, insert hook into both Ch 2 spaces and attach yarn.
- Ch 1, Sc into Ch 2 space, *insert hook into back loop of front motif and front loop of back motif of next St and complete Sc* Rep from ** till you reach next Ch 2 space.
- Repeat above till you have 4 sets of 2.
- Take 2 of your sets and lay them on top of each other wrong sides together,
- Ch 1, Sc into Ch 2 space, *insert hook into back loop of front motif and front loop of back motif of next St and complete Sc* Rep from ** till you reach the end making sure to Sc in Ch 2 spaces.
- Rep with other 2 sets
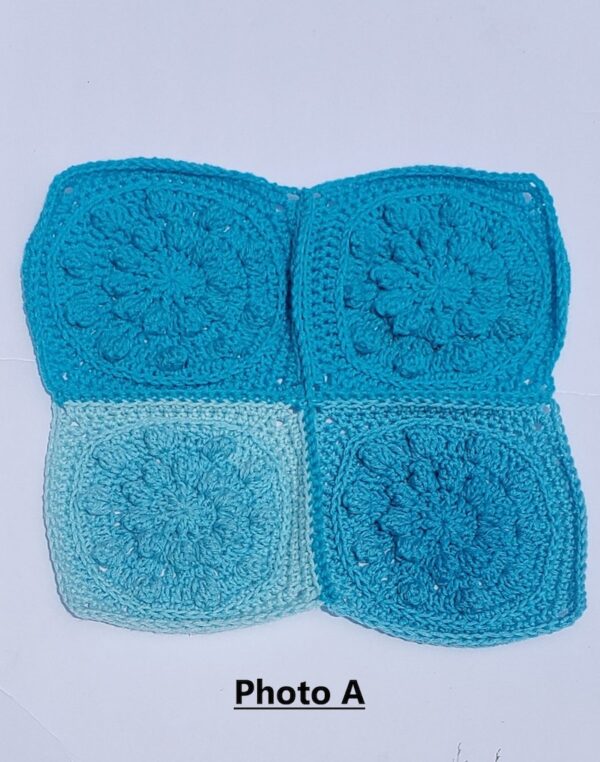
- You should have 2 pieces that look like this. (See Photo A below.)

- Take 1 panel and count down 5 stitches, place stitch marker in 6th stitch. Rep this on the other side of panel.
- Rep on other panel
- Place panels together (stitch markers should be on the same side) wrong sides facing, attach yarn in Ch 2 space (do not sew the side of the panel with the stitch markers)
- Ch 1, Sc into Ch 2 space, *insert hook into back loop of front motif and front loop of back motif of next St and complete Sc* Rep from ** making sure to Sc in Ch 2 spaces
- Rep this on 3 sides of panel
- Once you’ve sewn your bag together attach your yarn to the top of the bag (I used my solid color for the top of my bag) Ch 1, Hdc in the same stitch and each stitch around, making sure to replace stitch markers back in same stitch. Sl St to 1st Hdc made.
- Ch 1, Hdc in same stitch and each stitch around.
Straps
- R1: Sl St in each stitch to first marker, Ch 1, Hdc in same stitch Hdc in each stitch till you reach next stitch marker

