

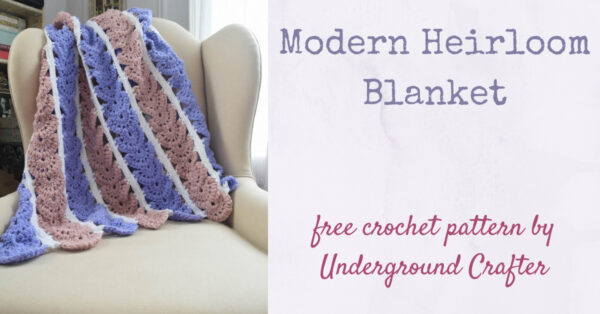
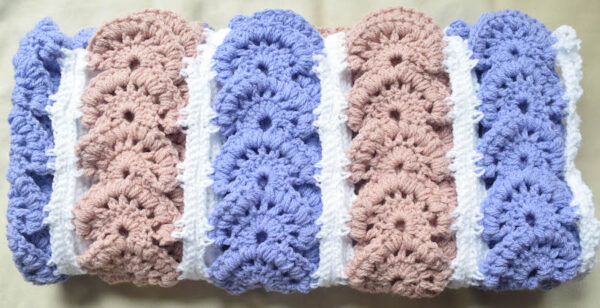
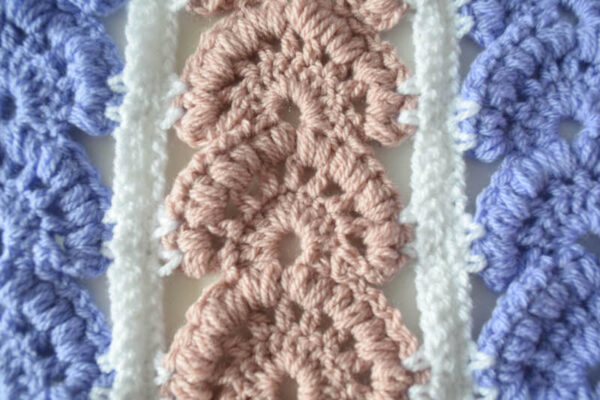
Are you looking for a crochet heirloom baby blanket to make that will make the new parents oooh and ahh? Then you’ll love the Modern Heirloom Blanket! This mile-a-minute blanket is crocheted with strips of beautiful puff stitch shells.
This post contains affiliate links. I may receive compensation (at no added cost to you) if you make a purchase using these links. Yarn for this project were generously provided by Bluprint (formerly Craftsy).
It’s no secret that I love baby blankets. While times have changed and pediatricians no longer recommend that you let infants sleep underneath blankets (especially not bulky crochet ones), baby blankets still make great projects to gift for decorating a nursery, to use as stroller or car seat blankets, or to use for “tummy time.”
This pattern was originally designed as part of a kit for Craftsy (now Bluprint). It was one of my first mile-a-minute (also known as strip-pieced) crochet patterns.
While the colors for this version are pretty feminine, you could also use neutrals for a less gendered project.
If you’re not sure what colors to use, try and get a sneak peak of the nursery. I find that most expecting parents are pretty excited when things coordinate!
This pattern is listed as intermediate, but if you have patience and are comfortable making puff stitches, a beginner can definitely tackle it!

If you make your own Modern Heirloom Blanket project, I’d love to see it! Share your progress and questions by tagging me on Facebook as @Underground Crafter, Instragram as @ucrafter, or Twitter as @ucrafter. You can also share a picture in the Underground Crafters Facebook group. Sign up for my weekly newsletter and get a coupon code for your choice of one of my premium patterns and other subscriber goodies. Plus, you’ll never miss one of my free patterns again!
Add the Modern Heirloom Blanket to your favorites or queue on Ravelry.

Modern Heirloom Blanket
Crochet Pattern by Underground Crafter
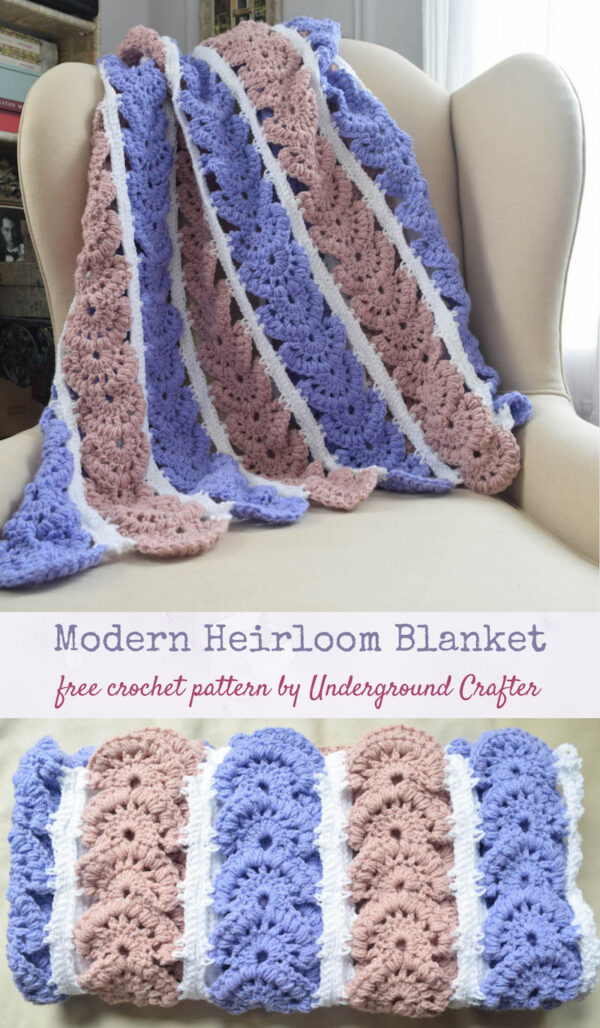


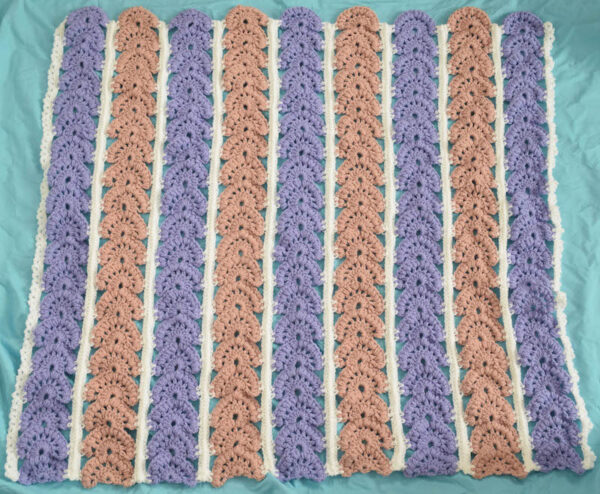
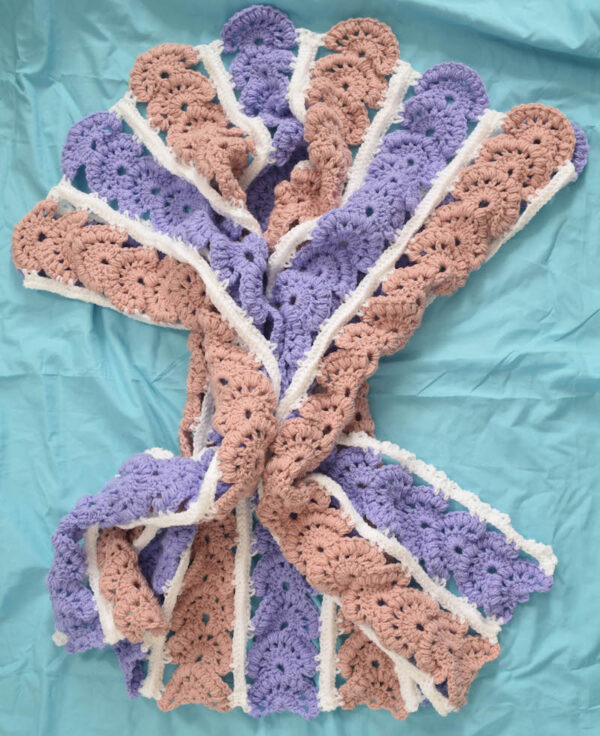
Strips of lacy puff stitch shells create a stunning, heirloom-quality baby blanket.
Finished Sizes
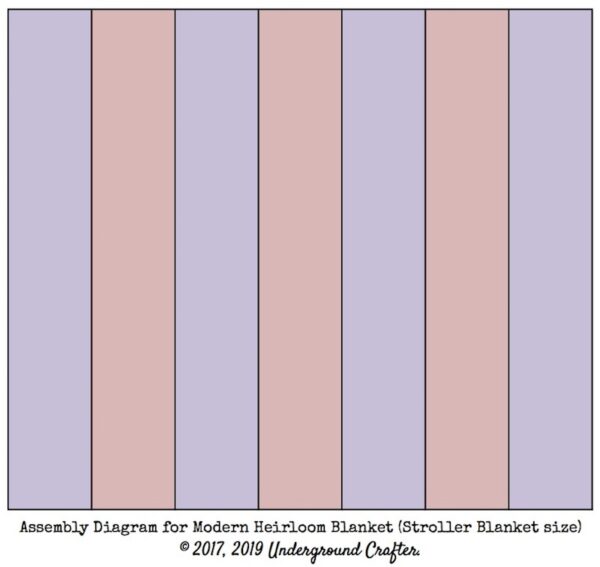
- Stroller
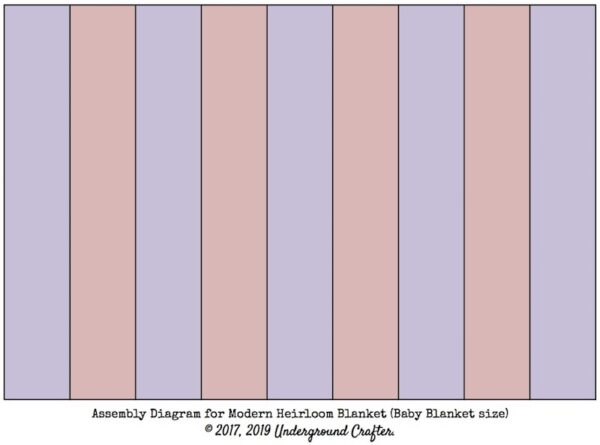
Blanket (Baby Blanket). Photographed
sample is size Baby Blanket.
- Stroller: 37” (94 cm) height x 36” (106.5 cm) wide.
- Baby Blanket: 37” (94 cm) height x 42” (106.5 cm) wide.
Materials
- Sprightly Acrylic Worsted yarn (100% acrylic, 3.5 oz/100 g/201 yd/184 m) – 4 (5) skeins in 501-005 Lavender (CA), 3 (4) skeins in 501-020 Misty Pink (CB), and 2 skeins in 501-025 White (CC), or approximately 732 yd/915 yd (669.5 m/836.5 m) in CA, 550 yd/732 yd (503 m/669.5 m) in CB, 320 yd/400 yd (292.5 m/366 m) in CC in any medium weight yarn.
- US Size I-9/5.5 mm crochet hook, or size needed to obtain gauge.
- Yarn needle.
Gauge
- Strip = 3.5” (9 cm) wide in pattern. Exact gauge is not critical for this project.
Abbreviations Used in This Pattern
- CA – Color A
- CB – Color B
- CC – Color C
- ch – chain
- ea – each
- rep – repeat
- pf – puff stitch – Yo, insert hook in next st, yo and draw up a loop, [yo, insert hook in same st, yo and draw up a loop] twice, yo and draw through 7 loops on hook. This tutorial by Jessie At Home shows a puff stitch with 2 additional repeats.
- sc – single crochet
- sk – skip
- sl st – slip stitch
- st(s) – stitch(es)
- yo – yarn over
- Repeat the instructions following the asterisk as indicated.
- () Instructions within parenthesis are worked into indicated stitch or space.
- [] Repeat instructions between brackets as indicated.
Pattern Notes
- Blanket is crocheted in Strips and then joined with slip stitch. You can find a tutorial for slip stitch seams here.
- Pattern is reversible, so designate favorite side as front (right) side when joining Strips.
Pattern Instructions
Strip – Make 4 (5) in CA and 3 (4) in CB
- Ch 6, turn, sk 5 ch, join with sl st to form ring.
- Row 1: Ch 3 (counts as dc, here and throughout), 8 dc in ring. (9 sts)
- Row 2: Turn, ch 4 (counts as dc + ch-1 sp, here and throughout), dc in next st, [ch 1, dc in next st] 7 times. (9 sts + 8 ch-1 sp)
- Row 3: Turn, sl st in first ch-1 sp, starting in same sp *[(pf, ch 1) twice in next ch-1 sp] 4 times,** ch 4, rep from * to ** once. (16 pf sts + 16 ch-1 sp + ch-4 sp)
- Row 4: Turn, starting in first ch-1 sp, [sl st in ch-1 sp, ch 1] 6 times, sk (pf, ch 1, pf), 9 dc in ch-4 sp, sk (pf, ch 1, pf), sl st in next ch-1 sp. (9 dc)
- Row 5: Turn, sl st in first dc, ch 4 (counts as dc + ch-1 sp), dc in next st, [ch 1, dc in next st] 7 times. (9 dc + 8 ch-1 sp)
- Rep Rows 3-5 – 15 (17) more times, ending after Row 5.
- Row 6: Turn, sl st in first ch-1 sp, starting in same sp [(pf, ch 1) twice in next ch-1 sp] 7 times, (pf, ch 1, pf) in last ch-1 sp. (16 pf sts + 15 ch-1 sp)
- Fasten off. With yarn needle, weave in ends.
Edging – Strip 1
- Row 1: Join CC with sl st in ch-1 sp after first pf at bottom shell of any CA Strip, ch 1, sc in same sp, ch 1, sc in next ch-1 sp, *ch 5, sc in ch-1 sp after first pf on next shell, ch 1, sc in next ch-1 sp; rep from * across length of Strip. – 131 (147) sts, or any multiple of 8 sts, + 3 sts.
- Row 2: Turn, ch 1, sc in first st, sc in ch-1 sp, sc in next st, *sc in ea of next 5 ch, sc in next st, sc in ch-1 sp, sc in next st; rep from * across length of Strip.
- Row 3: Turn, ch 1, sc in first st, *ch 3, sk 1, sc in next st; rep from * across length of Strip. Fasten off.
- Rep Rows 1 & 2 on other side of Strip 1. Fasten off.
Edging – Strip 2
- Row 1: Join CC with sl st in ch-1 sp after first pf at bottom shell of any CB strip, ch 1, sc in same sp, ch 1, sc in next ch-1 sp, *ch 5, sc in ch-1 sp after first pf on next shell, ch 1, sc in next ch-1 sp; rep from * across length of Strip.
- Row 2: Turn, ch 1, sc in first st, sc in ch-1 sp, sc in next st, *sc in ea of next 5 ch, sc in next st, sc in ch-1 sp, sc in next st; rep from * across length of Strip. Do not fasten off.
- With right (front) sides of Strip 1 and Strip 2 facing, join with slip stitch seam (see Pattern Notes) along wrong side of Row 2. Fasten off.
- Rep Rows 1 & 2 on other side of Strip 2. Fasten off.
Continue Edging
- Continue to work edging as for Strip 2, alternating colors as you join strips as shown in assembly diagrams below.
- On final Strip, do not fasten off after Row 2 on second side.
- Rep Edging Strip 1 Row 3 on final Strip. Fasten off.
Finishing
- With yarn needle, weave in ends on wrong (back) side of blanket.
This baby rug looks lovely ,l do a lot of crochet for charities,always looking for new ideas,thank you for .Pamela Lawrence.