

I’m kicking off this year’s Holiday Stashdown Crochet Along with CAL Central Crochet with the Boom Box Softie crochet amigurumi pattern. This cutie makes a great gift for anyone who loves music or who is nostalgic for late 1970s through early 1990s technology. Read on for the pattern and details on how you can join the CAL!

This post contains affiliate links. I may receive compensation (at no added cost to you) if you make a purchase using these links. Materials for this project were generously provided by Fairfield World and WeCrochet.
My longtime readers know I’m a native of Brookyn, New York and spent most of my life between the boroughs of Brooklyn and Manhattan. One fixture in that life from the late 1970s through the early 1990s was the boom box. It was a portable music system with (at that time) a tape deck. People would bring them on the subway (annoying) and also to start a party on their stoop (totally cool). I made many, many, many (really, an uncountable number) of mix tapes on a boom box for friends and family. Fun times!

I’ve been wanting to make a crochet version of the boom box for a while, but things always came up. When I learned that Fairfield World was celebrating the 80th Anniversary of Poly-Fil fiber filling, I knew that now was the time to make my boom box amigurumi project a reality. I’ve been a Fairfield World Design Team member since 2017, and this seemed like the perfectly personal project to commemorate their anniversary.

The best thing about this softie is that it is immediately recognizable to anyone who loved a boom box, or even to the youngsters who have only read retro vintage posts about boom boxes.

My Boom Box Softie is not life sized. Instead, it’s a handheld project that you can make with one skein of yarn in the main color and small bits in the other colors. For my version, I used WeCrochet Brava Bulky, a soft acrylic yarn available in lots of beautiful colors. If you prefer to work with medium weight yarn, there is a Brava Worsted, too. Your softie will be smaller, of course.

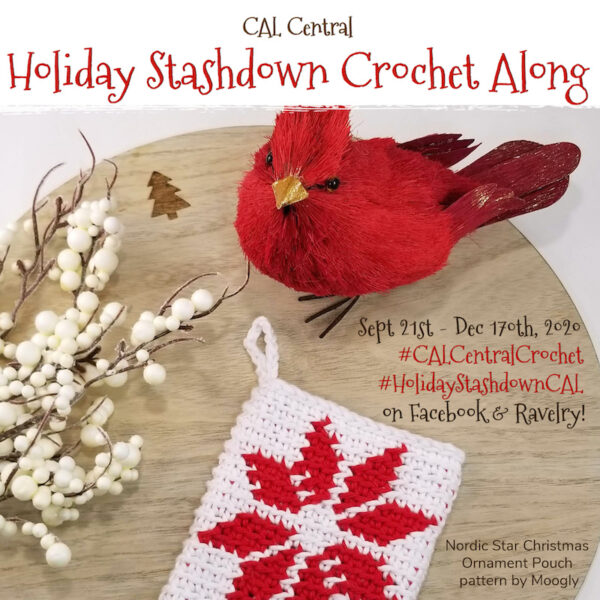
This is the first pattern in the 2020 sixth annual Holiday Stashdown Crochet Along with CAL Central. Join in with us!
- Learn more about the CAL and enter for your chance to win the end-of-CAL giveaways prizes from Babé Crochet, Bags by Awesome Grannie, Clover USA, GlassEyesOnLine, I Like Crochet, JitterBeanMugs, Knitter’s Pride, Kraemer Yarns, Nelsonwood, Search Press North America, Unicorn, Walnut Farm Designs, and WeCrochet by 11:59 p.m. Eastern on Thursday, December 31, 2020 in this blog post.
- You can join in by crocheting the patterns as you have time.
- Share your progress and post pictures of your finished projects. Tag your projects and posts #CALCentralCrochet and #HolidayStashdownCAL on all social media.
- If you’d like to chat with other crocheters, join the CAL Central Crochet Facebook group, or visit this thread in the CAL Central Ravelry group.
- If you’d like to get an email with links to the CAL patterns for the week, sign up for the Underground Crafter newsletter here.
- By the end of the CAL, you’ll have up to 26 gifts, decorations, or wrap projects for the winter holidays.
- Use this button below on your Ravelry project pages or elsewhere on social media. Right click (on desktop) or tap and hold (on mobile) to save.
If you make your own Boom Box Softie, I’d love to see it! Share your progress and questions by tagging me on Facebook as @Underground Crafter, Instragram as @ucrafter, or Twitter as @ucrafter. You can also share a picture in the Underground Crafters Facebook group. Sign up for my weekly newsletter and get a coupon code for your choice of one of my premium patterns and other subscriber goodies. Plus, you’ll never miss one of my free patterns again!
Add the Boom Box Softie to your favorites or queue, or buy the ad-free PDF on Ravelry.

Boom Box Softie
Crochet Amigurumi Pattern by Underground Crafter


This simple, rag doll style amigurumi pattern is reminiscent of a late 1970s to early 1990s tape cassette boom box. This is the first pattern in the 2020 Holiday Stashdown Crochet Along.
Finished Size
- Approximately 10” (25.5 cm) across x 5.5” (14 cm) tall after folding and before stuffing.
Materials
- WeCrochet Brava Bulky yarn (100% acrylic, 3.5 oz/100 g, 136 yd/124 m) – 1 skein each in 29339 Cobblestone Heather (CA), 28335 Black (CB), 28343 Dove Heather (CC), and 28352 Red (CD), or approximately 136 yd (124 m) in CA, 20 yd (18.5 m) in CB, 10 yd (9 m) in CC, and 2 yd (2 m) in CD in any bulky weight yarn.
- US Size G-6/4 mm crochet hook, or any size needed to obtain correct gauge.
- Fairfield Poly-Fil Premium Polyester Fiber Fill, 12 ounce bag.
- WeCrochet locking stitch marker set.
- 12 mm black safety eyes – 1 pair.
- Yarn needle.

Gauge
- 14 sc x 16 rows = 4” (10 cm). Exact gauge is not critical for this project. Stitches should be small so that fiber filling doesn’t show.
Abbreviations Used in This Pattern
- BL – back loop – Moogly has helpful videos for identifying the front and back loops here.
- CA – Color A
- CB – Color B
- CC – Color C
- CD – Color D
- ch – chain
- dc –double crochet
- hdc – half double crochet
- rep – repeat
- sc – single crochet
- sl st – slip stitch
- st(s) – stitch(es)
- *Repeat instructions after asterisk as indicated.
Pattern Notes
- This project is crocheted in 5 pieces and then seamed. The Speakers are crocheted in the round; all other pieces are crocheted flat in rows.
- When selecting colors, CA is the main color of the Boom Box, CB is the color of the Speakers, CC is the color of Radio Dial and the Tape Deck, and CD is the color of the markings.
- Ch 1 at beginning of rows and rounds does not count as a stitch.
- Video tutorials for the back stitch and cross stitch embroidery stitches are available at the end of this blog post.
- A helpful tutorial for joining with the single crochet seam is available here.
Pattern Instructions
Speakers (Make 2)
- With CB, ch 4, skip 3 ch, join with sl st to next ch to form ring.
- Round 1: Ch 1, 12 dc in ring, do not join. (12 sts)
- Round 2: 2 dc in each st around. (24 sts)
- Round 3: Hdc in next st, sc in next st, sl st in next st. Fasten off with long yarn tail (approximately 12”/30.5 cm) for seaming.
Radio Dial
- With CC, ch 25.
- Row 1: Turn, skip 1 ch, sc in next 24 ch. (24 sts)
- Row 2: Turn, ch 1, sc in first st and in each st across.
- Rows 3-4: Rep Row 2 twice. Fasten off with long yarn tail (approximately 18”/46 cm) for seaming.
Tape Deck
- With CC, ch 9.
- Row 1: Turn, skip 1 ch, sc in next 8 ch. (8 sts)
- Row 2: Turn, ch 1, sc in first st and in each st across.
- Rows 3-8: Rep Row 2, 6 times. Fasten off with long yarn tail (approximately 12”/30.5 cm) for seaming.
Boom Box
- With CA, ch 37.
- Row 1: Turn, skip 1 ch, sc in next 36 ch. (36 sts)
- Row 2: Turn, ch 1, sc in first st and in each st across.
- Rows 3-22: Rep Row 2, 20 times.
- Row 23: Turn, ch 1, scBL in first st and in each st across.
- Rows 24-44: Rep Row 2, 21 times. Do not fasten off.
Assembly and Finishing
- Place a locking stitch marker in loop at end of Row 44 so project doesn’t unravel during assembly. Fold Boom Box over at Row 22. Choose best side as “front” for assembly.

- With yarn needle, weave in starting yarn tail (not long tail for seaming) on Speakers, Radio Dial, Tape Deck, and Boom Box on wrong side/inside.
- Decorate Tape Deck. Position safety eyes on face. Attach firmly by securing washers on back. Thread yarn needle with approximately 1 yd (1 m) of CD. Position 3 cross stitches (see Pattern Notes) beneath safety eyes. Weave in CD yarn tails on back of Tape Deck.

- Position Speakers, Tape Deck, and Radio Dial on right side top portion of Boom Box. Use locking stitch markers to pin pieces into place. Thread yarn needle with yarn tail from each piece and sew into position, being sure to work only through top layer of Boom Box. Weave in yarn tails on inside of Boom Box.

- Thread yarn needle with approximately 1 yd (1 m) of CD. Position a back stitch (see Pattern Notes) on the Radio Dial to mark your favorite station. Weave in CD yarn tails on inside of Boom Box.
- Remove locking stitch marker from last loop of Row 44. Working through both layers and crocheting across the top of the Boom Box, join with a single crochet seam (see Pattern Notes) into next 36 sts.
- Turn to work along short edge, join with a single crochet seam into the side of each row. Fasten off CA. With yarn needle, weave in ends on inside of Boom Box.
- Stuff Boom Box firmly with fiber filling.
- Join CA with a slip stitch on unseamed short edge. Join short edge with single crochet seam into the side of each rows, adding fiber filling as you work. Join with sl st to first sc on long edge seam. Fasten off CA. With yarn needle, weave in ends on inside of Boom Box.

© 2020 by Marie Segares (Underground Crafter). This pattern is for personal use only. You may use the pattern to make unlimited items for yourself, for charity, or to give as gifts. You may sell items you personally make by hand from this pattern. Do not violate Marie’s copyright by distributing this pattern or the photos in any form, including but not limited to scanning, photocopying, emailing, or posting on a website or internet discussion group. If you want to share the pattern, point your friends to this link: https://undergroundcrafter.com/2020/09/21/amigurumi-pattern-boom-box-softie/. Thanks for supporting indie designers!
