

I’m sharing the deceptively simple — yet dramatic looking — knit clutch pattern for the Ribbon Stitch Clutch.

This post contains affiliate links. I may receive compensation (at no added cost to you) if you make a purchase using these links. I am a King Cole Brand Ambassador and this post is part of our ongoing collaboration. All opinions and words are my own. Additional supplies for this project were generously provided by Knitter’s Pride and WeCrochet.
This knit clutch pattern was originally designed as a mystery knit along with AllFreeKnitting. Since the knit along had three parts, I had to come up with a design that could easily be divided up. But, first, I had to pick the yarn.
King Cole Timeless Classic Super Chunky (available at your local yarn shop, or online at LoveCrafts or Wool Warehouse UK) is a beautiful, two-toned, marled yarn. It’s super bulky weight, which is kinda my favorite for knitting. Because I knit verrrrrrrrrrrrry slowwwwwwwwwwly. The super bulky is what lets me actually finish projects! All the colorways in King Cole Timeless Classic Super Chunky include a twist of gray yarn. This makes it so easy to mix and match colors.
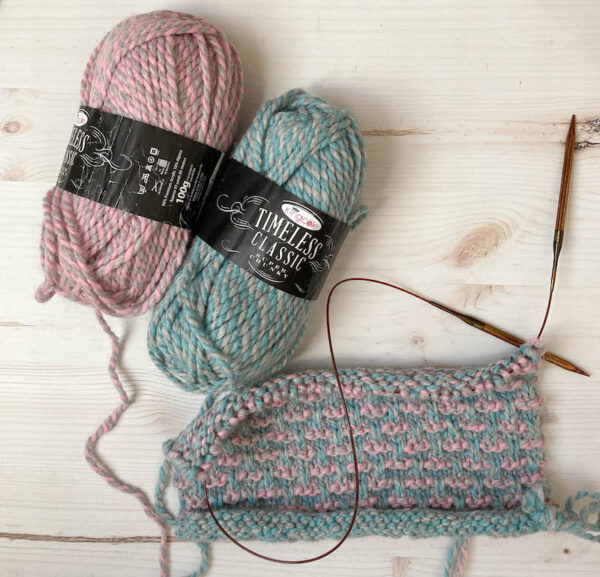
Once I had the yarn picked out, I thought for a while about stitches. I love the ribbon stitch (I’ve used it before in my free knitting patterns for the Ribbon Stitch Cowl and the Ribbon Stitch Dishcloth) and it’s a great way to make colors pop. I also had a video tutorial for it. Decision made: ribbon stitch it is!
Scroll down for the free knitting pattern for the Ribbon Stitch Clutch!
If you make your own Ribbon Stitch Clutch, I’d love to see it! Share your progress and questions by tagging me on Bluesky as @UndergroundCrafter, Facebook as @UndergroundCrafter, or on Instagram as @ucrafter. You can also share a picture in the Underground Crafters Facebook group. Sign up for my weekly newsletter and get a coupon code for your choice of one of my premium patterns and private access to my vault of subscriber goodies. Plus, you’ll never miss one of my free patterns again!
Add the Ribbon Stitch Clutch to your favorites or queue, or buy the ad-free PDF on Ravelry.

Ribbon Stitch Clutch
Knit Clutch Pattern by Underground Crafter


This colorful, beginner-friendly clutch with an asymmetrical flap works up quickly in super bulky yarn. It can also be used as an electronics cozy.
Finished Size
- Clutch: Approximately 12” (30.5 cm) wide x 9.5” (24 cm) height with the flap folded down after assembly.
Materials
- King Cole Timeless Classic Super Chunky yarn (90% acrylic/10% alpaca, 3.5 oz/100 g/93 yd/85 m) – 2 skeins each in 4649 Topaz (CA) and 4650 Quartz (CB), or approximately 120 yd (110 m) each in CA and CB in any super bulky weight yarn.
- Timeless Classic Super Chunky is available at your local yarn shop, or online at LoveCrafts or Wool Warehouse UK.
- US Size 10.5/6.5 mm Knitter’s Pride Ginger Interchangeable Needles, or size needed to obtain gauge. If you’re new to these needles, you can watch my unboxing below.
- If you can’t see the Knitter’s Pride Ginger video above, click here to watch it on YouTube.
- Clover Quick Locking Stitch Marker set (for knit seamlessly in the round version).
- Clover bent-tip yarn needle.
- WeCrochet Premium Blocking Mats.
Gauge
- 14 sts = 4” (10 cm) in stockinette stitch. Exact gauge is not critical for this pattern. Your stitches should be tight and firm, creating a dense fabric which may curl.
- To work gauge swatch, CO 16 sts.
- Row 1: K across.
- Row 2: P across.
- Rep Rows 1-2 until swatch measures approximately 4” (10 cm) long. Bind off in pattern for Row 1.
- Your swatch will probably be curling. Pin it flat without stretching to measure. Your swatch should measure between 4.25” (11 cm) to 4.5” (11.5 cm) wide.
Abbreviations Used in This Pattern
- CA – Color A
- CB – Color B
- CO – cast on
- k – knit
- k2tog – knit 2 stitches together (decrease) – A helpful video tutorial for the k2tog decrease is available below.
- If you can’t see the video for the k2tog above, click HERE to watch it on YouTube.
- p – purl
- p2tog – purl 2 stitches together (decrease) – AllFreeKnitting has a helpful video tutorial for the p2tog decrease here.
- rep – repeat
- sl – slip stitch purlwise
- st(s) – stitch(es)
- wyib – with yarn in back
- wyif – with yarn in front
- [] Repeat instructions between brackets as indicated.
Pattern Notes
- If you have difficulty “reading” your stitches, place a locking stitch marker on the front of Row 1 of the Front Panel to mark the right/front side.
- If you’re new to blocking, you can find tutorials and supply lists here.
Clutch
Front Panel
- With CA, CO 40 sts.
- A video tutorial for the stitch pattern used on the Front Panel is available below.
- If you can’t see the Ribbon Stitch video tutorial above, click here to watch it on YouTube.
- Set Up Row 1: (Right Side) K across.
- Set Up Row 2: P across.
- Set Up Rows 3-4: Rep Rows 1-2 again. Do not fasten off CA.
- Row 1: With CB, [k3, sl 1 wyib] across.
- Row 2: With CB, [Sl 1 wyif, k3] across. Do not fasten off CB.
- Row 3: With CA, k across.
- Row 4: With CA, p across. Do not fasten off CA.
- Row 5: With CB, [k1, sl 1 wyib, k2] across.
- Row 6: With CB, [k2, sl 1 wyif, k1] across. Do not fasten off CB.
- Rows 7-8: Rep Rows 3-4 once.
- Rows 9-32: Rep Rows 1-8, 3 times.
- Rows 33-38: Rep Rows 1-6 once. Fasten off CB at the end of the repeat of Row 6.
- Rows 39-42: Rep Rows 3-4 twice.
- Bind off in pattern for Row 3. Fasten off CA.
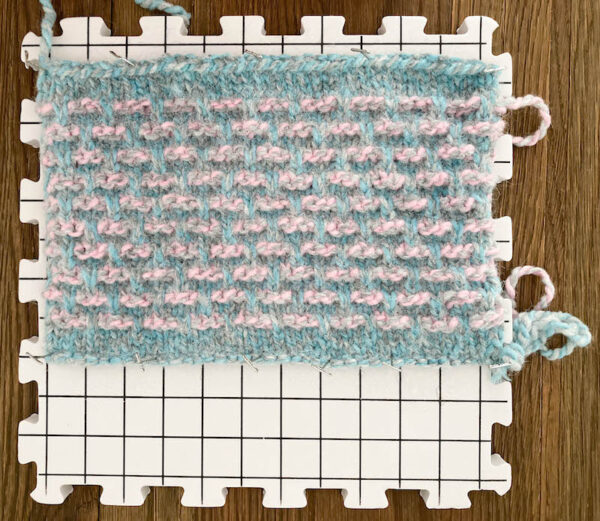
- Your piece may be curling dramatically. Block it flat using spray or wet blocking (see Pattern Notes).
Back Panel
- With CB, CO 40 sts.
- Row 1: Sl 1, k across to last st, p1.
- Row 2: Sl 1, p across.
- Rows 3-48: Rep Rows 1-2, 23 times.
- Do not bind off; keep stitches on the needle.
- Fasten off CB with long yarn tail (approximately 36”/91.5 cm) for seaming.
- Your piece may be curling, but do not block it yet.

Front Flap
- Continue working on the Back Panel piece.
- Row 1: (RS) Change to CA, p across. (40 sts)
- Row 2: Sl 1, p across.
- Row 3: Sl 1, k to last 3 sts, k2tog, p1. (Decreases by 1 st to an odd number of sts)
- Row 4: Sl 1, p2tog, p across. (Decreases by 1 st to an even number of sts)
- Rows 5-38: Rep Rows 3-4, 17 times. (4 sts)
- Row 39: Rep Row 3. (3 sts)
- Row 40: Sl 1, p2tog. (2 sts)
- Row 41: K2tog. (1 st)
- Do not bind off.
- Fasten off CA with long yarn tail (approximately 36”/91.5 cm) for seaming. Draw yarn tail through last loop on needle and fasten off.
Assembly and Finishing
- Block this piece flat as follows using spray or wet blocking (see Pattern Notes).
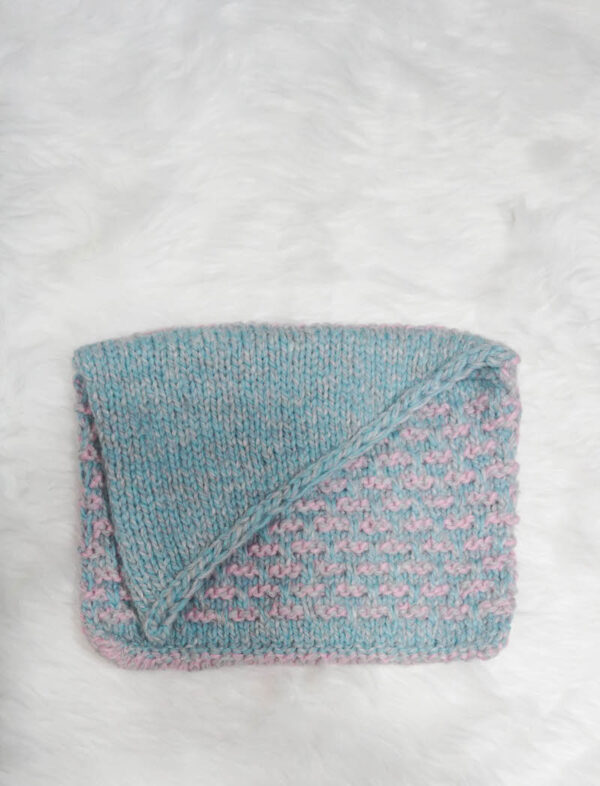
- Fold over the asymmetrical flap at Row 1 of the Front Flap and pin the Back Panel to the size of the Front Panel as shown in the photo below.

- Thread the long yarn tails from the end of your project into your yarn needle and seam the pieces together using the mattress stitch (see video tutorial below) as follows. Position Wrong Sides together with Right Sides facing out. Seam the Front Panel to the Back Panel along three sides so that the asymmetrical flap and the top long edge are not seamed.
- If you can’t see the video tutorial above, click here to watch it on YouTube.
- With yarn needle, weave in ends on inside of Clutch.
