

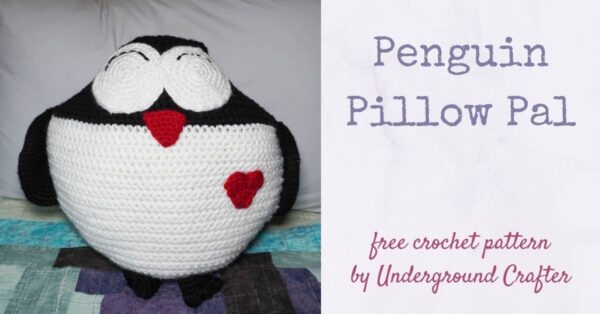
I’m so excited to kick off the Cozy at Home crochet along with CAL Central Crochet with this adorable penguin crochet pattern! The Penguin Pillow Pal is a sleepy buddy that can add a touch of crochet whimsy to any room. With the decorative heart, it’s a wonderful gift for Valentine’s Day, Mother’s Day, or birthdays.
This post contains affiliate links. I may receive compensation (at no added cost to you) if you make a purchase using these links. I am a King Cole Brand Ambassador and this post is part of our ongoing collaboration. Additional supplies for the sample were generously provided by Clover USA and Fairfield World.
For my version of the Penguin Pillow Pal, I used King Cole Big Value Super Chunky in three colors. This is a super soft acrylic yarn that is easy to care for in the washer and dryer. This super bulky yarn is available at your local yarn shop, or online at LoveCrafts or Wool Warehouse UK.

My finished version has Flippers and Webbed Feet so it can be a pillow or a cuddle buddy, but you can also make your version without Flippers or Webbed Feet. You won’t need as much black yarn and it will be a bit easier to sleep on, too.
Scroll down to get the free pattern for the Penguin Pillow Pal. This is the first pattern in the Cozy at Home Crochet Along with CAL Central Crochet. You can get all the details, including links to all 12 included patterns, and enter the giveaway to win one of five great prizes in this blog post. To join the Cozy at Home CAL:
- Sign up for my newsletter to get reminders each week with the new patterns included.
- You can join in by crocheting the patterns as you have time.
- Share your progress and post pictures of your finished projects. Tag your projects and posts #CALCentralCrochet on all social media.
- If you’d like to chat with other crocheters, join the CAL Central Facebook group or visit this thread in the CAL Central Ravelry group.
- By the end of the CAL, you’ll have up to 12 awesome projects. Make your home comfy and cozy while having fun with us!
- Use this button below on your Ravelry project pages or elsewhere on social media. Right click (on desktop) or tap and hold (on mobile) to save.

If you make your own Penguin Pillow Pal, I’d love to see it! Share your progress and questions by tagging me on Bluesky as @UndergroundCrafter, Facebook as @UndergroundCrafter, or on Instagram as @ucrafter. You can also share a picture in the Underground Crafters Facebook group. Sign up for my weekly newsletter and get a coupon code for your choice of one of my premium patterns and private access to my vault of subscriber goodies. Plus, you’ll never miss one of my free patterns again!
Add the Penguin Pillow Pal to your favorites or queue, or buy the ad-free PDF on Ravelry.

Penguin Pillow Pal
Penguin Crochet Pattern by Underground Crafter


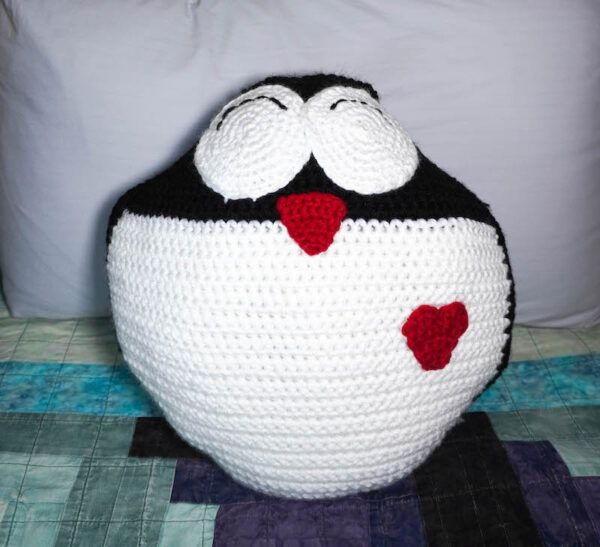
This adorable, sleeping penguin pillow adds a touch of crochet whimsy to any room. Make your version without or with flippers and webbed feet.
Finished Size
- Approximately 15.5” (39.5 cm) tall x 15” (38 cm) wide at widest point before seaming and stuffing.
Materials
- King Cole Big Value Super Chunky yarn (100% acrylic, 3.5 oz/100 g/90 yd/81 m) – 2 skeins in 1758 White (CA), 4 skeins in 8 Black (CB), and 1 skein in 20 Wine (CC), or approximately 150 yd (137 m) in CA; 324 yd (296 m) in CB; and 20 yd (18 m) in CC in any super bulky weight yarn.
- King Cole Big Value Super Chunky is available at your local yarn shop, or online at LoveCrafts | Wool Warehouse UK
- Clover Amour US Size J-10/6 mm crochet hook, or size needed to obtain gauge.
- Clover Quick Locking Stitch Marker Set.
- Clover bent-tip yarn needle.
- Fairfield World Poly-Fil Premium Polyester Fiber Fill – 20 ounce bag.
Gauge
- 12 sc = 4” (10 cm) wide. Exact gauge is not critical for this pattern. Stitches should be tight so that fiber filling doesn’t show through.
Abbreviations Used in This Pattern
- bob – 5-repeat bobble – [Yo, insert hook into st, yo and draw up a loop, yo and draw through 2 loops] 5 times in the same st, yo and draw through all 6 loops on hook. A video tutorial for this stitch pattern is below.
- If you can’t see the video tutorial for bobble stitch above, watch it on YouTube.
- CA – Color A
- CB – Color B
- CC – Color C
- ch – chain
- dc – double crochet
- pm – place stitch marker
- rep – repeat
- Rnd(s) – Round(s)
- RS – right (front) side
- sc – single crochet
- sc2tog – single crochet 2 stitches together (decrease) – [Insert hook in next st, yo and draw up a loop] twice, yo and draw through all 3 loops on hook. A helpful sc2tog video is available below.
- If you can’t see the sc2tog video above, watch it on YouTube.
- sl st – slip stitch
- st(s) – stitch(es)
- yo – yarn over
- * Repeat instructions after asterisk as indicated.
- [] Repeat instructions between brackets as indicated.
Pattern Notes
- When choosing colors, note that CA is the color of the Eyes and parts of the Front. CB is the color of the Back, Flippers, Webbed Feet, and parts of the Front. CC is the color of the Bill and Heart.
- Change colors in the last yarn over of a stitch and crochet over the yarn tails as you work. A helpful video tutorial demonstrating this is available below.
- If you can’t see the video tutorial above for changing colors and crocheting over yarn tails, watch it on YouTube.
- Oombawka Design has a helpful video tutorial for starting with the magic adjustable ring here.
- A helpful tutorial for seaming with the whipstitch is available below.
- If you can’t see the whipstitch video above, watch it on YouTube.
- A helpful video tutorial for the embroidery backstitch is available at the end of this blog post.
Pattern Instructions
Front
- With CB, ch 14.
- Row 1: Turn, skip 1 ch, sc in next 13 ch. (13 sts)
- Row 2: Turn, ch 1, 2 sc in first st, sc in each st across to last st, 2 sc in last st. (Increases by 2 sts – 15 sts)
- Rows 3-16: Rep Row 2, 14 times. (43 sts)
- Row 17: Rep Row 2, changing to CA in last yo of final st. Fasten off CB. (45 sts)
- Row 18: Turn, ch 1, sc in first st and in each st across.
- Rows 19-34: Rep Row 18, 16 times.
- Row 35: Turn, ch 1, sc2tog in first 2 sts, sc in each st across to last 2 sts, sc2tog. (Decreases by 2 sts – 43 sts)
- Rows 36-49: Rep Row 35, 14 times.
- Row 50: Rep Row 35, changing to CB in last yo of final sc2tog. Fasten off CA. (13 sts)
- Border Rnd: (RS – see video below for tutorial for working single crochet around edge of rows) Turn, ch 1, sc in first st and next 12 sts across Row 50, ch 1, turn to work along curved edge, 2 sc in side of next row, sc in side of each of next 48 rows, 2 sc in side of next row, ch 1, turn to work across foundation chain, sc in unworked side of next 13 ch, ch 1, turn to work along curved edge, 2 sc in side of first row, sc in side of each of next 51 rows, ch 1, join with sl st to first sc. Fasten off CB.
- If you can’t see the video above for working single crochet around the edge of rows, watch it on YouTube.
Back
- Work as for Front using CB for entire Back including Border Rnd. (Do not change colors in Row 17 or Row 50.) Fasten off CB with long yarn tail (approximately 4 yds/3.5 m) for seaming.
Eyes (Make 2)
- With CA, start with magic adjustable ring (see Pattern Notes).
- Rnd 1: (RS) Ch 1, 6 sc in ring, pull yarn tightly to close ring, pm in last st to mark position. Move marker up each Rnd. (6 sts)
- Rnd 2: 2 sc in each st around. (12 sts)
- Rnd 3: [2 sc in next st, sc in next st] around. (18 sts)
- Rnd 4: [2 sc in next st, sc in next 2 sts] around. (24 sts)
- Rnd 5: [2 sc in next st, sc in next 3 sts] around. (30 sts)
- Rnd 6: [2 sc in next st, sc in next 4 sts] around. (36 sts)
- Fasten off CA with long yarn tail (approximately 18”/46 cm) for seaming.
Bill
- With CC, ch 2.
- Row 1: Turn, skip 1 ch, 2 sc in next st. (2 sts)
- Row 2: Turn, ch 1, sc in first st, 2 sc in next st. (3 sts)
- Row 3: Turn, ch 1, sc in first st, sc in each st across to last st, 2 sc in last st. (Increases by 1 st – 4 sts)
- Rows 4-6: Rep Row 3, 3 times. (7 sts)
- Fasten off CC with long yarn tail (approximately 12”/30.5 cm) for seaming.
Heart
- With CC, work as for Bill through Row 5.
- Row 6: (RS) Turn, ch 1, [skip 1 st, 4 dc in next st, sl st in next st] twice.
- Fasten off CC with long yarn tail (approximately 12”/30.5 cm) for seaming.
Flippers (Make 2)
- With CB, ch 2.
- Rnd 1: (RS) Skip 1 ch, 6 sc in next ch, pm in last st to mark position. Move marker up each Rnd. (6 sts)
- Rnd 2: 2 sc in each st around. (12 sts)
- Rnd 3: [2 sc in next st, sc in next st] around. (18 sts)
- Rnd 4: [2 sc in next st, sc in next 2 sts] around. (24 sts)
- Rnd 5: [2 sc in next st, sc in next 3 sts] around. (30 sts)
- Rnd 6: [2 sc in next st, sc in next 4 sts] around. (36 sts)
- Rnd 7: [2 sc in next st, sc in next 5 sts] around. (42 sts)
- Rnd 8: [2 sc in next st, sc in next 6 sts] around. (48 sts)
- Rnd 9: [2 sc in next st, sc in next 7 sts] around. (54 sts)
- Fold circle in half along diameter as shown in photo below, ch 1, working through both layers on curved edge, join with sl st seam (see video tutorial below) through next 26 sts.
- If you can’t see the slip stitch seam video above, watch it on YouTube.

- Fasten off CB with long yarn tail (approximately 18”/46 cm) for seaming.
Webbed Feet – Left Foot
- With CB, work as for Flipper through Rnd 4.
- Joining Row: (RS) Fold circle in half along diameter as shown in photo for Flippers, ch 1, working through both layers on curved edge, join with sc seam (see video tutorial below) through next 11 sts.
- If you can’t see the video tutorial for joining with a single crochet seam above, watch it on YouTube.
- Final Row: Turn, ch 1, sc in first st, [bob in next st, sc in next st] 3 times, sl st in next 4 sts.
- Fasten off CB with long yarn tail (approximately 18”/46 cm) for seaming.
Webbed Feet – Right Foot
- Work as for Left Foot through Joining Row.
- Final Row: Turn, ch 1, sl st in first 4 sts, [sc in next st, bob in next st] 3 times, sc in next st.
- Fasten off CB with long yarn tail (approximately 18”/46 cm) for seaming.
Assembly and Finishing
- Use yarn needle to weave in all but long yarn tail for seaming at ends of Back, Eyes, Bill, Heart, Flippers, and Webbed Feet.
- Position first Eye on RS of Front on top of CB section as shown in the photo below. Thread yarn needle with CA from first Eye. With yarn needle, join Eye to Front with whipstitch seam (see Pattern Notes).

- Thread yarn needle with CA from second Eye. Position second Eye to slightly overlap first Eye as shown in the photo below. With yarn needle, join Eye to Front with whipstitch seam. Weave in yarn tails for both Eyes on wrong side of Front.

- Position Bill centered between Eyes as shown in photo below. Thread yarn needle with CC from Bill. With yarn needle, join Bill to Front with whipstitch seam. Weave in yarn tail on wrong side of Front.

- Position Heart on Front using photo below as guide. Thread yarn needle with CC from Heart. With yarn needle, join Heart to Front with whipstitch seam. Weave in yarn tail on wrong side of Front.

- Thread yarn needle with approximately 18” (46 cm) in CB. Using embroidery back stitch (see Pattern Notes), embellish with “sleepy” eyes using photo below as guide. With yarn needle, weave in yarn tails on wrong side of Front.
- Position Front over Back with wrong sides together.

- Thread yarn needle with CB from end of Back and join together with whipstitch seam, leaving the bottom open so you can stuff firmly with fiber filling.
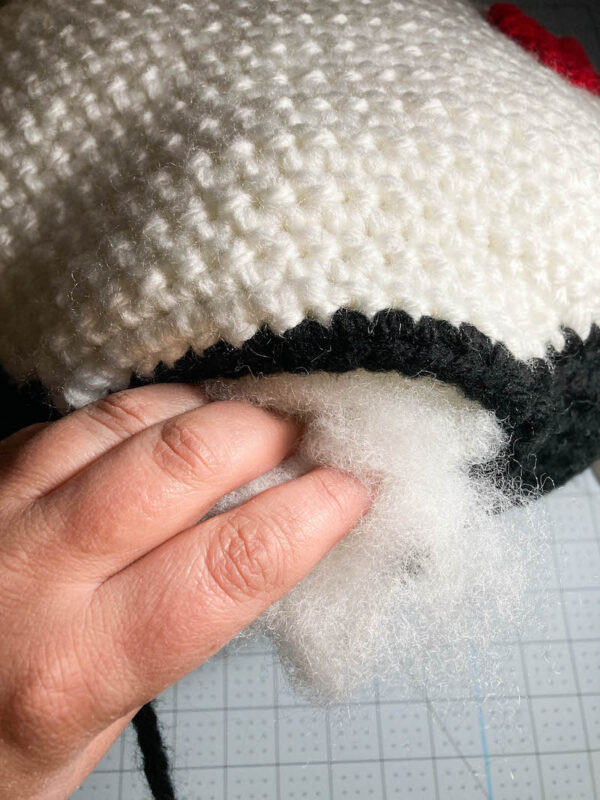
- Finish seaming, continuing to add fiber filling as necessary. Weave in yarn tails from whipstitch seam on Back.
Join Flippers and Webbed Feet (Optional)

- Position first Flipper at side of Front so that top of Flipper is at first Row in CA. Thread yarn needle with CB from end of Flipper and join to edge of Front (same area where Front and Back were seamed) with whipstitch seam. With yarn needle, weave in ends. Repeat for second Flipper.

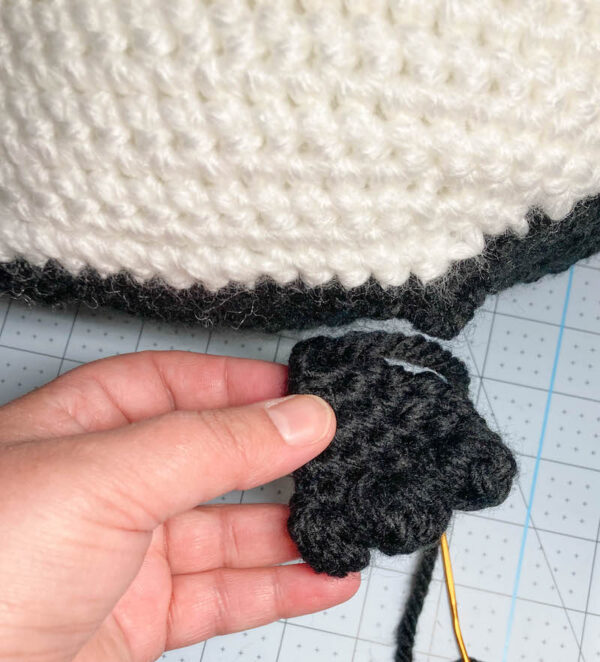
- To finish first Webbed Foot, fold flat edge (slip stitches on Final Row) so it is behind bobble stitches on Final Row. Thread yarn needle with CB from end of Webbed Foot and seam edge closed with whipstitch.

- Position first Webbed Foot at bottom of Front so that flat seamed edge of Webbed Foot will attach to the body and “bobble toes” are right side up. Thread yarn needle with CB from end of Webbed Foot and join to edge of Front (same area where Front and Back were seamed) with whipstitch seam. With yarn needle, weave in ends.
- Repeat process for second Webbed Foot.
