

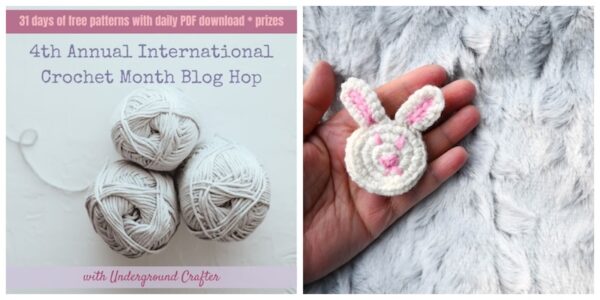
I’m sharing the sixteenth pattern in the 4th Annual International Crochet Month Blog Hop: a pocket hug bunny crochet pattern. The Pocket Hug Bunny adds comfort wherever you go. It’s perfect for stash busting, and it also makes a great sugar-free alternative for an Easter egg hunt. This pattern is forever free on my blog, but the PDF version is available for free download with coupon code through 10am Eastern on March 17, 2026 as part of the Blog Hop.
This post contains affiliate links. I may receive compensation (at no added cost to you) if you make a purchase using these links.
My mom is a great gift giver, and she makes delightful Easter baskets for the kiddos in our family. If you’re looking for a small gift to include in with a treat this year, you’ll love the Pocket Hug Bunny! It uses just a small amount of scrap yarn and it’s a great portable bit of comfort to carry in your pocket. (You can also include the Emotional Support Pocket Hug Bear as a pal so it doesn’t get lonely!)
Scroll down for the free version of the Pocket Hug Bunny crochet pattern. This pattern is part of the 4th Annual International Crochet Month Blog Hop. To follow the blog hop…
- Visit this blog post to get the link to each pattern as it goes live and to enter the giveaway for your chance to win one of 12 prizes from Denise, Forbidden Fiber Co., Fox Chapel Publishing, Furls, GlassEyesOnline, Guild of Master Craftsman Publications, KnitPal, Knitter’s Relief Balm, LennyMudPottery, MBT Creates, Unicorn, and WalnutFarmDesigns. Don’t forget to enter the giveaway for a chance to win one of 12 prizes by Sunday, April 5, 2026, at 11:59pm Eastern.
- Sign up for Crochet Along updates and the Underground Crafter newsletter to get regular updates, including links to new CAL patterns as they are released. When you sign up, you’ll also get access to my subscriber vault which includes exclusive free PDF patterns, a coupon code for your choice of any crochet or knitting pattern or ebook from my Ravelry shop, and coupon codes from other indie designers and crafts businesses.
- You can join in by crocheting the projects as you have time.
- Share your progress and post pictures of your finished projects. Tag your projects and posts #undergroundcrafter on all social media.
- If you’d like to chat with other crafters, join the Underground Crafters Facebook group or visit this thread in the Underground Crafter Ravelry group.
- By the end of the Blog Hop, you’ll have 31 awesome projects to keep, gift, donate, or sell.
- Use this button below on your Ravelry project pages or elsewhere on social media. Right click (on desktop) or tap and hold (on mobile) to save.

If you’re reading this blog post before 10am Eastern on March 17, 2026, you’re in luck! You can grab the Ravelry PDF version of the Pocket Hug Bunny for free with coupon code bunny2026 or you can add the pattern with coupon code to your cart HERE or by clicking on the International Crochet Month-Pocket Hug Bunny collage image below. Be sure your cart is set to $0 before checking out as there will be no refunds for accidental purchases.
If you make your own Pocket Hug Bunny, I’d love to see it! Share your progress and questions by tagging me on Bluesky as @UndergroundCrafter, Facebook as @UndergroundCrafter, or on Instagram as @ucrafter. You can also share a picture in the Underground Crafters Facebook group. Sign up for my weekly newsletter and get a coupon code for your choice of one of my premium patterns and private access to my vault of subscriber goodies. Plus, you’ll never miss one of my free patterns again!
Add the Pocket Hug Bunny to your favorites or queue, or buy the ad-free PDF on Ravelry.

Pocket Hug Bunny
Bunny Crochet Pattern by Underground Crafter
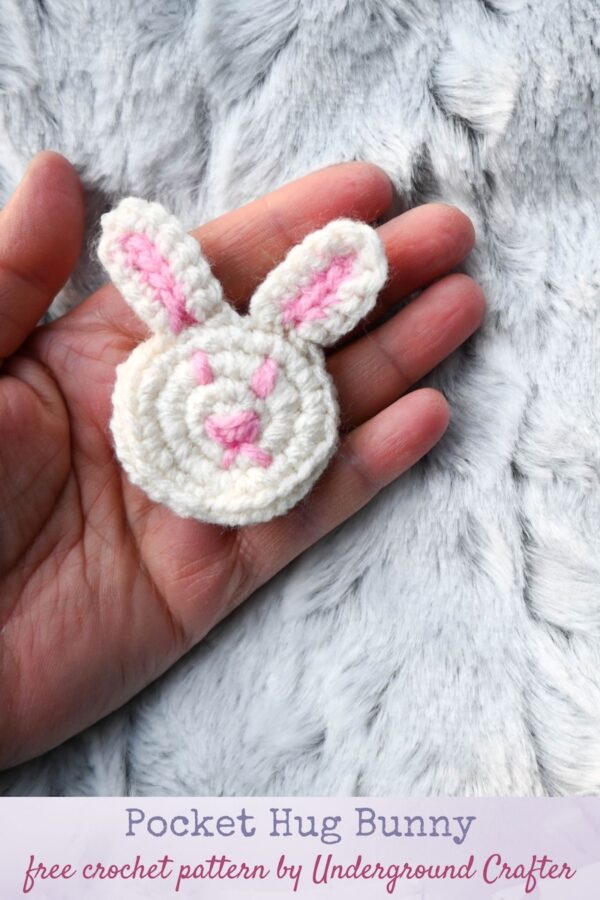


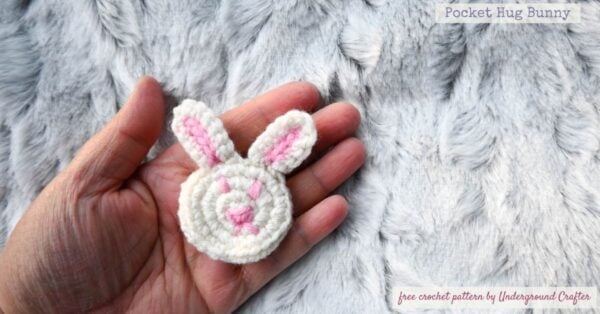
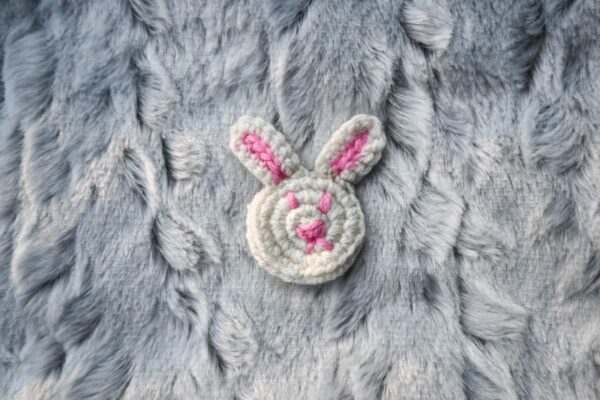
This pocket hug bunny crochet pattern is a stress-buster you can bring along anywhere. It also makes a great sugar-free alternative for an Easter egg hunt. This is the sixteenth pattern in the 4th Annual International Crochet Month Blog Hop.
Finished Size
- One Size: Approximately 3″ (7.5 cm) tall when finished.
Materials
- Big Twist Value yarn (100% acrylic, 6 oz/170 g, 380 yd/347 m) – 1 skein each in Ivory (CA) and Medium Rose (CB), or approximately 15 yd (13.5 m) in CA and 1 yd (1 m) in CB in any medium weight yarn.
- KnitPro Waves 2.0 hooks (available online at LoveCrafts | Amazon) US Size F-5/3.75 mm crochet hook, or any size needed to obtain correct gauge.
- Locking stitch marker.
- Yarn needle.
Gauge
- Exact gauge is not critical for this pattern. Stitches should be small as though for stuffed toys.
Abbreviations Used in This Pattern
- BL – back loop – Fiber Flux has a helpful video identifying the back loop in crochet here.
- CA – Color A
- CB – Color B
- ch – chain
- FL – front loop – A helpful video for identifying the front loop is available below.
- If you can’t see the video showing the front loop above, watch it on YouTube.
- pm – place stitch marker
- sc – single crochet
- sl st – slip stitch
- st(s) – stitch(es)
- [] Repeat instructions within brackets as indicated.
Pattern Notes
- Stitch markers are moved up each round to mark position(s) unless otherwise noted.
- Oombawka Design Crochet has helpful photo and video tutorials for starting with the magic adjustable ring here.
- A helpful video demonstrating how to seam with the whipstitch is available below.
- If you can’t see the video above showing how seam with the whipstitch, watch it on YouTube.
- A helpful video tutorial demonstrating how to embellish crochet with the embroidery back stitch is available at the end of this blog post.
Pattern Instructions
Bunny
Back
- With CA, start with the magic adjustable ring (see Pattern Notes).
- Round 1: Ch 1, 6 sc in ring, tighten magic ring to close, pm in last st to mark end of Rnd, move marker up each Rnd. (6 sts)
- Round 2: 2 sc in each st around. (12 sts)
- Round 3: [2 sc in next st, sc in next st] around. (18 sts)
- Round 4: [2 sc in next st, sc in next 2 sts] around. (24 sts)
- Fasten off CA.
- With yarn needle, weave in yarn tails on wrong side.
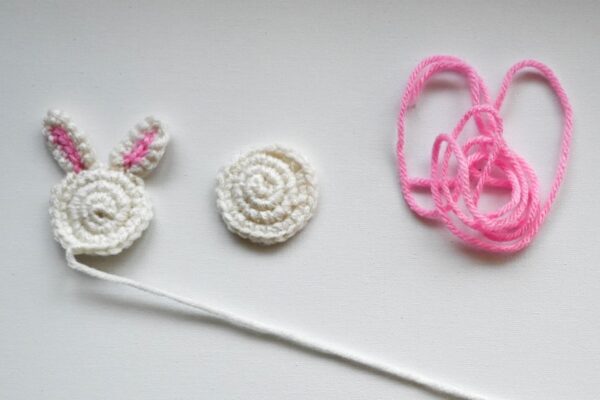
Front
- Repeat as for Back through Rnd 4. Fasten off CA with long yarn tail (approximately 12″/30.5 cm) for seaming. With yarn needle, weave in yarn tail from magic adjustable ring on wrong side.
First Ear
- Row 1: Join CB with slstFL to any st on Front, ch 5, turn, skip 1 ch, sl st in next 4 ch, join CA with slstFL to same st on Front, slstFL in next st on Front, fasten off CB.
- Row 2: Turn, ch 1, skip current and next sl st on Front, sc in first 4 sts on First Ear, 3 sc in skipped ch at top of First Ear, turn along next side of First Ear, sc in next 4 sts, slstFL to same st on Front, slstFL in next st on Front. Fasten off CA.
- With yarn needle, weave in yarn tails on wrong side of Front.
Second Ear
- Skip 2 sts after First Ear, join CB with slstFL to next st on Front. Follow instructions as for First Ear.
Embellishment, Assembly, and Finishing
- Cut a piece of CB approximately 12″ (30.5 cm) long for embellishing the face.
- Thread yarn needle with cut piece of CB. Using the embroidery back stitch (see Pattern Notes), create two Eyes, a Nose, and a Mouth. Weave in yarn tails on wrong side of Front.
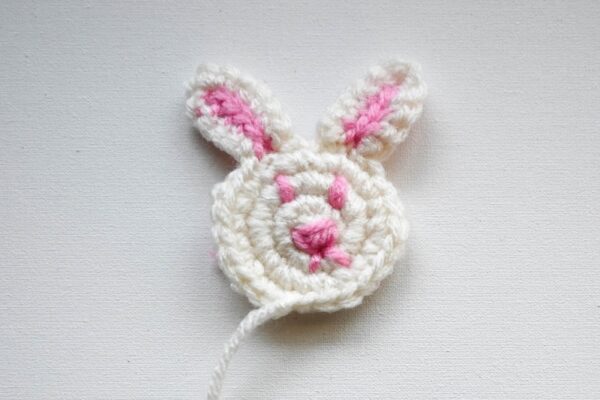
- Position Front on Back with wrong sides together and right (front) sides facing out. Thread yarn needle with CA from Front. Join the Front and Back with whipstitch seam (see Pattern Notes) in BL of both pieces.
- With yarn needle, weave in yarn tails on inside.