
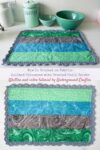
In today’s Sewing Basics post, I’m sharing how to crochet on fabric with the Quilted Placemats with Crochet Shells Border workshop. This was an online class I taught at a summit a few years ago. I’ve updated it to include more detailed written instructions and your choice of watching the full video or shorter sections based on the skills you need.

This post contains affiliate links. I may receive compensation (at no added cost to you) if you make a purchase using these links. I’m a Baby Lock Brand Ambassador. This post is part of our ongoing collaboration but all opinions and words are my own. Additional supplies were provided by King Cole, Michael Miller Fabrics, and Nelsonwood.
Back in 2021, I was one of the teachers at Simple Simon & Company’s Spring Mod Bee, a 3-day online event for quilters. I taught a class on how to crochet on fabric through the Quilted Placemats with Crochet Shells Border project.
Since then, this project has shown up as part of a different bundle and now I’m ready to share it with you all! I’ve updated the pattern to include crochet instructions with abbreviations (for more experienced crocheters who know how to read patterns) and without abbreviations (for sewists that are new to crochet patterns). And, you have the option of watching the whole class in one video, or watching just the parts you need Because each section of the pattern includes written instructions along with a shorter video.
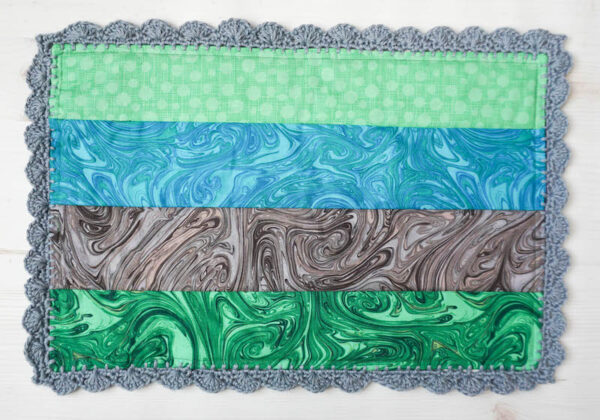
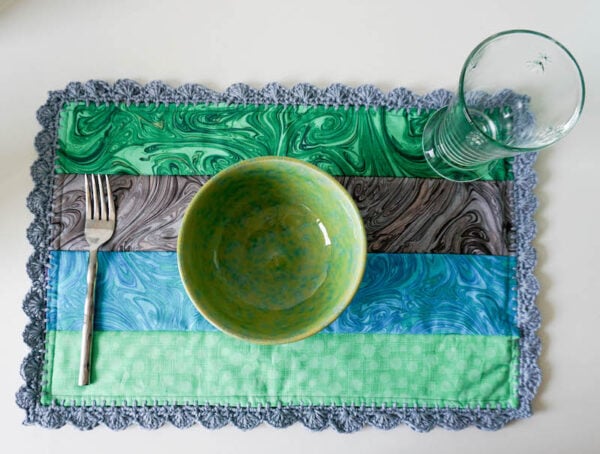
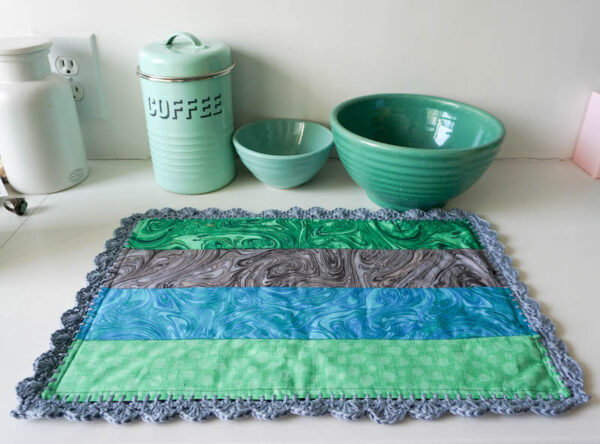
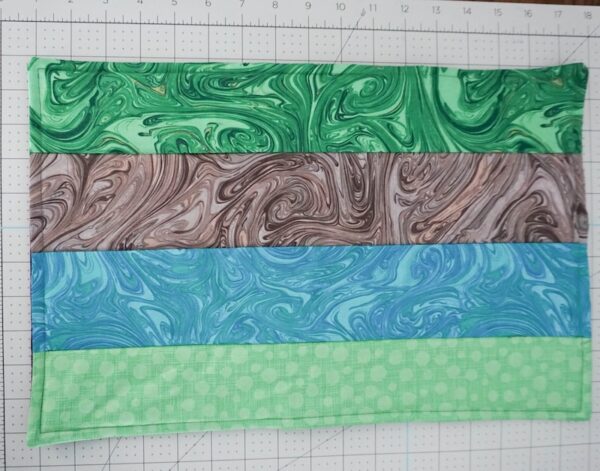
The Quilted Placemats part of the pattern is very beginner friendly and could literally be someone’s first sewing project. It’s all straight lines and small sections. You can use yardage or fat quarters, as you prefer. (If you’re new to fat quarters, find out more about precut fabrics in this post.) I made each of my placemats a little different, so that everyone at the table could have their own customized variation, but you can make four the same if you prefer. The front of the placemats are made with strips…
…and the back is one piece of fabric.
After you put your placemats together, you’ll move on to adding the crochet. This pattern uses a few simple stitches (chain, double crochet, single crochet, and slip stitch) and each of these are shown in the videos.
Scroll down for the free how to crochet on fabric sewing tutorial for the Quilted Placemats with Crochet Shells Border. If you make your own Quilted Placemats with Crochet Shells Border, I’d love to see them! Share your progress and questions by tagging me on Bluesky as @UndergroundCrafter, Facebook as @UndergroundCrafter, or on Instagram as @ucrafter. You can also share a picture in the Underground Crafters Facebook group. Sign up for my weekly newsletter and get a coupon code for your choice of one of my premium patterns and private access to my vault of subscriber goodies. Plus, you’ll never miss one of my free patterns again!
You can also buy the ad-free PDF for this pattern on Payhip.
Quilted Placemats with Crochet Shells Border
How To Crochet on Fabric Sewing Tutorial by Underground Crafter
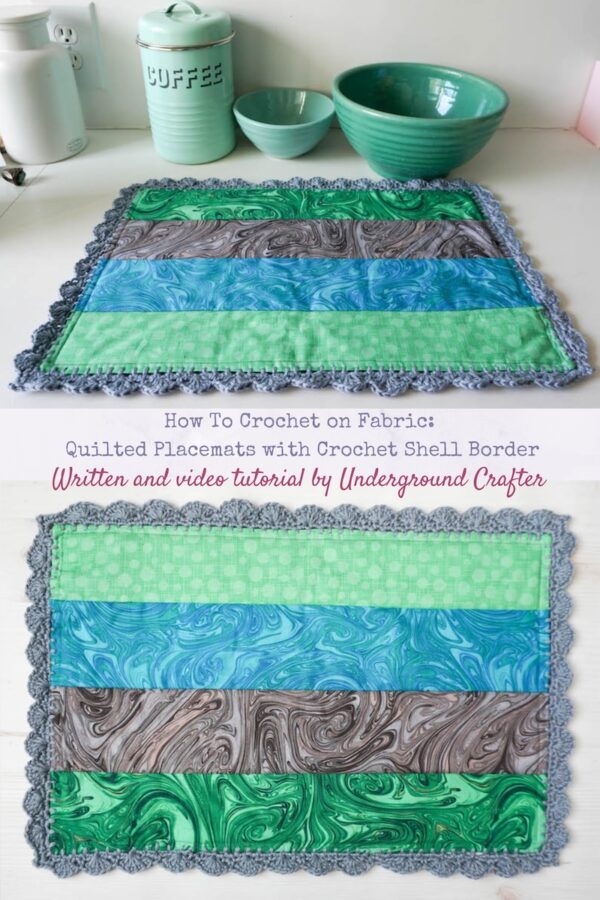
Originally designed for the Simple Simon & Company Mod Bee online summit for quilters, this pattern has been updated to include crochet instructions with and without abbreviations. With complete video tutorial showing how to crochet on fabric and finish border.
Finished Size
- Makes 4 placemats (each approximately 12″ x 18″).
Tools
- Baby Lock Jubilant sewing machine, or any sewing machine with straight stitches.
- Recommended (but not required) presser feet: 1/4″ Seam for piecing; Edge Joining for stitching in the ditch.
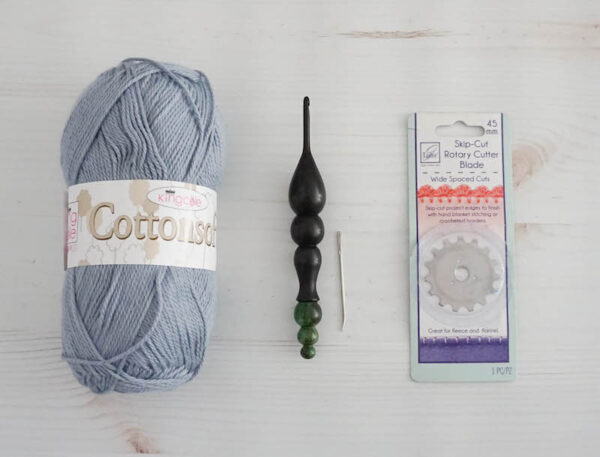
- 45 mm rotary cutter with blade, acrylic ruler, and cutting mat.
- Iron and iron-safe surface.
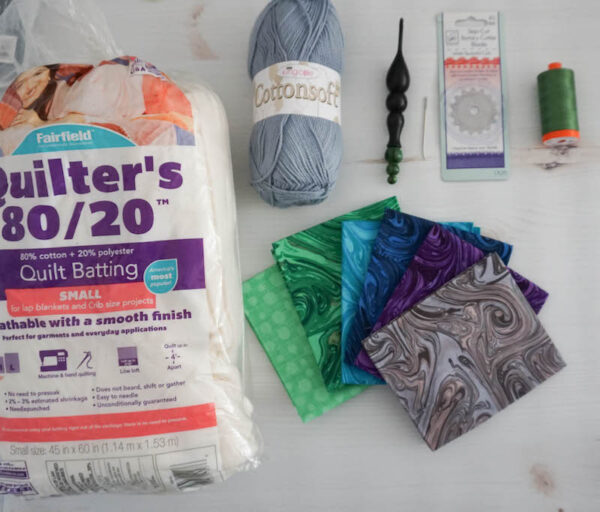
- Nelsonwood Black Cat US Size G-6/4 mm crochet hook, or any size you prefer for crocheting with light (DK/#3) weight yarn.
- Clover Bent Tip Darning Needle (from Art. No. 3121), or yarn or embroidery needle with large eye.
- June Tailor 45 mm Skip-Cut Rotary Cutter Blade for Wide Spaced Cuts. (You can use this blade on a standard 45 mm rotary cutter.)
- Basic sewing supplies (seam ripper, Clover Wonder Clips, etc.).
Materials To Make 4 Placemats (12″ x 18″)
- Sewing machine needle (Universal 80/12 recommended).
- 100% cotton quilting fabric.
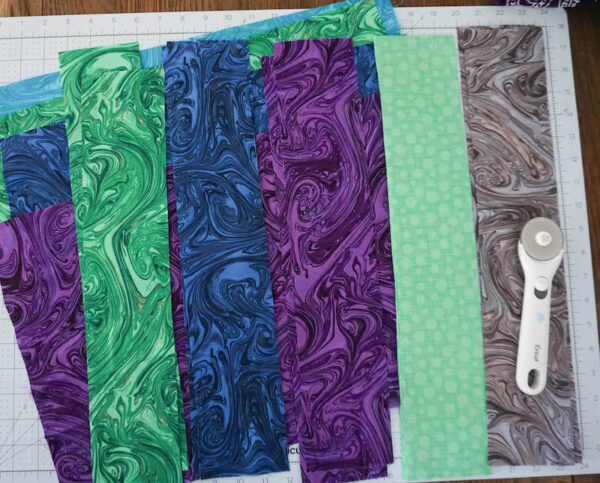
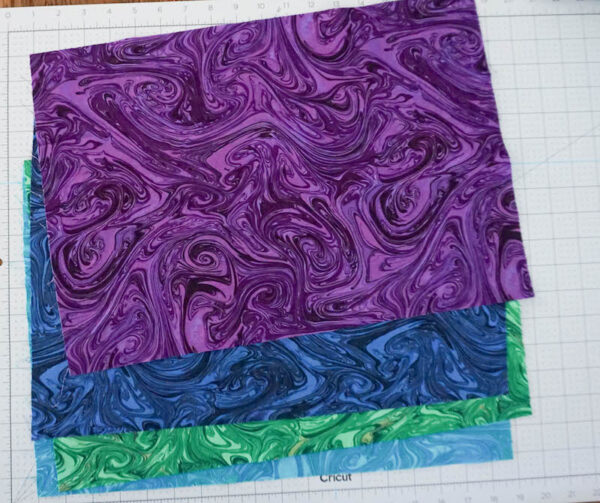
- This pattern is fat quarter friendly! I used 6 coordinating fat quarters from the Michael Miller Fabrics Frosty Marbled Hash fat quarter bundle. Each of my placemats is unique.
- If you want all of your placemats to be the same, or prefer to use yardage, you will need 4 fabrics (1/8” yard each) for the striped front and 1 fabric (1 yard) for the solid backs.
- Cotton thread. (I used Aurifil 50 wt in 2890 Grass Green.)
- King Cole Cottonsoft DK yarn (100% cotton, 3.5 oz/100 g, 229 yd/210 m) – 2 skeins in 3365 Midnight, or approximately 300 yd /274.5 m in any 100% cotton light (#3/DK) weight yarn.
- Low-loft cotton or cotton blend batting – 1 yard.
Note
- The complete 1-hour class video is embedded at the bottom of this post (beneath the copyright notice). You can watch while working on the project. Alternatively, I have also edited the video into shorter sections. Each of these shorter videos are introduced at the start of each part of the pattern so you can just watch the parts you need more guidance on.
Instructions
Part 1: Introduction and Materials
- If you are new to quilting, or to crochet, watch the Part 1: Introduction and Materials video below.
- If you can’t see the Part 1 video above, watch it on YouTube.
Part 2: Sewing the Placemats
- Watch the Part 2: How To Sew and Quilt the Placemats video below, or follow the step-by-step instructions below.
- If you can’t see the Part 2 video above, watch it on YouTube.
Prepare Fabric and Batting
- Don’t prewash your fabric for this project. This allows the yarn and the fabric to shrink together.
- Press the fabric to remove wrinkles and folds.
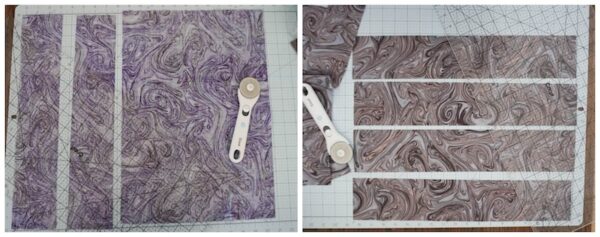
- Using your rotary cutter, acrylic ruler, and cutting mat, cut your fabric. For each placemat, you will need 4 strips measuring 3.5” x 18.5” for the front and 1 piece measuring 12.5” x 18.5” for the back.
- From fat quarters: Cut 4 strips, each measuring 3.5” x 18.5” from each of 2 fat quarters. Cut 1 piece measuring 12.5” x 18.5” and 2 pieces measuring 3.5” x 18.5” from each of 4 fat quarters.
- From yardage: Cut 2 strips, each measuring 3.5” x width of fabric from each of your 1/8 yard cuts. Cut 4 pieces, each measuring 12.5” x 18.5” for the backs from your 1 yard cut.
- Cut 4 pieces of batting, each measuring 12.5” x 18.5”.
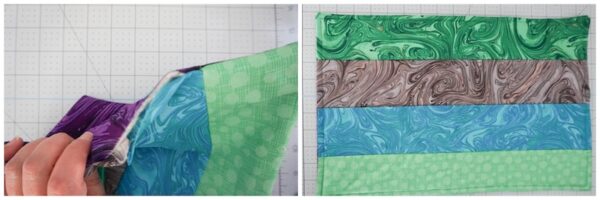
Sew Front of Placemats (Make 4)
- For each placemat, sew 4 strips together as follows.
- Starting with first 2 strips, place right sides together. Sew with 1/4″ seam along long edge. With iron, press seams towards darker fabric.
- Position third strip to piece with right sides together. Sew with 1/4” seam along long edge. With iron, press seams towards darker fabric.
- Position fourth strip to piece with right sides together. Sew with 1/4” seam along long edge. With iron press seams towards darker fabric.
Assemble Placemats (Make 4)
- Trim down your fabrics so that the front piece, back piece, and batting are the same size.
- Make a quilt sandwich with the batting on the bottom, the back piece in the middle facing right side up, and the front piece facing down.
- Use Wonder Clips to secure all 3 layers for sewing.

- Starting at the bottom third of a short side, sew through all layers with a 1/2″ seam. Continue to sew along the next long side, the next short side, and the last long side. When you reach the first short side, leave an opening of about 4” for turning the piece right side out.
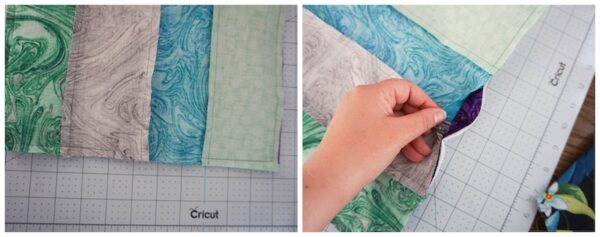
- If necessary, trim any excess fabric from the back or the batting that is larger than the front piece. Clip the corners, being careful not to cut your seams.
- Turn the piece right side out, working through the opening that you left when seaming. It helps to use your crochet hook to push the corners out.
- At this point, your placemat will be fairly wrinkled, so iron out the wrinkles before finishing.
- Sew a 1/4″ seam topstitch around your placemat, being sure to close the opening that you used for turning.
- Quilt as desired, working between the topstitching. For a project that combines crochet, I prefer to stitch in the ditch with my Edge Joining presser foot, or to use simple and minimal lines.

- Once your quilting is completed, you’re ready to prepare the placemat for your crochet border.
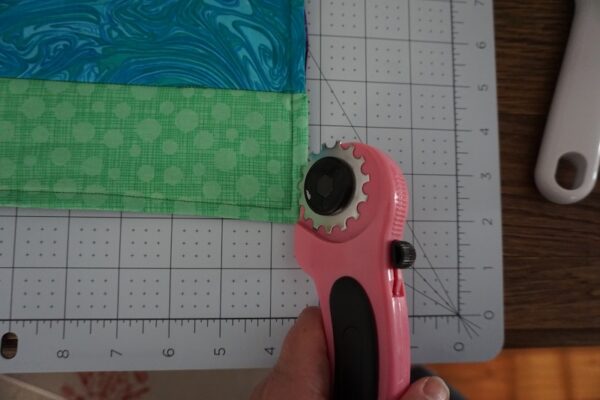
Part 3: Prepare Fabric With Skip Cut Blade
- Watch the Part 3: Prepare Fabric with Skip Cut Blade video below to learn how to prepare your fabric for a crochet border using a skip cut blade, or read the written instructions below.
- If you can’t see the Part 3 video above, watch it on YouTube.
Prepare Fabric for Crochet Border
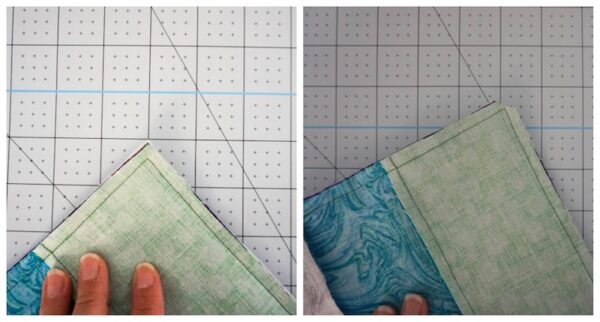
- Using your acrylic ruler and a rotary cutter fitted with your Skip-Cut Blade, create perforations on the edges of your placemat as follows.
- Your perforations should be between your top stitch and the edge of your project on all 4 sides.
- Line up your acrylic ruler between the top stitch and edge. Pressing firmly so you cut through all layers, use your Skip-Cut Blade along the edge of your ruler.
- Repeat on each remaining side.
Part 4: Add Blanket Stitch Edging
- Watch the Part 4: Add Blanket Stitch Edging video below to learn how to add a blanket stitch edging to your fabric piece. This will form the foundation for your crochet border. Or, read the written instructions below.
- If you can’t see the Part 4 video above, watch it on YouTube.
- Thread your Bent Tip Needle with approximately 1 yard of yarn. (While you will need more yarn for this next part, it can easily become unwieldy and tangled if you use a longer piece .) Pull the yarn through the needle about half way and then knot it so you are working with two layers of yarn.
- Using the needle and yarn, work a blanket stitch border around your placemat, starting by inserting the needle through at one corner between the seam, and then pulling it out through the first skip-cut mark on the next side. With many fabrics, you will be able to find the next skip-cut mark by feel rather than sight.
- Be sure not to pull the yarn too tightly at the corners or your corners will buckle.
- When you have worked into the last skip-cut mark on the fourth side, finish by inserting the needle under the first blanket stitch on the first side. Draw through your yarn. Fasten off with a knot, leaving several inches of yarn tail. Don’t worry about the yarn tails being unsightly as you will finish them later.
Part 5: Single Crochet Edging
- Watch the Part 5: Single Crochet video below to learn how to single crochet into blanket stitch edging. This is the first round of your crochet border. You can also read the written instructions below. The version without pattern abbreviations (for those new to crochet) is first, followed by the version with pattern abbreviations (for those familiar with crochet patterns).
- If you can’t see the Part 5 video above, watch it on YouTube.
Version 1: Add a Single Crochet Edging To Your Blanket Stitches (No Abbreviations for Crochet Newbies)
- Note: I have a video of the 6 basic crochet stitches (including slip stitch, single crochet, and double crochet) on YouTube for reference.
- With right side facing you and using your crochet hook, join the yarn with a slip stitch under the corner blanket stitch on any side.
- Chain 1.
- Evenly crochet 85 single crochet stitches on each long side and 61 single crochet stitches on each short side, (or any multiple of 6 stitches, + 1 stitch on each side).
- Before turning to the next side, chain 3.
- Repeat until you have worked the single crochet border across all 4 sides.
- After your final chain 3, join with a slip stitch to the first single crochet stitch.
- For a simple edging, stop here and go on to Finishing instructions. For a shell border, continue to Part 6.
Version 2: Add a Single Crochet Edging To Your Blanket Stitches (With Abbreviations for Crocheters Who Can Read US Patterns)
- With right side facing you and using your crochet hook, join the yarn with a sl st under the corner blanket stitch on any side, ch1, evenly crochet 85 sc on each long side and 61 sc stitches on each short side, (or any multiple of 6 sts, + 1 st on each side), before turning to the next side, ch 3.
- Repeat until you have worked the sc border across all 4 sides, after your final ch 3, join with a sl st to the first sc.
- For a simple edging, stop here and go on to Finishing instructions. For a shell border, continue to Part 6.
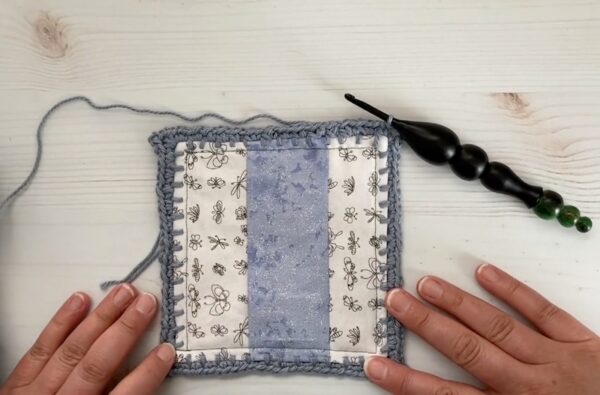
Part 6: Shell Stitch Border
- Watch the Part 6: Shell Stitch Border video below to learn how shell stitch to complete your crochet border. You can also read the written instructions below. The version without pattern abbreviations (for those new to crochet) is first, followed by the version with pattern abbreviations (for those familiar with crochet patterns).
- If you can’t see the Part 6 video above, watch it on YouTube.
Version 1: Add a Shell Stitch Border to Your Single Crochet Edging (No Abbreviations for Crochet Newbies)
- Chain 1. Single crochet into the same stitch.
- +Skip 2 stitches. In the next stitch, double crochet 5 times. Skip 2 stitches. Single crochet into the next stitch.++
- Repeat from + to ++ across to the chain-3 space at the corner of each side.
- In the chain-3 space, (single crochet, chain 3, single crochet).* Single crochet into the first stitch on the next side.
- Repeat from + 3 more times, ending last repeat at *.
- Join with a slip stitch to the first single crochet stitch.
- Fasten off the yarn with a yarn tail several inches long.
Version 2: Add a Shell Stitch Border to Your Single Crochet Edging (With Abbreviations for Crocheters Who Can Read US Patterns)
- Ch 1, sc in same st, *[skip 2 sts, 5 dc in next st, skip 2 sts, sc in next st] across to corner ch-3 sp, (sc, ch 3, sc) in ch-3 sp,** sc in first st on next side; repeat from * around, ending last repeat at **, join with sl st to first sc.
- Fasten off yarn.
Part 7: Finishing
- Watch the Part 7: Finishing video below to finish your crochet border by weaving in yarn tails, or read the written instructions below.
- If you can’t see the Part 7 video above, watch it on YouTube.
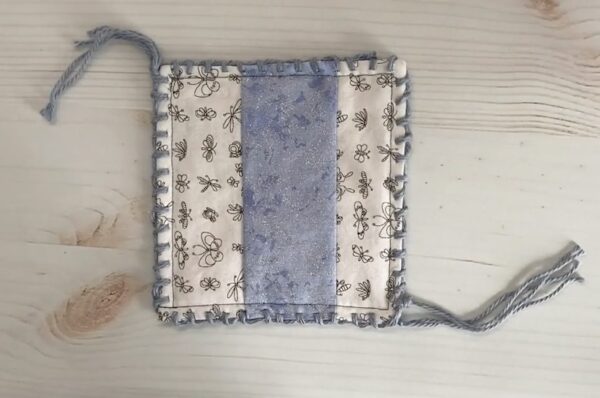
Finishing
- Thread your yarn needle with the yarn tail from the end or beginning of the project, or from any of the joins. Weave in the yarn tails.
Care
- I recommend handwashing and drying flat using a fiber wash such as Unicorn Baby. You can find out more about using Unicorn here.
© 2021, 2026 by Marie Segares (Underground Crafter). This pattern is for personal use only. You may use the pattern to make unlimited items for yourself, for charity, or to give as gifts. You may sell items you personally make by hand from this pattern. Do not violate Marie’s copyright by distributing this pattern or the photos in any form, including but not limited to scanning, photocopying, emailing, or posting on a website or internet discussion group. If you want to share the pattern, point your friends to this link: https://undergroundcrafter.com/2026/04/11/how-to-crochet-on-fabric-class/. Thanks for supporting indie designers!
Watch the full How To Crochet on Fabric: Quilted Placemats with Crochet Shells Border class below!
