
I’m finishing my series of posts about the Scoring Wheel and Double Scoring Wheel, a new set of tools for the Cricut Maker that helps you make faster, easier, and more precise folds in your projects made with a variety of materials. In my first post in this series, I talked about the difference between the two Scoring Wheels and shared my first projects using them. Last week, I showed you how even a paper craft newbie like me can make picture-perfect cards with the Scoring Wheel. Today, I’ll be focusing on the Double Scoring Wheel, which I used to make an awesome, shiny gift box!
This post contains affiliate links. I may receive compensation (at no added cost to you) if you make a purchase using these links. This post is part of a series sponsored by Cricut, but all opinions and thoughts are my own.
By the way, since I started this series, I’ve been getting some questions about where you can buy the Scoring Wheels. They are currently available on HSN and you can also sign up to be notified when they are ready for purchase on the Cricut website.
Which Scoring Wheel Do I Need?
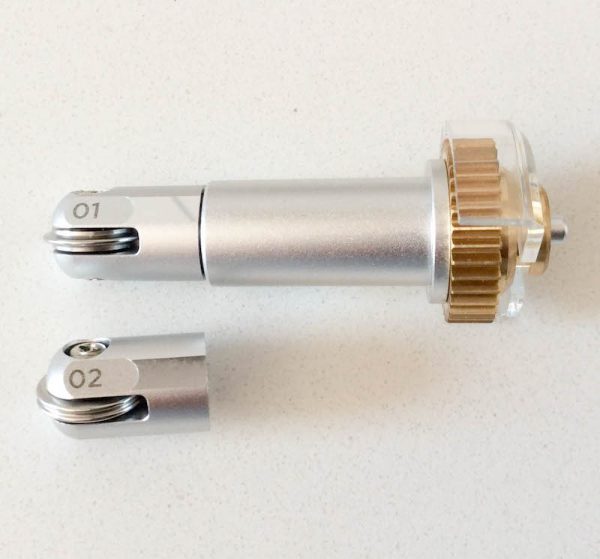
The main difference between the “single” or “standard” Scoring Wheel and the Double Scoring Wheel is the number of lines in the score. As you can probably guess, the Double Scoring Wheel makes a double-line score, which means that it makes it possible to easily fold the scores on thicker materials, like heavy papers (including corrugated paper, watercolor paper, shimmer paper, and sparkle paper), heavy cardstocks (like poster board, flat cardboard, kraft board, patterned glitter cardstock, or light chipboard), cork, leather, and craft foam.
Something to keep in mind when using the Double Scoring Wheel is that your cutting materials should go face down on the mat because it’s easier to fold into the score. In other words, score on the wrong side of your projects.
Don’t get stressed out though, because the Scoring Wheels will be packaged together in a set, are easy to switch out, and Design Space will let you know which on you need to use once you select your cutting materials. Easy peasy!
What Can I Make With the Double Scoring Wheel?
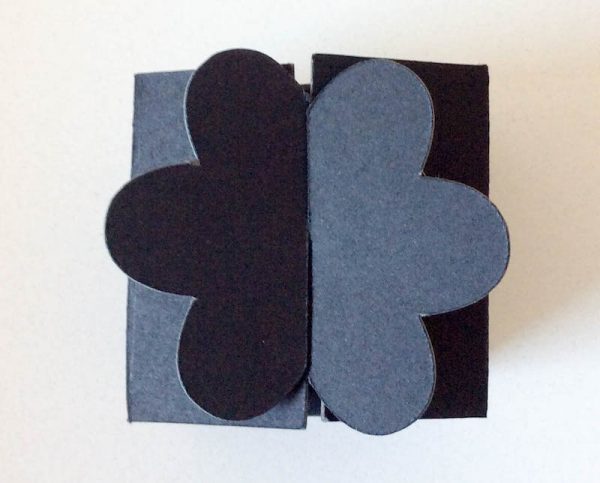
In my first post in this series, I made a flower box with Cricut Kraft Board.
There aren’t too many bloggers sharing projects with the Double Scoring Wheel yet, because it is so new, but here are three projects that I absolutely love! These photos are copyright the respective bloggers and are used with permission.
Angie at The Country Chic Cottage made this great DIY Leather Notebook, which would be a perfect crochet project notebook, don’t you think?

Jessica at Mad in Crafts used Shimmer Paper for her version of the Pineapple Vases project.

I used cardstock and the single Scoring Wheel for my version of the same Ready-to-Make project here, but I love how hers shine!
And, Rebecca at The Crafted Sparrow used Foil Poster Board for her Treat Bags. (Don’t they make the churros look extra yummy??!!)

By the way, if you’re wondering about how the Scoring Wheels compare to the Scoring Stylus, read this post by The Country Chic Cottage. I’m new to scoring — so I found Angie’s perspective really informative.
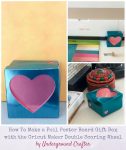
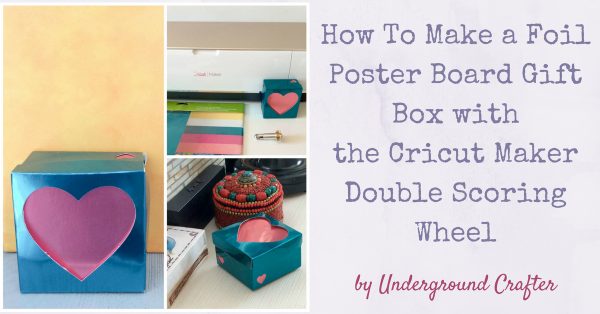
How To Make a Foil Poster Board Gift Box with the Cricut Maker Double Scoring Wheel

Ok, so on to my project for today! I searched through the Ready-to-Make projects in Design Space looking for boxes until I found this Heart Box. I thought this would be a really cute box to make but I wanted it to have a bit more pizzazz than the one in the picture, so I dug through my stash of cutting materials looking for this Fairy Tale Sampler of Foil Poster Board. Now, I was ready to tackle the project. Read on for details.
Heart Box Materials
- Cricut Maker with Cricut Design Space and Cricut Access Standard subscription,
- Cricut Maker Double Scoring Wheel,
- Your choice of cut files in Design Space,
- Premium Fine Point Blade,
- StandardGrip Cutting Mat,
- Foil Poster Board in 2 colors (12” x 12” sheet in each color) – I used the teal and hot pink from the Fairy Tale Sampler,
- Scissors or trimmer (optional, but allows you to save any excess materials for your next project) – I used the ones in my Essential Tool Set,
- Elmer’s Craft Bond Paper Craft Glue Gel, or any clear glue for paper.

The first mat is the backgrounds that will become the heart colors in your box, and the second mat is the outside of your box, so choose your pieces of Foil Poster Board accordingly. Don’t forget to put the shiny foil side face down on the mat so the scores will be on the back!

Once you select your materials, Design Space will notify you which Scoring Wheel to use and also when to change it out with the Premium Fine Point Blade.

I love that there are mini hearts on all four sides (which I didn’t realize when I picked out the project). The next time I make this box, I may customize it so that I use five different colors for the hearts — and that would be a great way to use up scrap pieces from other projects, too.

After all the pieces are scored and cut. fold the box along the double scoring lines and start glueing! Wait for everything to dry before you start posing your box for pictures.

I hope you enjoyed this series on the Cricut Scoring Wheels! If you have any questions about them, let me know and I’ll be happy to answer.
This is a sponsored conversation written by me on behalf of Cricut. The opinions and text are all mine.
very cute!