
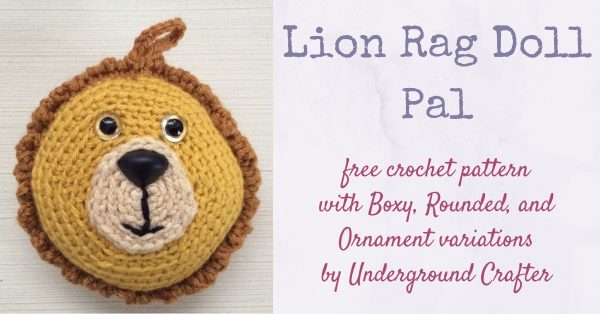
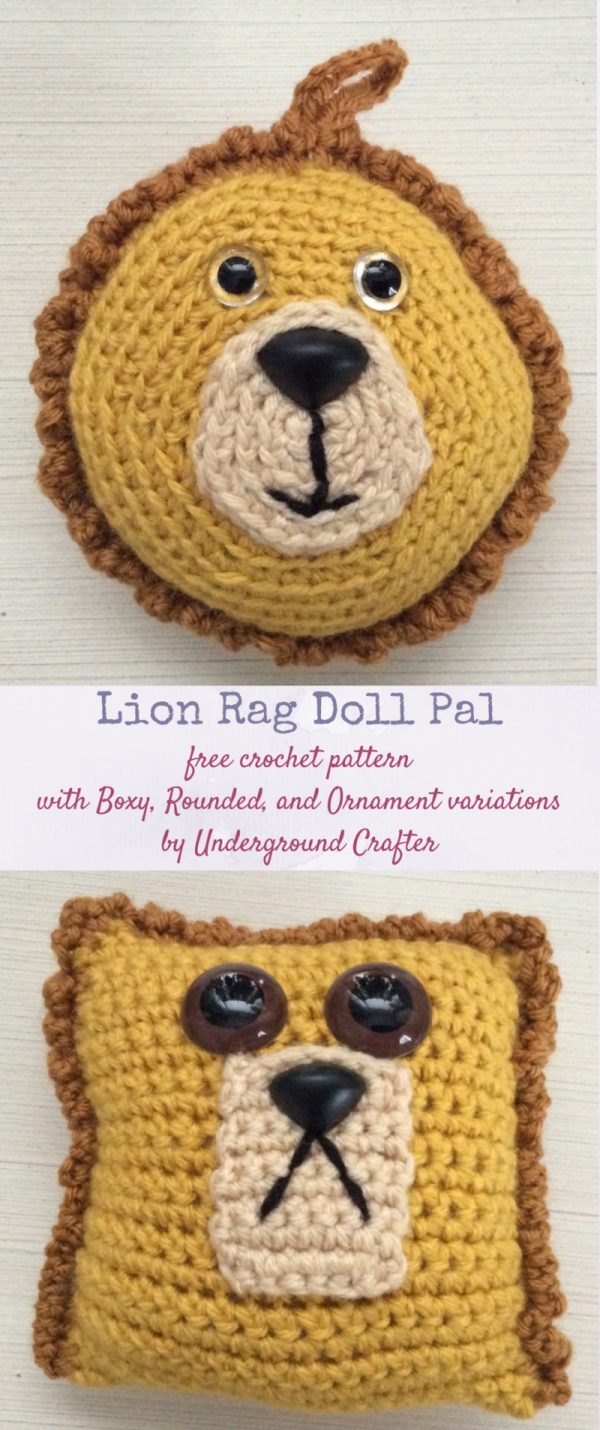
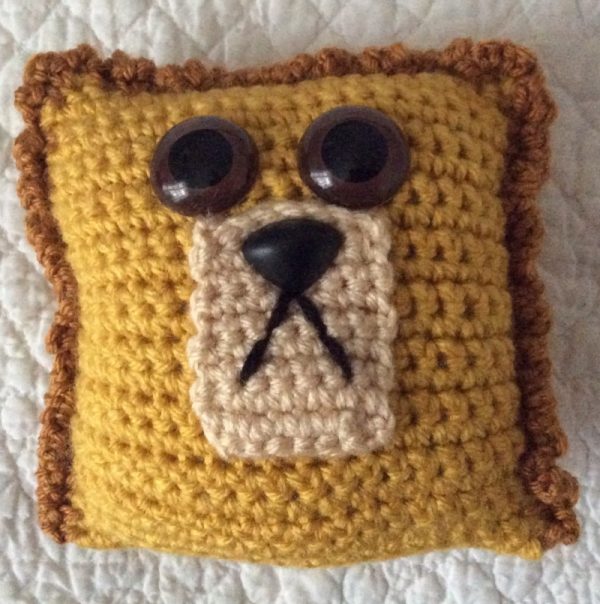
The Lion Rag Doll Pals have the option for a hanging ornament loop. This crochet amigurumi lion is a little version of your favorite big cat. It’s just the right size for small hands to carry, or to add embellishment to gift wrap, or to use as an ornament. To make this pattern more beginner friendly, I am sharing two versions: the Boxy Lion Rag Doll Pal is crocheted flat in rows, while the Rounded Lion Rag Doll Pal is crocheted in the round.
This post contains affiliate links. I may receive compensation (at no added cost to you) if you make a purchase using these links. Materials for this project were generously provided by Canvas Corp, Consumer Crafts, Fairfield, Fiskars, Knit Picks, Lion Brand, and VELCRO ® Brand.
At the end of September, I taught a Crochet Rag Doll Characters class at In the MKNG, a creativity festival further upstate in New York. I wanted the class to be awesome, so I reached out to some of my favorite companies to see if they would be able to provide supplies for kits for the students. Everyone said yes (yay!), so I was able to put together something really fun.
Each kit included all of the supplies required to make the Lion Rag Doll Pal (listed in the materials section of the pattern, below), as well as a few extras.
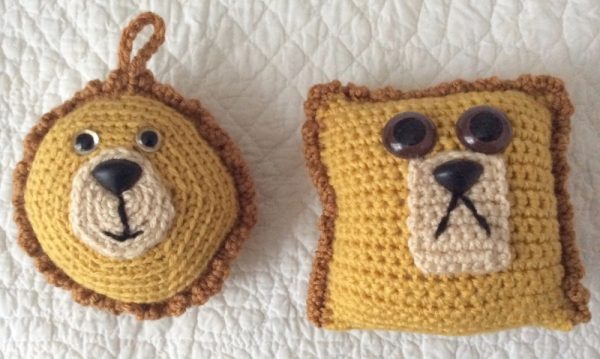
There were additional options for eyes from Consumer Crafts, including 30 mm Comical Eyes and Sticky Black Eyes. Eyes can really make the difference in your rag doll character’s personality, as you can see from my two variations.
Each kit also included a pair of Fiskars Kids Scissors to make fastening off simple. I always keep a pair in my “to go” crochet bag so I don’t accidently cut myself when digging into my bag.
The small bits of Lion Brand Vanna’s Choice yarn needed for the muzzle, mane, and facial features were wrapped securely in Knit Picks Small 2” Diameter Yarn Bobbins. Knit Picks also provided View Sizers so it was easy to take measurements.
Since I didn’t know how tight or how loosely students would crochet, Lion Brand provided crochet hooks in two sizes so everyone had options.
All of the small pieces, like the safety eyes and noses and tapestry needles, were placed securely in VELCRO® Brand Extra Small PRESS-LOK® Bags, so once I assembled the kits I didn’t have to worry about eyes getting lost. And Canvas Corp provided each student with a sturdy Canvas Tote with Gusset that held all the yarn, Poly-Fil, notions, and hand outs.
We had a few extras of the kits left after class, so I distributed those to yarn lovers at the event. Fun!
I waited a few weeks after the event to share this pattern because I think the Lion Rag Doll Pals are great for the handmade holidays. You can make ornaments from each version, which add a happy crochet touch to your decor.
You can stuff either with lavender to make an ultra cute sachet.
You can tie ribbon through the ornament version’s hanging loop to use as gift-wrap embellishments for a big present. Or, you can gift these buddies to your favorite kid (or kid at heart).
If you make your own Lion Rag Doll Pal, I’d love to see it! Share your progress and questions by tagging me on Facebook as @Underground Crafter or Instagram as @ucrafter. You can also share a picture in the Underground Crafters Facebook group. Sign up for my weekly newsletter and get a coupon code for your choice of one of my premium patterns and other subscriber goodies. Plus, you’ll never miss one of my free patterns again!
Lion Rag Doll Pals
Crochet Patterns by Underground Crafter


These little versions of the beloved big cats are just the right size for being carried around by a little one, or to use as gift embellishments or ornaments.
Finished Sizes
- Boxy version: Approximately 5.25” (13.5 cm) square after stuffing.
- Rounded version: Approximately 5” (13 cm) diameter after stuffing.
Materials to Make 1 Rag Doll Pal
- Lion Brand Vanna’s Choice yarn (100% acrylic, 3.5 oz/100 g, 170 yd/156 m/medium weight) – 1 skein each in 158 Mustard (CA), 123 Beige (CB), 153 Black (CC), and 130 Honey (CD), or approximately 85 yd (78 m) in CA, and 7 yd (6.5 m) each in CB, CC, and CD in any medium weight yarn.
- Vanna’s Choice is available online at Lion Brand | LoveCrafts
- US F-5/3.75 mm crochet hook, or any size needed to obtain correct gauge.
- Fairfield Poly-Fil fiber filling.
- 1 pair – animal safety eyes – I used Consumer Crafts 12 mm Clear Animal Eyes for the Rounded Ornament version and Consumer Crafts 24 mm Brown Animal Eyes for the Boxy version.
- 18 mm clear animal safety eyes – 1 pair.
- 21 mm triangular safety nose.
- Knit Picks Bent Tip Tapestry Needles.
- Knit Picks Locking Stitch Markers.
Gauge
- Exact gauge is not critical for this project. Stitches should be small so that fiber filling doesn’t show.
Abbreviations Used in These Patterns
- BL – back loop only – Lion Brand has a helpful video for identifying the back loop here.
- CA – Color A
- CB – Color B
- CC – Color C
- CD – Color D
- ch – chain
- rep – repeat
- sc – single crochet
- sl st – slip stitch
- st(s) stitches
- *Repeat instructions after asterisk as indicated.
- [] Repeat instructions between brackets as indicated.
Pattern Notes
- When choosing colors, CA is for the Body, CB is for the Muzzle, CC is for the facial details, and CD is for the Mane/Hair.
- Helpful video tutorials for several embroidery stitches (to add character to rag doll faces) can be found at the end of this blog post.
- A helpful tutorial for using a single crochet seam is available here.
- To mark your position when working in the round, place a locking stitch marker in the last stitch of each round. Move up the marker at the end of each round.
Pattern Instructions – Rounded Version

Add the Rounded Lion Rag Doll Pal to your Ravelry favorites or queue.

Face (Make 2)
- With CA, ch 2.
- Set Up Row: Turn, skip first ch, 6 sc in next ch, place marker in last st (see Pattern Notes). Begin crocheting in the round in unjoined spirals. (6 sts)
- Round 1: 2 scBL in each st around. (12 sts)
- Round 2: *2 scBL in next st, scBL in next st; rep from * around. (18 sts)
- Round 3: *2 scBL in next st, scBL in next 2 sts; rep from * around. (24 sts)
- Round 4: *2 scBL in next st, scBL in next 3 sts; rep from * around. (30 sts)
- Round 5: *2 scBL in next st, scBL in next 4 sts; rep from * around. (36 sts)
- Round 6: *2 scBL in next st, scBL in next 5 sts; rep from * around. (42 sts)
- Round 7: *2 scBL in next st, scBL in next 6 sts; rep from * around. (48 sts)
- Round 8: *2 scBL in next st, scBL in next 7 sts; rep from * around. (54 sts)
- Round 9: *2 scBL in next st, scBL in next 8 sts; rep from * around. Fasten off. (60 sts)
Muzzle
- With CB, rep instructions for Face through Round 3. Fasten off with long yarn tail (approximately 18”/46 cm) for seaming.
Assembly
- Attach nose and Muzzle to Face: Use stitch markers to pin Muzzle to front piece of Face. Thread yarn needle with yarn tail from Muzzle. Sew Muzzle to front piece of Face. With yarn needle, weave in ends on wrong side of Face. Position safety nose on Muzzle. Attach firmly by securing washers on back of Face.
- Embroider facial features: With CC and yarn needle, back stitch features such as smile or whiskers to Muzzle (see Pattern Notes for link to embroidery tutorials). Weave in ends on wrong side of Face.
- Attach eyes: Position safety eyes on Face above Muzzle and nose. Attach firmly by securing washers on back of Face. The French Knot embroidery stitch can also be used to make eyes for a rag doll that will be gifted to a child under 3 years old (see Pattern Notes for link to embroidery tutorials).
- Seam Pieces and Add Mane (With Ornament Hanging Loop): Use stitch markers to pin front piece of Face (with features) to back (blank) piece of Face. Join CD with sl st to at center of top of front piece of Face. Begin working a single crochet seam through both layers (see Pattern Notes) as follows: sc in same st, *ch 2, sc in next st; rep from * around until approximately three-quarters of the Face is seamed closed. Stuff firmly with Poly-Fil. Rep from * around to first sc, ch 15, join with sl st to first sc. Fasten off, weave in ends inside of Face.
- Seam Pieces and Add Mane (Without Ornament Loop): Use stitch markers to pin front piece of Face (with features) to back (blank) piece of Face. Join CD with sl st to any st on front piece of Face. Begin working a single crochet seam through both layers (see Pattern Notes) as follows: sc in same st, *ch 3, sc in next st; rep from * around until approximately three-quarters of the Face is seamed closed. Stuff firmly with Poly-Fil. Rep from * around to first sc, ch 3, join with sl st to first sc. Fasten off, weave in ends inside of Face.
Pattern Instructions – Boxy Version
Add the Boxy Lion Rag Doll Pal to your Ravelry favorites or queue.Face
- With CA, ch 21.
- Row 1: Turn, sk 1 ch, sc in next ch and in each ch across. (20 sts)
- Row 2: Turn, ch 1, sc in first st and in each st across.
- Rep Row 2 until Body measures approximately 9” (23 cm) long. Fasten off.
Muzzle
- With CB, ch 8.
- Row 1: Turn, sk 1 ch, sc in next ch and in each ch across. (7 sts)
- Row 2: Turn, ch 1, sc in first st and in each st across.
- Rep Row 2 until Muzzle measures approximately 2” (5 cm) long. Fasten off with long yarn tail (approximately 18”/46 cm) for seaming.
Assembly
- Attach nose and Muzzle to Face: Fold Face piece in half. Use stitch markers to mark midpoint. Use stitch markers to pin Muzzle to front side of Face centered between top and midpoint stitch marker. Thread yarn needle with yarn tail from Muzzle. Sew Muzzle to front side of Face. With yarn needle, weave in ends on wrong side of Face. Position safety nose on Muzzle. Attach firmly by securing washers on back of Face.
- Embroider facial features: With CC and yarn needle, back stitch features such as smile or whiskers to Muzzle (see Pattern Notes for link to embroidery tutorials). Weave in ends on wrong side of Face.
- Attach eyes: Position safety eyes on Face above Muzzle and nose. Attach firmly by securing washers on back of Face. The French Knot embroidery stitch can also be used to make eyes for a rag doll that will be gifted to a child under 3 years old (see Pattern Notes for link to embroidery tutorials).
- Seam Pieces and Add Mane (With Ornament Hanging Loop): Fold Face piece in half. Use stitch markers to pin sides of Face with front piece of Face (with features) facing up. Join CD with sl st to first row after fold on side of Face. Begin working a single crochet seam through both layers (see Pattern Notes) as follows: sc in same row or st, *ch 3, sc in next row or st;** rep from * around until center of top of Face, ch 15, sc in next st, rep from * to ** around until approximately three-quarters of the Face is seamed closed. Stuff firmly with Poly-Fil. Rep from * to ** around to fold. Fasten off, weave in ends on inside of Face.
- Seam Pieces and Add Mane (Without Ornament Loop): Fold Face piece in half. Use stitch markers to pin sides of Face with front piece of Face (with features) facing up. Join CD with sl st first stitch after fold on side of Face. Begin working a single crochet seam through both layers (see Pattern Notes) as follows: sc in same row or st, *ch 3, sc in next row or st; rep from * around until approximately three-quarters of the Face is seamed closed. Stuff firmly with Poly-Fil. Rep from * around to fold. Fasten off, weave in ends on inside of Face.