

I’m sharing the crochet duck pattern for Herbert the Duckling today. Herbert is a simple amigurumi pattern that uses fur yarn for the fuzzy texture and layered pieces in smooth yarn to add dimension to the bill and flippers.

This post contains affiliate links. I may receive compensation (at no added cost to you) if you make a purchase using these links. I’m a King Cole Brand Ambassador and this post is part of our ongoing collaboration. Additional materials for the sample were generously provided by Fairfield World and NELSONWOOD.
I like to crochet softies in the spring and summer (because who doesn’t need a break from making winter accessories and holiday gifts all fall and winter), but THIS spring has been filled with challenges and my little amigurumi pals have added some comfort in interesting times.

When AllFreeCrochet invited me to be part of their Easter Hop Ahead online event, I had already designed This Little Piggy Lip Balm Holder and Sunny the Sheep. I wanted to use the other color of the King Cole Truffle yarn that I received in my Brand Ambassador welcome package since the pink Fondant on the left was used for This Little Piggy.

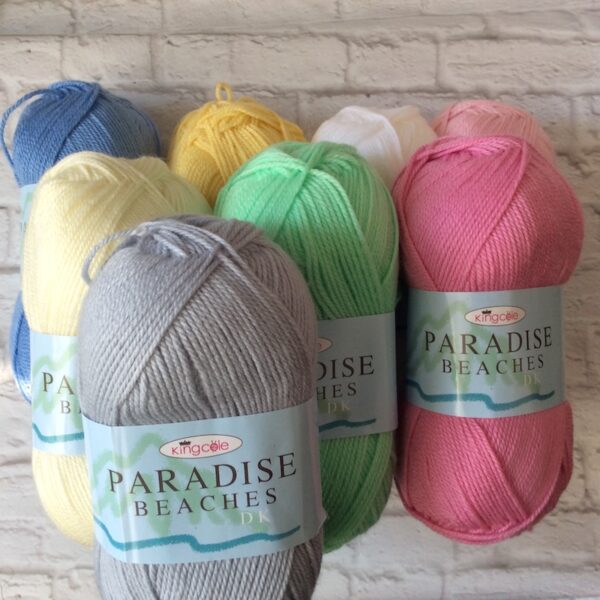
I asked my friend Mary Beth from MBT Creates to (virtually) brainstorm ideas with me for white fuzzy creatures. She was the one who suggested baby duckling. I did some web searching and decided that pink was the best option for the bill and flippers based on the pictures I found online. I looked back into my welcome package and found the King Cole Paradise Beaches yarn in Pink Gin (at the bottom right) would be the best fit.
Once I had the yarns and colors picked out. I had to think about a personality for my crochet duck pattern.

Herbert’s a duckling, after all, so the world is new to him. I imagined he’d be inquisitive, but also a bit shy.

I wanted his bill and flippers to have a lot of dimension to them, so I made them with layered pieces of crochet.

I think the 12 mm black safety eyes are a perfect compliment, but of course, you could change Herbert’s expression by using larger or smaller eyes, or sewing on buttons, or embroidering eyes.

If you make your own Herbert the Duckling, I’d love to see it! Share your progress and questions by tagging me on Bluesky as @UndergroundCrafter, Facebook as @UndergroundCrafter, or on Instagram as @ucrafter. You can also share a picture in the Underground Crafters Facebook group. Sign up for my weekly newsletter and get a coupon code for your choice of one of my premium patterns and private access to my vault of subscriber goodies. Plus, you’ll never miss one of my free patterns again!
Add Herbert the Duckling to your favorites or queue, or buy the ad-free PDF on Ravelry.

Herbert the Duckling
Crochet Duck Pattern by Underground Crafter
Updated 12/2/2023


This simple amigurumi pattern for a fuzzy duckling uses a fur yarn for texture and layered pieces in smooth yarn for a dimensional bill and flippers.
Finished Size
- Approximately 6” (cm) tall after stuffing.
Materials
- King Cole Truffle yarn (100% polyamide, 3.5 oz/100 g, 196 yd/180 m) – 1 skein in 4371 Vanilla (CA), or approximately 60 yd (55 m) in CA in any medium weight or fur yarn.
- King Cole Paradise Beaches yarn (70% acrylic, 30% polyamide, 3.5 oz/100 g, 278 yd/255 m) – 1 skein in 3007 Pink Gin (CB), or approximately 25 yd (23 m) in CA in any light weight yarn.
- NELSONWOOD US Size G-6/4 mm crochet hook, or any size needed to obtain gauge.
- NELSONWOOD US Size F-5/3.75 mm crochet hook, or any size needed to obtain gauge.
- 12 mm black safety eyes – 1 pair.
- Locking stitch markers.
- Fairfield Poly-Fil Crafter’s Choice Dry Packing Fiber Fill, 10 ounce bag.
- Yarn needle.
Gauge
- Through Rnd 7 in pattern for Body with larger hook = 3” (7.5 cm) diameter. Exact gauge is not critical for this project. Stitches should be small so that fiber filling doesn’t show.
Abbreviations Used in This Pattern
- BL – back loop only – Fiber Flux has a helpful video tutorial for identifying the back loop here.
- bob – 5-repeat bobble – [Yo, insert hook into st, yo and draw up a loop, yo and draw through 2 loops] 5 times in the same st, yo and draw through all 6 loops on hook. A helpful video tutorial for this stitch is available below.
- If you can’t see the video above demonstrating the 5-repeat bobble, watch it on YouTube.
- CA – Color A
- CB – Color B
- ch – chain
- rep – repeat
- Rnd(s) – Round(s)
- sc – single crochet
- sc2tog – single crochet 2 stitches together (decrease) – [Insert hook in next st, yo and draw up a loop, insert hook in next st, yo and draw up a loop] twice, yo and draw through all 3 loops on hook. A helpful video for this decrease is available below.
- If you can’t see the sc2tog video above, watch it on YouTube.
- sl st – slip stitch
- st(s) – stitch(es)
- yo – yarn over
- Repeat instructions after asterisk as indicated.
- [] Repeat instructions between bracked as indicated.
- () Stitches in parentheses are worked into same stitch or space.
Pattern Notes
- Oombawka Design Crochet has a helpful magic ring tutorial here.
- When choosing colors, note CA is the color of the Body and CB is the color of the Bill and Flippers.
- Body is crocheted in the round in unjoined spirals. Move stitch marker 1 up each round to mark the position of the last stitch of the round. Bill is crocheted flat in rows and seamed. Flippers are crocheted in the round, seamed, and then finished with a row of stitches.
Pattern Instructions
Body
- With larger hook and CA, start with magic adjustable ring (see Pattern Notes).
- Rnd 1: Ch 1, 6 sc in ring, pull yarn tail tightly to close ring, place stitch marker #1 in last st (see Pattern Notes). (6 sts)
- Rnd 2: 2 sc in each st around. (12 sts)
- Rnd 3: *2 sc in next st, sc in next st; rep from * around. (18 sts)
- Rnd 4: *2 sc in next st, sc in next 2 sts; rep from * around. (24 sts)
- Rnd 5: *2 sc in next st, sc in next 3 sts; rep from * around. (30 sts)
- Rnd 6: *2 sc in next st, sc in next 4 sts; rep from * around. (36 sts)
- Rnd 7: *2 sc in next st, sc in next 5 sts; rep from * around. (42 sts)
- Pm2 to mark position. Do not move place stitch marker #2 down each round.
- Rnd 8: Sc in each st around.
- Rep Rnd 8 until Body measures approximately 3” (7.5 cm) from marker #2.

Add safety eyes
- Position first safety eye approximately 0.5” (1.5 cm) below marker #2. When satisfied with position, attach firmly by securing washer on back. Rep with second eye. Remove marker #2.

Decrease towards base of Body
- Rnd 9: *Sc2tog, sc in next 5 sts; rep from * around. (36 sts)
- Rnd 10: *Sc2tog, sc in next 4 sts; rep from * around. (30 sts)
- Rnd 11: *Sc2tog, sc in next 3 sts; rep from * around (24 sts.)
- Rnd 12: *Sc2tog, sc in next 2 sts; rep from * around. (18 sts)
- Rnd 13: *Sc2tog, sc in next st; rep from * around. (12 sts)

- Stuff Body firmly with fiber filling.
- Rnd 14: Sc2tog around. (6 sts)
- Rnd 15: Sc2tog around. Remove marker #1. (3 sts)
- Fasten off with long yarn tail (approximately 12”/30.5 cm) for seaming. Thread yarn needle with yarn tail. Seam Rnd 15 to close Body. With yarn needle, weave in ends.
Bill
- With CB and smaller hook, ch 6.
- Row 1: Turn, skip 1 ch, sc in next 5 ch. (5 sts)
- Row 2: Turn, ch 1, sc in first st and in each st across.
- Rows 3-4: Rep Row 2 twice.
- Row 5: Turn, ch 1, sc2tog in first 2 sts, sc in next st, sc2tog in next 2 sts. (3 sts)
- Row 6: Turn, ch 1, sc2tog in first 2 sts, sc2tog in same and next st. (2 sts)
- Row 7: Turn, ch 1, sc2tog in first 2 sts. (1 st)
- Row 8: Turn, ch 1, scBL in first st.
- Row 9: Turn, ch 1, sc in first st.
- Row 10: Turn, ch 1, 2 sc in first st. (2 sc)
- Row 11: Turn, ch 1, 2 sc in first st, sc in next st. (3 sts)
- Row 12: Turn, ch 1, 2 sc in first st, sc in next st, 2 sc in next st. (5 sts)
- Rows 13-15: Rep Row 2, 3 times.
- Do not fasten off.

- Fold Bill at skipped front loop/Row 8.

- Working through both layers, join with single crochet (see video below) as follows: sc in side of each of next 7 rows along shaped edge, sc in unworked front loop of Row 8, sc in side of each of next 7 rows along shaped edge.
- If you can’t see the video above demonstrating how to seam with single crochet, watch it on YouTube.

- Stuff Bill lightly with fiber filling.
- Continue to seam by working sc through both layers in next 5 sts. Fasten off with long yarn tail (approximately 12”/30.5 cm) for seaming. With yarn needle, weave in short yarn tail from foundation row.
Flippers (Make 2)
- With CB and smaller hook, ch 4, skip 3 ch, join with sl st to next ch to form ring.
- Rnd 1: Ch 1, 6 sc in ring, place stitch marker #1 to mark last st of round. (6 sts)
- Rnd 2: 2 sc in each st around. (12 sts)
- Rnd 3: *2 sc in next st, sc in next st; rep from * around. (18 sts)
- Rnd 4: *2 sc in next st, sc in next 2 sts; rep from * around. (24 sts)
- Rnd 5: *2 sc in next st, sc in next 3 sts; rep from * around. (30 sts)
- Do not fasten off.

- Fold over Flipper at center diameter.

- Next Row: Ch 1, working through both layers, join with single crochet (see video tutorial above) by working sc in next 15 sts across.

- Next Row: Turn, ch 1, sl st in same st and in next 4 sts, [bob in next st, sl st in next st] 3 times, sl st in next 4 sts. Fasten off with long yarn tail (approximately 18”/46 cm) for seaming. With yarn needle, weave in short yarn tail from foundation row.
Finishing

- Position Bill approximately 0.5” (1.5 cm) below and centered between safety eyes. Thread yarn needle with long yarn tail from end of Bill. Sew Bill to Body, matching up the 5 stitches on the end of the Bill with stitches on the Body. Weave in yarn tail on inside of Body.
- Position first Flipper at bottom of Body. Thread yarn needle with long yarn tail from end of Flipper. Sew Flipper to Body, matching the folded edge with stitches on the Body. Repeat for second Flipper. Weave in yarn tail on inside of Body.
© 2020, 2023 by Marie Segares (Underground Crafter). This pattern is for personal use only. You may use the pattern to make unlimited items for yourself, for charity, or to give as gifts. You may sell items you personally make by hand from this pattern. Do not violate Marie’s copyright by distributing this pattern or the photos in any form, including but not limited to scanning, photocopying, emailing, or posting on a website or internet discussion group. If you want to share the pattern, point your friends to this link: https://undergroundcrafter.com/2020/04/08/crochet-duck-pattern-herbert-duckling/. Thanks for supporting indie designers!
This pattern was featured in AllFreeCrochet’s 2020 Easter Hop Ahead. Get the other patterns below!
- Bunny Booty Bunting by Jessie at Home,
- Just Hatched Easter Basket by Brenda K. B. Anderson for Red Heart.
- Easter Egg Washcloth by Moogly, and
- Friendly Bunny Hat by Oombawka Design Crochet