

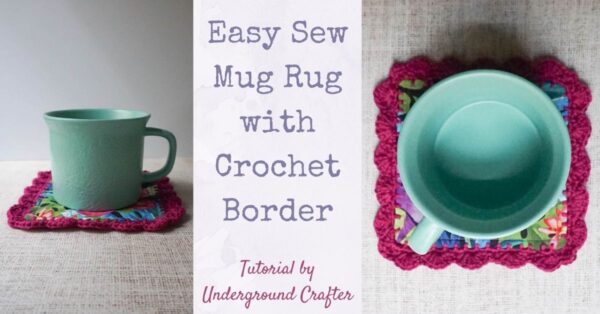
I love fabric mug rugs for absorption but a crochet edging will really take your fabric mug rug to the next level. In today’s tutorial, I’m going to show you how to sew an easy mug rug, how to crochet onto fabric, and how to crochet a lovely shell stitch border. If you have basic sewing machine skills and know the basic crochet stitches, this project is within your reach!
This post contains affiliate links. I may receive compensation (at no added cost to you) if you make a purchase using these links. This post is sponsored by Baby Lock. All opinions and thoughts are my own. Additional supplies for this tutorial were generously provided by Clover USA, Cricut, Fairfield World, Furls, King Cole, and Michael Miller Fabrics. Camera generously provided by B&H Photo Video Pro Audio.
Mug rugs are great for using up pieces of fabric leftover from larger projects, or for showcasing a special fabric, and for making something quick and easy (and satisfying!) that is both useful and pretty.

But, once you plunk your mug down, they are not quite as fun to look at since most of the fabric (and, more specifically, the part you were trying to highlight!) will be covered by your mug. Adding a crochet edging in a coordinating or contrasting yarn adds a wonderful touch to your mug rug. Plus, combining sewing and crochet is double the fun, right??!!

If you make your own Easy Sew Mug Rug with Crochet Border, I’d love to see it! Share your progress and questions by tagging me on Facebook as @Underground Crafter, Instragram as @ucrafter, or Twitter as @ucrafter. You can also share a picture in the Underground Crafters Facebook group. Sign up for my weekly newsletter and get a coupon code for your choice of one of my premium patterns and private access to my vault of subscriber goodies. Plus, you’ll never miss one of my free patterns again!
Add the Easy Sew Mug Rug with Crochet Border to your favorites or queue on Ravelry.

Easy Sew Mug Rug with Crochet Border
Sewing Tutorial and Crochet Pattern by Underground Crafter

Mug rugs are practical and add a handmade touch to your home. Mug rugs make great last-minute gifts for holidays, birthdays, housewarmings, or for anytime for your favorite hot-beverage lover. This tutorial is divided into 3 parts: how to sew an easy mug rug, how to crochet onto fabric, and how to add a lovely shell stitch border.
Finished Size
- 6″ (15 cm) before adding crochet border; approximately 7.5″ (19 cm) square after adding crochet border.
Tools
- Baby Lock Jubilant sewing machine. (Read my review of the Jubilant here.)
- Cricut 45 mm rotary cutter, acrylic ruler, and self-healing cutting mat. OR fabric scissors and marking pen.
- Clover Flower Head Pins.
- Furls Turquoise and Rose Gold Odyssey US Size G-6/4 mm crochet hook, or size appropriate for your yarn.
- Clover Darning Needle (Bent Tip), or embroidery needle with large eye.
- June Tailor Skip-Cut Rotary Cutter Blade for Wide Spaced Cuts.
- Iron and iron-safe surface.
- Basic sewing supplies (seam ripper, thread snips, etc.).
Materials
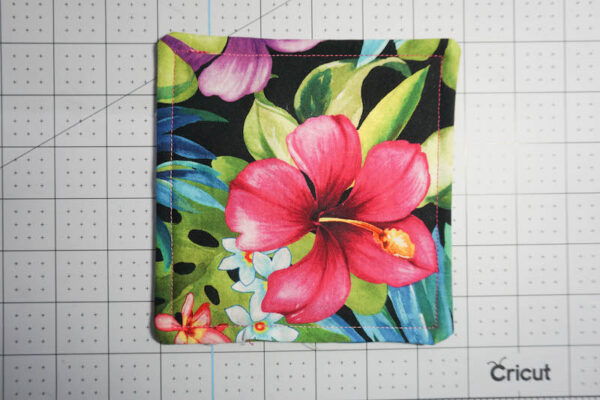
- Michael Miller Fabrics Tropical Bliss in Black from the Lost in Paradise collection. Ask for this fabric at your local quilt shop or shop online at Fat Quarter Shop or Amazon. NOTE: A half 1/2 yard or fat quarter cut will make several mug hugs.
- Fairfield Quilter’s 80/20 Batting – Small 45″ x 60″.
- 100% cotton thread in a color that coordinates or contrasts with fabric for sewing machine.
- King Cole Cottonsoft DK yarn (100% cotton, 3.5 oz/100 g, 229 yd/210 m) – 1 skein in 3459 Magenta, or approximately 20 yd (18.5 m) in any light weight cotton yarn . NOTE: Each skein makes 10-12 mug rug borders.

Part 1: How to Sew an Easy Mug Rug
Prepare Fabric
- Iron your fabric. You may need to use steam to remove any creases or folds.
- Using your Cricut 45 mm rotary cutter, acrylic ruler, and self-healing cutting mat. OR fabric scissors and marking pen, cut two 6.5″ (16.5 cm) squares from your fabric and one 6.5″ (16.5 cm) square from your Fairfield Quilter’s 80/20 Batting. TIP: If using the rotary cutter, fold over your fabric and layer over batting so you can cut through all three pieces at once.

- Layer your fabric and batting as follows: batting on bottom, fabric right side up in middle, fabric wrong side up on top.

- Using your Clover Flower Head Pins, pin all layers together securely.

Sew Layers Together
- Using a straight stitch (I used #3 with the default length and width settings on my Baby Lock Jubilant sewing machine) and a 1/4″ seam allowance, sew through all layers on 3 sides. TIP: Be sure to remove the pins as you sew, as both your needle and your machine can be damaged by sewing through pins.

- On the fourth side, sew about a third of the way down the side, leaving an opening.

- Turn your fabric right side out through the opening.


Finishing Fabric Mug Rug
- Fold unseamed fabric edges in.

- Pin together.

- Using the same settings (straight stitch and 1/4″ seam allowance), top stitch around all four sides, being sure to secure your stitches at the start/end. TIP: Stitch slowly as you get to the corners. Stop sewing with your needle in the down position, lift your presser foot, and rotate the mug rug to turn to sew the next side. After you put your presser foot down and before you start sewing again, make sure you still have a 1/4″ seam allowance.

- Trim your threads. You now have a completed easy sew mug rug! Read on for instructions for adding the crochet border.
Part 2: How to Crochet on to Fabric
Prepare Fabric
- There are actually several ways to add crochet on to fabric but my favorite method is using a combination of a skip cut rotary cutter blade and the embroidery blanket stitch. For this project, I used the June Tailor Skip-Cut Rotary Cutter Blade for Wide Spaced Cuts (at right).

- Replace the blade on your 45 mm rotary cutter with the skip-cut blade following the instructions from the rotary cutter manufacturer for safe removal and replacement of blades. TIP: Keep the packaging for the skip-cut blade so you can return it for storage. Use painter’s tape or masking tape to close the package so the blade doesn’t slide out.

- Line up your acrylic ruler between the seam and edge of your mug rug. Using the skip-cut blade and your rotary cutter, pass through all 3 layers of fabric and batting starting and ending at the horizontal seam lines. You will create small perforations on each of the four sides.

- Thread your Clover Bent Tip Needle with approximately 1 yd (1 m) of King Cole Cottonsoft DK yarn. Pull the yarn through about half way and then knot it so you are working with two layers of yarn.
- Using the needle and yarn, work a blanket stitch border around your mug rug. I used this helpful blanket stitch video tutorial by Tammy Hallam and started by inserting the needle through at one corner between the seam, and then pulling it out through the first skip-cut mark on the next side. If you’re using a darker fabric, like I did, you will be able to find the next skip-cut mark by feel rather than sight.
- Be sure not to pull the yarn too tightly at the corners or your mug rug will buckle.
- When you have worked into the last skip-cut mark on the fourth side, finish by inserting the needle under the first blanket stitch on the first side. Draw through your yarn. Fasten off with a knot, leaving several inches of yarn tail. Don’t worry about the yarn tails being unsightly as you will crochet over them in the next part of the tutorial.
Part 3: How to Crochet a Shell Border Around Fabric

U.S. Stitch Abbreviations Used in This Pattern
- ch – chain
- dc – double crochet
- rep – repeat
- Rnd(s) – Round(s)
- sc – single crochet
- sl st – slip stitch
- sp – space
- st(s) – stitch(es)
- * Repeat instructions after asterisk as indicated.
- () Instructions between parentheses are worked into same stitch or space.
- [] Repeat instructions between brackets as indicated.
Pattern Notes
- This shell stitch crochet border is worked in the round into your blanket stitch edging.
- Ch 1 at beginning of row or round does not count as a stitch.
- Crochet over the yarn tail as you work. Fiber Flux has a helpful tutorial explaining how to do this here. For best results, point yarn tail end towards wrong side of mug rug.
- Need a crochet refresher? The video below includes helpful tutorials for crocheting the dc, sc, and sl st.
- If you can’t see the video above, click here to watch it on YouTube.
Crochet Shell Stitch Border
- Designate one side of your mug rug as the right (front) side.
- With right side facing you and using Furls Odyssey crochet hook, join King Cole Cottonsoft DK yarn with sl st under first loop formed by blanket stitch after corner st on any side.
- Rnd 1: Ch 1, [evenly work 27 sc (or any multiple of 6 sts, + 3 sts) along side to next corner loop, (2 sc, ch 2, 2 sc) in corner loop, turn to work along next side] 4 times; join with sl st to top of first sc.
- Stitch count: 31 sc (or any multiple of 6 sts + 1 st) on each side + 4 ch-2 sp

- Rnd 2: Sl st to next st, ch 1, 5 dc in same st, *[skip 2 sts, sc in next st, skip 2 sts, 5 dc in next st] across to last 3 sts before corner ch-2 sp, skip 2 sts, sc in next st, (sc, ch 1, sc) in corner ch-2 sp, turn to work along next side, sc in first st, skip 2 sts,** 5 dc in next st; rep from * twice, rep from * to ** once, join with sl st to first dc.
- Fasten off. With tapestry needle, weave in yarn tails.

© 2020 by Marie Segares (Underground Crafter). This pattern is for personal use only. You may use the pattern to make unlimited items for yourself, for charity, or to give as gifts. You may sell items you personally make by hand from this pattern. Do not violate Marie’s copyright by distributing this pattern or the photos in any form, including but not limited to scanning, photocopying, emailing, or posting on a website or internet discussion group. If you want to share the pattern, point your friends to this link: https://undergroundcrafter.com/2020/12/31/easy-sew-mug-rug-with-crochet-border-tutorial/. Thanks for supporting indie designers!

I would just do the blanket stitch around the edges and not use the rotary cutter. This is the way I do my dish towel toppers. I do the blanket stitch with crochet thread. Just an idea.