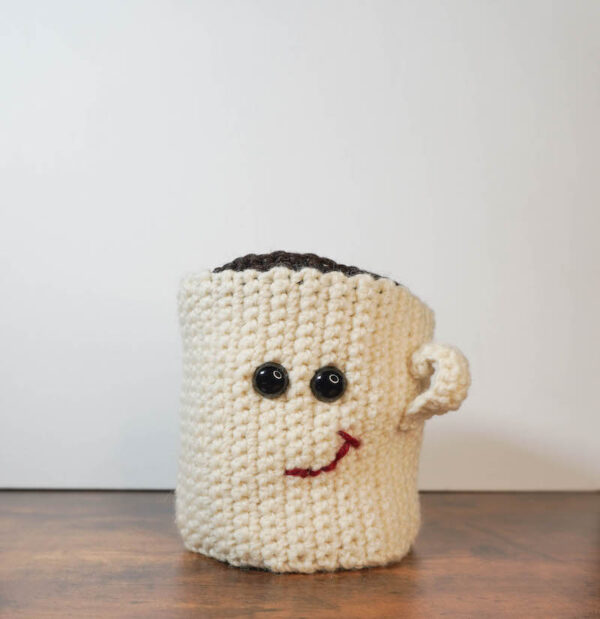
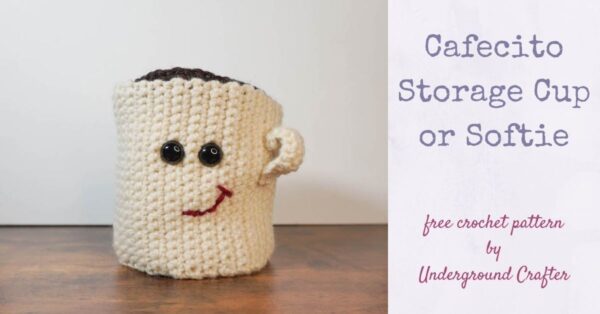
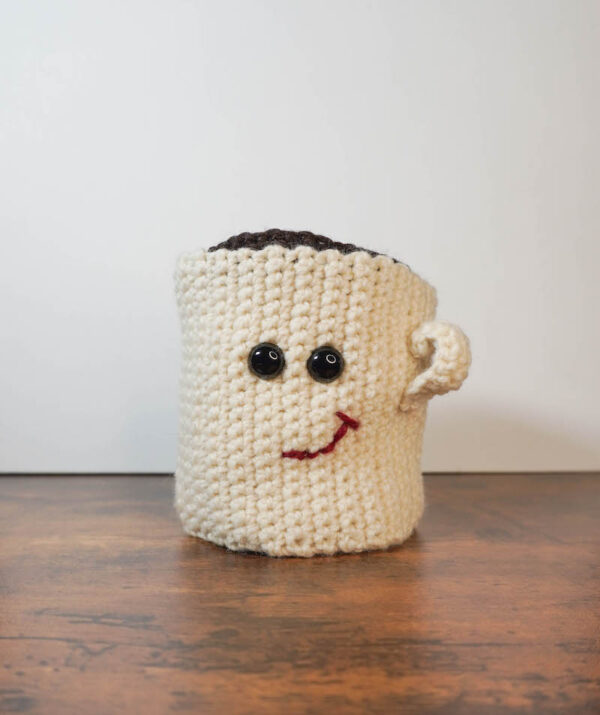
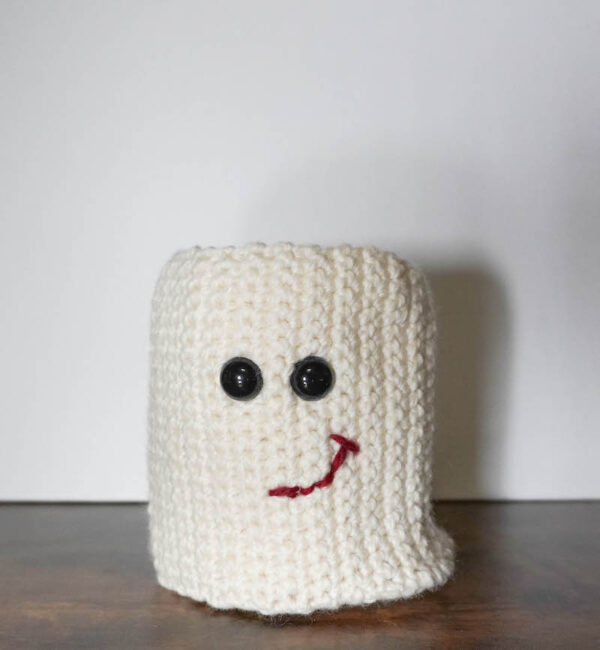
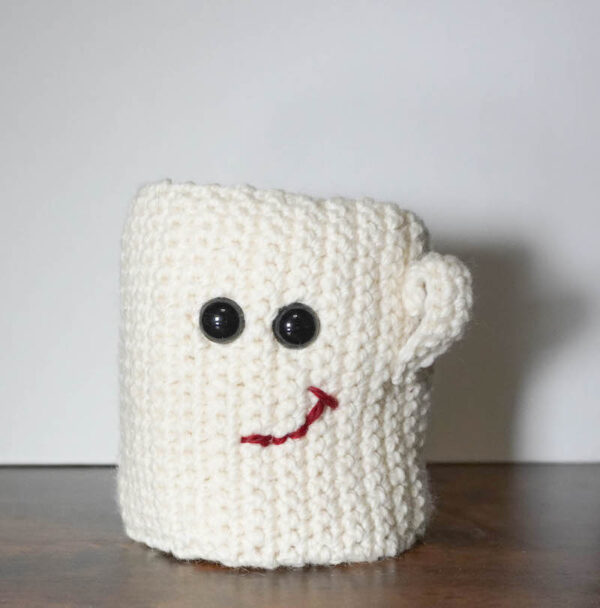
I’m joining in the Spring Décor Blog Hop and Crochet Pattern Bundle with E’Claire Makery today with an adorable crochet coffee cup pattern. The Cafecito Storage Cup or Softie is perfect for storing small crafts supplies like buttons and safety eyes, or mementos like movie ticket stubs. Or, stuff it to make your version a squishable softie.
This post contains affiliate links. I may receive compensation (at no added cost to you) if you make a purchase using these links. Supplies for this project were generously provided by Clover.
It’s spring and for a lot of people, that means it’s time for spring cleaning. I’m not much of a cleaner myself, but I do find myself reorganizing my craft and work space as the seasons change and I need different supplies. When Claire from E’Claire Makery invited me to join the Spring Décor Blog Hop, I knew I wanted to make something small and cute as I sometimes need “crafting instant gratification” as the weather gets warmer.
My version of the Cafecito crochet coffee cup pattern is a Storage Cup. But as it sat on my desk holding all of the tiny things that tend to pile up and tempt cats to walk over my keyboard, I realized it’s also pretty cute as a softie, so I’m including instructions for both options.
Scroll down for the free crochet pattern for the Cafecito Storage Cup or Softie. This pattern is part of the Spring Décor Blog Hop with E’Claire Makery. Visit this blog post on E’Claire Makery daily through April 30, 2022. Each day, you can find the coupon code to get that day’s PDF patterns for FREE. These coupon codes are only available for 24 hours through 8 am Pacific on the designated day through 8 am Pacific on the following day!

If you make your own Cafecito, I’d love to see it! Share your progress and questions by tagging me on Facebook as @Underground Crafter or on Instragram as @ucrafter. You can also share a picture in the Underground Crafters Facebook group. Sign up for my weekly newsletter and get a coupon code for your choice of one of my premium patterns and private access to my vault of subscriber goodies. Plus, you’ll never miss one of my free patterns again!
Add Cafecito to your favorites or queue, or buy the ad-free PDF on Ravelry.

Cafecito Storage Cup or Softie
Crochet Coffee Cup Pattern by Underground Crafter


This adorable crochet coffee cup pattern is guaranteed to put a smile on any coffee lover’s face! At just under 4” (10 cm) tall, it’s perfect for storing small crafts supplies, like buttons, safety eyes, and more. Or use it to keep mementos like movie tickets, USBs, or any other small items that resists organization. Or, stuff it and make it a squishable softie!
Finished Size
- Approximately 3.75” (9.5 cm) height after assembly.
Materials
- Blue Sky Fibers Woolstok Worsted yarn (100% wool, 1.75 oz/50 g, 123 yd/112 m) – 1 skein each in 1303 Highland Fleece (CA), 1313 Dark Chocolate (CB), and 1315 Red Rock, or approximately 90 yd (82.5 m) in CA, 20 yd (18.5 m) in CB, and 1 yd (1 m) in CC in any 100% wool or 100% cotton medium weight yarn.
- Tulip Etimo US Size F-5/3.75 mm crochet hook, or any size needed to obtain correct gauge.
- Clover Quick Locking Stitch Marker Set.
- 12 mm black safety eyes – 1 pair.
- Clover bent-tip yarn needle.
- Optional: Fusible interfacing, iron or heat press, heat-safe surface, pen or marking tool, and sharp scissors.
- Optional: For a softie version, skip the interfacing and use Fairfield Poly-Fil Premium Polyester Fiber Fill to stuff.
Gauge
- Through Rnd 11 = 4” (10 cm) diameter in pattern for Bottom. Exact gauge isn’t critical for this project. Stitches should be tight so that contents do not peek through.
Abbreviations Used in This Pattern
- CA – Color A
- CB – Color B
- CC – Color C
- ch – chain
- pm – place stitch marker
- rep – repeat
- Rnd(s) – Round(s)
- sc – single crochet
- st(s) – stitch(es)
Pattern Notes
- When choosing colors, note that CA is the color of the cup and handle. CB is the color of the cafecito/coffee. CC is the color of the smile.
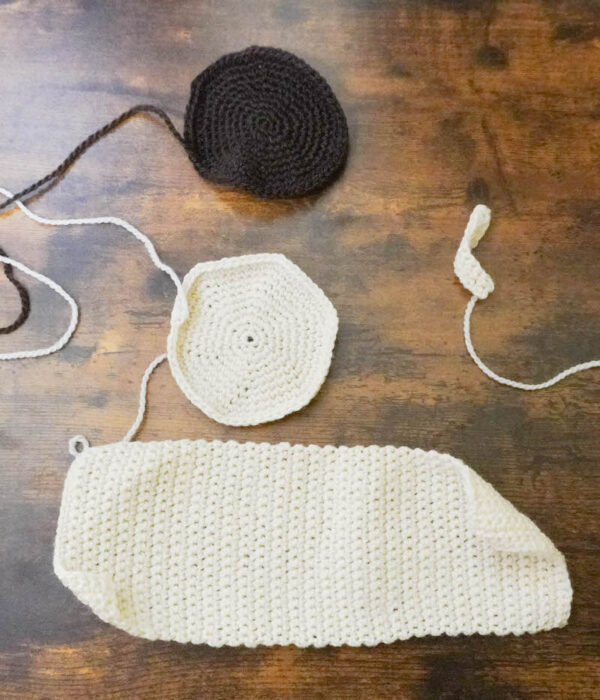
- Cup Bottom and Coffee are crocheted in the round in unjoined spirals. Cup Sides and Handle are crocheted flat in rows. Pieces are backed with fusible interfacing (optional, for stability for the Storage Cup), decorated, and then seamed. For the softie version, the project is stuffed while seaming.
- A helpful video tutorial for embellishing with the embroidery back stitch is available at the end of this blog post.
- A helpful photo tutorial for seaming with the whipstitch is available here.
Pattern Instructions
Cup Bottom
- With CA, ch 2.
- Rnd 1: (Right Side) Skip first ch, 6 sc in next ch, pm in last st to mark position. Move marker up each Rnd. (6 sts)
- Rnd 2: 2 sc in each st around. (12 sts)
- Rnd 3: [2 sc in next st, sc in next st] around. (18 sts)
- Rnd 4: [2 sc in next st, sc in next 2 sts] around. (24 sts)
- Rnd 5: [2 sc in next st, sc in next 3 sts] around. (30 sts)
- Rnd 6: [2 sc in next st, sc in next 4 sts] around. (36 sts)
- Rnd 7: [2 sc in next st, sc in next 5 sts] around. (42 sts)
- Rnd 8: [2 sc in next st, sc in next 6 sts] around. (48 sts)
- Rnd 9: [2 sc in next st, sc in next 7 sts] around. (54 sts)
- Rnd 10: [2 sc in next st, sc in next 8 sts] around. (60 sts)
- Rnd 11: Sc in each st around.
- Fasten off with long yarn tail (approximately 30”/76 cm) for seaming.
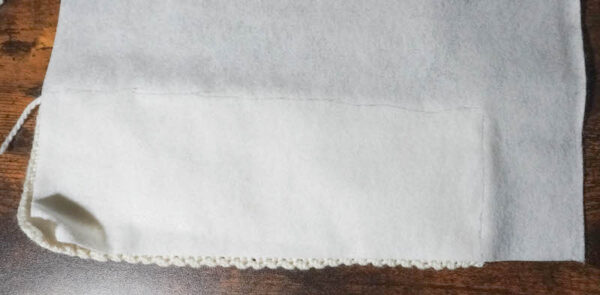
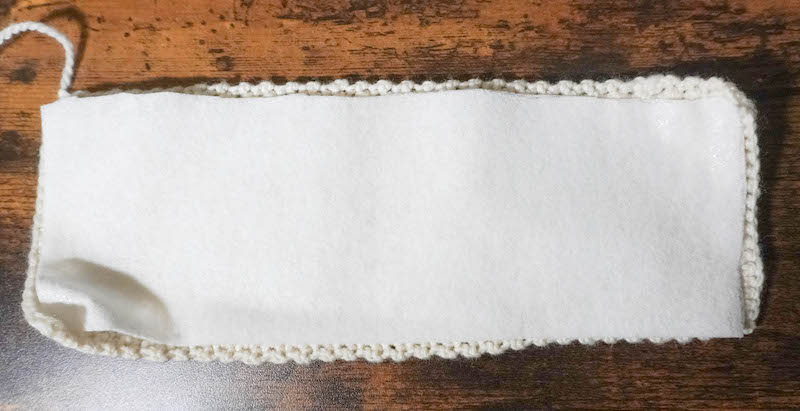
Cup Sides
- With CA, ch 21.
- Row 1: Turn, skip 1 ch, sc in next 20 ch. (20 sts)
- Row 2: Turn, ch 1, sc in first st and next 19 sts.
- Rows 3-60: Rep Row 2, 58 times.
- Fasten off with long yarn tail (approximately 12”/30.5 cm) for seaming.
Cup Handle
- With CA, ch 12.
- Row 1: Turn, skip 1 ch, sc in next 11 ch. (11 sts)
- Row 2: Turn, ch 1, sc in first st and in each st across.
- Row 3: Rep Row 2.
- Fasten off with long yarn tail (approximately 8”/20.5 cm) for seaming.
Cafecito/Coffee
- With CB, repeat as for Cup Bottom.
Assembly and Finishing
Weave in yarn tails
- Before starting assembly, use the yarn needle to weave in yarn tail from the start of each piece on the wrong side of each piece.
- If adding fusible interfacing, continue to Add Fusible Interfacing. If skipping fusible interfacing, continue to Decorate Facial Features.
Add Fusible Interfacing
- Interfacing can add stability to your Storage Cup. Starting with the Cup Sides, use a pen or marking tool to mark the interfacing. You will need to leave the top and bottom row, and approximately one stitch on each edge, WITHOUT interfacing. As shown in the photo below, mark so that your interfacing piece will be cut smaller than the crocheted piece.
- Use a pen or marking tool to mark the interfacing for the Cup Bottom and Cafecito/Coffee. Again, you will want to mark the interfacing to be smaller than the finished piece, so that the final Round is not covered with interfacing. With scissors, cut out all 3 pieces of interfacing.
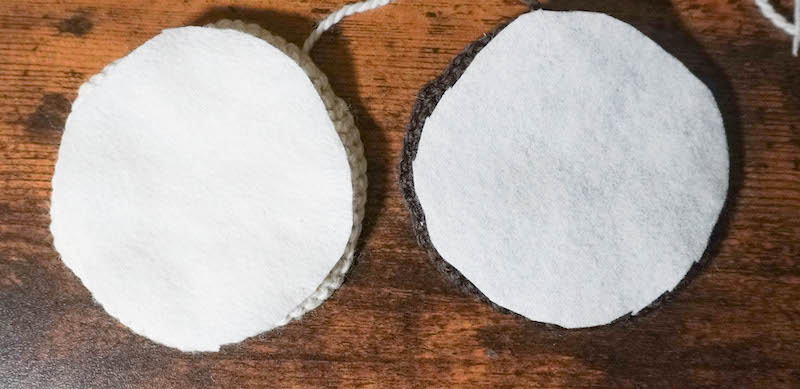
- Follow the manufacturer’s instructions for your interfacing to fuse the interfacing to the wrong side of each crocheted piece. Set aside pieces to cool.
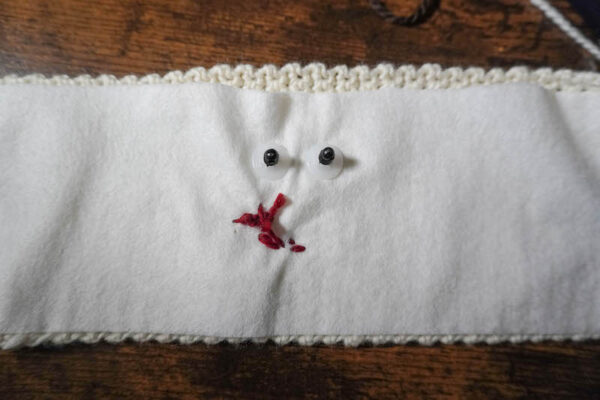
Decorate Facial Features
- Position first safety eye at center of Cup Sides as desired. When satisfied with position, use bent-tip yarn needle to push a hole through the interfacing if necessary. Insert safety eye and secure by attaching washer firmly on the wrong side. Repeat for second safety eye.
- Thread yarn needle with approximately 1 yd/1 m in CC. Embellish face with smile using the embroidery back stitch (see Pattern Notes).

- When finished, tie a knot securely on wrong side if your project used interfacing, or use the yarn needle to weave in the yarn tail on the back if you did not use interfacing.
Join Cup Pieces
- Thread yarn needle with long yarn tail in CA from Cup Sides. With Right Side facing out and wrong sides together, join short edges with whipstitch (see Pattern Notes). Weave in yarn tails on inside of Cup.
- Thread yarn needle with long yarn tail in CA from Cup Bottom. With Right Side facing out and wrong sides together, align each stitch on the final round of the Cup Bottom with the edge of a row at bottom of the Cup Sides. Join with whipstitch (see Pattern Notes). Weave in yarn tails on inside of Cup.
- Thread yarn needle with long yarn tail in CA from Cup Handle. Position Cup Handle at side of Facial Features as desired. With yarn needle, sew Cup Handle to Cup Sides, working through the interfacing if necessary.
- When finished, tie a knot securely on wrong side if your project used interfacing, or use the yarn needle to weave in the yarn tail on the back if you did not use interfacing.
- Thread yarn needle with long yarn tail in CB from Cafecito/Coffee. With Right Side facing out and wrong sides together, align each stitch on the final round of the Cup Bottom with the edge of a row at bottom of the Cup Sides. Starting at the back of the project (at the opposite side of the Cup Sides to the Facial Features), join 20 stitches with whipstitch (see Pattern Notes).
- For the Storage Cup version: Leave remaining 40 stitches of Cafecito/Coffee unseamed so that it can open and close like a lid to your Storage Cup. Weave in yarn tails on inside of Cup.
- For the Softie version: Stuff firmly with fiber filling. Continue to join the next 40 stitches with whipstitch (see Pattern Notes). Weave in yarn tails on inside of Cup.