

I love crocheting granny squares, and over the years, I’ve tried many different joining methods but I’ve never settled on a favorite. I shared a tutorial for joining grannies with the mattress stitch last month, and with the Mystery Lapghan crochet-a-long underway, I thought now would be a good time to share another joining method. Today I’m sharing how whipstitch, another easy way to join granny squares, or any other crochet or knitting project that needs to be seamed.

This post contains affiliate links. I may receive compensation (at no added cost to you) if you make a purchase using these links.
Just as for the mattress stitch, you’ll need a yarn needle for the whipstitch join. Yarn needles are blunt needles with very large eyes. These large eyes make it easy to thread the needles with yarn, and the blunt tip keeps you from pricking yourself and makes it less likely that you will split the yarn while seaming.
My favorite yarn needles are the Susan Bates 2″ steel yarn needles and the Clover bent-tip yarn needle sets (which come with a little carrying case). These are great for light (also known as #3 or DK) yarn through jumbo (also known as #7 or roving) yarn.
Tutorial: How to whipstitch for seams and joins

Update: A video tutorial is now available. Watch below or scroll down for the photo tutorial.
If you can’t see the video tutorial demonstrating the whipstitch above, click HERE to watch it on YouTube.
Thread the yarn needle (preferably with the yarn tail of one piece).
I generally leave a yarn tail that is about 3 times longer than the piece I’m seaming. This allows me enough yarn to join the pieces and to weave in ends comfortably to prevent my project from unraveling in the wash.
You can also use a new piece of yarn to thread the needle. In this case, be sure to leave about 5″ (13 cm) at each end to weave in after seaming.

Position the pieces with the right sides together/wrong sides out.
If you are using a project where pieces are reversible, choose the best looking side of each piece as the “right” (front) side.
Starting with the piece furthest away from you, insert the needle through the outer loop of each piece, working towards you.

When I’m using the yarn tail from an existing piece, rather than a separate piece of yarn, I always start by inserting the needle into the other piece (that isn’t currently attached to the yarn). Pull the yarn through both loops.
Be sure not to tug your your work too tightly, or your work will pucker.
Insert the needle through the next stitches.
With the whipstitch, you will always be inserting your needle from the piece furthest away from you and working towards you.

Continue working across, being sure to line up the corresponding stitches before inserting your needle and pulling the yarn through.
Do your best to line up stitches on both sides to avoid puckering or gaps.

After your seam is finished, weave in the yarn tail on the wrong side of your project to secure it from unraveling.


Since you worked through the outer loops, the two center loops will be untouched once you turn the pieces over. This will make the seam less visible while also making the edge details of each piece more prominent on the front side.
Now that you’ve learned how to join granny squares with the whipstitch, you may want to try it out right away! Here are some of my free granny square patterns that you may enjoy.
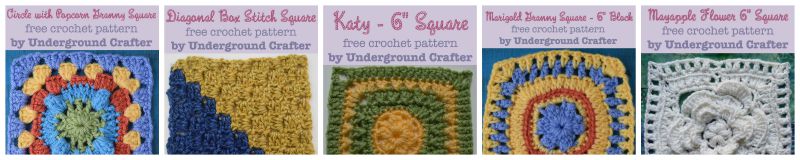
From left to right:
- Circle with Popcorn Granny Square
- Diagonal Box Stitch Square (with video tutorial)
- Katy Square
- Marigold Granny Square
- Mayapple Flower Square
What’s your favorite method for joining granny squares?
18 thoughts on “How To Join Granny Squares Using the Whipstitch | #Crochet #TipsTuesday”