
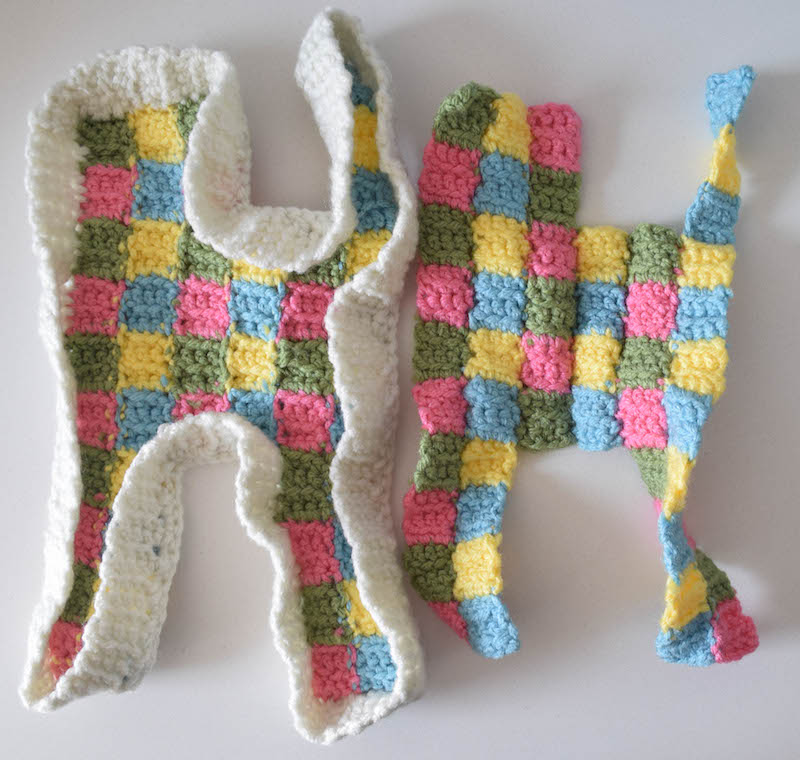
Recently, I’ve been getting back into sewing again. I used to sew (or really, do patchwork and quilting) a lot before I moved in with MC. Since I’ve lived here, my sewing table has moved around without really finding a true home. Now that it has finally settled, my fingers have been itching to sew, so I have been looking through my quilting books for inspiration. This patchwork cat is designed in the style of a cat quilt block. It’s a great way to use up yarn scraps. I used the leftovers from my Classic Granny with a Twist Blanket – together, these would make a great gift!
This post contains affiliate links. I may receive compensation (at no added cost to you) if you make a purchase using these links. Materials for this project were generously provided by Clover USA, Fairfield World, and Red Heart.
One of my favorite quilt books to flip through is The Cat’s Meow: Purr-fect Quilts for Cat Lovers by Janet Kime. One of the quilt patterns, Checkers, is a beginner-friendly cat using mostly squares. I decided to replicate it in crochet for this project.
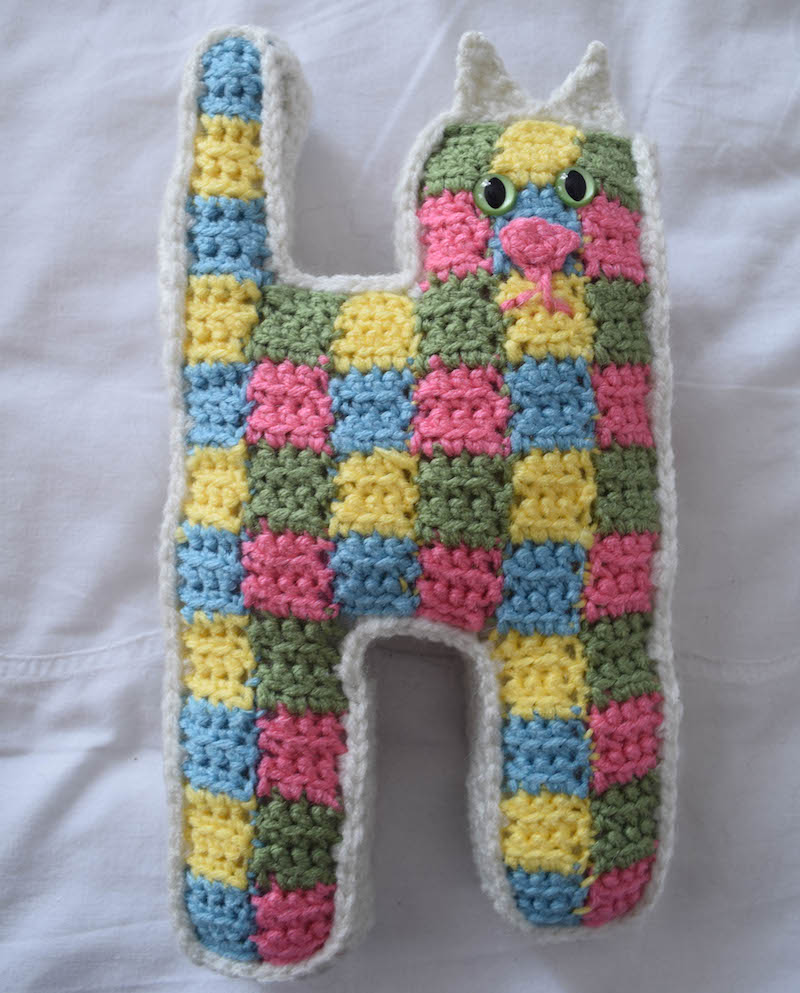
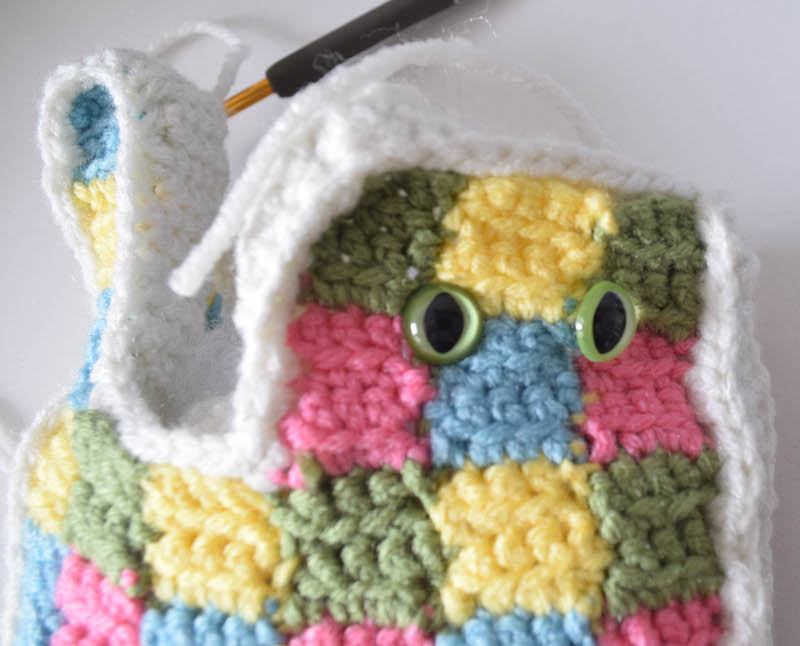
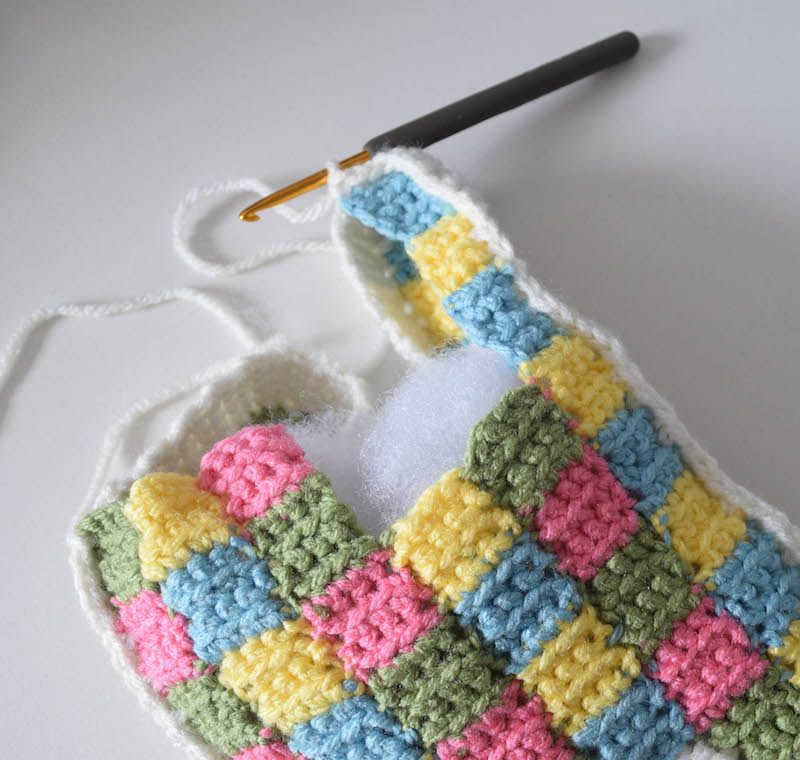
I love the look of the FreshStitches cat craft eyes, and I decided to keep the nose and mouth rustic to match the rest of the pattern. If you gift the Patchwork Cat to a baby or infant, embroider on the eyes with yarn or thread instead of using craft eyes for safety. I used Fairfield Poly-Fil Crafter’s Choice Dry Polyester Packing Fiber Fill because it has a coarser texture than other types of stuffing. It’s easier to pack in and it makes a firmer toy than when you use a softer stuffing. This made it easier for the cat to stand up after stuffing.
If you’re anxious about weaving in lots of ends, I recommend crocheting over your yarn tails after you change color. If you’re not sure how to do that, there’s a helpful video tutorial in the pattern. If you have lots of small scraps, you can turn them into one big ball of yarn using the Russian join. Here’s a helpful Russian join tutorial.
If you make your own Patchwork Cat, I’d love to see it! Share your progress and questions by tagging me on Facebook as @Underground Crafter or Instagram as @ucrafter. You can also share a picture in the Underground Crafters Facebook group. Sign up for my weekly newsletter and get a coupon code for your choice of one of my premium patterns and other subscriber goodies. Plus, you’ll never miss one of my free patterns again!
Add the Patchwork Cat to your Ravelry favorites or queue.

This pattern is part of the 2017 Holiday Blog Hop.

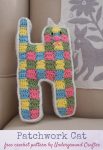
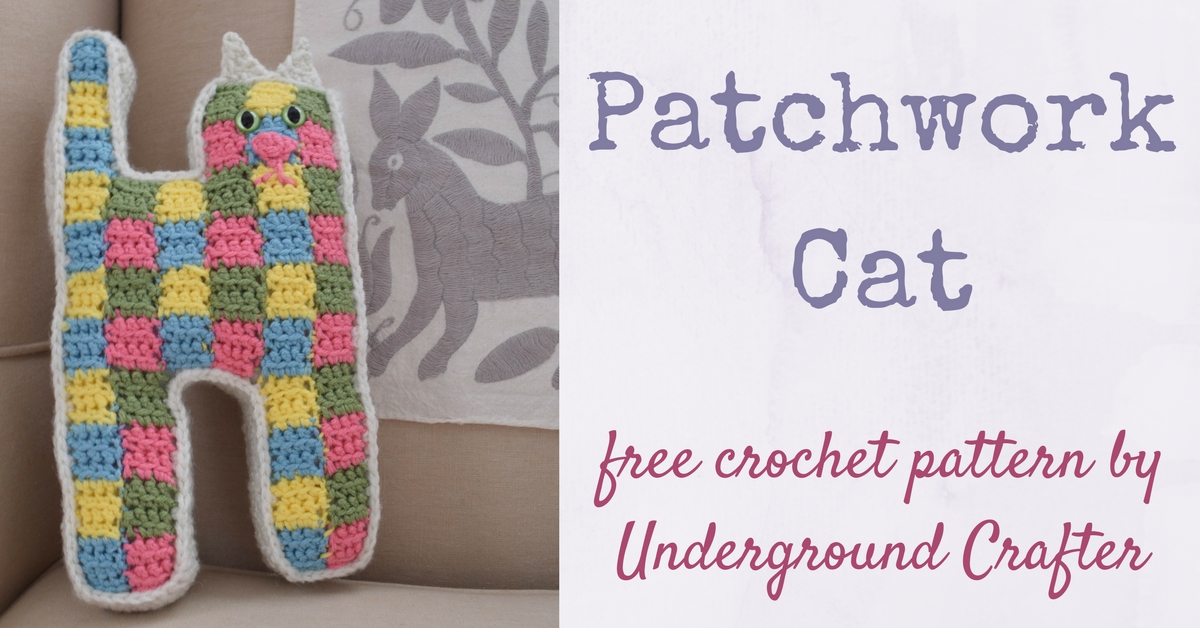
Patchwork Cat
Crochet Pattern by Underground Crafter


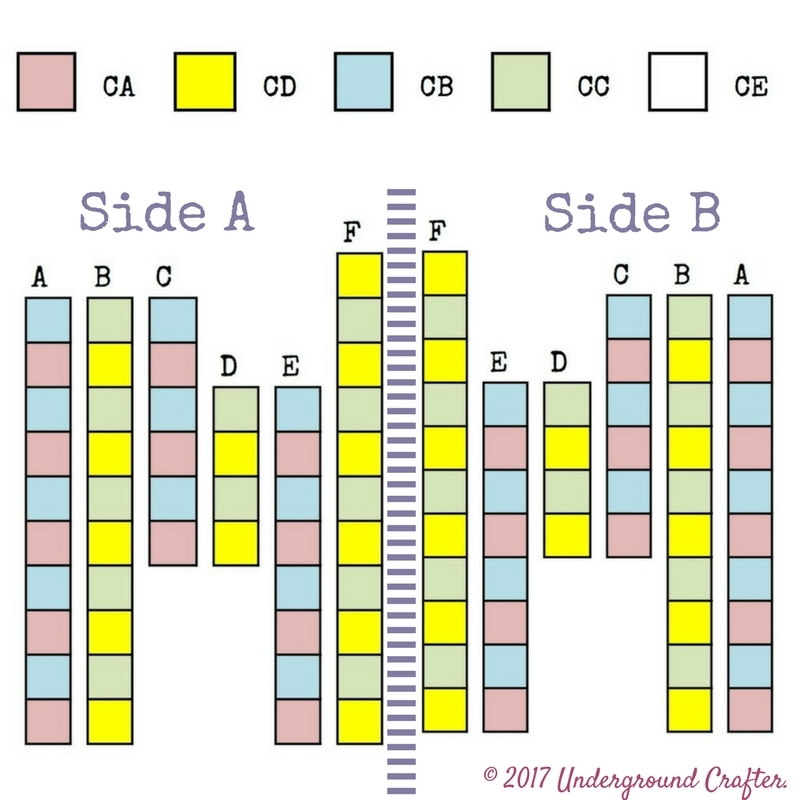
This patchwork cat is designed in the style of a classic quilt block. Use planned colors, as I did, or make it scrappy.
Finished Size
- Approximately 10.5” (26.5 cm) length (from tip of tail to toe) x 5.75” (14.5 cm) width x 1.25” (3 cm) depth when stuffed.
Materials
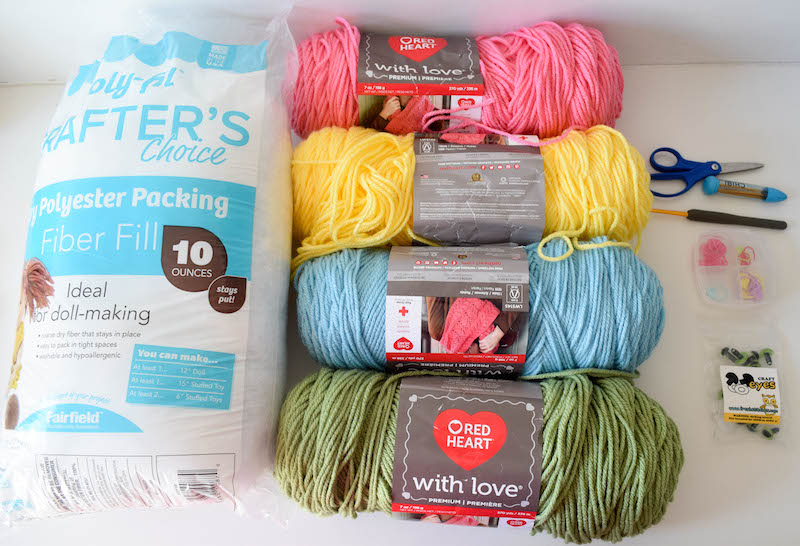
- Red Heart With Love yarn (100% acrylic, 7 oz/198 g/370 yd/338 m) – 1 skein ea in 1704 Bubble Gum (CA), 1502 Iced Aqua (CB), 1601 Lettuce (CC), 1201 Daffodil (CD), and 1101 Eggshell (CE), or approximately 30 yd (27.5 m) ea in CA, CB, CC, and CD, and 100 yd (91.5 m) in CE in any medium weight yarn. For a scrappy look, expect to use approximately 2 yd (1.5 m) for every 4 row “square.”
- US Size G-6/4 mm crochet hook, or size needed to obtain gauge.
- Yarn needle.
- Clover Quick Locking Stitch Marker set, or locking stitch markers.
- 12 mm cat craft/safety eyes – 1 pair.
- Fairfield Poly-Fil Crafter’s Choice Dry Polyester Packing Fiber Fill – 10 ounce bag.
Gauge
- 4 sts = 0.75” (2 cm) in pattern. Exact gauge is not critical for this project but stitches should be small so that fiber filling doesn’t show.
Abbreviations Used in This Pattern
- CA – Color A
- CB – Color B
- CC – Color C
- CD – Color D
- CE – Color E
- ch – chain
- ea – each
- rep – repeat
- RS – right (front) side
- sc – single crochet
- sc2tog – single crochet 2 stitches together – (Insert hook in next st, yarn over and draw up a loop) twice, yarn over and draw through all 3 loops on hook.
- sk – skip
- sl st – slip stitch
- st(s) – stitch(es)
- WS – wrong (back) side
- * Repeat the instructions following the asterisk as indicated.
- () Repeat the instructions between parenthesis as indicated.
Pattern Notes
- Change colors in last yarn over of final sc of indicated rows.
- Pattern indicates color changes pictured. For a scrappy patchwork cat, change color in last yarn over of final sc at the end of every fourth row.
Pattern Instructions
Strip A (Make 2)
- With CA, ch 5
- Row 1: Turn, sk 1 ch, sc in next 4 ch. (4 sts)
- Row 2: Turn, ch 1, sc in first st and ea st across. (4 sts)
- Rows 3-4: Rep Row 2 twice, change to CB, fasten off CA.
- Rows 5-8: Rep Row 2 – 4 times, change to CA, fasten off CB.
- Rows 9-12: Rep Row 2 – 4 times, change to CB, fasten off CA.
- Rows 13-36: Rep Rows 5-12 – 3 times, change to CB, fasten off CA.
- Rows 37-40: Rep Row 2 – 4 times, fasten off CB with long yarn tail (approximately double the height of the 40 rows) for seaming.
Strip B (Make 2)
- With CD, ch 5
- Row 1: Turn, sk 1 ch, sc in next 4 ch. (4 sts)
- Row 2: Turn, ch 1, sc in first st and ea st across. (4 sts)
- Rows 3-4: Rep Row 2 twice, change to CC, fasten off CD.
- Rows 5-8: Rep Row 2 – 4 times, change to CD, fasten off CC.
- Rows 9-12: Rep Row 2 – 4 times, change to CC, fasten off CD.
- Rows 13-36: Rep Rows 5-12 – 3 times, change to CC, fasten off CD.
- Rows 37-40: Rep Row 2 – 4 times, fasten off CC with long yarn tail (approximately double the height of the 40 rows) for seaming.
Strip C (Make 2)
- With CA, ch 5
- Row 1: Turn, sk 1 ch, sc in next 4 ch. (4 sts)
- Row 2: Turn, ch 1, sc in first st and ea st across. (4 sts)
- Rows 3-4: Rep Row 2 twice, change to CB, fasten off CA.
- Rows 5-8: Rep Row 2 – 4 times, change to CA, fasten off CB.
- Rows 9-12: Rep Row 2 – 4 times, change to CB, fasten off CA.
- Rows 13-20: Rep Rows 5-12 once, change to CB, fasten off CA.
- Rows 21-24: Rep Row 2 – 4 times, fasten off CB with long yarn tail (approximately double the height of the 24 rows) for seaming.
Strip D (Make 2)
- With CD, ch 5
- Row 1: Turn, sk 1 ch, sc in next 4 ch. (4 sts)
- Row 2: Turn, ch 1, sc in first st and ea st across. (4 sts)
- Rows 3-4: Rep Row 2 twice, change to CC, fasten off CD.
- Rows 5-8: Rep Row 2 – 4 times, change to CD, fasten off CC.
- Rows 9-12: Rep Row 2 – 4 times, change to CC, fasten off CD.
- Rows 13-16: Rep Rows 5-8 once, fasten off CD with long yarn tail (approximately double the height of the 16 rows) for seaming.
Strip E (Make 2)
- With CA, ch 5
- Row 1: Turn, sk 1 ch, sc in next 4 ch. (4 sts)
- Row 2: Turn, ch 1, sc in first st and ea st across. (4 sts)
- Rows 3-4: Rep Row 2 twice, change to CB, fasten off CA.
- Rows 5-8: Rep Row 2 – 4 times, change to CA, fasten off CB.
- Rows 9-12: Rep Row 2 – 4 times, change to CB, fasten off CA.
- Rows 13-28: Rep Rows 5-12 – 2 times, change to CB, fasten off CA.
- Rows 29-32: Rep Row 2 – 4 times, fasten off CB with long yarn tail (approximately double the height of the 32 rows) for seaming.
Strip F (Make 2)
- With CD, ch 5
- Row 1: Turn, sk 1 ch, sc in next 4 ch. (4 sts)
- Row 2: Turn, ch 1, sc in first st and ea st across. (4 sts)
- Rows 3-4: Rep Row 2 twice, change to CC, fasten off CD.
- Rows 5-8: Rep Row 2 – 4 times, change to CD, fasten off CC.
- Rows 9-12: Rep Row 2 – 4 times, change to CC, fasten off CD.
- Rows 13-44: Rep Rows 5-12 – 4 times, fasten off CD with long yarn tail (approximately double the height of the 44 rows) for seaming.
Gusset Strip (Make 1)
- With CE, ch 5
- Row 1: Turn, sk 1 ch, sc in next 4 ch. (4 sts)
- Row 2: Turn, ch 1, sc in first st and ea st across. (4 sts)
- Rows 3-44: Rep Row 2 – 42 times, place marker in first and last st to mark Row 44.
- Rows 45-52: Rep Row 2 – 8 times, place marker in first and last st to mark Row 52.
- Rows 53-68: Rep Row 2 – 16 times, place marker in first and last st to mark Row 68.
- Rows 69-76: Rep Rows 2 – 8 times, place marker in first and last st to mark Row 76.
- Rows 73-92: Rep Row 2 – 16 times, place marker in first and last st to mark Row 92.
- Rows 93-100: Rep Row 2 – 8 times, place marker in first and last st to mark Row 100.
- Rows 101-144: Rep Row 2 – 40 times, place marker in first and last st to mark Row 144.
- Rows 145-156: Rep Row 2 – 12 times, place marker in first and last st to mark Row 156.
- Rows 157-164: Rep Row 2 – 8 times, place marker in first and last st to mark Row 164.
- Rows 165-172: Rep Row 2 – 8 times, place marker in first and last st to mark Row 172.
- Rows 173-184: Rep Row 2 – 12 times, place marker in first and last st to mark Row 176. Do not fasten off. Set aside gusset.
Assembly
- Thread long yarn tail through yarn needle and join Strip A to Strip B with whipstitch seam. (A whipstitch join tutorial is available here: How To Join Granny Squares Using the Whipstitch.)
- Continue joining strips with yarn tails following assembly diagram.
- With yarn needle, weave in ends on WS.
- Beginning at top of tail (unattached part of Strip F) and moving towards bottom of tail, join gusset to edge of RS of Side A using CE and single crochet seam. (A single crochet join tutorial is available here: How To Join Granny Squares Using Single Crochet.) Stitch markers are placed to line up gusset with ends of strips. Remove stitch markers from side of one side rows as you work.

- When gusset is worked around Side A, join gusset with slip stitch seam across first row of gusset. (A slip stitch join tutorial is available here: How To Join Granny Squares with the Slip Stitch.) Do not fasten off.

- Repeat to join other side of gusset to RS of Side B, stopping as you get near the top of the face to attach safety eyes and to stuff thoroughly.
- Continue seaming, stuffing before you seal up gusset. Join with sl st to first stitch of gusset. Fasten off. With yarn needle, weave in ends on inside of cat.
Nose
- With CA, ch 2.
- Row 1: Turn, sk 1 ch, 2 sc in next st.
- Row 2: Turn, ch 1, sc in first 2 sts, sc in skipped ch from Row 1. Fasten off with long yarn tail (approximately 20”/51 cm) for seaming. With yarn tail and tapestry needle, sew nose to front of face below eyes. Use CA to stitch mouth. Weave remaining yarn through inside of cat. Fasten off.
First Ear
- In first of 9 sts in center of gusset seam above face, join CE with sl st.
- Row 1: Ch 1, sc in same st an ea of next 3 sts. (4 sts)
- Row 2: Turn, ch 1, sc in next 2 sts, sc2tog. (3 sts)
- Row 3: Turn, ch 1, sc in next st, sc2tog. (2 sts)
- Row 4: Turn, ch 1, sc2tog. (1 sts) Fasten off.
Second Ear
- Sk 1 st on gusset seam after first ear, join CE with sl st. Rep Rows 1-4 from First Ear.
Finishing
- With yarn needle, weave in ends onto back of ears or into inside of cat.
This is SO cute, Marie!
Thank you, Jennifer!