

I’m back to share another pattern for the seventh annual Softie Crochet Along with CAL Central Crochet. Osvaldo is a crochet penguin pattern that works up quickly with super bulky yarn.

This post contains affiliate links. I may receive compensation (at no added cost to you) if you make a purchase using these links. Materials for the sample were generously provided by Clover USA and Lion Brand.
Penguins are one of my favorite animals to observe from afar. Growing up in New York City, I had the opportunity to see penguins getting fed during several zoo visits, and it was always a lot of fun.
Penguins are also fun to crochet! I’ve designed other crochet penguin patterns over the years, including the pocket-sized Amigurumi Baby Penguin and the jumbo Penguin Pillow Pal. For this particular design, I wanted to make something that was big enough to cuddle but not too big to be portable.

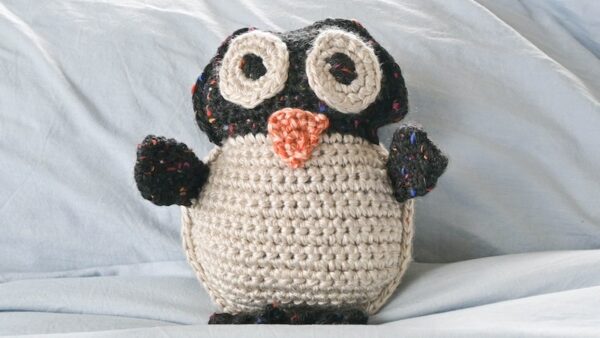
As soon as I finished this crochet penguin pattern, the name Osvaldo came to me. As you can see, he is waiting to be loved!

Scroll down for free Osvaldo the Penguin pattern. Osvaldo the Penguin is part of the seventh annual Softie Crochet Along! To join the Softie Crochet Along:
- Sign up for Crochet Along updates and the Underground Crafter newsletter to get regular updates, including an update as each CAL pattern is released. When you sign up, you’ll also get access to my subscriber vault which includes exclusive free PDF patterns, a coupon code for your choice of any crochet or knitting pattern or ebook from my Ravelry shop, and coupon codes from other indie designers and crafts businesses.
- Visit this blog post for links to each pattern as it goes live, and to enter the giveaway by June, 2024 at 11:59 p.m. Eastern for your chance to win a great prize.
- Share your progress and post pictures of your finished projects. Tag your projects and posts #CALCentralCrochet on all social media.
- If you’d like to chat with other crocheters, join the CAL Central Facebook group or visit this thread in the CAL Central Ravelry group.
- By the end of the CAL, you’ll have up to 15 awesome softies to cuddle with!
- Use this button below on your Ravelry project pages or elsewhere on social media. Right click (on desktop) or tap and hold (on mobile) to save.

If you make your own Osvaldo the Penguin, I’d love to see it! Share your progress and questions by tagging me on Bluesky as @UndergroundCrafter, Facebook as @UndergroundCrafter, or on Instagram as @ucrafter. You can also share a picture in the Underground Crafters Facebook group. Sign up for my weekly newsletter and get a coupon code for your choice of one of my premium patterns and private access to my vault of subscriber goodies. Plus, you’ll never miss one of my free patterns again!
Add Osvaldo the Penguin to your favorites or queue, or buy the ad-free PDF on Ravelry.

Osvaldo the Penguin
Crochet Penguin Pattern by Underground Crafter


This crochet penguin pattern works up quickly with super bulky yarn. This pattern was designed as part of the seventh annual Softie Crochet Along with CAL Central Crochet.
Finished Size
- One Size: Approximately 10.5” (26.5 cm) height when stuffed.
Materials
- Lion Brand Hometown (94% acrylic/6% rayon, 5 oz/113 g, 64 yd/59 m) – 2 skeins 303J Cambridge Tweed (CA) and 1 skein each in 238 Catskills Corner (CB) and 233J San Juan Sunset (CC), or approximately 90 yd (82.5 m) in CA, 45 yd (41 m) in CB, and 10 yd (9 m) in CC in any super bulky weight yarn.
- Hometown is available online from Lion Brand | LoveCrafts | Amazon
- Clover Amour US Size I-9/5.5 mm crochet hook, or size needed to obtain gauge.
- Yarn needle.
- Ball head/quilting pins (for assembly).
- Fiber filling.
Gauge
- 12 sc = 4” (10 cm) across. Exact gauge is not critical for this pattern. Stitches should be small so fiber filling doesn’t show.
Abbreviations Used in This Pattern
- BL – back loop only – Fiber Flux has a helpful video tutorial for identifying the back loop in crochet here.
- bob – 3-repeat bobble – [Yo, insert hook into st, yo and draw up a loop, yo and draw through 2 loops] 3 times in the same st, yo and draw through all 4 loops on hook. A helpful video tutorial for this stitch is available below.
- If you can’t see the video tutorial for the bobble above, click HERE to watch it on YouTube.
- CA – Color A
- CB – Color B
- CC – Color C
- ch – chain
- FL – front loop only – A helpful video for identifying the front loop is available below.
- If you can’t see the video tutorial for the front loop above, click HERE to watch it on YouTube.
- FPsc – front post single crochet – Insert hook from front around back to front of st in previous round, yo and draw up a loop, yo and draw through 2 loops. A video tutorial for this stitch is available below.
- If you can’t see the video tutorial for the FPsc above, click HERE to watch it on YouTube.
- pm – place stitch marker
- Rnd(s) – Round(s)
- rep – repeat
- RS – right (front) side
- sc – single crochet
- sc2tog – single crochet 2 stitches together (decrease) – [Insert hook in next st, yo and draw up a loop] twice, yo and draw through all 3 loops on hook. A helpful video tutorial for this stitch is available below.
- If you can’t see the video tutorial for the sc2tog above, click HERE to watch it on YouTube.
- sl st – slip stitch
- st(s) – stitch(es)
- WS – wrong (back) side
- yo – yarn over
- [] Repeat stitches between brackets as indicated.
Pattern Notes
- When selecting colors, note that CA is the color of the top of the head, the Back, the Flippers, the Feet, and the pupils. CB is the color of the body and the Eyes. CC is the color of the Beak.
- The Eyes and Flippers are crocheted in the round in unjoined spirals.
- The Front, Back, Feet, and Beak are worked flat in rows. Designate your preferred side as the RS when assembling.
- Change color in the last yarn over of the row as instructed. When possible, you should also crochet over your yarn tails. The video below demonstrates how to change color and crochet over your yarn tails.
- If you can’t see the video above demonstrating how to change color and crochet over your yarn tails, click HERE to watch it on YouTube.
- Helpful video tutorials demonstrating how to embellish crochet with embroidery are available at the end of this pattern.
- A helpful video tutorial for seaming with the whipstitch is available below.
- If you can’t see the video tutorial for seaming with whipstitch above, click HERE to watch it on YouTube.
- A helpful video tutorial for seaming with single crochet is available below.
- If you can’t see the video tutorial for seaming with single crochet above, click HERE to watch it on YouTube.
Pattern Instructions
Eyes (Make 2)
- With CB, ch 2.
- Rnd 1: (RS) Skip first ch, 6 sc in next ch, pm in last st to mark position. Move marker up each Rnd. (6 sts)
- Rnd 2: (RS) 2 sc in each st around. (12 sts)
- Rnd 3: (RS) [2 sc in next st, sc in next st] around. (18 sts)
- Fasten off with long yarn tail (approximately 12”/30.5 cm long) for seaming. With yarn needle, weave in yarn tail from start on WS.
Front
- With CA, ch 12.
- Row 1: Turn, skip first ch, sc in next 11 ch. (11 sts)
- Row 2: Turn, ch 1, 2 sc in first st, sc in next st and each st across to last st, 2 sc in next st. (13 sts/increases by 2 sts)
- Rows 3-5: Rep Row 2, 3 times. (19 sts)
- Row 6: Turn, ch 1, sc in first st and each st across.
- Rows 7-9: Rep Row 6, 3 times.
- Row 10: Turn, sl st in first 3 sts, sc in next 13 sts, skip next 3 sts. (13 sts)
- Row 11: Turn, ch 1, sc in first st and each st across, changing to CB in last yo of final sc (see Pattern Notes). Fasten off CA.
- Rows 12-15: Rep Row 2, 4 times (21 sts)
- Rows 16-22: Rep Row 6, 7 times.
- Row 23: Turn, ch 1, sc2tog in first 2 sts, sc in next st and each st across to last 2 sts, sc2tog. (19 sts/decreases by 2 sts)
- Rows 24-27: Rep Row 23, 4 times. (11 sts)
- Fasten off CB.
Back
- With CA, work as for Front but without changing color in Row 11. Fasten off CA.
Assemble Front
- Position Eyes on CA section of Front. Pin Eyes in position. Thread yarn needle with long yarn tail from end of first Eye and sew Eye to Front. Weave in yarn tails on WS of Front. Rep for second Eye.

First Foot
- Position Front with RS facing and final Row at top as shown in the photo below.
- Row 1: (RS) Skip first st. Join CA with slstFL to second st, ch 1, scFL in same st, scFL in next 3 sts, skip 6 sts. (4 sts)

- Row 2: (WS) Turn, ch 1, sc in first st and each st across. (4 sts)
- Row 3: (RS) Turn, ch 1, 2 sc in first st, sc in next 2 sts, 2 sc in next st. (6 sts)
- Row 4: (WS) Turn, ch 1, starting in first st [sc in next st, bob in next st] across.
- Row 5: (RS): Turn, ch 1, starting in first st [FPsc around bob, sc in next st] across. Fasten off CA.
Second Foot
- Position Front with RS facing and final Row at top as shown in the photo below.
- Row 1: (RS) Skip st after First Foot. Join CA with slstFL to next st, ch 1, scFL in same st, scFL in next 3 sts, skip 1 st. (4 sts)

- Rows 2-3: Rep Rows 2-3 as for First Foot.
- Row 4: (WS) Turn, ch 1, starting in first st [bob in next st, sc in next st] across.
- Row 5: (RS): Turn, ch 1, starting in first st [sc in next st, FPsc around bob] across. Fasten off CA.

Beak
- With CC, ch 2.
- Row 1: Turn, skip first ch, 2 sc in next ch. (2 sts)
- Row 2: Turn, ch 1, sc in first st, 2 sc in next st. (3 sts)
- Row 3: Turn, ch 1, sc in first st and in each st across to last st, 2 sc in last st. (4 sts/increases by 1 st)
- Row 4: Rep Row 3 once. (5 sts)
- Fasten off CA with long yarn tail (approximately 12”/30.5 cm long) for seaming. With yarn needle, weave in end from start of Beak on WS.
Assemble Beak and Decorate Pupils
- Position Beak between Eyes on RS of Front as desired. Pin in position. Thread yarn needle with long strand in CC and sew to Front. Weave in yarn tail on WS.
- Cut a piece of CA, approximately 18” (45.5 cm) long. Thread yarn needle with CA. Use embroidery to create Pupils as shown in the photo below (see Pattern Notes). Weave in yarn tail on WS.

Flippers (Make 2)
- Starting with long yarn tail in CA (approximately 12”/30.5 cm long), ch 9.
- Set Up Row: Turn, skip first ch, sc in next 8 ch, pm in last st to mark position, begin to crochet in the round. Move marker up each Rnd. (8 sts)
- Rnd 1: (RS) Sc in each st around.
- Rnd 2: [2 sc in next st, sc in next 3 sts] twice. (10 sts)
- Rnd 3: [2 sc in next st, sc in next 4 sts] twice. (12 sts)
- Rnd 4: Rep Rnd 1.
- Rnd 5: [Sc2tog, sc in next 4 sts] twice. (10 sts)
- Rnd 6: [Sc2tog, sc in next 3 sts] twice. (8 sts)
- Fasten off CA. Whipstitch Rnd 6 closed (see Pattern Notes). Weave in yarn tail from end of Rnd 6.
Attach Flippers to Front
- Thread yarn needle with long yarn tail from start of first Flipper. Attach Flipper to CB section of Front on RS, starting at approximately 3 rows below color change. Join with whipstitch seam (see Pattern Notes) through all 3 layers (both sides of Flipper and Front). Weave in yarn tails on WS of Front. Repeat for second Flipper.

Assembly and Finishing
- Position Front on top of Back with RS facing up.

- Join CB with sl st to RS of Front at Row 12, ch 1, join Front and Back with single crochet seam (see Pattern Notes) by working 1 sc in side of each Row from Rows 12-27, turn to work along bottom edge, sc in next st, scBL in next 4 sts behind first Foot, sc in next st, scBL in next 4 sts behind second Foot, sc in next st, turn to work along next side, work 1 sc in side of each Row from Row 27 back to Row 12, changing to CA in last yo of final sc. Fasten off CB.

- Continue working 1 sc in side of each Row up to foundation Row.

- Stuff body firmly with fiber filling.
- Continue along foundation row, working 1 sc in next 11 sts. Add more fiber filling as necessary.

- Turn to work along side of head, working 1 sc in side of each Row up to Row 11. Join with sl st to first sc. Fasten off CA. With yarn needle, weave in any remaining yarn tails on inside of body.
