
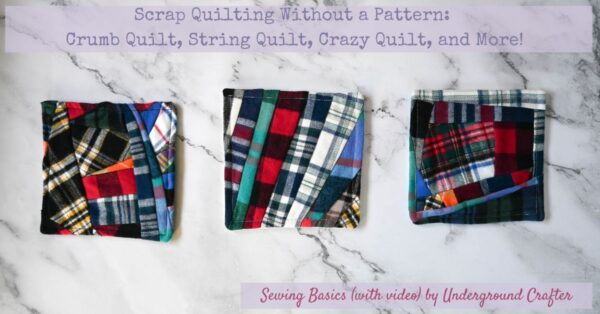
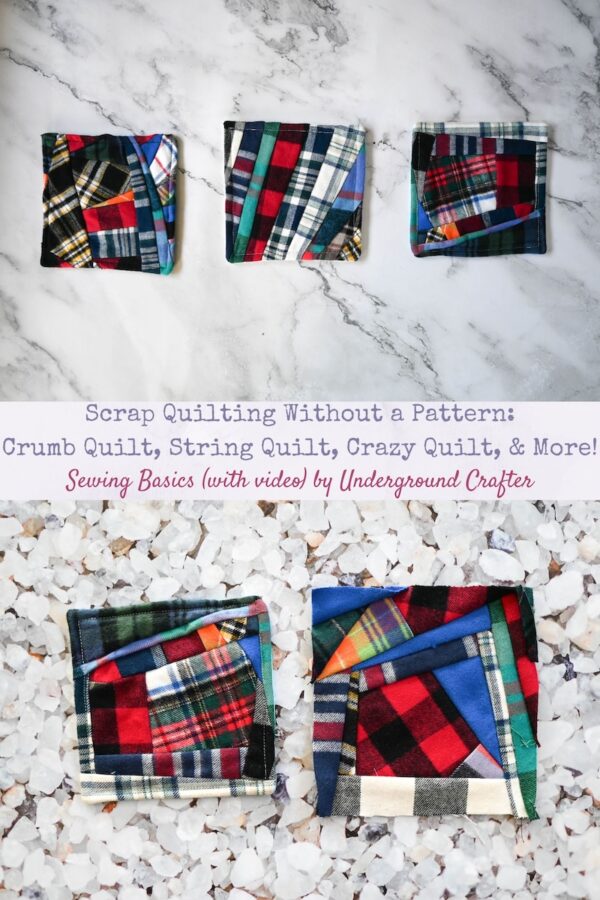
Today’s Sewing Basics post is a guide to scrap quilting without a pattern. If you’re like most beginning quilters, you have a growing pile of fabric scraps in your home and you don’t know what to do with it. I’ll walk you through crumb quilting, string quilting, and other freeform ways to use up your scraps; tips for organizing your scraps and setting up your scrap sewing workstation; answers to frequently asked questions about scrap quilting; and more so you’ll never have to waste a fabric scrap again! This post includes two videos to guide you through your scrap quilting adventures.
This post contains affiliate links. I may receive compensation (at no added cost to you) if you make a purchase using these links. This post is sponsored by Baby Lock and I’m a Baby Lock Brand Ambassador. This post is part of our ongoing collaboration but all opinions and words are my own. Additional supplies were provided by Clover USA and Sewing by Sarah.
When I first started quilting, I saved all my scraps and then I tried to find patterns for scrap fabrics. I never had quite the right configurations of scraps and it became frustrating. Crumb quilting, string quilting, crazy quilting, and scrappy strips are four freeform ways to use up your scraps improvisationally, without a pattern and guided only by your own creativity. I’m sharing videos and instructions for these projects and more so you can get started on your own scrap quilting journey!
I’m using flannel scraps from The Vermont Flannel Company 5 Lb. Bag of Scraps in these projects. You can check out my unboxing video below.
If you can’t see my unboxing video above, watch it on YouTube.
Never Waste a Scrap Again: Crumb Quilting, String Quilting, and More!
Scrap Quilting Sewing Basics by Underground Crafter
I’m using my Baby Lock Bloom for these scrap quilting projects. You can watch my unboxing on YouTube. Remember, you can always use coupon code SAVE10-A424 to get 10% off all machines, accessories and software at Baby Lock. I made two videos for this post, and I’ve also included extra detail and links in the blog post.
You can watch the first video below, including an introduction to scrap quilting, tips for organizing your scraps, how to set up your scrap sewing workstation, how to sew a crumb quilt block, how to turn your scrap block into a coaster, how to sew a string quilt block, and tips for using micro scraps.
If you can’t see the video above, watch it on YouTube.
Tips for Organizing Your Scraps
Let’s start by talking about how to organize your scraps. If you’re here looking for someone to tell you to spend hours sorting, cutting, and ironing scraps into special piles by size and color, you’ve come to the wrong place! I like to spend more time sewing than sorting, so I use a simple system.
- Size: I only save scraps that are at least 1” wide or long. (I confess to having a few that are closer to three-quarter inches wide or long). You want something to show after putting 1/4″ seams on each side. I store small scraps, skinny strips, or current project scraps in plastic bags (upcycled from random stuff I’ve ordered online over the years). I store my big scraps (orphaned pre-cuts and bigger than about 4” pieces) in storage bags.
- Sort by Care Instructions/Project Type: I separate my scraps by fabric type into three types:
- 100% cotton flannel,
- 100% cotton quilting fabric, and
- “Crazy quilt” scraps. This is just about anything else–upholstery fabric, minky, etc.–but it has all been pre-washed.
- This way, I can easily grab into my scrap bags without worrying about shrinkage or care instructions.
Some folks do combine all types of fabrics, but I don’t love it when one part of my project shrinks while the other doesn’t, or one part can’t go into the dryer while the other can.
A word about selvages: Some folks store these separately or include them in regular scraps. Since selvages behave differently than the rest of the fabric, I don’t use them in my scrap projects, but I don’t cut them off until I start working with the scrap since they can help to minimize fraying.
Setting Up Your Scrap Sewing Workstation
Before you get started with scrap quilting, you’ll want to set up your scrap sewing workstation with portable cutting and pressing stations in addition to your sewing machine. I typically put the cutting station to the left of my Baby Lock Bloom and my pressing station to the right on my Arrow Gidget I portable sewing table.
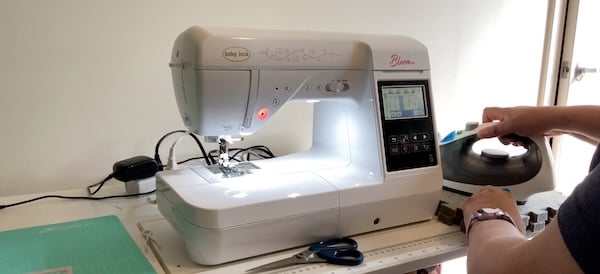
For my cutting station, I use:
- Kimberly Cuts 12.5″ Square Rotating Cutting Mat: This self-healing cutting mat rotates so you can stay seated while cutting all sides of your blocks up to 12.5” square.
- Lori Holt 6.5″ Square Ruler: In the tutorials below, I’m making 6.5” squares. I usually use an 18” or 24” ruler, but it helps to have a smaller size so you can cut while seated. If you’re making larger blocks, find the right size for your project.
- 45mm Rotary Cutter: Your favorite brand will do! You’ll also need refill blades. Scrap quilting involves lots of cutting and thick parts where seams interconnect, so it tends to dull blades quickly.
- Clover 7″ Patchwork Scissors: This sharp-pointed scissor has a great length for snipping off selvages, overlapping bits, and general “bulk” from behind the seams.
- Micro-tip scissor or thread snips: These are a bit safer for trimming threads, of which you’ll have many!
For my ironing station, I use:
- Steamfast Cordless Steam Iron: This cordless iron has been a gamechanger for me since I don’t have to drape the cord across my work area. You could also use the Oliso Mini Iron (small, but with a cord) or the Clover Mini Iron (with a cord, too, and a small tip that is great for pressing seams). If you don’t have a small iron, a sturdy seam roller could also work.
- Sewing by Sarah Wool Press ‘n Lock Tiles: I usually use 4 tiles for other projects, but for scrap quilt blocks I just use 1 tile for pressing seams.
On my sewing machine, I use:
- Schmetz Universal needle: Start with a fresh needle and expect to switch it out every 6-8 hours. I use 80/12 for thinner fabrics like quilting cotton and 90/14 for thicker fabrics like the flannels in the videos.
- Your choice of thread: Use the threads you typically use for projects with the same type of fabrics. I use either 100% cotton thread for quilt fabrics or “all purpose” 100% polyester thread (which works for most fabrics). It helps to have a few bobbins filled before you start because you may use more thread than you expect!
- Baby Lock J Zigzag foot with leveling pin: This is standard on the Bloom and most Baby Lock machines. You can use straight or zigzag stitches and also work with bulky seams easily with this presser foot. Another option is a walking foot. Find out more in my Sewing Machine Presser Foot Guide.
I also keep a magnetic lint bin next to my sewing table for easy clean up of the micro scraps I’ll be generating while making my scrap blocks!
Scrap Quilting Technique 1: Crumb Quilting
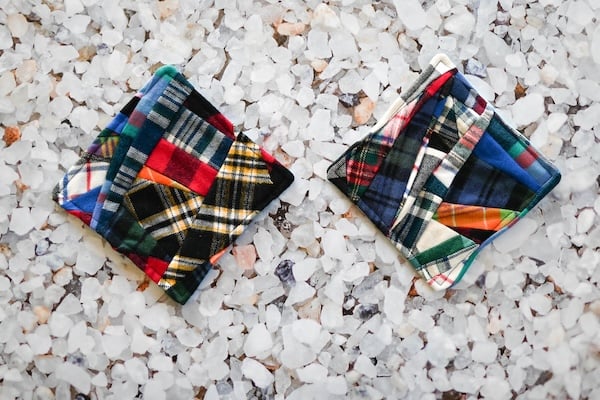
What is Crumb Quilting?
Crumb quilting is all about sewing small, irregular pieces together. There’s no stabilizer or backing fabric, just freeform sewing. This is the perfect technique for using up small fabric “crumbs,” those little pieces that are under 2” wide or long, or random little pieces of patchwork that were cut from larger projects when you were “squaring up” quilt blocks.
How to Make a Crumb Quilt Block
- Gather your scraps: Pull out a variety of small pieces and press them flat.
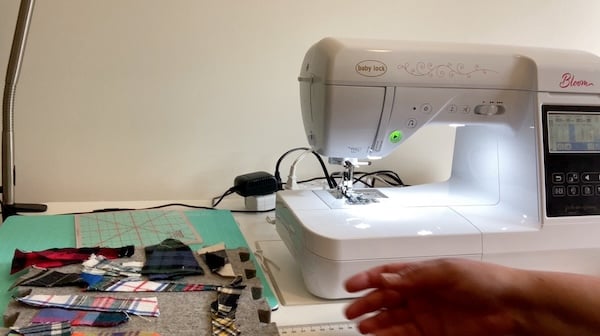
- Sew pieces together: Place 2 scraps right sides together and sew with a 1/4″ seam.
- Prepare for the next piece: Clip excess fabric from behind the seam. Press the seam (either open or to lay flat as you prefer).
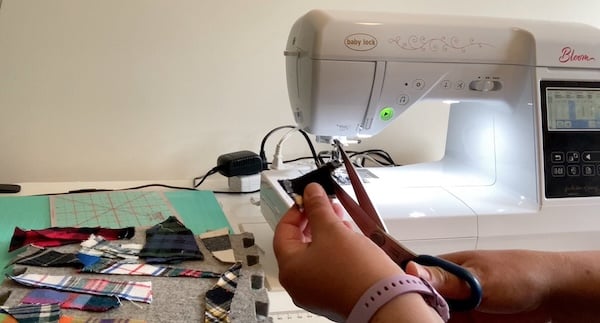
- Build your block: Continue adding pieces and sewing with right sides together and a 1/4″ seam, trimming excess, and pressing until your block is larger than your desired size. (I aimed for 6.5” squares so I could make my block into a coaster. See below for those instructions.) If you’re using very small pieces, you’ll probably have to make a “row” of crumbs to attach to another “row” of crumbs. Tip: Putting a strip between rows of crumbs can make the seam bulk more manageable.
- Trim to size: Once your block is bigger than your intended size, trim it down to your desired size.
Tips for Crumb Quilting
- There are no rules: You can place fabrics randomly or plan them out, avoid repeating (or keep repeating) fabrics, stick to solids or prints or combine it all. It’s up to you!
- Press after every seam: This keeps seams flat and makes it easier to add new pieces.
- Trim bulky excess regularly: Cut away excess fabric periodically from the wrong side so your block is more manageable.
- Reinforcement stitches: If you’re using the blocks in the near future, you don’t need to use reinforcement stitches. If you plan to store the block for a project months or weeks down the line, reinforce at the start and end of each seam to keep the block stable.
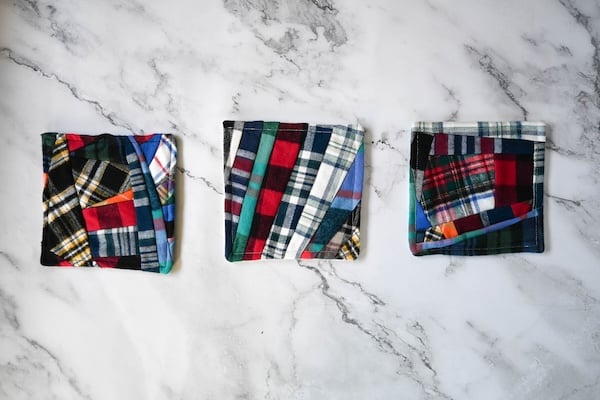
Turn A Scrap Quilt Block into a Coaster
You can make a coaster out of any 6.5” scrap block square made from quilting cotton, cotton flannel, and/or wool fabric. These won’t melt with heat and can absorb the condensation at the bottom of your cup, mug, or class. In addition to the scrap sewing workstation supplies listed above, you’ll also need:
- Prym Point Turner
- One 6.5” square of 100% cotton quilting fabric for the back
- One 6.5” square of batting (100% cotton, 80/20 cotton blend, wool, or bamboo all work)
- Optional: Pins or Clover Wonder Clips.
How to Make a Scrappy Coaster
- Make your “quilt sandwich”: Place the batting under the wrong side of your block. Position the backing fabric on top of the quilt block with right sides facing (and the wrong side of the backing fabric at the top). If you want to pin or use Wonder Clips, position them to keep the seams on the block flat.
- Sew: With a 1/2″ seam, stitch around 3 sides and partially around the fourth side, leaving a 2–3” opening.
- Trim and turn: Trim excess fabric and batting and the corners. Pull the fabric through the opening so the block is right side out, using your point turner in the corners.
- Press: Press so that the seams at the opening are facing inside.
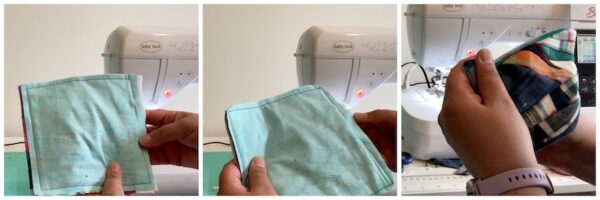
- Finish: Starting and ending with reinforcement stitches, topstitch around all 4 sides, seaming the opening closed. Trim any threads.
Scrap Quilting Technique 2: String Quilting
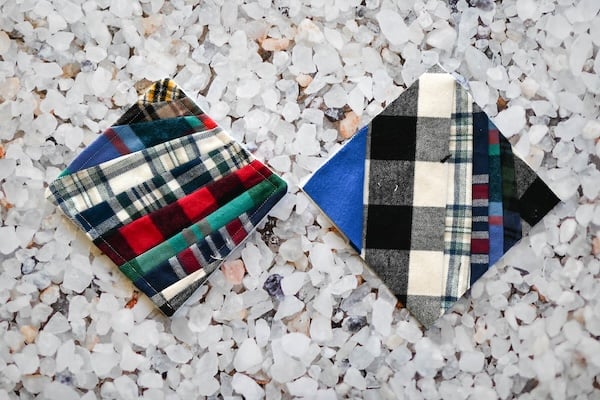
What is String Quilting?
String quilting uses longer strips of fabric (often 1” or wider) sewn onto a foundation fabric (usually muslin). This method is great for managing seams and threads more easily than crumb quilting. It’s ideal for folks who do a lot of strip quilting and may have long scraps. While string quilting is often done “on point” with strips getting longer at the center, that isn’t required!
How to Make a String Quilt Block
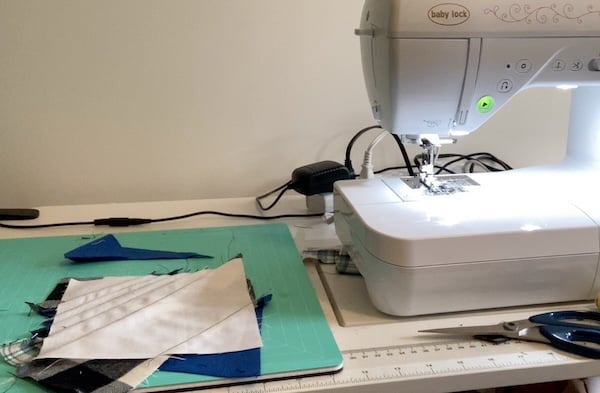
- Start with a foundation fabric: Cut a piece of fabric for the foundation to the size of your planned quilt block. In the tutorial, I use a 6.5” square of muslin, but you can also use “ugly” fabric or a big leftover piece of fabric.
- Gather your scraps: Pull out a variety of long scraps/strips and press them flat.
- Sew pieces together: Place your first strip right side up at the corner of your muslin foundation, being sure that you have about 1/2″ overhang on each side of the foundation. Place 2 scraps right sides together and sew through the scraps and foundation with a 1/4″ seam.
- Press: Press the strips open so the right side is up.
- Add strips: Add subsequent strips face down to the previous strip, ensuring they hang over the muslin about 1/2″ on each side. Continue adding pieces and sewing with right sides together and a 1/4″ seam and pressing until your foundation is covered.
- Trim to size: Once your foundation is covered, turn the block to the wrong side and trim it down on the foundation side.
Tips for String Quilting
- Use longer strips: This method works best with strips, not tiny crumbs.
- No batting needed: String quilt blocks are very stable and are heavier than typical quilt blocks. You may decide to skip the batting on your project, depending on the weight of the fabric you use for your strings and your backing fabric.
- Less bulk and more stability: String quilt blocks are easy to store. There are no exposed seams and the threads are more orderly on the foundation.
Tips for Using Micro Scraps
As you work with your scraps, leftover pieces will get progressively smaller until they don’t make a lot of sense for quilting. What can you do with really small scraps?
- Fiber filling for toys and pillows. Collect your micro scraps and use for stuffing (alone, or in combination with manufactured fiber filling).
- Craft projects. Use micro scraps for craft projects. Without losing the seam allowances, they could be just the right size when affixed with fabric glue or fusible web.
You can watch the second video below, including how to sew a crazy quilt inspired block, how to sew scrappy strips on stabilizer, and how to turn crazy quilt inspired blocks to crazy quilt blocks.
If you can’t see the video above, watch it on YouTube.
Scrap Quilting Technique 3: Crazy Quilt-Inspired Blocks
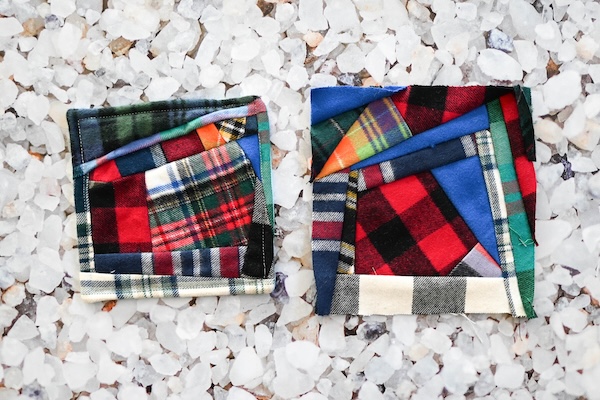
What Is Crazy Quilting?
Crazy quilting is an art form that is all about using up all types of fabric, sewing together unusual shapes, and freeform design. Crazy quilts are typically embellished with embroidery, buttons, lace, beads, or other findings. For these crazy quilt inspired blocks, you’ll intentionally incorporate odd shapes like pentagons, triangles, and hexagons, and build the block from the center out in a log cabin style.
How to Make a Crazy Quilt-Inspired Block
- Start with a center shape: Use an irregular shape as your starting point. I used these crazy quilt templates to cut the pentagon in the video, but you can also start with a standard shape (like a triangle or square) and trim to unusual angles.
- Add pieces counter-clockwise: Start with the center piece right side up and add a scrap with right sides facing. Your new piece should have a 1/4″ overhang on each side that you are seaming it to. Sew with 1/4″ seam on the wrong sides.
- Press and trim: Press seams (flat or open) and trim excess fabric as you go to keep the block manageable.
- Continue adding pieces counter-clockwise: Keep adding pieces, waiting until after pressing to move any overhang. Periodically trim to straight sides, but try to keep the unusual shape for as long as possible before block becomes rectangular or square.
- Fill in gaps: As you approach your target size (mine was 6-1/2″), you won’t work counter-clockwise anymore. Instead, add smaller pieces to fill in any gaps.
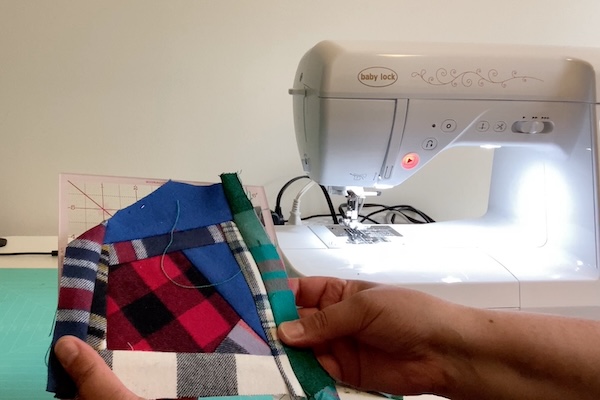
- Trim to size: Once your block is bigger than your intended size, trim it down to your desired size.
Tips for Crazy Quilt Blocks
- Embrace the chaos: Irregular the shapes keep the block interesting
- No stabilizer needed: Unlike traditional crazy quilting, we’re not adding embellishments here, so stabilizer isn’t necessary. (See below if you’d like to do actual crazy quilt blocks with stabilizer.)
- Trim strategically: Keep edges straight where possible, but don’t stress over perfection.
Bonus Scrap Quilting Technique: Scrappy Strips on Stabilizer
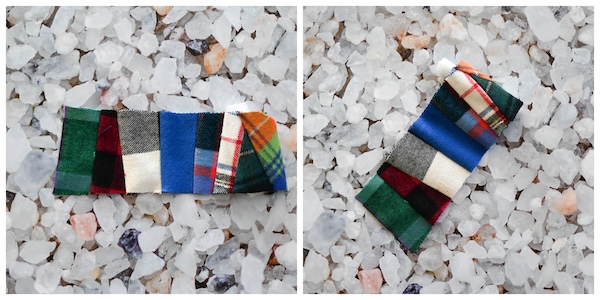
You can make your own fabric strips using tiny scraps that are hard to use in other projects. These strips are backed with wash-away stabilizer like Baby Lock Dissolve-Away Mesh Stabilizer. These are easy to store (like string quilt blocks) because the stabilizer covers the seams until the project is assembled and washed, but they use smaller pieces (like crumb quilts). In addition to the scrap sewing workstation supplies listed above, you’ll also need:
- Baby Lock Dissolve-Away Mesh Stabilizer. (Alternatively, you can also use Scrap Tape.)
- Optional: Dritz Non-Stick Pressing Sheet
How To Make Scrappy Strips on Stabilizer
- Cut stabilizer: Cut your wash-away stabilizer and cut into 2.5” strips (or desired width).
- Sew scraps onto stabilizer: Start with one scrap right side up, then position the next scrap face down with a small overhang (about 1/4″) on each side of the stabilizer. Sew through both scraps and the stabilizer with a 1/4″ seam.
- Press and trim: Being careful not to press iron to stabilizer (or covering with pressing sheet), press the scraps open so the right side is up.
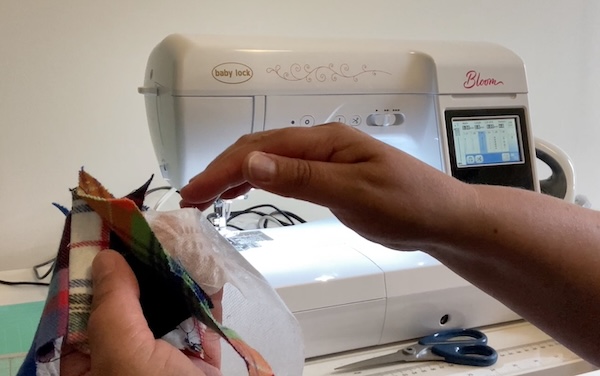
- Add scraps: Add subsequent scraps face down to the previous scrap, ensuring they hang over the stabilizer about 1/4″ on each side. Continue adding pieces and sewing with right sides together and a 1/4″ seam and pressing until your stabilizer is covered.
- Trim to size: Once your stabilizer is covered, turn the strip to the wrong side and trim it down on the stabilizer side.
How To Use Scrappy Strips on Stabilizer
These strips are great to use as sashing between quilt blocks, for scrappy binding, for bag straps, or in any pattern calling for 2.5” strips. Or, make bigger strips in your favorite size! Once you wash your finished project, the stabilizer will wash away. To store, roll up and use a safety pin or clip to secure.
How To Turn Crazy Quilt Inspired Blocks to Crazy Quilt Blocks with Scrappy Strips on Stabilizer
Join scrappy strips on stabilizer to your crazy quilt inspired blocks. The stabilizer on the back will make it possible to embroider and embellish your crazy quilt block on your sewing or embroidery machine. Start with your scrappy strip, then attach it to your crazy quilt block as you build it.
Frequently Asked Questions About Scrap Quilting
Still have questions about scrap quilting? Here are answers to nine frequently asked questions about scrap quilting!
What is scrap quilting?
Scrap quilting is a way to use up your fabric scraps leftover from other projects. It’s a great way to flex your creativity, keep fabric out of the landfill, and save money by using fabric you already have. In this post, I shared four different ways to freeform or improv scrap quilt blocks and strips without a pattern: crumb quilting, string quilting, crazy quilting, and scrappy strips on stabilizer. There are also quilt block patterns specifically designed for using up scraps. Quiltville by Bonnie K. Hunter and Scrap Fabric Love are two of my favorite sites for scrap quilt patterns. Side note: Swoodson Says also does a lot of upcycled sewing using fabric scraps.
What is the smallest size scrap I should keep for quilting?
Since quilting uses 1/4″ seams on both sides, any piece smaller than 1” wide or 1” long will show very little (or not at all) in a quilt while adding unnecessary bulk.
What can I do with fabric scraps that are too small for quilting?
Scraps that are too small for quilting can be used for fiber filling to stuff toys and pillows, or for craft and sewing projects using fabric glue or fusible web.
Do I need a foundation for scrap quilting?
Some types of scrap quilting use foundation. String quilt blocks usually have a muslin foundation while scrappy strips use wash-away stabilizer for foundation. Crumb quilt blocks don’t use foundation. Crazy quilt blocks can be made with or without a stabilizer foundation.
How do I prevent my scrap quilts from looking messy?
While I enjoy the creative freedom and “no rules” approach of unplanned scrap quilts, they don’t work for everyone! Some ways of creating more orderly or standardized scrap quilts include:
- Using planned colors within blocks: Use the same color (such as all green fabrics), only one or two colors, or only coordinating colors within a single block.
- Using only solid color scraps within blocks: Using solid scraps can make a block look less “busy” than using print scraps.
- Using measured scraps within blocks: Cut your scraps to the same width or length for a more organized appearance.
- Alternate scrap blocks with solid colors: Scrap blocks set against white, black, or other solid fabric backgrounds can look very dramatic, clean, and modern.
How do I manage seams and bulk when working with scraps?
Press seams after every scrap is sewn on and trim away bulk as you work. Use a leveling foot or a walking foot to make sewing over bulky seams easier. Alternatively, use a scrap quilting approach with a foundation, like string quilting or scrappy strips, so the seams are encased between the front of the block and the foundation.
Can I mix fabric types when scrap quilting?
You can, but it will impact how the finished project can be used and cared for. Personally, I only mix fabrics when I’m crazy quilting (and those fabrics were already pre-washed). If you do mix fabrics, wash on cold and consider hang drying to minimize shrinking and distortion.
What if I don’t have any scrap fabric?
Believe it or not, you can buy scrap fabric! I used scraps from The Vermont Flannel Company 5 Lb. Bag of Scraps for this post. You can also buy Moda Scrap Bags at Fat Quarter Shop and Mystery Scrap Boxes at Mood Fabrics (perfect for crazy quilts), or search “scrap fabric for quilting” on Etsy or eBay. Quilt guilds often have swaps or free tables where you can pick up scraps. And, if you have a creative reuse/secondhand craft supply shop near you, they often sell scraps or small bits of fabric.
Which scrap quilting technique is right for me?
I made a table comparing the four scrap quilting techniques from this post.
| Technique | Best For | Pros | Cons |
| Crumb quilting | Smaller pieces, irregular pieces | Uses up small pieces | More seams and threads to manage |
| String quilting | Longer strips, scrap blocks that won’t turn into finished projects right away | Few exposed seams, easier to store | Requires foundation fabric and longer scraps |
| Crazy quilting | Irregular pieces, smaller pieces, strips, any size | Visually dynamic, can be embellished to use up scraps of yarn, ribbon, thread, and/or buttons | More seams and threads to manage unless you combine with scrappy strips on stabilizer |
| Scrappy strips on stabilizer | Very small pieces, scraps that won’t turn into a finished project right away | Scrappy binding and sashing or bag straps, easier to store | Requires wash away stabilizer, use caution when pressing |
I hope this post has showed you that fabric scraps don’t have to be a burden. Not only can scrap quilting keep fabric out of landfills, it can also be a creative opportunity! Whether you choose crumb quilting, string quilting, crazy quilt-inspired blocks, or scrappy strips, there’s a method for every type of scrap.
Do you have a favorite way to use fabric scraps or a question about scrap quilting? Let me know in the comments!
If you make your own scrappy quilt blocks or strips using these tutorials, I’d love to see them! Share your progress and questions by tagging me on Bluesky as @UndergroundCrafter, Facebook as @UndergroundCrafter, or on Instagram as @ucrafter. You can also share a picture in the Underground Crafters Facebook group. Sign up for my weekly newsletter and get a coupon code for your choice of one of my premium crochet or knitting patterns and private access to my vault of subscriber goodies. Plus, you’ll never miss one of my free patterns again!