
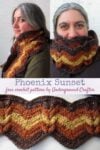
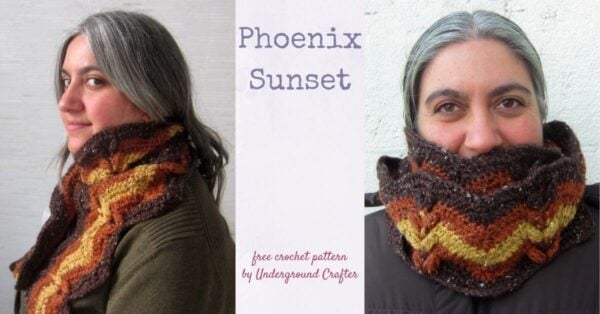
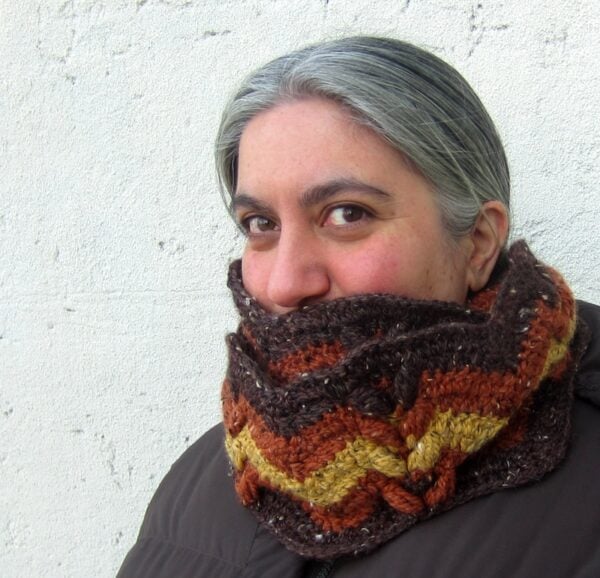
I’m sharing Phoenix Sunset, a crochet ripple scarf, as a free pattern for the first time. My inspiration was a beautiful sunset I saw in Phoenix, Arizona during a trip for work. You can wear your version of Phoenix Sunset as a scarf or seam it into an infinity cowl. This pattern includes tutorials for all the special stitches and for the invisible seam I used.
This post contains affiliate links. I may receive compensation (at no added cost to you) if you make a purchase using these links.
Sometimes you encounter a stitch pattern that is screaming to be transformed into a project. That’s how I felt when I came across this ripple pattern. Sadly, I can no longer remember the original source and my notes are long gone.
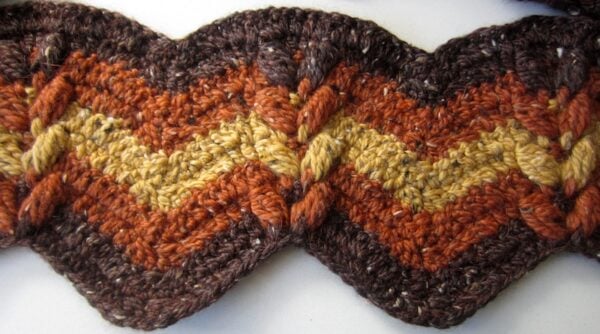
At the time I designed this, I was traveling a lot for work and was still recalling this gorgeous sunset I saw during a trip to Phoenix. Once I saw the yarn, everything (stitch, inspiration, and scarf pattern) came together!
This pattern was originally a premium pattern, but as of today, it will be available as a free blog pattern. The yarn has since been discontinued, but I share substitute options in the pattern.
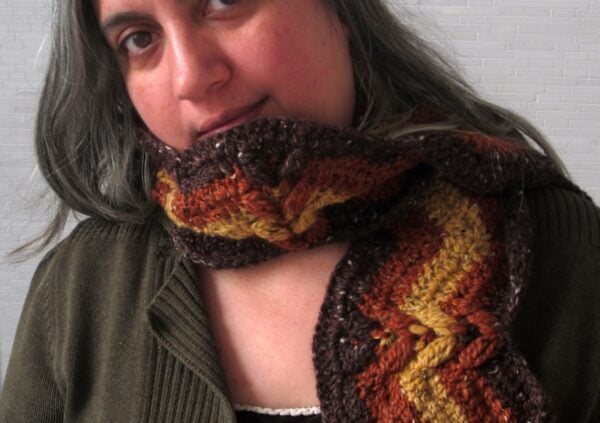
Scroll down for the free Phoenix Sunset crochet ripple scarf pattern. If you make your own Phoenix Sunset, I’d love to see it! Share your progress and questions by tagging me on Bluesky as @UndergroundCrafter, Facebook as @UndergroundCrafter, or on Instagram as @ucrafter. You can also share a picture in the Underground Crafters Facebook group. Sign up for my weekly newsletter and get a coupon code for your choice of one of my premium patterns and private access to my vault of subscriber goodies. Plus, you’ll never miss one of my free patterns again!
Add Phoenix Sunset to your favorites or queue, or buy the ad-free PDF on Ravelry.

Phoenix Sunset
Crochet Ripple Scarf Pattern by Underground Crafter
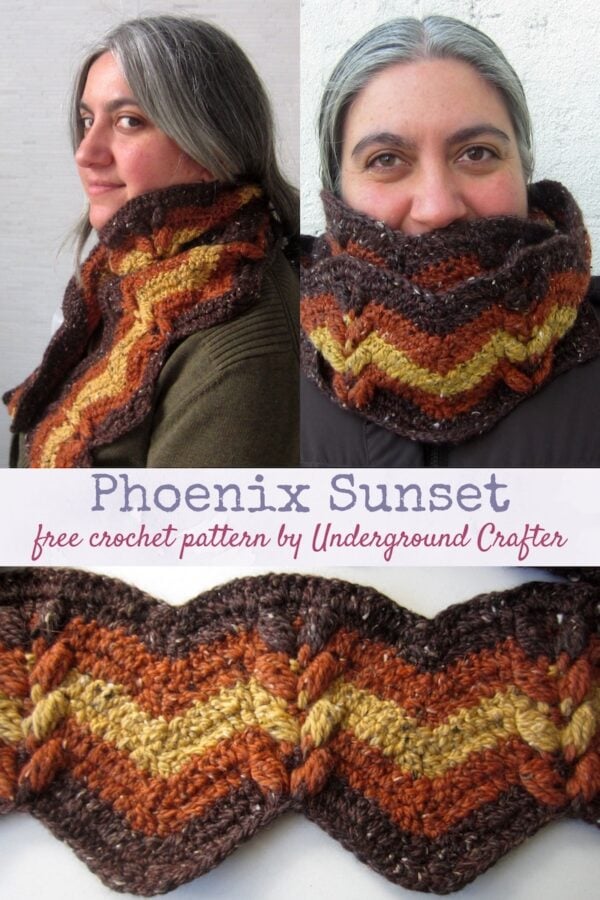



My inspiration for this crochet ripple scarf pattern was a beautiful sunset I saw while visiting Phoenix, Arizona. Wear it as a scarf or join into a cowl. Includes tutorials for the special stitches and optional seam.
Finished Size
- Teen/Adult: 53” (134.5 cm) length/circumference, 5.5” (14 cm) height after blocking.
Materials
- Knit Picks City Tweed HW (55% Merino wool/25% superfine alpaca/20% Donegal tweed, 3.5 oz/100 g/164 yd/150 m) – 1 skein ea in Tarantella (CA), Habanero (CB), and Lemon Curd (CC), or approximately 160 yd (146 m) in each of 3 colors in any medium weight yarn. NOTE: This yarn has been discontinued. You can find suitable alternatives on YarnSub here.
- Addi Swing US Size I/9-5.5 mm crochet hook, or size needed to obtain gauge.
- Addi Swing hooks are available online at Herrschners | Amazon
- Yarn needle.
- 10 locking stitch markers.
Gauge
- 20 sts x 10 rows in pattern = 5” (13 cm) length x 5.5” (14 cm) height. Exact gauge is not critical for this project.
Abbreviations Used in This Pattern
- CA – Color A
- CB – Color B
- ch – chain
- dc – double crochet
- dc2tog – double crochet 2 stitches together (decreases 1 st) – [Yo, insert hook in next st, yo and draw up a loop, yo and draw through 2 loops] twice, yo and draw through all 3 loops on hook. A video tutorial for this decrease is available below.
- If you can’t see the dc2tog video above, watch it on YouTube.
- dc3tog – double crochet 3 stitches together (decreases 2 sts) – [Yo, insert hook in next st, yo and draw up a loop, yo and draw through 2 loops] 3 times, yo and draw through all 4 loops on hook. A helpful video tutorial for this decrease is available below.
- If you can’t see the dc3tog video above, watch it on YouTube.
- FPcl – front post cluster – [Yo, insert hook from front around back to front of indicated st 2 rows below, yo and draw up a loop even to height of loop on hook, yo and draw through 2 loops] 3 times, yo and draw through all 4 loops on hook. A photo tutorial for this stitch is available in the Special Stitch Pattern section below.
- pm – place stitch marker
- st(s) – stitch(es)
- yo – yarn over
- * Repeat instructions after asterisk as indicated.
- [] Repeat instructions within brackets as indicated.
Special Stitch Pattern Tutorial: FPcl
- Yarn over.
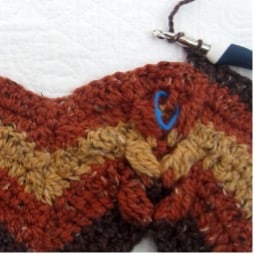
- Insert hook from front around back to front of indicated stitch 2 rows below.
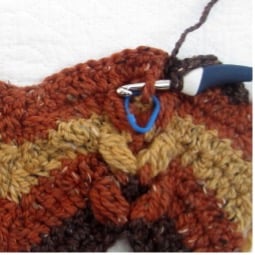
- Yarn over.
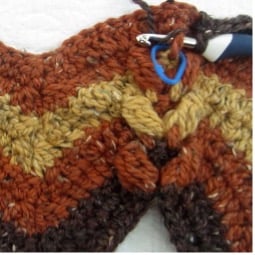
- Draw up a loop even to height of first loop on hook.
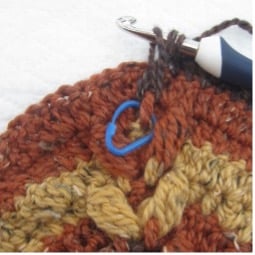
- Yarn over and draw through 2 loops. (2 loops remain on hook.)
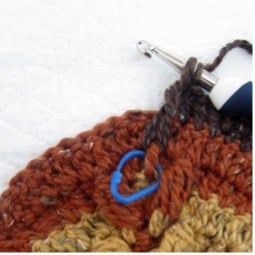
- Yarn over and insert hook from front around back to front of same stitch.
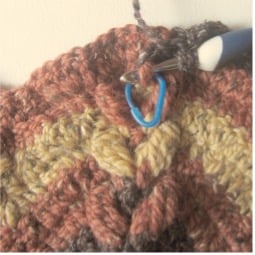
- Yarn over and draw up a loop even to height of first loop on hook.
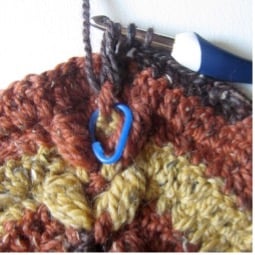
- Yarn over and draw through 2 loops. (3 loops remain on hook.)
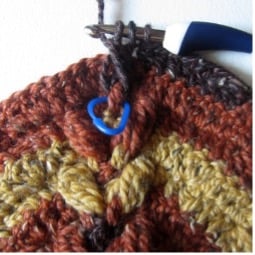
- Yarn over and insert hook from front around back to front of same stitch.
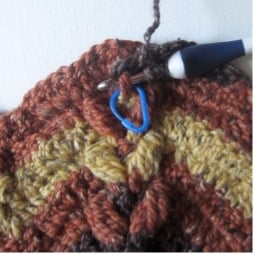
- Yarn over and draw up a loop even to height of first loop on hook.
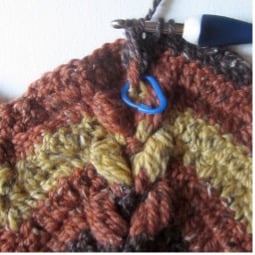
- Yarn over and draw through 2 loops. (4 loops remain on hook.)
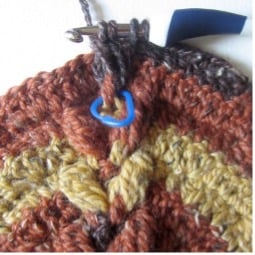
- Yarn over.
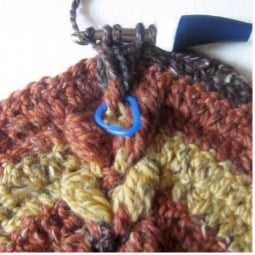
- Draw through all 4 loops on hook.
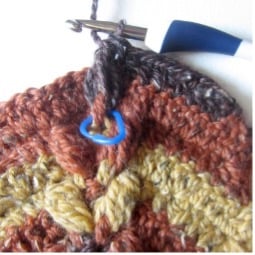
- Remove stitch marker.
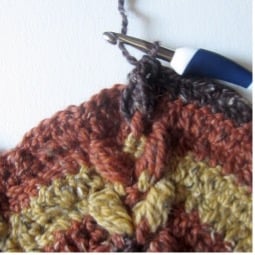
Pattern Notes
- A helpful video tutorial for changing colors in the last yarn over of a stitch is available below.
- If you can’t see the changing colors video above, watch it on YouTube.
- Scarf is crocheted flat in rows. To seam into an infinity cowl, watch a helpful video for seaming with the mattress stitch below.
- If you can’t see the mattress stitch seam video above, watch it on YouTube.
- New to blocking? Get instructions and watch videos here.
Pattern Instructions
Scarf
- With CA, ch 201.
- Row 1: (Right/Front Side) Turn, skip 2 ch, dc2tog, [dc in next 2 ch, 2 dc in next ch] twice, dc in next ch, pm around last dc, dc in next st, [2 dc in next ch, dc in next 2 ch] twice, *dc3tog twice, [dc in next 2 ch, 2 dc in next ch] twice, dc in next ch, pm around last dc, dc in next ch, [2 dc in next ch, dc in next 2 ch] twice; repeat from * across to last 3 ch, dc3tog. (200 sts)
- Row 2: Turn, ch 2, skip first dc3tog and next dc, dc2tog, dc in next 2 sts, [2 dc in next st, dc in next 2 sts] 4 times, *dc3tog twice, dc in next 2 sts, [2 dc in next st, dc in next 2 sts] 4 times; repeat from * across to last 2 sts, dc2tog changing to CB with last yo of final dc2tog (see Pattern Notes), fasten off CA.
- Row 3: Turn, ch 2, skip first dc2tog, dc2tog, dc in next 2 sts, 2 dc in next st, dc in next 2 sts, FPcl around marked st, rm, dc behind FPcl and in next st, pm around last dc, dc in next 2 sts, FPcl around next st 2 rows below, dc behind FPcl and in next st, 2 dc in next st, dc in next 2 sts, *dc3tog twice, dc in next 2 sts, 2 dc in next st, dc in next 2 sts, FPcl around marked st, rm, dc behind FPcl and in next st, pm around last dc, dc in next 2 sts, FPcl around next st 2 rows below, dc behind FPcl and in next st, 2 dc in next st, dc in next 2 sts; repeat from * to last 3 sts, dc3tog.
- Row 4: Repeat Row 2 once, changing to CC with last yo of final dc2tog, fasten off CB.
- Row 5: Repeat Row 3 once.
- Row 6: Repeat Row 2 once, fasten off CC.
- Row 7: Repeat Row 3 once.
- Row 8: Repeat Row 2, changing to CA with last yo of final dc2tog, fasten off CB.
- Row 9: Repeat Row 3 once without placing markers.
- Row 10: Repeat Row 2 once without changing colors, fasten off CA, leaving long yarn tail (approximately 18″/45.5 cm) for seaming.
- Spray block to size (see Pattern Notes).
Finishing
- Optional: Thread yarn needle with yarn tail from Row 10, use mattress stitch to join short edges of cowl together (see Pattern Notes).
- With yarn needle, weave in ends on inside of scarf.