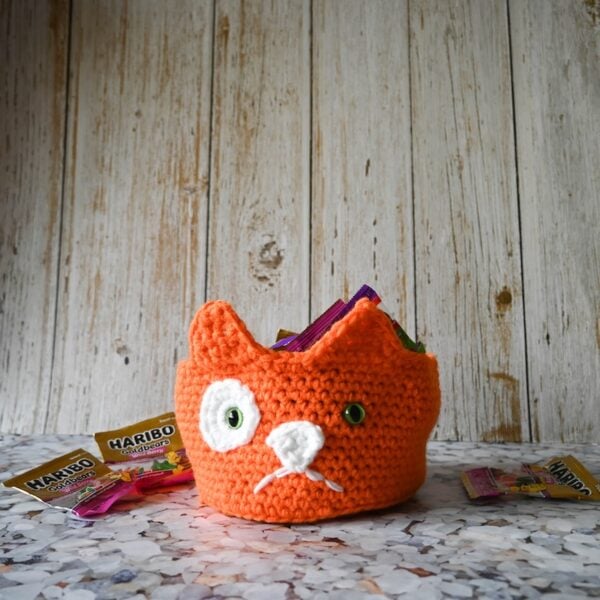
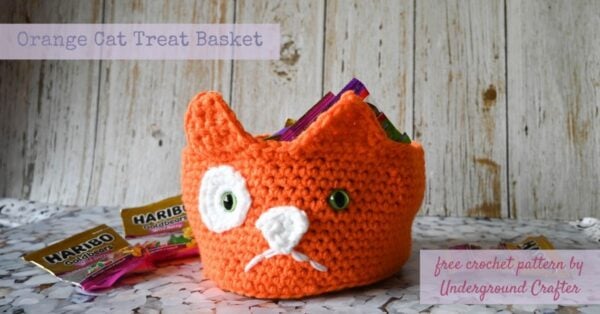
For the ninth project in the 8th Annual Halloween Crochet Along with CAL Central Crochet, I’m sharing a small crochet basket pattern. The Orange Cat Treat Basket has cat ears and you can make your version with black, white, grey, or multicolor yarns to match your calico or tortie. Stuff your basket with Halloween treats or use it to hold yarn and other goodies.
This post contains affiliate links. I may receive compensation (at no added cost to you) if you make a purchase using these links. Yarn for the sample was generously provided by Herrschners.
Scroll down for the free small crochet basket pattern for the Orange Cat Treat Basket. Looking for more cat-themed Halloween projects? Check out my free patterns for the Black Cat Softie, the Black Cat Treat Bag, the Halloween Character Buddies, and the Halloween Pocket Scarf!
This is the ninth pattern in the 8th Annual Halloween Crochet Along Along with CAL Central Crochet. To follow the CAL…
- Sign up for Crochet Along updates and the Underground Crafter newsletter to get regular updates, including links to new CAL patterns as they are released. When you sign up, you’ll also get access to my subscriber vault which includes exclusive free PDF patterns, a coupon code for your choice of any crochet or knitting pattern or ebook from my Ravelry Shop, and coupon codes from other indie designers and crafts businesses.
- You can join in by crocheting the patterns as you have time.
- Share your progress and post pictures of your finished projects. Tag your projects and posts #CALCentralCrochet on all social media.
- If you’d like to chat with other crocheters, join the CAL Central Crochet Facebook group, or visit this thread in the CAL Central Ravelry group.
- By the end of the CAL, you’ll have up to 14 spooky Halloween projects.
- Use this button below on your Ravelry project pages or elsewhere on social media. Right click (on desktop) or tap and hold (on mobile) to save.
If you make your own Orange Cat Treat Basket, I’d love to see it! Share your progress and questions by tagging me on Bluesky as @UndergroundCrafter, Facebook as @UndergroundCrafter, or on Instagram as @ucrafter. You can also share a picture in the Underground Crafters Facebook group. Sign up for my weekly newsletter and get a coupon code for your choice of one of my premium patterns and private access to my vault of subscriber goodies. Plus, you’ll never miss one of my free patterns again!
Add the Orange Cat Treat Basket to your favorites or queue, or buy the ad-free PDF on Ravelry.

Orange Cat Treat Basket
Small Crochet Basket Pattern by Underground Crafter
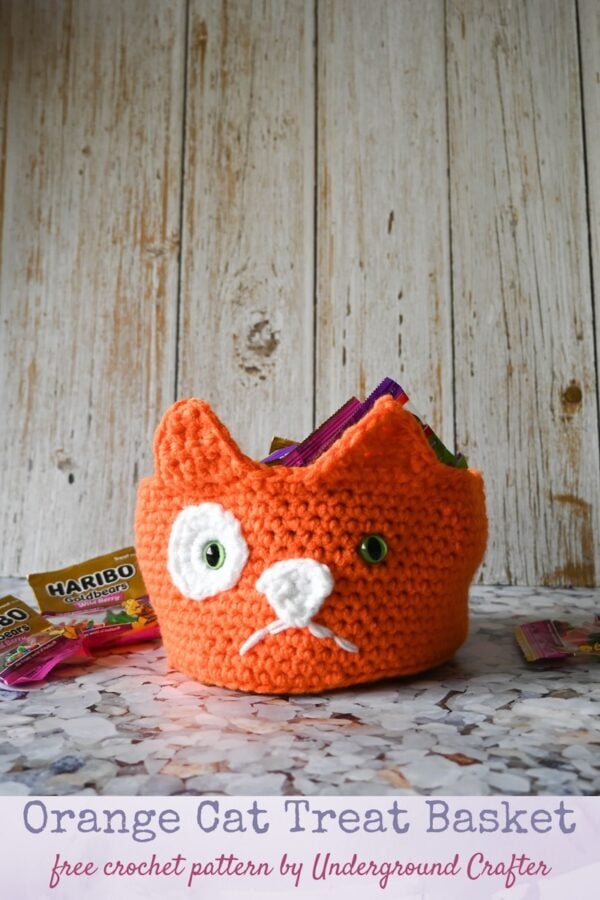



This small crochet basket pattern has cat ears and can be customized with different yarn colors to match your favorite cat. My version is filled with Halloween treats, but you can also use the basket to hold yarn and other goodies. This is the ninth pattern in the 8th Annual Halloween Crochet Along with CAL Central Crochet.
Finished Size
- Approximately 19″ (48 cm) circumference x 4.25″ (11 cm) height.
Materials
- Herrschners Worsted 8 yarn (100% acrylic, 8 oz/226 g, 489 yd/448 m) – 1 skein in Blaze (CA), or approximately 285 yd (260.5 m) in any medium weight yarn.
- Herrschners Worsted 3 yarn (100% acrylic, 3 oz/85 g, 183 yd/168 m) – 1 skein in White (CB), or approximately 10 yd (9 m) in any medium weight yarn.
- US Size K-10.5/6.5 mm crochet hook, or any size needed to obtain correct gauge.
- Yarn needle.
- 18 mm cat safety eyes – 1 pair. I used green eyes from this MUCUNNIA 80-piece safety eye set.
- Locking stitch marker.
Gauge
- Through Round 7 in pattern for Base = 4″ (10 cm) diameter. Exact gauge is not critical for this project.
Abbreviations Used in This Pattern
- BL – back loop only – Moogly has a helpful video showing the back and front loops here.
- CA – Color A
- CB – Color B
- ch – chain
- FL – front loop only – Moogly has a helpful video showing the back and front loops here.
- pm – place stitch marker
- Rnd(s) – Round(s)
- sc – single crochet
- sc2tog – single crochet 2 stitches together (decrease) – [Insert hook in next st, yo and draw up a loop] twice, yo and draw through all 3 loops on hook. A helpful video for this decrease is available below.
- If you can’t see the sc2tog video above, watch it on YouTube.
- sl st – slip stitch
- st(s) – stitch(es)
- yo – yarn over
- *Repeat instructions after asterisk as indicated.
- [] Repeat instructions between brackets as indicated.
Pattern Notes
- Ch 1 at start of Rows and Rounds and sl st joins at end of Rounds DO NOT count as stitches.
- Entire pattern is crocheted with two strands of yarn held together.
- For my version, I made the Basket Base and Basket Side separately because I liked the look better. Alternatively, at the end of Basket Base Rnd 11, do not fasten off. Work the Next Rnd as scBL around. Then, continue on to instructions for Continue to Basket Side.
- Oombawka Design Crochet has helpful photo and video tutorials for starting with the magic adjustable ring here.
- A helpful video showing how to single crochet around the side of your project is available below.
- If you can’t see the video for crocheting around the side of your project above, watch it on YouTube.
- A helpful video for joining with a whipstitch seam is available below.
- If you can’t see the video above showing the whipstitch join, watch it on YouTube.
- A helpful video demonstrating how to embellish crochet with the embroidery Back Stitch is available at the end of this blog post.
Pattern Instructions
Basket Base
- With 2 strands of CA held together throughout, start with the magic adjustable ring (see Pattern Notes).
- Rnd 1: (Right Side) Ch 1, 6 sc in ring, tighten magic ring to close, pm in last st to mark position, move marker up each Rnd. (6 sts)
- Rnd 2: 2 sc in each st around. (12 sts)
- Rnd 3: [2 sc in next st, sc in next st] around. (18 sts)
- Rnd 4: [2 sc in next st, sc in next 2 sts] around. (24 sts)
- Rnd 5: [2 sc in next st, sc in next 3 sts] around. (30 sts)
- Rnd 6: [2 sc in next st, sc in next 4 sts] around. (36 sts)
- Rnd 7: [2 sc in next st, sc in next 5 sts] around. (42 sts)
- Rnd 8: [2 sc in next st, sc in next 6 sts] around. (48 sts)
- Rnd 9: [2 sc in next st, sc in next 7 sts] around. (54 sts)
- Rnd 10: [2 sc in next st, sc in next 8 sts] around. (60 sts)
- Rnd 11: Sc in each st around, fasten off CA.
Join to Base
- (See Pattern Notes.) With Right Side facing down, join 2 strands of CA held together with sl st to Base. Sl st will be in FL from your perspective on the Wrong Side of the Basket Base (but is on the BL of the Right Side of the Base that is facing down). Continuing with both strands, ch 1, scFL in same st and each st around, pm in last st to mark position, move marker up each Rnd. (60 sts)
Continue to Basket Side
- Rnd 1: (Right Side) Continuing with 2 strands of CA held together, sc in each st around. (60 sts)
- Rnds 2-13: Repeat Rnd 1, 12 times, do not fasten off.
First Cat Ear
- Row 1: (right Side) Continuing with 2 strands of CA held together, sc in next 6 sts, skip 54 sts. (6 sts)
- Row 2: Turn, ch 1, sc in first 4 sts, sc2tog. (5 sts)
- Row 3: Turn, ch 1, sc in first 3 sts, sc2tog. (4 sts)
- Row 4: Turn, ch 1, sc in first 2 sts, sc2tog. (3 sts)
- Row 5: Turn, ch 1, sc in first st, sc2tog. (2 sts)
- Row 6: Turn, ch 1, sc2tog, fasten off CA. (1 st)
Second Cat Ear
- Row 1: Skip 3 sts after First Cat Ear on Basket Side Rnd 13. With Right Side facing, join 2 strands of CA held together with sl st to next st on Side Rnd 13, ch 1, sc in same st and next 5 sts, skip next 45 sts. (6 sts)
- Repeat from Row 2-6 as for First Cat Ear, do not fasten off.
Edging
- Edging Rnd 1: Turn to Right Side, ch 1, sc in top st of Ear, turn to work along side of Rows (see Pattern Notes), sc in side of next 5 rows along Ear, sc in next 45 sts along Basket Side, turn to work along side of Rows, sc in side of next 5 rows along Ear, sc in top st of Ear, turn to work along side of Rows, sc in side of next 5 rows along Ear, sc in next 3 sts, turn to work along side of Rows, sc in side of next 5 rows along Ear, join with sl st to first sc, fasten off CA.
Color Patch
- With 2 strands of CB held together throughout, start with the magic adjustable ring (see Pattern Notes).
- Rnd 1: (Right Side) Ch 1, 6 sc in ring, tighten magic ring to close, pm in last st to mark position, move marker up each Rnd. (6 sts)
- Rnd 2: 2 sc in each st around. (12 sts)
- Rnd 3: [2 sc in next st, sc in next st] around, fasten off CB with long yarn tail (approximately 18″/45.5 cm) for seaming. (18 sts)
Nose
- With 2 strands of CB held together throughout, ch 2.
- Row 1: Turn, skip 1 ch, 2 sc in next ch. (2 sts)
- Row 2: Turn, ch 1, sc in first st, 2 sc in next st. (3 sts)
- Row 3: Turn, ch 1, sc in first 2 sts, 2 sc in next st. (4 sts)
- Row 4: Turn, ch 1, sc in first 3 sts, 2 sc in next st. (5 sts)
- Row 3: Turn, ch 1, sc in first 4 sts, 2 sc in next st, fasten off CB with long yarn tail (approximately 18″/45.5 cm) for seaming. (6 sts)
Assembly and Finishing
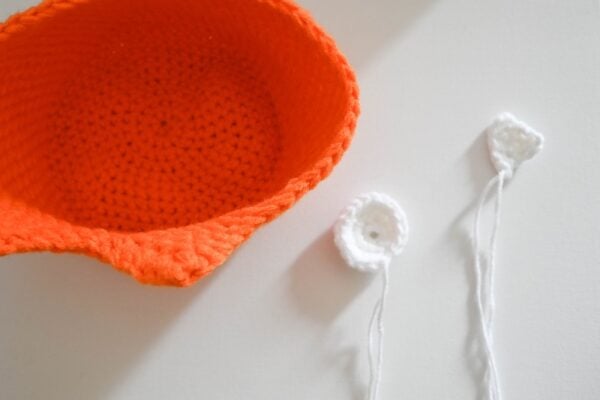
- Thread yarn needle with 2 strands of CB from long tail at end of Rnd 3. Position Color Patch below Ear and join by sewing or with whipstitch seam (see Pattern Notes). Weave in yarn tails on inside of basket. Thread yarn needle with 2 strands of CB from end of Row 3. Position Nose between Ears and join by sewing or with whipstitch seam (see Pattern Notes). Embellish Mouth using embroidery back stitch (see Pattern Notes). Weave in any remaining yarn tails on inside of basket.
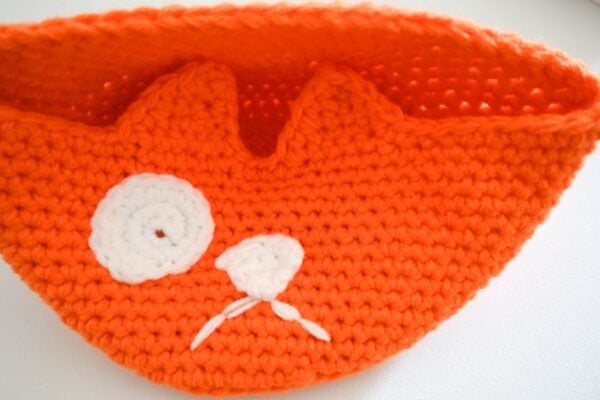
- Position safety eyes so that one is inside of Color Patch. When satisfied with position, secure by attaching washers firmly inside of basket.