


Naomi from How To Heat Press is back with the second of three guest posts to help you explore your Cricut! Today, she’ll share an iron-in vinyl tutorial. Iron-on, also known as heat transfer vinyl (HTV) is a really fun material for customizing projects. By the way, you can use what you learn from this iron-on vinyl tutorial to make any iron-on project with any cutting machine.
This post contains affiliate links. I may receive compensation (at no added cost to you) if you make a purchase using these links. Photos in this post are © How To Heat Press and are used with permission.
About How To Heat Press
How To Heat Press was started by Naomi and Dan in 2016. They’ve been using heat press and cutting machines for years, and they love all the wonderful projects you can create with these machines. How To Heat Press provides information about heat press and cutting machines (with a focus on Cricut machines), heat press and Cricut tips and tutorials, and t-shirt business tutorials.
Show your support by following Naomi on Website | Facebook | Instagram | Pinterest | Twitter
Cricut Basics: How To Make A Cricut Iron-On
Tutorial by How To Heat Press

Making custom t shirts, sweatshirts, and baby onesies are among my favorite things to create with Cricut.
It’s so much better being able to make it yourself, rather than buying it from the shop, don’t you think? It makes the top more memorable and precious!
Last time I shared on Underground Crafter, I customized a pencil case with adhesive vinyl. In this post, I’m going to show you how you can jazz up a plain jumper with a cute HTV design. Find out more aboutthe differences between HTV & adhesive vinyl here!
The design I’m using comes from this awesome SVG bundle on Creative Fabrica.
I uploaded the design to Cricut Design Space and then decided what size I wanted it to be, as well as what colors I wanted to use.
I decided to use black and blue Siser EasyWeed HTV, which I will cut with the Cricut Maker, and press with the Power Press heat press.
I made the design 5 inches wide which is a good width for a baby/toddler shirt.

How To Cut Iron-On With The Cricut Maker
I mirrored my mat so that the design would be cut out in reverse (essential for Iron-On).
Next, I set my material to ‘Iron On’ in Design Space.
I placed the HTV shiny side facing down on the mat.
Depending on the type of HTV you use, you may want to do a test cut, and alter the default pressure settings. I cut out two different mats, one for each color in my design.

Once the Cricut Maker had cut out the design, I weeded away the excess HTV. That is, I took away all the vinyl that is NOT part of the design, so that only what I wanted remained on the carrier sheet.
Using the Cricut BrightPad, as described in this post, will make weeding vinyl even easier!

How To Press HTV With A Heat Press
To transfer Siser EasyWeed HTV with a heat press:
- Set the temperature on the heat
press to 305°F, and the pressure to medium - Pre-press the garment for a couple
seconds to remove wrinkles and moisture - Press each layer/color for 1
second to tack it down, then press the full remaining time on the last layer - Peel the carrier sheet away while
hot or cold
See this post for how to apply iron-on with the Cricut EasyPress 2.
I turned on my heat press and left it for ten minutes to heat up to 305°F. Once it had heated up I pre-pressed the jumper.
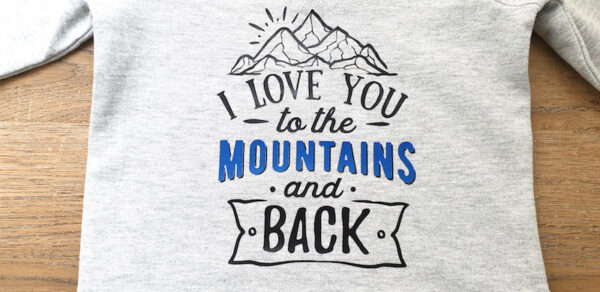
I positioned the black layer of my design onto the jumper, covered it with a Teflon sheet, and pressed it for a second to tack it down. I peeled the carrier sheet away while hot.
Next I positioned the blue layer on top, covered it with a Teflon sheet again and pressed it for the full remaining time (14 seconds). Then I peeled away the carrier sheet from the blue layer.
If your Siser EasyWeed doesn’t seem to tack down after 1 second this could be because:
- The pressure on the heat press is
not high enough – turn it up so that it applies more pressure - Seams, buttons or zips are
interfering with the pressure applied to your transfer – use a heat press
pillow within the garment or position it on the platen so that you avoid
pressing on seams, zips etc.
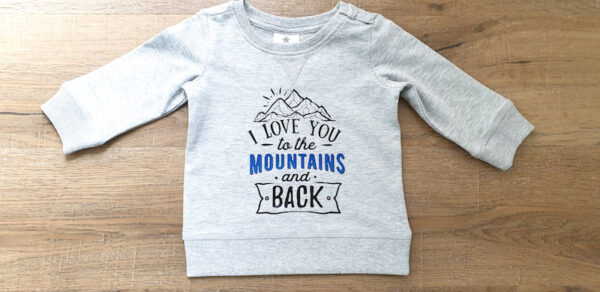
All done… What a cute top!
There are many ways to make your own custom garment designs at home – heat transfer vinyl, screen printing, embroidery, infusible ink transfers, and more. But I think HTV is my favorite! It’s so easy to use, and the results are always amazing.
Let us know what you’ve been making in the comments down below!
Love the SVG – such a cute sweater!