
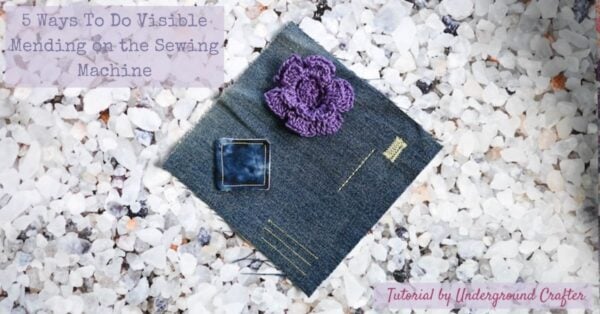
Visible mending is trending again, but if you don’t prefer to sew and embroider by hand, you may have thought it wasn’t for you. In today’s Sewing Basics post, I’m sharing 5 different ways to do visible mending on your sewing machine, along with tips and tools for your next visible mending project.
This post contains affiliate links. I may receive compensation (at no added cost to you) if you make a purchase using these links. This post is sponsored by Baby Lock and I’m a Baby Lock Brand Ambassador. This post is part of our ongoing collaboration but all opinions and words are my own.
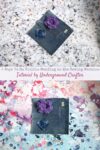
Visible Mending on the Sewing Machine: Tips, Tools, and Methods
Sewing Basics by Underground Crafter

In today’s post I’ll be sharing more about visible mending on the sewing machine, including how to prepare your clothes or other items for mending, materials for visible mending, recommended presser feet for visible mending, and five different ways to do visible mending: with crochet applique, with quilt blocks or fabric scraps, with patterned straight or decorative stitches, with zigzag stitches, and with machine embroidery patches.
What is Visible Mending?
Visible mending is just what the name suggests: it’s when you repair clothes (or other items) in a way that is viewable, rather than hidden or invisible. It’s a great way to extend the life of your favorite wearables while adding a handmade touch. In this post, I’m using denim, but the same tools and tricks apply to other types of fabrics. Historically, visible mending has been done by hand, but you can also do it with a sewing machine.
How To Prepare Your Clothes for Visible Mending
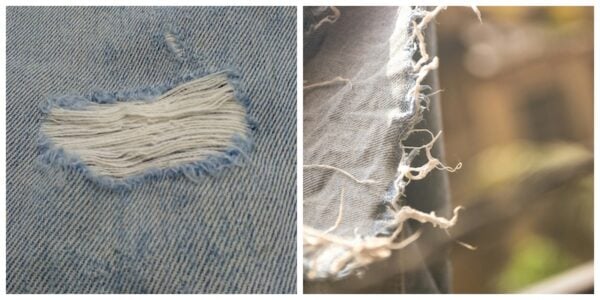
Before you start any mending project, you’ll want to prepare the fabric. Wash and dry the item as you would normally, and snip off any loose strands so you have a cleaner, smoother surface to work with.
Materials for Visible Mending on a Sewing Machine
Before your start your visible mending project, you’ll need some materials.
- Needle. Always start with a new needle since burrs can snag on your clothes and further damage them, or break under the stress of the heavier thread in the top spool. I used a universal 80/12 needle, but you can also use a denim or jeans needle for mending denims.
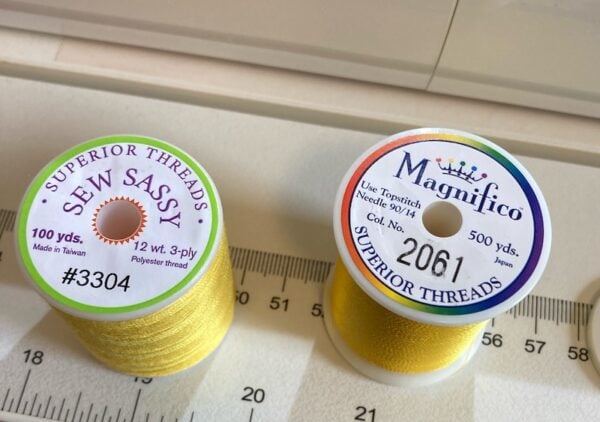
- Thread. For visible mending on your sewing machine, you’ll want to use heavier weight threads than you typically do, and you should also choose bold thread colors and/or thread colors that contrast your fabric so your stitches really pop. You can use 100% cotton thread for cotton fabrics or polyester thread for most fabrics.
- For straight stitches: Use a 12-weight or 28-weight thread for the top spool and 40-weight or 50-weight thread for the bobbin.
- For decorative stitches: Use a 28-weight thread for the top spool and 40-weight or 50-weight thread for the bobbin.
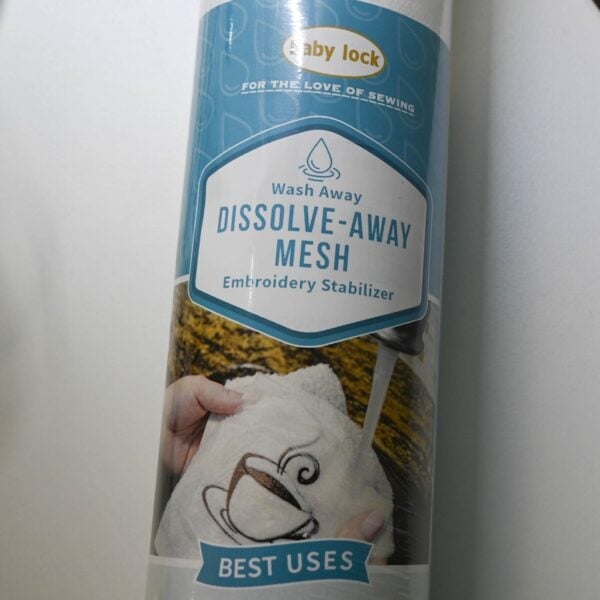
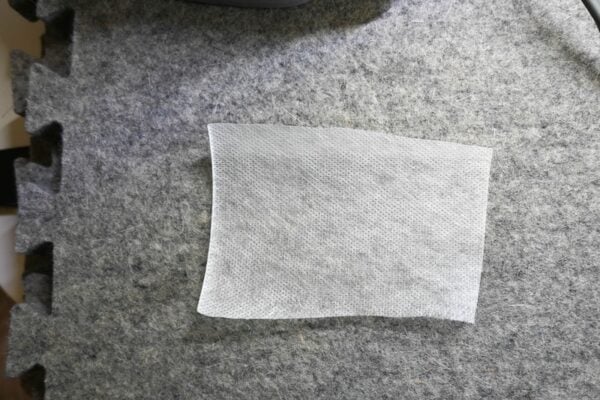
- Stabilizer. For decorative stitches, when working with slippery fabrics, or if you’re covering a large hole, use a wash away stabilizer on the back, such as Baby Lock Dissolve-Away Mesh.
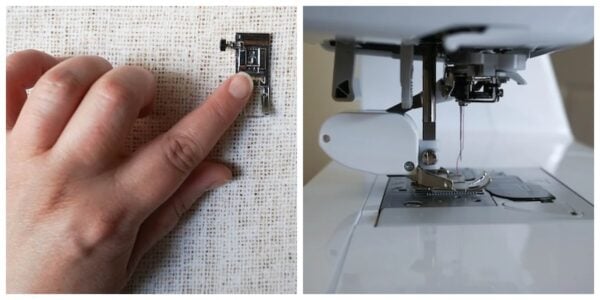
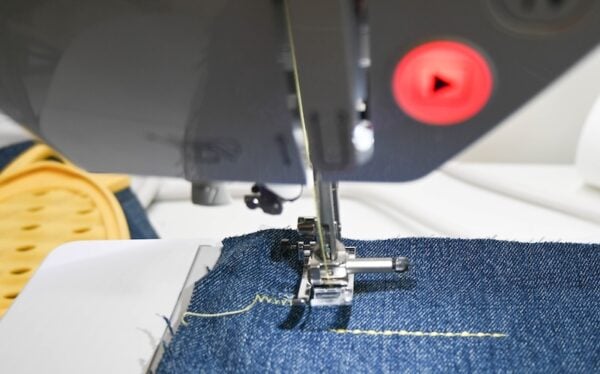
Presser Feet for Visible Mending
For straight stitches, I recommend using the J Zigzag Leveling Presser Foot (the standard foot on most Baby Lock machines, including the Bloom I used for this post) or a Walking Foot. Most visible mending work involves sewing over multiple layers or thicknesses of fabric, so these feet will help. For decorative or embroidery stitches, use your machine’s recommended foot for the selected stitch or pattern. Find out more about presser feet in the Sewing Machine Presser Foot Guide and learn how to use a walking foot in this blog post.
Looking for presser feet, machines, or software? Use my coupon code SAVE10-A424 to get 10% off all machines, accessories and software at Baby Lock.
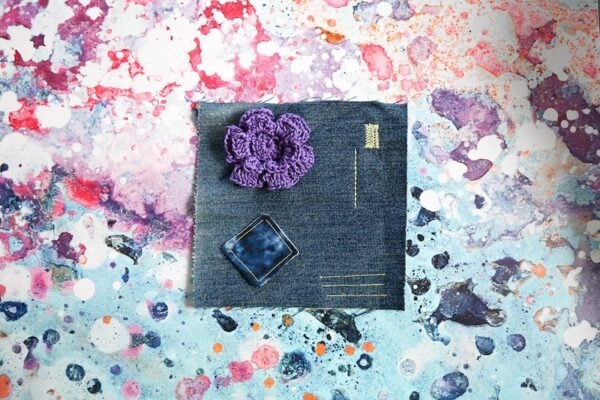
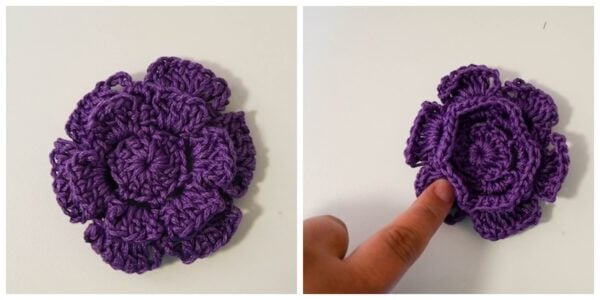
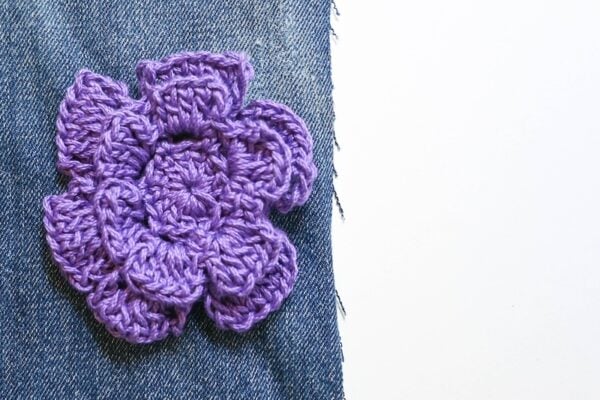
Visible Mending Technique 1: Crochet Applique
Crochet applique is great for visible mending. For ease of washing, it’s best if your yarn is a similar fiber to the clothes. For this project, I used a flower I crocheted with Lion Brand 24/7 Cotton in Purple.
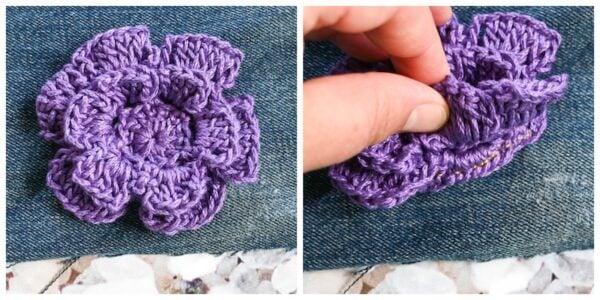
I wanted the flower’s petals to pop off the denim rather than to sew them to the fabric, so I added a final round to make a circle of stitches on the back that I could sew over a small hole in the fabric.
- Set your sewing machine speed to slow.
- Thread the top spool with 12-weight thread and the bobbin with 40-weight thread.
- With the flower face up on the fabric, I pushed the petals to the side so that I would only sew through the crochet circle at the back.
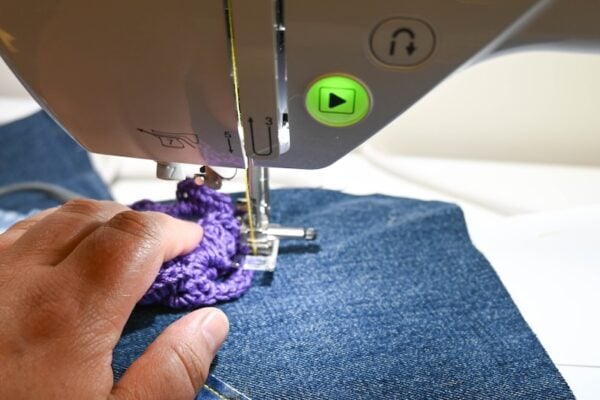
- I worked around slowly, starting and ending with reinforcement stitches and occasionally pivoting the fabric while the needle was down after lifting the pressure foot.
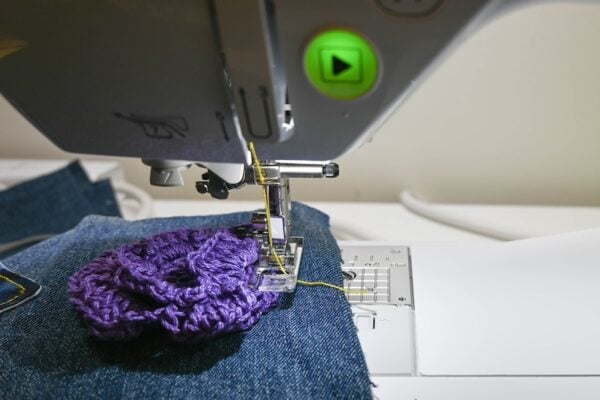
- To finish, snip the threads on the back and push the petals back into position.
Visible Mending Technique 2: Fabric Scraps or Quilt Blocks
If you’re like most sewists, you have half finished projects, “orphan” quilt blocks, and scraps in your sewing studio. Those make great patches for visible mending.
- Place your quilt block or fabric scrap piece face down over a piece of fabric that will not be visible (front sides together/sewing on the wrong side). For this project, I used two scraps of 100% cotton quilting fabric cut to 2.5 inches.
- With 12-weight thread in the top spool and 40-weight thread in the bobbin, stitch around 3 sides with a 1/4″ seam, and leave a 2″ opening on the fourth side.
- Clip the corners.

- Fold the unseamed edges inward. Pin the fabric so it covers the damage on your clothes with the quilt block (or your favorite scrap piece) facing up.
- With speed set to slow, top stitch around all four sides of the fabric piece with a 1/4″ seam. Start and end with reinforcement stitches and seam the opening closed.
- When finished, snip the threads.
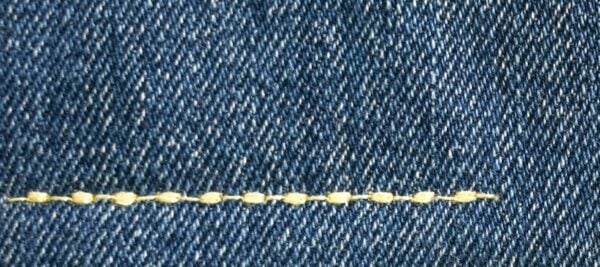
Visible Mending Technique 3: Patterned Straight or Decorative Stitches
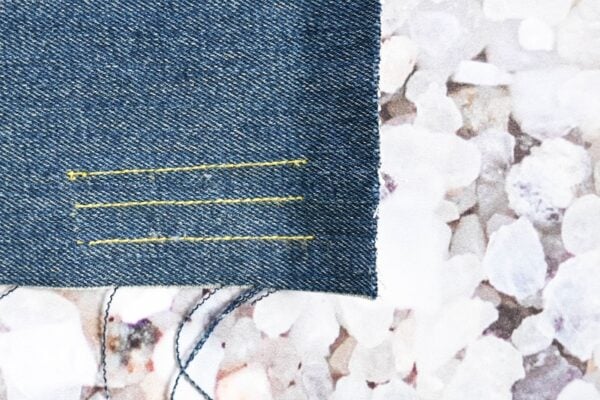
Patterned straight stitches or decorative stitches are great for damage where the fabric is still intact, such as stains.
When using patterned straight stitches:
- If you want to mark your fabric, first check that the marking can be easily removed from the clothing you are mending by testing a small spot on the inside.
- Set your sewing machine speed to slow.
- Thread the top spool with 12-weight thread and the bobbin with 40-weight thread.
- Start and end with reinforcement stitches and stitch along your marks or create your own designs.
- Snip the threads when finished.
For decorative stitches:
- Stabilize the fabric first. Cut a piece of Baby Lock Dissolve-Away Mesh that is larger than the area you plan to stitch to position on the back of the item you are mending.
- Thread the top spool with 28-weight thread and the bobbin with 40-weight thread.
- Set your machine speed to slow.
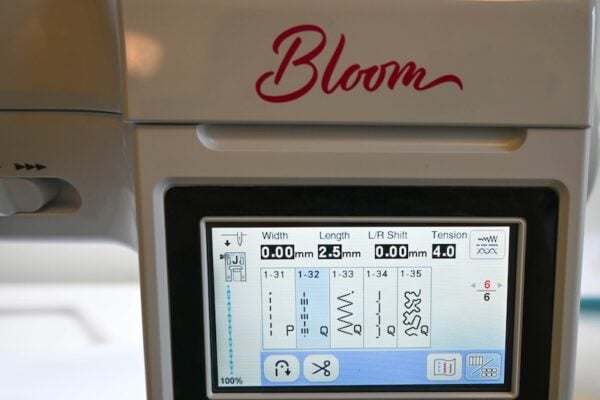
- Choose your decorative stitch. I love stitch 1-32 which mimics hand quilting.
- Change your presser foot if necessary for the stitch.
- Start and end with reinforcement stitches and stitch as desired.
- When finished, trim down the stabilizer piece on the back and snip the threads.
Visible Mending Technique 4: ZigZag Stitches
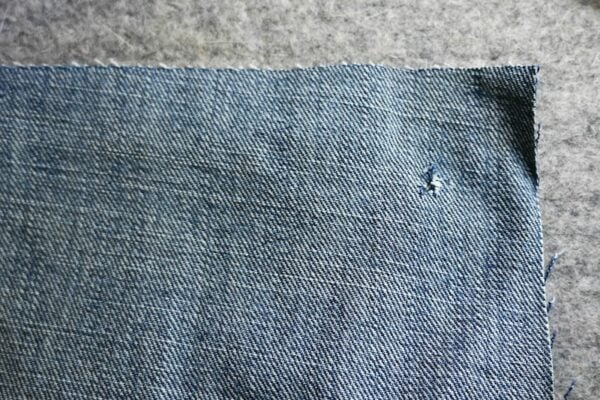
Zigzag stitches are a classic approach to mending, but usually you choose a thread that blends with the fabric and take other steps to make your repair invisible. For visible mending, you’ll want your work to be seen. This option is great for small snags, tears, or small holes where most of the fabric is intact.
- Prepare your clothes by placing Baby Lock Dissolve-Away Mesh on the back/wrong side to cover the damaged area.
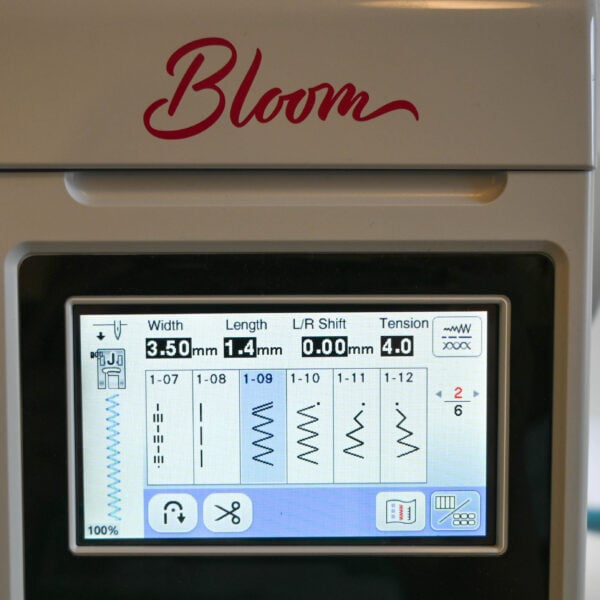
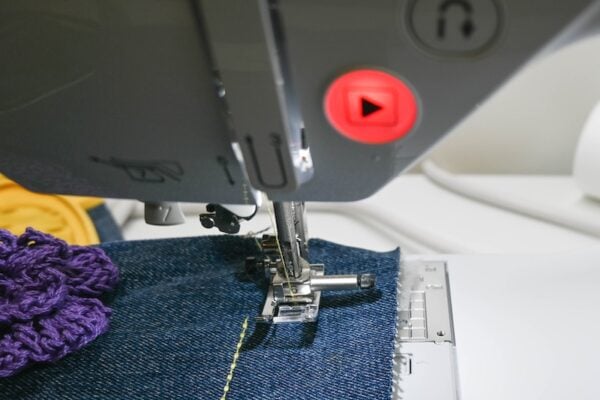
- Choose your zigzag stitch and change your presser foot, if necessary. I used 1-09 Zigzag stitch on the Bloom for this tutorial.
- Thread the top spool with 28-weight thread and the bobbin with 40-weight thread and set your machine speed to slow.
- Start at least an inch outside of the damaged area. You will create a zigzag “box” that is at least an inch larger than the damage on all sides. You can freestyle the box or use pins or a fabric marker to mark the borders.
- Start with a reinforcement stitch and stitch to the first line of your “box.”
- Stop with the needle down, then lift your presser foot.
- Turn perpendicular (90 degrees/right angle), sew just one stitch (needle up and down once), stop with the needle down, and lift your presser foot.
- Turn perpendicular again and, sew another row of stitches.
- Continue this process, working lines of zigzag stitches directly under each other (1 stitch apart) until you have created a box around the damaged area.
- End with a reinforcement stitch and clip the threads.
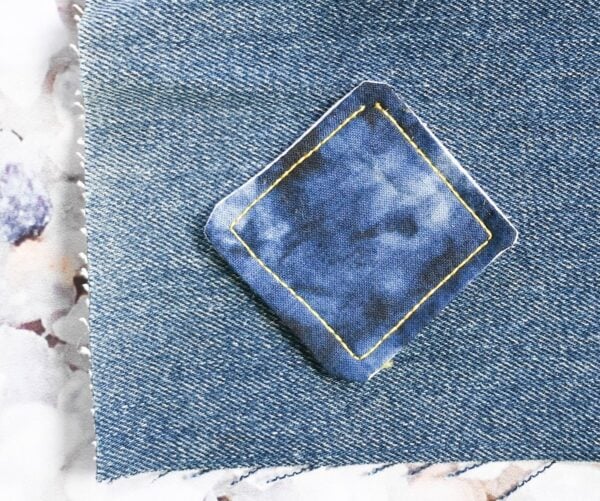
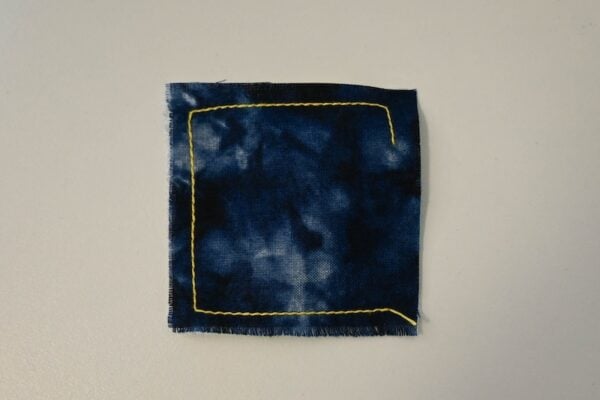
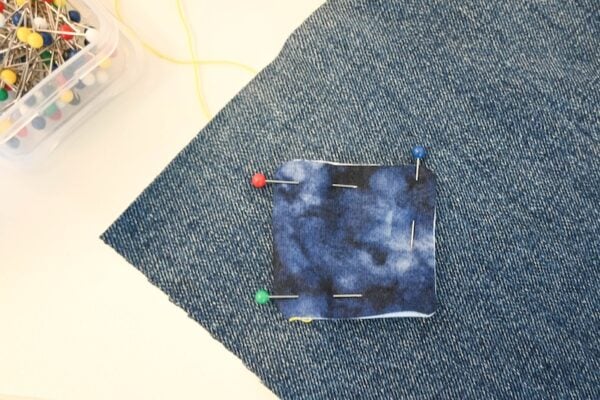
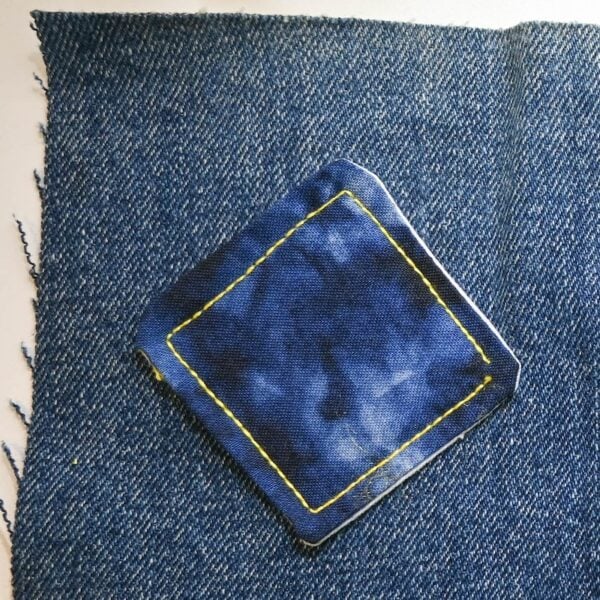
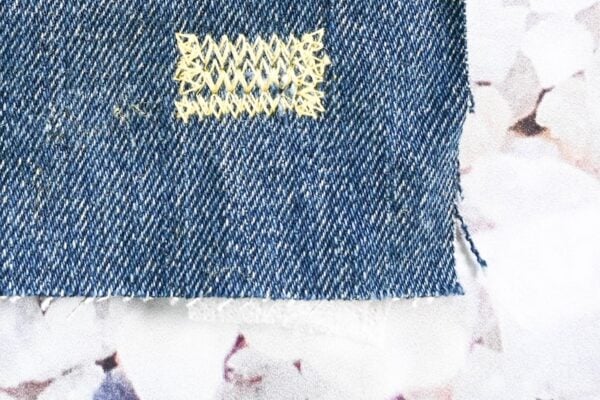
Visible Mending Technique 5: Machine Embroidery Patches
If you have an embroidery machine or a combination sewing-embroidery machine like the Bloom, you can create an embroidery patch to cover the damage. This is great for covering larger holes.
- Start by creating an embroidery project as shown in this tutorial, making sure the design is larger than the damage to your clothes.
- Trim the embroidery project fabric and stabilizer down to a square or rectangle that is at least 1/2″ larger than the design on all sides.

- Follow the instructions above for Visible Mending Technique 2: Fabric Scraps or Quilt Blocks (where the embroidery project is the fabric that will show on top).
- Alternatively, trim the fabric around the shape of the embroidery project and follow the instructions in the video below from Baby Lock and Pat Sloan to applique your embroidery patch to cover your damaged area on your mending project.
- Use a zigzag stitch with an Open Toe Foot and 28-weight thread in the top spool and 40-weight thread in the bobbin to keep the stitches more visible and set your machine speed to slow.

I hope you enjoyed these tips for doing visible mending on the sewing machine! If you have questions, let me know.