
If you followed along with the Mystery Lapghan Crochet-a-Long, you might be in the early stages of granny square withdrawal now that the CAL has ended. Today, I’m sharing another way to join granny squares: the join-as-you-go method (also known as JAYG). You can use this on your next granny square project.

This post contains affiliate links.
For the JAYG method, you’ll need a crochet hook and a granny square pattern that includes chain spaces along the sides and corners of the final round.
The “classic” granny square pattern, or any of these free crochet patterns from my collection would work well with the join-as-you go method:
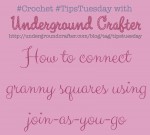
Tutorial: How to use the join-as-you-go method for connecting granny squares
- If the pattern doesn’t provide instructions for using the join-as-you-go method, start with one finished square.
- Then, work another square until just before the final round.
- Identify chain spaces in the final round of the pattern.
- You will substitute a single crochet to the finished square for each chain space in the corners and the side connecting the two squares.
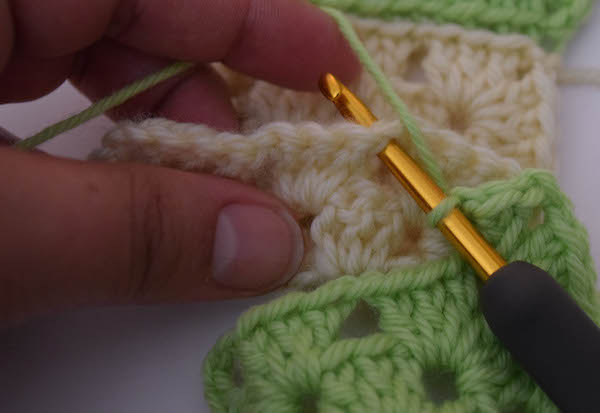
Step 1: Start crocheting the final round on the second square.
Step 2: At the first corner chain space, insert crochet hook in the corresponding corner space on the finished square.
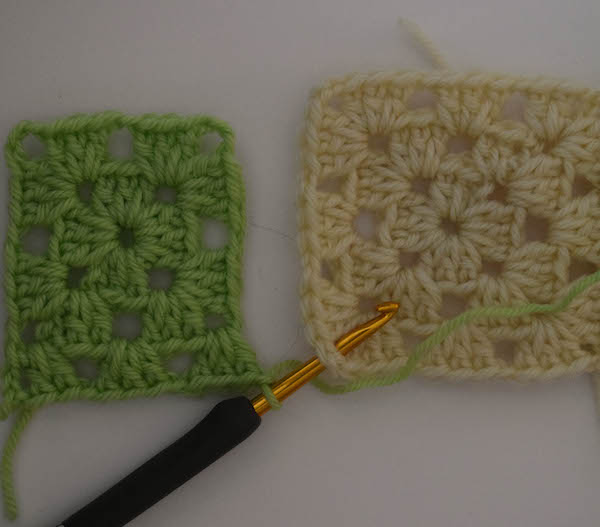
Make sure that the wrong sides of the squares are facing each other, or right sides are out.
Step 3: Yarn over.
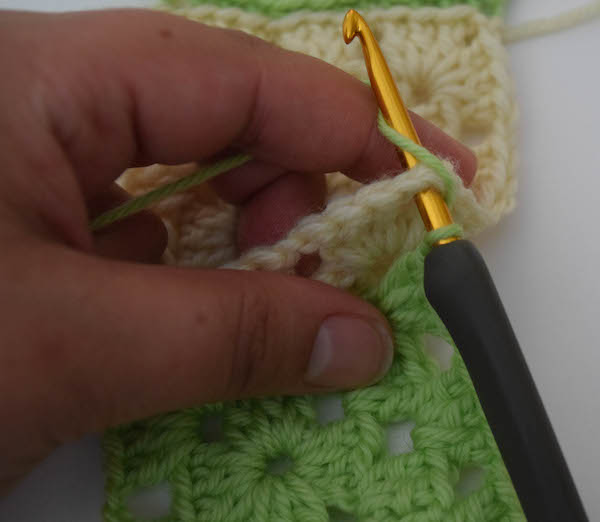
Step 4: Draw the yarn through the chain space on the finished square.
You will have two loops remaining on the crochet hook.
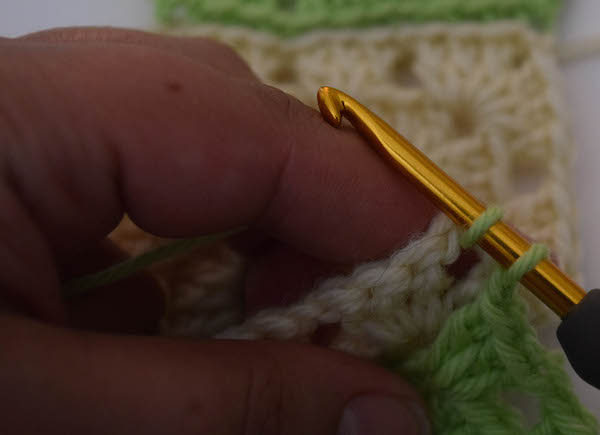
Step 5: Yarn over and draw through 2 loops.

You have made your first single crochet in the corner.
Step 6: Continue working pattern for final round until the next chain.
At the next chain in the pattern, insert your crochet hook into the chain space on the finished square. Form a single crochet into the chain space.
Step 7: Continue working across the side.
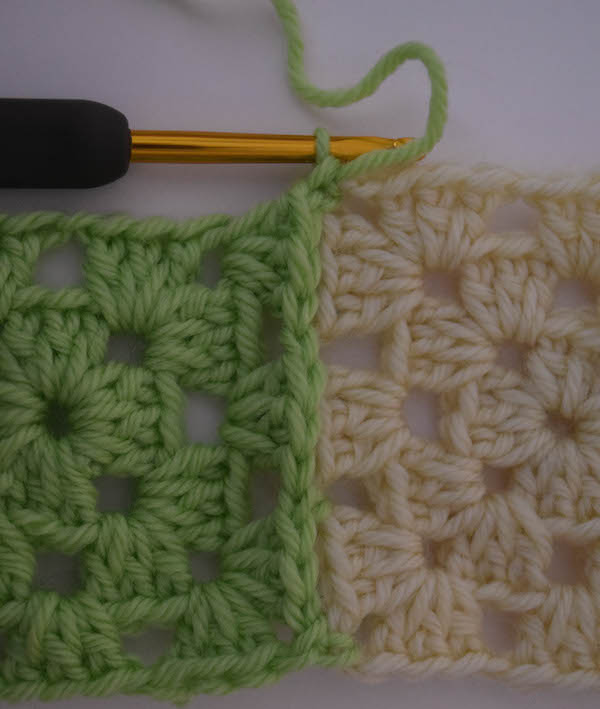
Replace each chain in the pattern with a single crochet to the finished square on the side where you join the two squares. Don’t forget to join at both corners.
Step 8: Work the rest of the final round as normal.
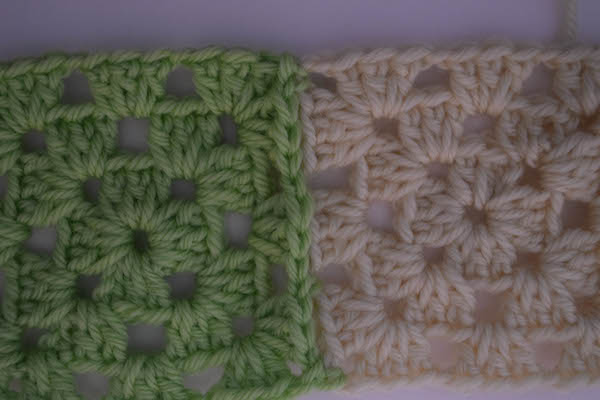
Once the two sides are joined together, you can continue the rest of the pattern as normal.
- Continue this process for joining a row of granny squares.
- On the next row, each square will need to be joined to both the adjoining square in the row above and the previous square on the row. In other words, replace the chain spaces on two sides and 3 corners with single crochets.
Looking for more ways to join granny squares?
Try these tutorials!
- How to join granny squares with the slip stitch
- How to join granny squares using single crochet
- How to join granny squares with the whipstitch
- How to join granny squares with the mattress stitch
What’s your favorite way to join granny squares?
I wish I had thought of that. Great idea!
So glad you found it helpful, Irma.